Ubuntu18.04下使用docker安装elasticsearch+kibana+filebeat用于记录日志
引言
近期调研了很多关于记录日志的工具,但经过尝试之后最终选择了filebeat+elasticsearch+kibana的方式(即ELK中E和K)。很多时候ELK中的Logstash用于记录日志,似乎对日志会做更细致的处理,但相对的logstash占用的内存就远大于filebeat了。

Logstash占用资源比较大,每台服务器都起一个Logstash是十分浪费性能的,所以一般需要使用轻量级的日志收集器Filebeat,Logstash单独部署在一台服务器用于解析日志。
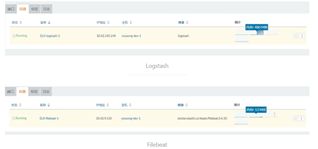
基本思路是通过filebeat获取docker和宿主机中的日志,然后,将日志转发给elasticsearch进行索引,kibana分析和可视化。
我原本想直接下载压缩文件,但后来发现下载速度实在太慢,好在有docker的下载方式。由于担心新版本出现的问题不好解决,我最终使用elasticsearch7.2.0+kibana7.2.0+filebeat的方式。
现在开始吧!
1. 安装和配置Elasticsearch
1.1 安装
docker安装只需一行命令:
docker pull elasticsearch:7.2.0
1.2 启动
下载完成后,启动运行:
docker run -d \
    --user root \
    -p 9200:9200 \
    -p 9300:9300 \
    --name elasticsearch \
    -e "discovery.type=single-node" \
    -v /data/elasticsearch:/usr/share/elasticsearch/data \ #挂载目录
    elasticsearch:7.2.0
chmod 777 -R /data/elasticsearch #修改权限
以下内容也有,但我认为暂不需要,就没有配置,用于设置最大日志数量和大小,以及自启动:
#--log-driver json-file --log-opt max-size=10m --log-opt max-file=3 --restart=always\
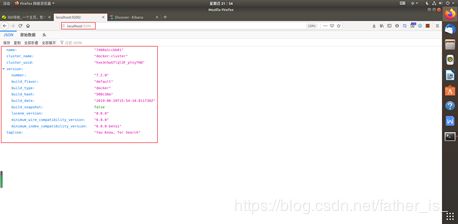
启动完成后,可以再浏览器中输入:http://localhost:9200。若出现如下信息,则证明成功了。
1.3 修改配置,解决跨域访问问题
首先进入到容器中,然后进入到指定目录修改elasticsearch.yml文件:
docker exec -it elasticsearch /bin/bash
cd /usr/share/elasticsearch/config/
vi elasticsearch.yml
在末尾加上:
http.cors.enabled: true
http.cors.allow-origin: "*"
重启容器:
docker restart elasticsearch
1.4 安装ik分词器(可选,具体作用我还未体验过)
为了增加对中文分词的友好性,同样进入到elasticsearch容器中,之后输入以下命令:
cd /usr/share/elasticsearch/plugins/
elasticsearch-plugin install https://github.com/medcl/elasticsearch-analysis-ik/releases/download/v7.2.0/elasticsearch-analysis-ik-7.2.0.zip
exit
docker restart elasticsearch
在kibana安装完成后,可以在del tools验证是否安装成功:
POST test/_analyze
{
  "analyzer": "ik_max_word",
  "text": "你好我是东邪Jiafly"
}
2. 安装和配置Kibana
2.1 安装
同样只需要一句命令:
docker pull kibana:7.2.0
2.2 启动kibana
使用—link使得与elasticsearch容器连接,同样我们也看可以设置自启动—restart=always什么的内容,我采用如下方式:
docker run --name kibana --link=elasticsearch:test  -p 5601:5601 -d kibana:7.2.0
docker start kibana
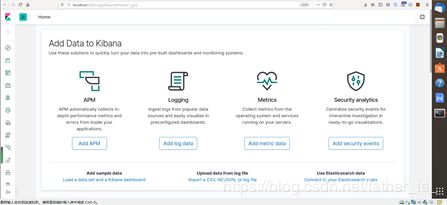
打开浏览器,输入http://localhost:5601就可以看到kibana画面了。
如果出现类似于Kibana server is not ready之类的,那再等等,或许浏览器还没有反应过来。若还是没有显示界面,可以再自行百度,网上有方法解决。
3. 安装和配置filebeat
该部分内容仅作为参考,由于我再配置过程中一直处于探索状态,安装过程的前后顺序可能会出现差错,但思路可以参考一下。
3.1 安装filebeat
打开http://localhost:5601/app/kibana#/home/tutorial/elasticsearchLogs,也可以从浏览器的home该界面的内容告诉你如何使用filebeat读取elasticsearch的log信息。
以下为deb下载filebeat的过程,其他方法可以自行查阅:
① 下载安装filebeat(注意getting started guide,若之前没有使用过filebeat,需要另行配置,可参考3.2部分)
curl -L -O https://artifacts.elastic.co/downloads/beats/filebeat/filebeat-7.2.0-amd64.deb
sudo dpkg -i filebeat-7.2.0-amd64.deb
② 编辑config文件/etc/filebeat/filebeat.yml,内容就是设置es的url等信息:
output.elasticsearch:
hosts: ["" ]
username: "elastic"
password: ""
setup.kibana:
host: ""
③ 配置和启动elasticsearch模块:
配置可在/etc/filebeat/modules.d/elasticsearch.yml中配置,启动命令为:
sudo filebeat modules enable elasticsearch
④ 启动filebeat
setup命令加载Kibana的dashboard。如果仪表板已经设置好了,就省略这个命令。然后开启filebeat:
sudo filebeat setup
sudo service filebeat start
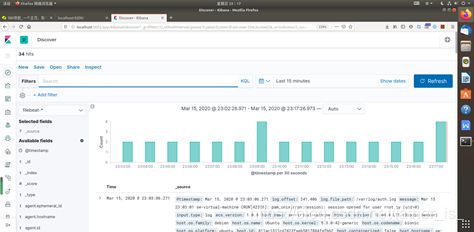
此时,应该可以在management看到filebeat,但如果和我一样第一次使用filebeat,在discover面板中没信息。

3.2 第一次配置filebeat,应该怎么做?
具体可参考:https://www.elastic.co/guide/en/beats/filebeat/7.2/filebeat-getting-started.html
① 第一步,安装:
使用的DEB方式,没遇到问题。
② 第二步,配置:
在/etc/filebeat/filebeat.yml配好输出elasticsearch和log的路径之后
使用./filebeat test config -e测试配置文件路径时遇到stat filebeat.yml: no such file or directory的问题,根据博客:https://blog.csdn.net/weixin_44239915/article/details/93724798 暂时采用在运行时直接加上配置文件路径:
./filebeat -e -c /etc/filebeat/filebeat.yml
③ 第三步,导入模板到elasticsearch:
原文步骤三中介绍了自己配置模板的方法,但默认情况下可以使用默认模板/etc/filebeat/field.yml,因此我使用默认模板。关于原文中的Configure template loading部分可以暂时忽略。
直接通过load the template manually中的内容,对deb安装的featbeat,在etc/filebeat目录下输入:
sudo filebeat setup --template -E output.logstash.enabled=false -E 'output.elasticsearch.hosts=["localhost:9200"]'
输入时说—template参数已经被弃用可使用以下方式:
sudo filebeat setup --index-management -E output.logstash.enabled=false -E 'output.elasticsearch.hosts=["localhost:9200"]'

如果不想要旧的信息,教程表示可以使用以下命令,从filebeat- *中删除旧文档,以强制Kibana查看最新文档。
curl -XDELETE 'http://localhost:9200/filebeat-*'
参考:
https://www.jianshu.com/p/134d0f9a367a Docker ELK实践之Filebeat
https://segmentfault.com/a/1190000020140461 Docker下安装ElasticSearch和Kibana
https://www.cnblogs.com/William-Guozi/p/elk-docker.html ELK:收集Docker容器日志
https://www.cnblogs.com/itzhao/p/11368765.html Dockerlogs
https://www.elastic.co/guide/en/beats/filebeat/7.2/filebeat-getting-started.html
