Ubunt18.04 Apache+mysql+phpmyadmin 安装方法
WEB服务器介绍
-
WEB网站服务器部署
网页类型 -
静态网页
HTML超文本协议语言,html.htmls等 -
动态网页
类似脚本语言,根据传送参数不同,返回结果均不相同
.asp/.php/java(jsp).jsp/Python(Django模块).wsgi/ -
HTTP – 超文本传输协议版本
-
http/0.9 仅纯文本传输
-
http/1.0 MIME机制,多用途互联网邮件扩展
-
http/1.1 无状态连接(增强缓存机制管理)
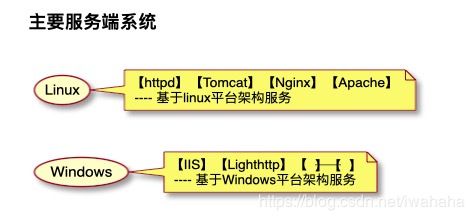
@startuml
(Linux)
note right of (Linux)
  【httpd】【Tomcat】【Nginx】【Apache】
   ---- 基于linux平台架构服务
end note
@enduml
@startuml
(Windows)
note right of (Windows)
  【IIS】【Lighthttp】【 -- 】【 -- 】
   ---- 基于Windows平台架构服务
end note
@enduml
安装Apache公司Linux服务端程序httpd
- 查询关于apache关键字相关程序组件
- 连续2次
tab``tab键显示结果
- 连续2次
# apt install apache
apache2                  apache2-dbg              apache2-ssl-dev          apache2-utils            apachetop
apache2-bin              apache2-dev              apache2-suexec-custom    apachedex
apache2-data             apache2-doc
apache2-suexec-pristine  apacheds
- 开始安装apache2主控程序
# apt install apache2
Reading package lists... Done
Building dependency tree
Reading state information... Done
The following packages were automatically installed and are no longer required:
- 启动及查看httpd服务状态
- Active状态:active(running)表示服务已经激活,处于运行状态
# systemctl status apache2.service
● apache2.service - The Apache HTTP Server
   Loaded: loaded (/lib/systemd/system/apache2.service; enabled; vendor preset: enabled)
  Drop-In: /lib/systemd/system/apache2.service.d
           └─apache2-systemd.conf
   Active: active (running) since Wed 2019-07-03 11:37:04 CST; 4min 0s ago
 Main PID: 24538 (apache2)
    Tasks: 6 (limit: 1110)
   CGroup: /system.slice/apache2.service
           ├─24538 /usr/sbin/apache2 -k start
           ├─24624 /usr/sbin/apache2 -k start
           ├─24625 /usr/sbin/apache2 -k start
           ├─24626 /usr/sbin/apache2 -k start
           ├─24627 /usr/sbin/apache2 -k start
           └─24628 /usr/sbin/apache2 -k start

Jul 03 11:37:04 nasa systemd[1]: Starting The Apache HTTP Server...
Jul 03 11:37:04 nasa apachectl[24521]: AH00558: apache2: Could not reliably determine the server's fully qualified domain name, using 17
Jul 03 11:37:04 nasa systemd[1]: Started The Apache HTTP Server.
- 再来看看一些操作Apache的常用命令
- 开启、关闭和重启服务器
#/etc/init.d/apache2 start    //启动Apache服务

#/etc/init.d/apache2 stop    //停止Apache服务

#/etc/init.d/apache2 restart    //重启Apache服务
- Ubunt18.04版本安装完Apache2程序后,不同于Centos7,需要增加开机自动运行服务命令
- 设定httpd服务开机自动启动
# service enable httpd //CentOS7需要此命令设置开机自启
- 浏览Apache服务器默认服务器地址访问页面
- 输入配置完成IP地址,远程打开访问页面
- 出现下图示例,即表示Ubunt18系统Apache服务开启成功
###Apache2修改网站根目录及默认网页
######我们来试着修改web服务器的配置,让我们可以在自己搭建的web服务器上访问到自己规定的数据:
- 修改根目录
- 在 /etc/apache2/sites-available 中修改 000-default.conf 中的DocumentRoot /var/www/ 修改为想要的目录
比如:DocumentRoot /var/www/html/mainpage
执行命令:
- 在 /etc/apache2/sites-available 中修改 000-default.conf 中的DocumentRoot /var/www/ 修改为想要的目录
#vim /etc/apache2/sites-available/000-default.conf
修改000-default.conf中的DocumentRoot /var/www/如下: ServerAdmin webmaster@localhost DocumentRoot /var/www/html // 一般我们默认为这个作为网站的根目录
- 接下来重启apache 即可
#sudo apache2ctl -k restart
在Unbuntu中重启Apache服务器出现错误: AH00558: apache2: Could not reliably determine the server's fully qualified domain name, using 127.0.1.1.等等。 解决方法:#sudo vim /etc/apache2/apache2.conf 最后加入一句: ServerName localhost:80
这里简单了解一下向文件末尾增加内容命令
- Linux 向文件末尾追加命令
- //echo后边用单引号包围要添加的内容
#echo 'ServerName localhost:80'>>/etc/apache2/apache2.conf
######注意:>> 是追加
echo '修改成你要增加的内容'>/etc/apache2/apache2.conf
######注意:> 是删除原有内容,仅添加所输入命令! 注意区分!!!
- 修改默认网页为自己想要的页面
- 修改/etc/apache2/mods-available/dir.conf中的内容
执行命令:
- 修改/etc/apache2/mods-available/dir.conf中的内容
vim /etc/apache2/mods-available/dir.conf
原来是:
添加上想要的/wordpress就行啦~
- 实际上在这里添加文件或目录的意思是,用于我们允许http请求访问到/var/www/html下的改文件或目录中的内容的意思:
例如我添加了test这个目录
- 在再里面添加个名为index.html的文档,写入“Hello World!”,于是我们便可通过IP地址+/test/index.html访问到:
经过测试,新建立test文件必须处于/var/www/html/test/才能有效执行Apache配置文件。
######Ubuntu中更改所有子文件和子目录所有者权限
Ubuntu中有两个修改命令可以用到,「change mode」&「change owner」
即chmod以及chown,其中可以用递归参数-R来实现更改所有子文件和子目录的权限。
#####1、利用chmod修改权限:
对Document/目录下的所有子文件与子目录执行相同的权限变更:
# chmod -R 700 Document/
- -R参数是递归 处理目录下的所有文件以及子文件夹
- 700是变更后的权限表示(只有所有者有读和写以及执行的权限)
- Document/ 是需要执行的目录
例:对/opt/Oracle/目录下的所有文件与子目录执行相同的权限变更:
# chmod -R 700 /opt/oracle/
-
-R参数是递归 处理目录下的所有文件以及子文件夹
-
700是变更后的权限表示(只有所有者有读和写以及执行的权限)
-
/opt/oracle/ 是需要执行的目录
#####2、利用chown改变所有者:
对Document/目录下的所有文件与子目录执行相同的所有者变更,修改所有者为users用户组的username用户
# chown -R username:users Document/
- username:users users用户组的username,
- 用户组参数不是必须有
例:对 /opt/oracle/ 目录下的所有文件与子目录执行相同的所有者变更,使所有者修改为oinstall用户组的oracle用户
chown -R oracle:oinstall /opt/oracle/
####创建检查PHP解析信息文件
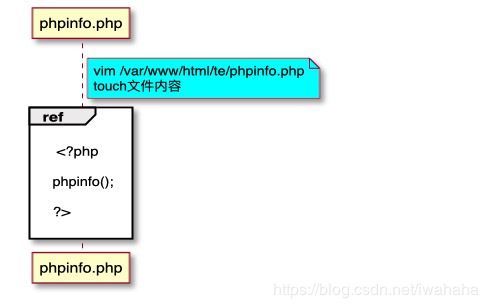
# touch /var/www/html/te/phpinfo.php
# vim /var/www/html/te/phpinfo.php
@startuml
note right of phpinfo.php #aqua
	vim /var/www/html/te/phpinfo.php
	touch文件内容
end note
ref over phpinfo.php


end ref
@enduml
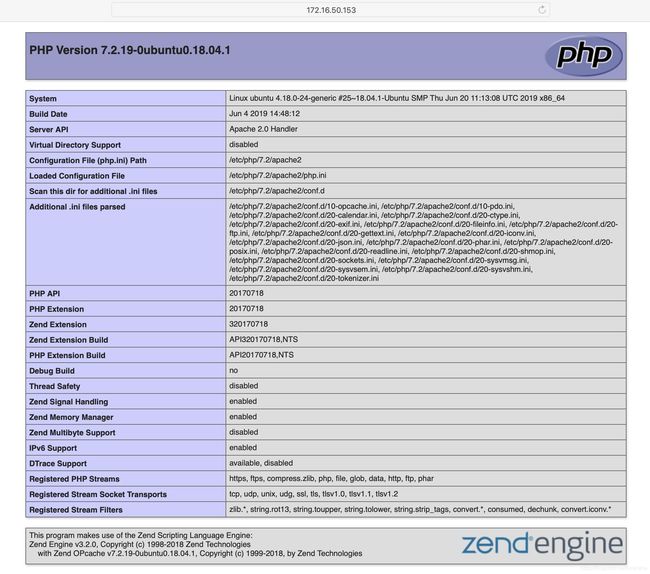
- 若使用ubunt安装源,在desktop版本测试过程中发现,无法解析php文件。
# php -v    ///显示php版本信息
PHP 7.2.19-0ubuntu0.18.04.1 (cli) (built: Jun  4 2019 14:48:12) ( NTS )
Copyright (c) 1997-2018 The PHP Group
Zend Engine v3.2.0, Copyright (c) 1998-2018 Zend Technologies
    with Zend OPcache v7.2.19-0ubuntu0.18.04.1, Copyright (c) 1999-2018, by Zend Technologies
- 无php版本信息显示或已经显示,仍需要单独安装php解析程序
- 重新安装更改了安装源为阿里云 Mirrior
# apt install php7.2    /// 安装php解析程序
root@ubuntu:/etc/apt# apt install php7.2
Reading package lists... Done
Building dependency tree
Reading state information... Done
The following package was automatically installed and is no longer required:
  libllvm7
Use 'apt autoremove' to remove it.
The following additional packages will be installed:
  libapache2-mod-php7.2
Suggested packages:
  php-pear
The following NEW packages will be installed:
  libapache2-mod-php7.2 php7.2
0 upgraded, 2 newly installed, 0 to remove and 0 not upgraded.
Need to get 1,360 kB of archives.
After this operation, 4,879 kB of additional disk space will be used.
Do you want to continue? [Y/n] y
Get:1 http://mirrors.aliyun.com/ubuntu bionic-security/main amd64 libapache2-mod-php7.2 amd64 7.2.19-0ubuntu0.18.04.1 [1,350 kB]
Get:2 http://mirrors.aliyun.com/ubuntu bionic-security/main amd64 php7.2 all 7.2.19-0ubuntu0.18.04.1 [9,244 B]
Fetched 1,360 kB in 0s (4,700 kB/s)
Selecting previously unselected package libapache2-mod-php7.2.
(Reading database ... 170373 files and directories currently installed.)
Preparing to unpack .../libapache2-mod-php7.2_7.2.19-0ubuntu0.18.04.1_amd64.deb ...
Unpacking libapache2-mod-php7.2 (7.2.19-0ubuntu0.18.04.1) ...
Selecting previously unselected package php7.2.
Preparing to unpack .../php7.2_7.2.19-0ubuntu0.18.04.1_all.deb ...
Unpacking php7.2 (7.2.19-0ubuntu0.18.04.1) ...
Setting up libapache2-mod-php7.2 (7.2.19-0ubuntu0.18.04.1) ...

Creating config file /etc/php/7.2/apache2/php.ini with new version
- 配置阿里云安装源
# vim /etc/apt/sources.list
deb http://mirrors.aliyun.com/ubuntu/ bionic main restricted universe multiverse
deb-src http://mirrors.aliyun.com/ubuntu/ bionic main restricted universe multiverse

deb http://mirrors.aliyun.com/ubuntu/ bionic-security main restricted universe multiverse
deb-src http://mirrors.aliyun.com/ubuntu/ bionic-security main restricted universe multiverse

deb http://mirrors.aliyun.com/ubuntu/ bionic-updates main restricted universe multiverse
deb-src http://mirrors.aliyun.com/ubuntu/ bionic-updates main restricted universe multiverse

deb http://mirrors.aliyun.com/ubuntu/ bionic-proposed main restricted universe multiverse
deb-src http://mirrors.aliyun.com/ubuntu/ bionic-proposed main restricted universe multiverse

deb http://mirrors.aliyun.com/ubuntu/ bionic-backports main restricted universe multiverse
deb-src http://mirrors.aliyun.com/ubuntu/ bionic-backports main restricted universe
# apt update    /// 重新更新安装源信息库
# apt upgrade   /// 检查是否有新版,且升级至最新版
# scp /etc/yum/repos.d/ubunt.repo [email protected]:/etc/yum/repos.d/
///在另一台配置好的安装原机器上,复制repos.d文件至目标机器
#####检查mysql状态
# systemctl status mysql
- 激活状态显示running,说明服务运行正常。
- 使用命令检查之后,如果看到有mysql 的socket处于 listen 状态则表示安装成功。
- 若netstat命令未安装,需要安装
# apt install netstat-tools  //安装netstat工具
# netstat -tap |grep mysql
tcp        0      0 localhost.localdo:mysql 0.0.0.0:*               LISTEN      2220/mysqld
- 修改配置文件
# sudo vim /etc/mysql/mysql.conf.d/mysqld.cnf
注:有的可能在 /etc/mysql/my.cnf这里面因为看好多都说在这里面,但是看配置文件就知道了,里面没东西,又引入的其他的文件;
找到bind-address = 127.0.0.1
bind-address = 127.0.0.1 修改为(注释掉)
#bind-address = 127.0.0.1
- 重启mysql服务,打开3306端口
# systemctl restart mysql
# sudo ufw allow 3306
# netstat -ano |grep 3306
tcp6       0      0 :::3306                 :::*                    LISTEN      off (0.00/0/0)
######登录MYSQL数据库
1.没有用户的
# mysql -u root
2.有用户的
# mysql -u root -p
Enter password:             //输入root用户密码
mysql>                      //成功登录mysql数据库
Welcome to the MySQL monitor. Commands end with ; or \g. Your MySQL connection id is 2 Server version: 5.7.26-0ubuntu0.18.04.1 (Ubuntu) Copyright (c) 2000, 2019, Oracle and/or its affiliates. All rights reserved. Oracle is a registered trademark of Oracle Corporation and/or its affiliates. Other names may be trademarks of their respective owners. Type 'help;' or '\h' for help. Type '\c' to clear the current input statement. --键入'help;'或'\h'获取帮助。键入'\c'以清除当前的输入语句。
- 登录数据库进行简单操作
- 查看当前数据库status
mysql> status//输入查看状态命令 mysql Ver 14.14 Distrib 5.7.26, for Linux (x86_64) using EditLine wrapper Connection id: 2 Current database: Current user: root@localhost SSL: Not in use Current pager: stdout Using outfile: '' Using delimiter: ; Server version: 5.7.26-0ubuntu0.18.04.1 (Ubuntu) Protocol version: 10 Connection: Localhost via UNIX socket Server characterset: latin1 Db characterset: latin1 Client characterset: utf8 Conn. characterset: utf8 UNIX socket: /var/run/mysqld/mysqld.sock Uptime: 3 hours 58 min 16 sec Threads: 1 Questions: 5 Slow queries: 0 Opens: 105 Flush tables: 1 Open tables: 98 Queries per second avg: 0.000
- 帮助命令参数列表
mysql> \h

For information about MySQL products and services, visit:
   http://www.mysql.com/
For developer information, including the MySQL Reference Manual, visit:
   http://dev.mysql.com/
To buy MySQL Enterprise support, training, or other products, visit:
   https://shop.mysql.com/

List of all MySQL commands:
Note that all text commands must be first on line and end with ';'
?         (\?) Synonym for `help'.
clear     (\c) Clear the current input statement.
                ---- 清除当前输入语句
connect   (\r) Reconnect to the server. Optional arguments are db and host.
                ---- 重新连接到服务器。可选参数为db和host
delimiter (\d) Set statement delimiter.
edit      (\e) Edit command with $EDITOR.
ego       (\G) Send command to mysql server, display result vertically.
                ---- 向mysql服务器发送命令,垂直显示结果
exit      (\q) Exit mysql. Same as quit.
                ---- 退出MySQL
go        (\g) Send command to mysql server.
                ---- 向mysql服务器发送命令
help      (\h) Display this help.
nopager   (\n) Disable pager, print to stdout.
notee     (\t) Don't write into outfile.
pager     (\P) Set PAGER [to_pager]. Print the query results via PAGER.
print     (\p) Print current command.
prompt    (\R) Change your mysql prompt.
quit      (\q) Quit mysql.
rehash    (\#) Rebuild completion hash.
source    (\.) Execute an SQL script file. Takes a file name as an argument.
status    (\s) Get status information from the server.
                ---- 从服务器获取状态信息
system    (\!) Execute a system shell command.
tee       (\T) Set outfile [to_outfile]. Append everything into given outfile.
use       (\u) Use another database. Takes database name as argument.
                ---- 使用另一个数据库。以数据库名称为参数
charset   (\C) Switch to another charset. Might be needed for processing binlog with multi-byte charsets.
warnings  (\W) Show warnings after every statement.
nowarning (\w) Don't show warnings after every statement.
resetconnection(\x) Clean session context.
                ---- 清理会话上下文
For server side help, type 'help contents'
- mysql版本信息查看
mysql> select version();    //显示mysql版本信息
+-------------------------+
| version()               |
+-------------------------+
| 5.7.26-0ubuntu0.18.04.1 |
+-------------------------+
1 row in set (0.00 sec)
- mysql密码保存文件位置及内容
# cat /etc/mysql/debian.cnf     //查看配置文件内容
# Automatically generated for Debian scripts. DO NOT TOUCH!
[client]
host     = localhost
user     = debian-sys-maint
password = QVn29fsf2Yvp1J		// 经过加密的字符
socket   = /var/run/mysqld/mysqld.sock
[mysql_upgrade]
host     = localhost
user     = debian-sys-maint
password = QVm29YvdMp321J    // 经过加密的字符
socket   = /var/run/mysqld/mysqld.sock
安装phpmyadmin
- 使用apt自动安装
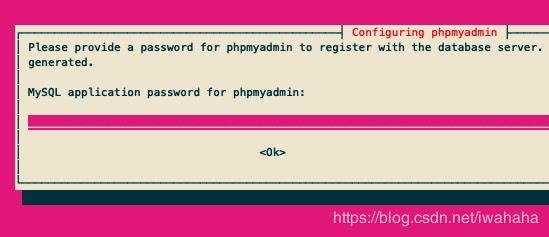
sudo apt install phpmyadmin
- 请提供phpmyadmin在数据库服务器上注册的密码。
- 如果留空,则随机生成密码。
- phpmyadmin管理的mysql应用程序密码
- 删除phpmyadmin程序
# apt remove phpmyadmin
phpmyadmin登录错误信息
- #1698 - Access denied for user ‘root’@‘localhost’
- 解决步骤:
- 1、打开phpmyadmin文件夹下面的config.inc.php文件并打开,查找且匹配字段行
$cfg['Servers'][$i]['controluser'] = 'pma';

$cfg['Servers'][$i]['controlpass'] = '';
将其注释掉并改成你的数据库用户和密码,保存
$cfg['Servers'][$i]['controluser'] = 'root';

$cfg['Servers'][$i]['controlpass'] = '123456';
刷新或重新打开phpmyadmin
- phpmyadmin登录配置文件
/etc/phpmyadmin/config.inc.php
此文件有设定登录用户库字段
/* Optional: User for advanced features */
$cfg['Servers'][$i]['controluser'] = $dbuser;
$cfg['Servers'][$i]['controlpass'] = $dbpass;
- phpmyadmin/WWW服务下面控制文件
vi /usr/share/phpmyadmin/config.sample.inc.php
// $cfg['Servers'][$i]['controlport'] = '';
$cfg['Servers'][$i]['controluser'] = '更改为你需要登录的用户';
$cfg['Servers'][$i]['controlpass'] = '用户登录的密码';
解决问题关键方法
- 但是phpmyadmin仍然無法使用root登入,此時思考應該安全性的問題。因此參考國外網友建議的方式,新增一個pmauser使用者,並且給予最大管理者權限。
mysql> CREATE USER 'lmphp'@'%' IDENTIFIED BY '更改成需要设置的密码';
////创建新用户lmphp,密码为TTUEHD
Query OK, 0 rows affected (0.00 sec)
mysql> GRANT ALL PRIVILEGES ON *.* TO 'lmphp'@'%' WITH GRANT OPTION;
////给予lmphp最大管理权限
Query OK, 0 rows affected (0.00 sec)


