Unity 2017使用 Kinect v2简单介绍及基本操作
最近由于需要使用 Unity + Kinect进行开发,所以就写一篇博客来记录一下自己的学习过程
一. Kinect简介
微软的一个体感游戏外设产品 TvT,其他自行百度。
二.Kinect API
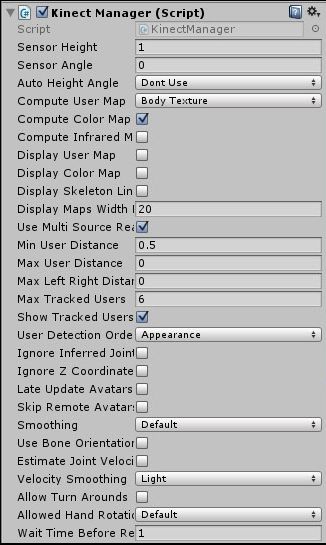
主要脚本:KinectManager
| 名字 | 功能 |
|---|---|
| Sensor Height | 传感器高出地面的高度,以米为单位。 |
| Sensor Angle | Kinect仰角(度)。可能是积极的或消极的。 |
| Auto Height Angle | 是否自动设置传感器高度和角度。用户必须留在传感器前面,以便自动检测功能正常工作。 |
| Compute User Map | 是否以及如何利用用户和深度图像。 |
| Compute Color Map | 是否使用彩色摄像机图像。 |
| Compute Infrared Map | 是否利用红外摄像机图像。 |
| Display User Map | 是否在屏幕上显示用户地图。 |
| Display Color Map | 是否在屏幕上显示彩色摄像机图像。 |
| Display Skeleton Lines | 是否在用户地图上显示骨架线。 |
| Display Maps Width Percent | 屏幕上的深度和彩色图像宽度,以屏幕宽度的百分比表示。图像高度根据宽度计算。 |
| Use Multi Source Reader | 是否使用多源阅读器(如果有)(仅限K2功能)。 |
| Min User Distance | 与用户的最小距离,以便为骨架数据处理考虑。 |
| Max User Distance | 与用户的最大距离,以便为骨架数据处理考虑。值0意味着没有最大距离限制。 |
| Max Left Right Distance | 与用户的最大左右距离,以便为骨架数据处理考虑。值为0意味着没有左/右距离限制。 |
| Max Tracked Users | 可以同时跟踪的最大用户数。 |
| Show Tracked Users Only | 是只在允许的距离范围内显示跟踪的用户,还是所有用户(较高的fps)。 |
| User Detection Order | 如何将用户分配给玩家指数 - 按照外观,距离或从左到右的顺序。 |
| Ignore Inferred Joints | 是否仅使用真正跟踪的关节(并忽略推断的关节)或不使用。 |
| Ignore Z-Coordinates | 是否忽略关节的Z坐标(即在2D场景中使用它们)。 |
| Late Update Avatars | 是否在LateUpdate()中更新AvatarControllers,而不是在Update()中。Mecanim动画混合需要。 |
| Skip Remote Avatars | 是否跳过多人游戏中的远程化身控制器。 |
| Smoothing | 一组联合平滑参数。 |
| Use Bone Orientation Constraints | 是否应用骨取向约束 |
| Estimate Joint Velocities | 是否估计身体关节速度。 |
| Velocity Smoothing | 一组关节速度平滑参数。 |
| Allow Turn-Arounds | 是否允许检测身体翻身或不翻身。 |
| Allowed Hand Rotations | 允许手腕和手的旋转:无 - 不允许手旋转,默认 - 允许手旋转,除了扭曲,全部 - 允许全部旋转。 |
| Wait-Time Before Remove | 等待几秒钟,然后丢失用户。这是为了防止零星的用户切换。 |
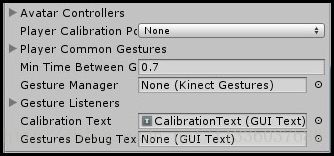
| Avatar Controllers | 场景中的头像控制器的列表。如果列表为空,则在现场启动时检测可用的头像控制器。 |
| Player Calibration Pose | 需要校准姿势,以打开相应播放器的跟踪。 |
| Player Common Gestures | 常见手势列表,为每个玩家检测。 |
| Min-Time Between Gestures | 手势检测之间的最短时间(以秒为单位)。 |
| Gesture Manager | 手势管理器,用于检测程序化Kinect手势。 |
| Gesture Listeners | 场景中的手势监听者列表。如果列表为空,则可在现场启动时检测可用的手势监听器。 |
| Calibration Text | GUI-Text显示用户检测消息。 |
| Gestures Debug Text | GUI-Text显示当前跟踪手势的调试消息。 |
…
……
………
太多了
不会的自己查文档
文档一:https://ratemt.com/k2gpapi/class_kinect_manager.html
文档二:https://ratemt.com/k2docs/KinectManager.html
三.Unity使用Kinect简单操作
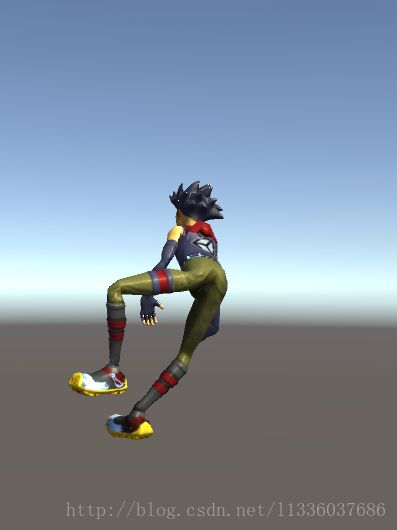
案例一:使用Kinect搭建人物模型让人物模型跟随人体动作
操作步骤
步骤1:导入官方unitypackage文件( * 以下所有案例都需要此包作为基础)
![]()
需要该文件的兄弟可以从这里获得:
链接:https://pan.baidu.com/s/1E8v5plUgOvlHKuZqalR40Q 密码:3226
步骤2:新建自己的场景
步骤3:拖入人物3d模型,可以选择使用官方自带的模型,官方自带模型位置:AvatarsDemo-> U_Character
步骤4:在人物模型上添加AvatarController脚本
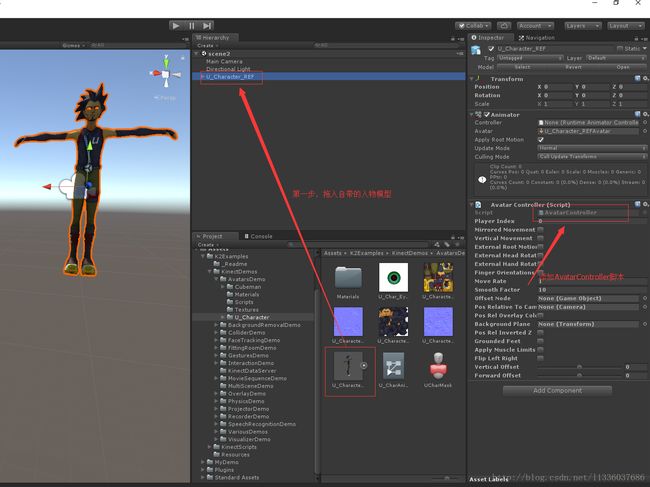
步骤5:新建一个空白物体,改名为KinectManager,添加脚本KinectManager
- 新建空白物体:右键->Create Empty
- 添加脚本:点击空白物体:Add Component -> 输入KinectManager
案例二:显示图像
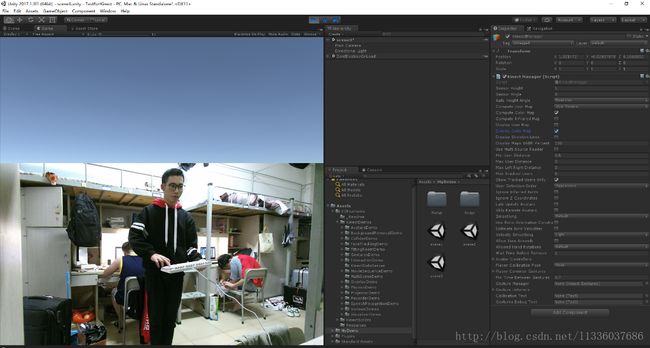
1.显示彩色图像
操作步骤:
步骤1:创建一个新场景,添加一个空白物体,在空白物体上添加KinectManager脚本
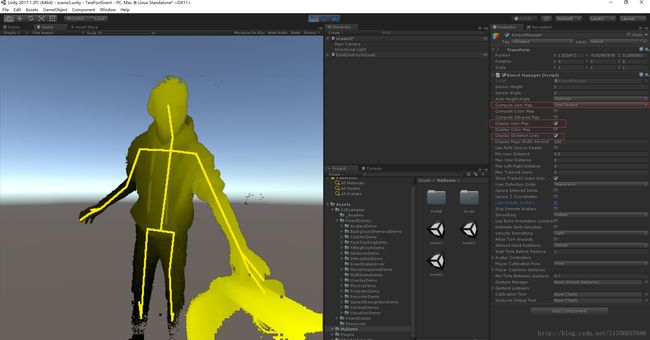
步骤2:勾选上KinectManager上的Compute Color Map(是否使用彩色摄像机图像), Display Color Map (是否在屏幕上显示彩色摄像机图像), 使用Display Maps Width Percent调节图像所占用的百分比
###2.显示人体骨骼图像
步骤1:同上
步骤2:选择Compute User Map(是否以及如何利用用户和深度图像。) 为 User Texture
步骤3:勾选上KinectManager上的Display User Map(是否在屏幕上显示用户地图), Display Skeleton Lines (是否在用户地图上显示骨架线), 使用Display Maps Width Percent调节图像所占用的百分比
案例三:获取人体空间位置
###1. 显示人物空间坐标
操作步骤:
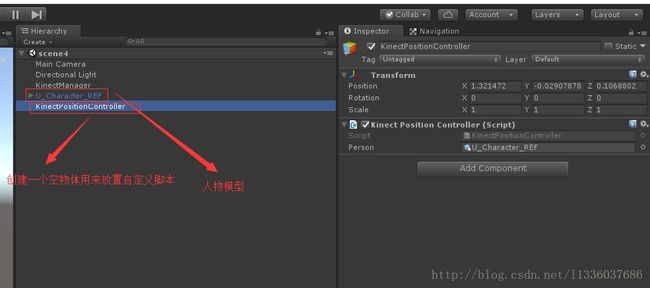
步骤1:新建场景,添加自带人物模型。
步骤2:创建一个空物体,添加KinectManager脚本,设置Compute User Map为 User Textur,勾选上KinectManager上的Display User Map, Display Skeleton Lines
步骤3:添加自定义脚本,用于获取人体空间坐标,以及设置模型位置:
步骤4:编辑脚本
public class KinectPositionController : MonoBehaviour {
    /*
     * 1.获取模型
     * 2.创建KinectManager对象
     * 3.获取用户ID
     * 4.获取人体空间坐标
     */

    public GameObject person;
    private KinectManager manager = null;
    private long userID = 0;

	// Use this for initialization
	void Start () {
        manager = KinectManager.Instance;//初始化KinectManager
	}

	// Update is called once per frame
	void Update () {
         //GetPrimaryUserID():获取主用户的UserID(第一个或最接近的),如果没有检测到用户,则为0。
        userID = manager.GetPrimaryUserID();//获取用户的userID

        if (userID != 0 && manager.IsInitialized())
        {
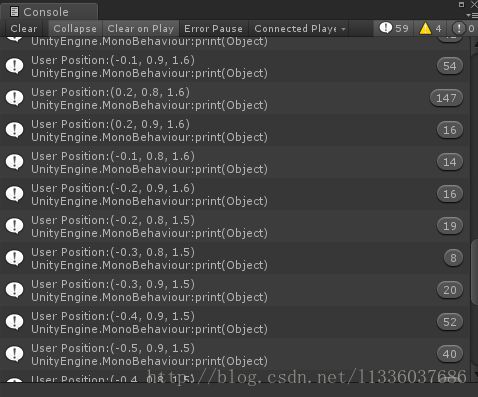
            Vector3 vec3 = manager.GetUserPosition(userID);//获取人体空间位置
            print("User Position:" + vec3);//打印人体空间坐标
            person.transform.position = vec3;
        }
	}
}
步骤5: 添加人物模型
##案例四:获取人体骨骼点信息
###1. 使用简单物体标志人体骨骼位置
操作步骤:
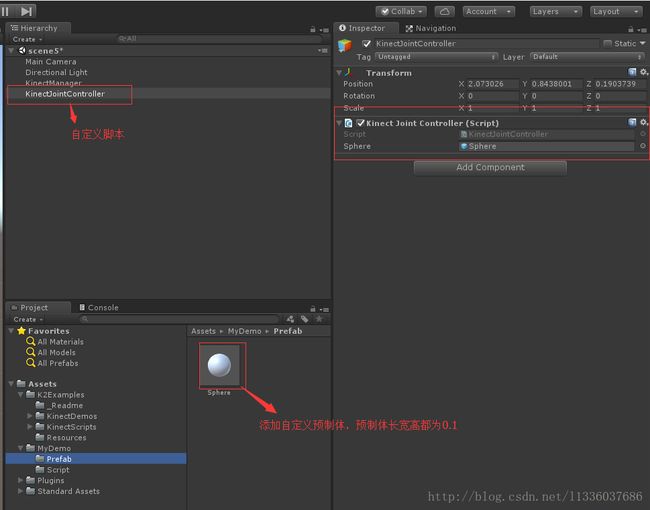
步骤1:创建新场景,创建一个空物体,添加KinectManager脚本
步骤2:添加自定义脚本,编辑自定义脚本
编辑脚本:
public class KinectJointController : MonoBehaviour {
    public GameObject sphere;//预制体
    private KinectManager manager = null;
    private GameObject[] joints;//关节数组
    private bool isCreate = false;//用于标注骨骼点物体是否创建
    private long userID = 0;
	// Use this for initialization
	void Start () {
        manager = KinectManager.Instance;//初始化KinectManager对象
	}
	// Update is called once per frame
	void Update () {
        userID = manager.GetPrimaryUserID();//获取用户userID , 如果未获得用户返回0
        if(userID != 0)
        {
            if (!isCreate)
            {
                joints = new GameObject[manager.GetJointCount()];
                for (int i = 0; i < manager.GetJointCount(); i++) //创建25个关节点
                {
                    joints[i] = Instantiate(sphere);
                }
                isCreate = true;
            }
            else
            {
                for (int i = 0; i < manager.GetJointCount(); i++)
                {
                    Vector3 vec3 = manager.GetJointKinectPosition(userID, i);
                    //print("joint " + i + vec3);//打印关节点坐标
                    joints[i].transform.position = manager.GetJointKinectPosition(userID, i);
                }
            }
        }
	}
}
步骤3:添加预制体
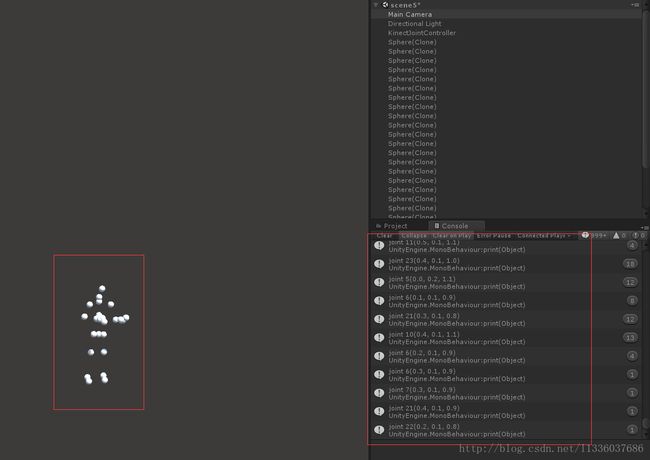
步骤4:运行,结果
##案例五:官方自带Demo了解
待添加…
四.Kinect骨骼追踪
##案例六.使用Kinect进行简单姿态识别
操作步骤:
步骤1:
- 1) 创建新场景
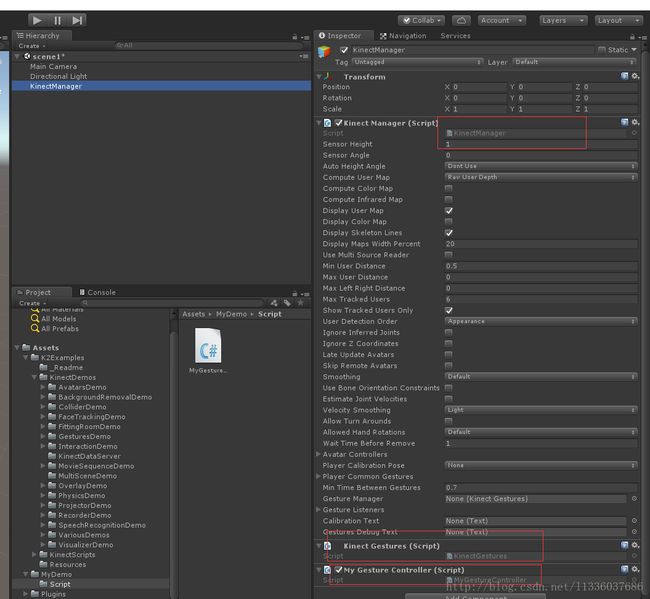
创建一个空物体,添加KinectManager脚本,设置Compute User Map为 User Textur,勾选上KinectManager上的Display User Map, Display Skeleton Lines - 2)在空物体上添加KinectGestures(用于姿态检测)脚本
步骤2:创建自定义脚本用于监听姿态,将自定义脚本添加到步骤1创建的空物体中。
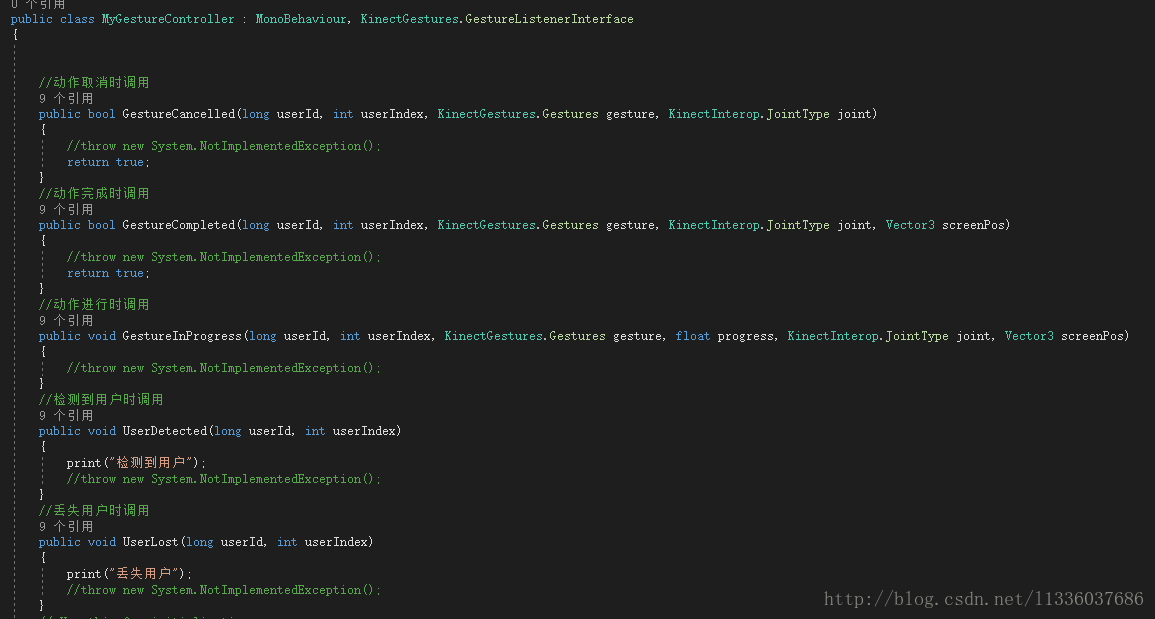
步骤3:编辑自定义脚本,脚本需要实现KinectGestures.GestureListenerInterface接口并实现其方法
步骤4:完善步骤3脚本检测姿态完成
public class MyGestureController : MonoBehaviour, KinectGestures.GestureListenerInterface
{

    public int playerIndex = 0;
    //动作取消时调用
    public bool GestureCancelled(long userId, int userIndex, KinectGestures.Gestures gesture, KinectInterop.JointType joint)
    {
        return true;
    }
    //动作完成时调用
    public bool GestureCompleted(long userId, int userIndex, KinectGestures.Gestures gesture, KinectInterop.JointType joint, Vector3 screenPos)
    {
        if (userIndex != playerIndex)
            return false;
        if (gesture == KinectGestures.Gestures.Psi)//判断如果完成的姿势是双手向上的姿势
        {
            print("Psi Completed...");
        }
        return true;
    }
    //动作进行时调用
    public void GestureInProgress(long userId, int userIndex, KinectGestures.Gestures gesture, float progress, KinectInterop.JointType joint, Vector3 screenPos)
    {
    }
    //检测到用户时调用
    public void UserDetected(long userId, int userIndex)
    {
        if (userIndex != playerIndex)
            return;
        print("检测到用户");
        KinectManager manager = KinectManager.Instance;//初始化KinectManager对象
        manager.DetectGesture(userId, KinectGestures.Gestures.Psi);//添加双手向上保持1秒的姿势检测

    }
    //丢失用户时调用
    public void UserLost(long userId, int userIndex)
    {
        print("丢失用户");
    }
    // Use this for initialization
    void Start () {

	}
	void Update () {

	}
}
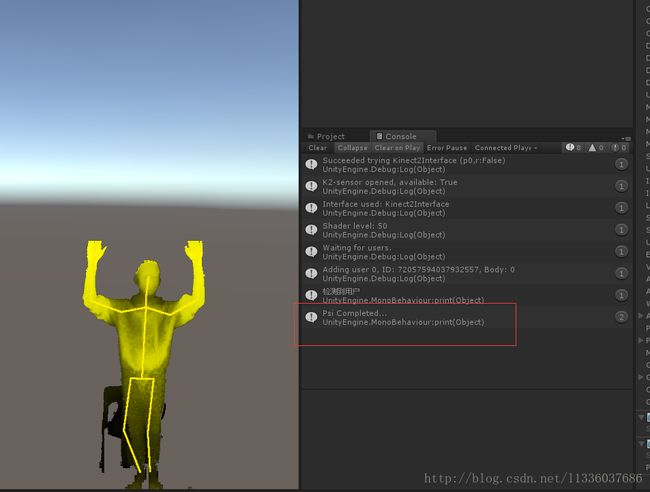
步骤5:运行
##1.分析自带的姿势识别脚本SimpleGestureListener
待完善…
五.Kinect自定义姿态
1.分析自带的姿态检测脚本
Kinect检测的姿态分为静态姿态与动态姿态
** & 文档中提供的添加姿态的方法:**
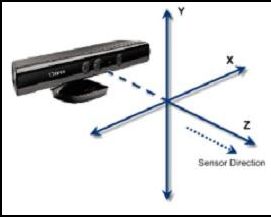
这里有一些关于如何在Kinect手势检测过程中添加自己的手势的提示。你需要一些C #编码技巧和一点基本的了解传感器的工作原理。据报道3D coordnates在Kinect坐标系中跟踪的身体部位,以米计。
添加自定义手势检测、开放的资产/ kinectscripts / kinectgestures.cs。然后:
- 1.找到手势枚举。首先你需要在该枚举的结尾添加你的手势的名称。
- 2.找到checkforgesture()功能。那里有一个长switch(),其案件过程每个手势检测,在手势的枚举定义。你需要为你的手势添加一个例子。这switch()结束脚本末尾。在那里你将实现手势检测。
- 3.关于如何做到这一点的一个例子,看看一些简单的手势的处理,比如
raiselefthand,raiserighthand,swipeleft或swiperight。 - 4.如你所见,每个手势都有它自己的内部switch()检查和改变姿态的关节状态。每个手势都像一个状态机,具有数字状态(0, 1, 2,3…)。其当前状态与其他的数据,存储在gesturedata型内部结构。创建了这个数据结构。对于需要在场景中检测到的每个手势。
- 5.每个手势的初始状态是0。在这种状态下,代码需要检测手势是否开始或不。为此,它检查和存储关节的位置,通常是左手或右手。如果关节位置适合手势开始,它增加状态。在下一个状态中,它检查3个关节通常在一段时间内到达需要的位置(或距离前一个位置的距离)。间隔,我们假设在1 - 1.5秒内。
- 6.如果关节在时间间隔内达到了目标位置(或距离),手势是考虑完成。否则将被视为取消。然后,可以重置手势状态。回到0,手势检测程序将再次启动。
KinectGestures.cs
此脚本主要用于定义检测的姿态
一些主要枚举以及变量介绍
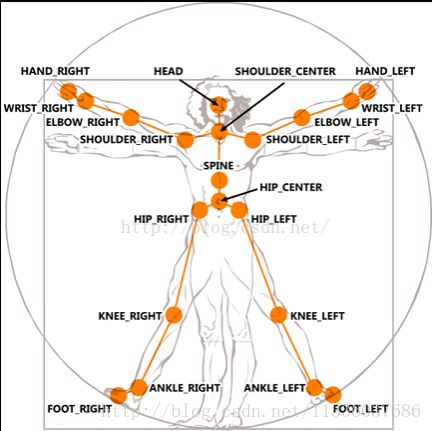
可以根据 KinectInterop.JointType对应的枚举值从上图中找到对应的关节位置
例如:KinectInterop.JointType.HandLeft 对应的是 HandLeft点 也就是左手掌点
节点类型JointType	节点名称

0	spineBase	脊椎基部
1	spineMid	脊椎中部
2	neck	    颈部
3	head	    头部
4	shoulderLeft	左肩
5	elbowLeft	左肘
6	wristLeft	左腕
7	handLeft	左手掌
8	shoulderRight	右肩
9	elbowRight	右肘
10	wristRight	右腕
11	handRight	右手掌
12	hipLeft	    左屁
13	kneeLeft	左膝
14	ankleLeft	左踝
15	footLeft	左脚
16	hipRight	右屁
17	kneeRight	右膝
18	ankleRight	右踝
19	footRight	右脚
20	spineShoulder	颈下脊椎
21	handTipLeft	左手指(食中无小)
22	thumbLeft	左拇指
23	handTipRight右手指
24	thumbRight	右拇指

/////////////////////////////////////////////////////////////////////////////////////////

leftHandIndex = manager.GetJointIndex(KinectInterop.JointType.HandLeft); //获取左手掌关节阵列中关节的索引
rightHandIndex = manager.GetJointIndex(KinectInterop.JointType.HandRight); //右手掌

leftElbowIndex = manager.GetJointIndex(KinectInterop.JointType.ElbowLeft); //左肘
rightElbowIndex = manager.GetJointIndex(KinectInterop.JointType.ElbowRight); //右肘

leftShoulderIndex = manager.GetJointIndex(KinectInterop.JointType.ShoulderLeft); //左肩
rightShoulderIndex = manager.GetJointIndex(KinectInterop.JointType.ShoulderRight); //右肩

hipCenterIndex = manager.GetJointIndex(KinectInterop.JointType.SpineBase); //脊椎基部
shoulderCenterIndex = manager.GetJointIndex(KinectInterop.JointType.SpineShoulder); //颈下脊椎

leftHipIndex = manager.GetJointIndex(KinectInterop.JointType.HipLeft); //左屁
rightHipIndex = manager.GetJointIndex(KinectInterop.JointType.HipRight); //右屁

leftKneeIndex = manager.GetJointIndex(KinectInterop.JointType.KneeLeft); //左膝
rightKneeIndex = manager.GetJointIndex(KinectInterop.JointType.KneeRight); //

leftAnkleIndex = manager.GetJointIndex(KinectInterop.JointType.AnkleLeft); //左踝
rightAnkleIndex = manager.GetJointIndex(KinectInterop.JointType.AnkleRight); //

spineMidIndex = manager.GetJointIndex(KinectInterop.JointType.SpineMid);//半身位置
##2.使用代码创建自定义姿势
案例七:使用代码创建自定义姿势
操作步骤:
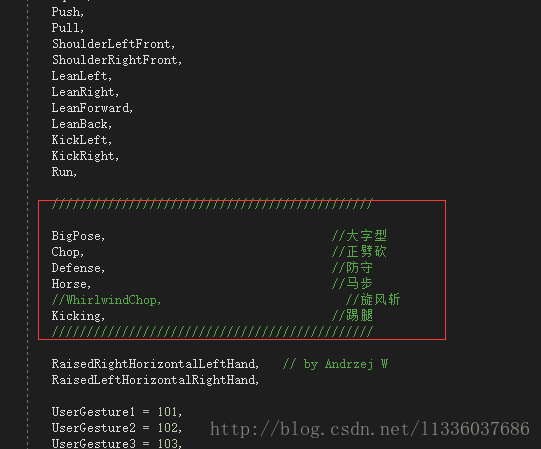
步骤1:添加自定义姿势枚举,在KinectGestures中public enum Gestures枚举内添加自定义姿态
步骤2:添加自定义姿势的逻辑
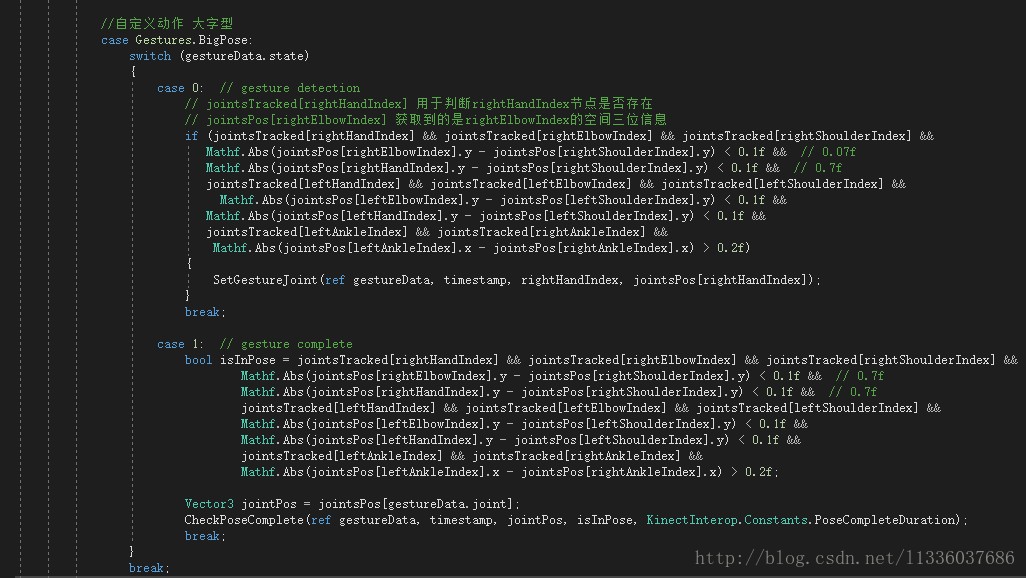
在KinectGestures中有一个switch用于判断处理姿势的具体逻辑,若要添加自己的姿势只需要在switch的末尾在添加一个case,在里面写上自己的逻辑即可,对于静态姿态只需要判断各个关节点是否到达预定位置,而动态姿态不仅需要判断是否到达预定姿态,还需要判断动作的完成度。
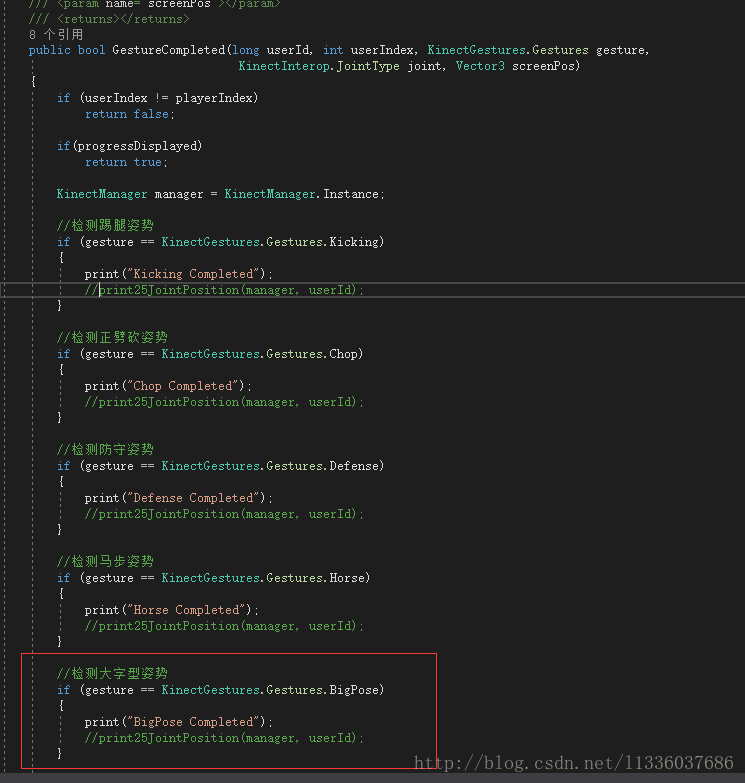
步骤3:测试:在检测姿势完成脚本中的GestureCompleted方法内添加姿态完成判断
3.使用Kinect自带训练器训练自定义姿势
训练分类器教程地址:https://blog.csdn.net/nijiayy/article/details/68926979
例子:
照着上面链接教程操作训练自己的分类器
例子2:训练动态姿势龟派气功姿势
我试了几次发现分类器名没有Progress的是静态姿势分类器,若要使用动态的需要使用有*Progress.gba文件
案例八.Unity使用分类文件
具体操作步骤:
步骤1:创建新的场景,创建一个空白物体,添加KinectManager脚本
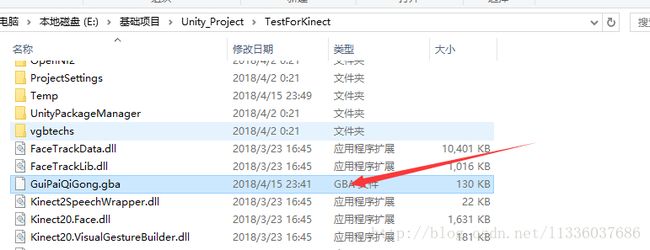
步骤2:在项目根目录下添加自己训练的分类器
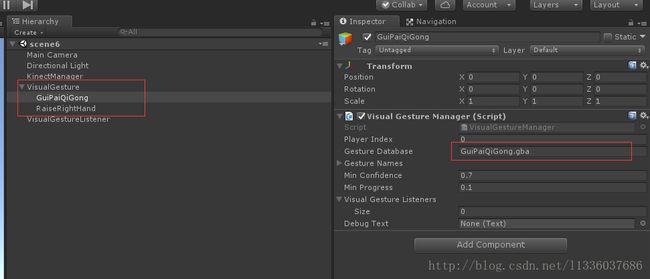
步骤3:创建一个空白物体作为分类器父组件,子组件可以用于添加需要监视的姿态动作。在子组件上添加VisualGestureManager脚本,在脚本上的Gesture Database上添加需要使用的分类器
步骤4:新建一个空白物体,添加用于监听姿态的脚本
- 编辑脚本:脚本需要实现VisualGestureListenerInterface接口
- 实现代码:
public class KinectGestureListener : MonoBehaviour, VisualGestureListenerInterface
{
    //动作姿态完成
    public bool GestureCompleted(long userId, int userIndex, string gesture, float confidence)
    {
        if (gesture == "RaiseRightHand_Right") //如果举起右手姿态完成
        {
            print("RaiseRightHand_Right...");
        }
        if (gesture == "GuiPaiQiGong") //如果龟派气功姿态完成
        {
            print("GuiPaiQiGong...");
        }
        return true;
        //throw new System.NotImplementedException();
    }
    //检测动作姿态过程
    public void GestureInProgress(long userId, int userIndex, string gesture, float progress)
    {

    }
    void Start () {

	}
	void Update () {

	}
}
结果:当自己摆出龟派气功姿态以及抬起右手时都能被检测到
同时对于检测时的各个关节点的空间位置,只要初始化一个KinectManager对象,调用其方法即可得到
