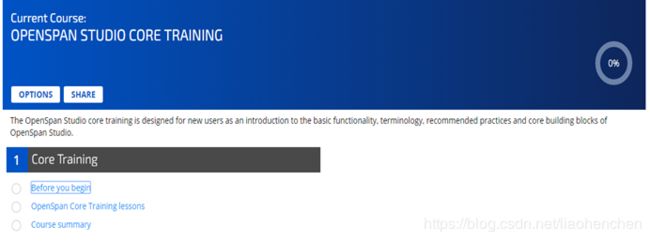
Pega(Open Span) 在线入门课程申请详解及入门了解
Robotic automation is the application of software to automate tasks and processes otherwise performed by humans. Simply, robotic automation is software automating software. Software robots can fully automate essential business transactions through Robotic Process Automation (RPA) or optimize the way people work with Robotic Desktop Automation (RDA). The goal of robotic automation is an improved customer experience and operational excellence through increased efficiency, performance, and agility in the day-to-day activities across the enterprise.
Pega Robotics(Openspan) Product Offerings
OpenSpan is robotic process automation (RPA) and workforce analytics software.
The 3 core products are: 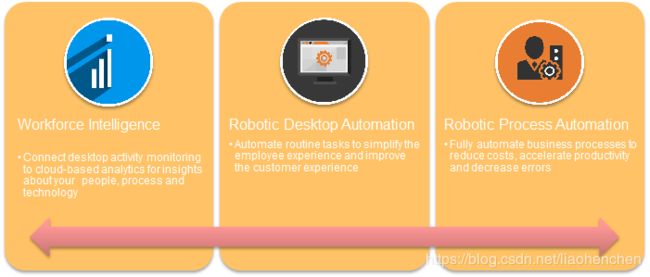
Running on 200,000 desktops at leading global enterprises, OpenSpan compliments Pegasystems’ Customer Relationship Management (CRM) application suite and Business Process Management (BPM) platform
Difference Between Pega RPA and Pega RDA
| Pega Robotic Desktop Automation(RDA)
•Personal Productivity Robot on a user Desktop. •Unifies Disconnected application and processes. •Solves “messy desktop” and increase productivity. • Example: Use-Case While servicing a customer call, fetch a customer account and a disputed transaction decision from a legacy app and display it inside Pega customer service. |
Pega Robotic Process Automation(RPA)
•Queue complex back-office processes to a pool of “unattended” robots virtual machine. •Batch-process work “in bulk”. •Free-up your work force for more valuable work. • Example: Use-Case A customer submits an address change inside a self-service portal that needs to be updated in three desktop apps and two web apps. Queue the assignment for a robot to process. |
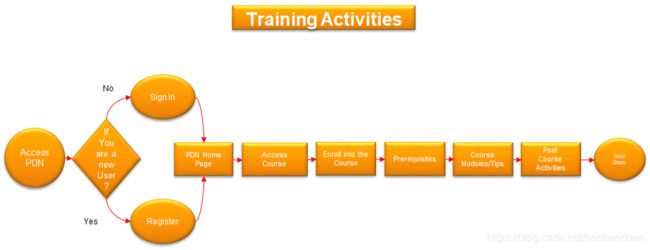
Access PDN(Pega Discovery Network)
•Access the URL: https://pdn.pega.com/
•You will be redirected to the following Web Page: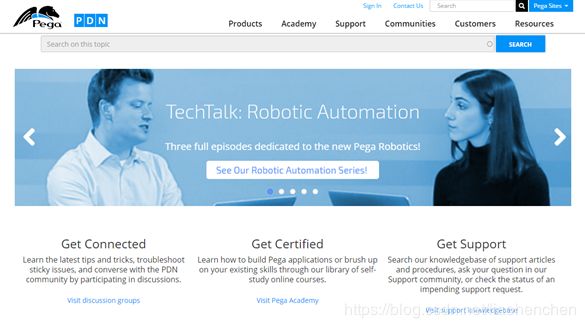
Sign Up
Step 1:After you access the URL: https://pdn.pega.com/
Step 2: if you are new user to the PDN portal you will choose the Sign-in option once you do that you will be redirected to the following page:
Sign Up(Register To PDN)
Step 3: Perform Click on the Create one button an you will be redirected to the below page.
Step 4: Enter all the required details and you will get your username and password in your email id.
Note: Create an account here using your Accenture Email Id.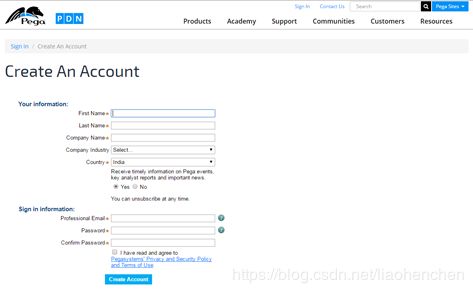
Sign In
Step 1:Access the URL: https://pdn.pega.com/
Step 2:Perform Click on the Sign-in button.
Step 3:Enter your Username and Password in the below page and sign in :
PDN Home Page(After you Sign into PDN)
Step 1: If you are an existing user of PDN or have just created an account in PDN by following Sign Up process correctly and after login into the PDN portal by using your Username and Password. You will be redirected to your home page below: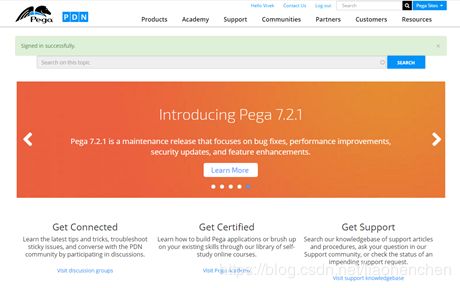
Search for the Course(In Your PDN Home Page)
Step 1: Now you are all set to search for the course named “Pega Robotic Automation Architect Essentials”.
Step 2: Perform click on My-Self-Study button from the context menu of Academy tab:
Step 3: You are now in your Self Study web page in side the PDN Portal. Perform click on By Product button from the drop down list of your Course Library list Box:![]()
Search for the Course(In Your PDN Home Page)
Step 4: Now you are in your course library portal filtered by the platform category:
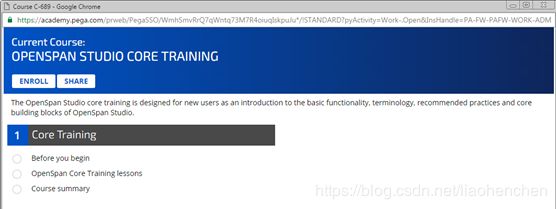
Look for the Pega Robotic Automation Architect Essentials Course and click on it
It would open in a pop-up window.
Enroll for the Course(In your PDN Home Page)
Step 1: Enroll for the course by submitting the enroll button you would be redirected to the following page :
In the below page select the enrollment objective check box. Click on the first enrollment objective check box which say ”To complete the course. Select this option if you are planning to complete the course and/or plan to take an exam based on this course”. Then click on AGREE TO TERMS AND ENROLL IN COURSE button to begin your course.
Note: This course is a four day course.![]()
You can set the Completion Target Date to any date in the future which could be more or less than four day. The target will have no impact on your assessment. It is just used for the reminders.
Prerequisite : Before you begin the course
Step 1:Perform click on the Before you begin button.
Now you will be in the following page:
Step 2:Download the following Files from the below location.
•Pega Robotic Automation Training Exercise Files
•Install this OpenSpanPluginVS2015Setup:
Step 3:Then click on GOT IT.
Now you will be in the following Page:
Step 4:Download the software from the link “Pega Robotic Automation Training Exercise Files” given and install it using the installations instruction file.
Step 4:Then click on the CONTINUE TO NEXT LESSON button to start your training.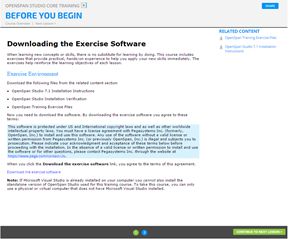
Course Modules and tips
•It is a self-paced training.
•In total there are five modules to cover.
•Make sure you follow the exact directions provided to complete the exercise.
•After each module there is a test to validate your understanding.
•The link for taking test is also given in the bottom of each page which displays the course content for a module. The password for taking the certification exam is also provided there.
•You can take all the certification exam at once or one by one after completing the respective module.
•Please note you only have two attempts and this is times. So plan accordingly.
Complete the Following POC(Proof of Concept) as an Exercise.
Proof of Concept No. 1: Level Beginner.
Scenario:
Create a Windows form with the field
•Index
•First name,
•Last name
•Middle name
•Date of Birth
•Age
•Address
•Submit Button
•Reset button
Objective :
1.Above filed data should be populated in an excel sheet after you click the submit button on the windows form.
2.After you click the reset button on the windows form it should reset itself to perform the same operation.
3.Use a single excel sheet during automation.
Concept Covered:
•Looping
•Excel Connector
Windows Form Integration.
Proof of Concept No. 2: Level Intermediate.
Scenario:
Create a Windows form with the field:
•To
•Subject
•Body
•Submit-button
•Reset-button
Objective :
1.After you click the submit button on the windows form it should send an email using the following fields above.
2.After you click the reset button on the windows form it should reset itself to perform the same operation.
3.To –will contain the receivers email address.
4.Subject-will contain the Subject of the email.
5.Body- will contain the core content of the email.
Concept Covered:
•Looping
•Outlook Connector
•Windows Form Integration.
•Proxy concepts Understanding.
Proof of Concept No. 3: Level Advance.
Scenario:
Create a Windows form with the field:
•Search
•Id
•Submit-button
•Reset-button
Objective :
1.After you click the submit button on the windows form it should perform a google search on the text entered into an Search Text Box.
2.Five search item uniform resource locator should be fetched from the first page of a google search and should be written in an excel file.
3.Id text filed on the windows form should act as an Primary Key for each row in the excel file
4.Only one excel file should be used throughout the operation.
5. After you click the reset button on the windows form it should reset itself to perform the same operation.
Concept Covered:
•Looping
•Excel Connector
•Web Application Integration.
•Clone Concept.
Next steps – Advance
•Explore Pega Robotic Automation Management Console to monitor the overall state of your Robotic Process Automation(RPA) solution within your Pega 7 Application.
•Explore Pega Robotics Desktop Management Console.This Cloud based server product from Pega provides a simple yet comprehensive way to manage the testing and implementation of the solutions you create with Pega Robotics Studio and the updates Pega periodically distributes.
•Explore the Script Component located inside your Pega Robotic Studio ToolBox window.
•Explore the Runtime Tab Components located inside the your Pega Robotic Studio ToolBox window.
•Explore the Data Tab Components located inside your Pega Robotic Studio ToolBox window.
