身份证识别(二)——使用OpenCV得到号码区域
前言
1.前面项目我写了如何检测到手持身份证的正面、反面、头像,那接下要试的是用OpenCV去等到身份证号码的区域。
2.我这里用到的OpenCV的版本是3.30,IDE是Qt和VS2015。
3.这个代码好多地方是借鉴了车牌识别那个开源项目。
代码
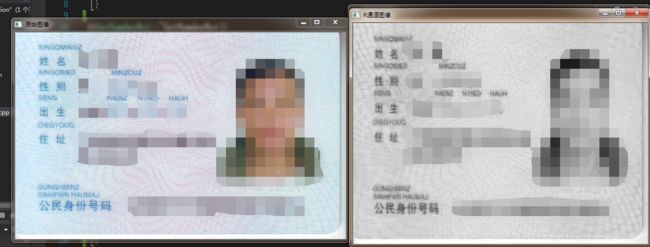
1.把传入的图像分离成只有R通道的图像
//获取R通道
//传入一个剪切好的身份证,返回一个只有R这个通道的图像
void getRChannel(const Mat &src, Mat &dst)
{
	//容器大小为通道数3
	vector split_BGR(src.channels());

	//通道分离
	split(src, split_BGR);
	if (src.cols > 700 | src.cols >600)
	{
		Mat resizeR(450, 600, CV_8UC1);

		cv::resize(split_BGR[2], resizeR, resizeR.size());

		dst = resizeR.clone();
	}
	else
	{
		dst = split_BGR[2].clone();
	}
}
//传入一个单通道的图像,得到一个旋转矩形的号码区域
void posDetect(const Mat &src, vector & rects)
{
	Mat threshold_R;

	//二值化
	OstuBeresenThreshold(src, threshold_R);

#ifdef DEBUG
	imshow("二值化", threshold_R);
#endif

	//新建一个全白的图像
	Mat reversal_img(src.size(), src.type(), cv::Scalar(255));

	//相减得到反转的图像
	Mat threshold_reversal = reversal_img - threshold_R;

#ifdef DEBUG
	imshow("反转黑白", threshold_reversal);
#endif

	//形态学闭操作的结构元素
	Mat element = getStructuringElement(MORPH_RECT, Size(15, 3));

	//闭运算
	morphologyEx(threshold_reversal, threshold_reversal, CV_MOP_CLOSE, element);

#ifdef DEBUG
	imshow("闭操作", threshold_reversal);
#endif

	vector< vector  > contours;

	//轮廓检测
	findContours(threshold_reversal, contours, CV_RETR_EXTERNAL, CV_CHAIN_APPROX_NONE);

	//对得到的轮廓进行进一步筛选
	vector< vector  > ::iterator itc = contours.begin();

	while (itc != contours.end())
	{
		//返回每个轮廓的最小有界矩形区域
		RotatedRect mr = minAreaRect(Mat(*itc));

		//判断矩形轮廓是否符合要求
		if (!isNumber(mr))
		{
			//删除
			itc = contours.erase(itc);
		}
		else
		{
			rects.push_back(mr);
			++itc;
		}
	}

#ifdef DEBUG
	//测试是否找到了号码区域
	Mat result;
	result = src.clone();

	Point2f vertices[4];
	for (int j = 0; j < rects.size(); j++)
	{
		rects[j].points(vertices);
		for (int i = 0; i < 4; i++)
		{
			//画线
			line(result, vertices[i], vertices[(i + 1) % 4], Scalar(0, 0, 0));
		}
		imshow("号码区域", result);
	}
#endif

}

//判断是否为数字区域(这个函数从车牌识别引用而来)
bool isNumber(const RotatedRect &candidate)
{
	float error = 0.2;
	//长宽比
	const float aspect = 4.5 / 0.3;
	//最小区域
	int min = 10 * aspect * 10;
	//最大区域
	int max = 50 * aspect * 50;
	//考虑误差后的最小长宽比
	float rmin = aspect - aspect*error;
	//考虑误差后的最大长宽比
	float rmax = aspect + aspect*error;

	int area = candidate.size.height * candidate.size.width;
	float r = (float)candidate.size.width / (float)candidate.size.height;
	if (r < 1)
	{
		r = 1 / r;
	}

	//满足该条件才认为该号码区域
	if ((area < min || area > max) || (r< rmin || r > rmax))
	{
		return false;
	}
	else
	{
		return true;
	}
}

//二值化,输入为单通道,输出一个二值图像
void OstuBeresenThreshold(const Mat &src, Mat &out)
{
	//otsu获得全局阈值
	double ostu_T = threshold(src, out, 0, 255, CV_THRESH_OTSU);

	double min;
	double max;
	minMaxIdx(src, &min, &max);
	const double CI = 0.12;
	double beta = CI*(max - min + 1) / 128;
	double beta_lowT = (1 - beta)*ostu_T;
	double beta_highT = (1 + beta)*ostu_T;

	Mat doubleMatIn;
	src.copyTo(doubleMatIn);
	int rows = doubleMatIn.rows;
	int cols = doubleMatIn.cols;
	double Tbn;
	for (int i = 0; i < rows; ++i)
	{
		//获取第 i行首像素指针
		uchar * p = doubleMatIn.ptr(i);
		uchar *outPtr = out.ptr(i);

		//对第i 行的每个像素(byte)操作
		for (int j = 0; j < cols; ++j)
		{

			if (i <2 | i>rows - 3 | j<2 | j>rows - 3)
			{

				if (p[j] <= beta_lowT)
				{
					outPtr[j] = 0;
				}

				else
				{
					outPtr[j] = 255;
				}

			}
			else
			{
				//窗口大小25*25
				Tbn = sum(doubleMatIn(Rect(i - 2, j - 2, 5, 5)))[0] / 25;
				if (p[j] < beta_lowT | (p[j] < Tbn && (beta_lowT <= p[j] && p[j] >= beta_highT)))
				{
					outPtr[j] = 0;
				}
				if (p[j] > beta_highT | (p[j] >= Tbn && (beta_lowT <= p[j] && p[j] >= beta_highT)))
				{
					outPtr[j] = 255;
				}
			}
		}
	}
}
运行效果:

红线是为了方便显示效果加的,黑色那个框就是程序得到的号码区域。
结语
关于整个工程的源码,运行程序时的bug,或者有如何优化的想法都可以加之前我博客后面提到的群,相互讨论学习。
