OpenCv学习笔记(七)---OpenCv中的基本绘图函数,圆,椭圆,线段,矩形,多边形的绘制(1)
(一)本节教程的目的
本节你将学到:
	1--如何使用Point在图像中定义2D点
	2--如何以及为何使用Scalar
	3--用OpenCv的函数Line绘直线
	4--用OpenCvd的函数ellipse绘制椭圆
	5--用OpenCv的函数rectangle绘矩形
	6--用OpenCv的函数circle绘圆
	7--用OpenCv的函数fillPoly绘填充多边形
(二)原理,本节我们将大量使用Point和Scalar这两个结构:
********************************************************************************************
    //【1】Point2f----二维单精度浮点型点类
	//【2】Point2d----二维双精度浮点型点类
	//【3】Point3i----三维整形点类
********************************************************************************************
    其源代码如下所示:
    typedef Point_      Point2i;
	typedef Point2i          Point;
	typedef Point_    Point2f;
	typedef Point_   Point2d;
	typedef Point3_     Point3i;
	typedef Point3_   Point3f;
	typedef Point3_  Point3d;
/**********************************************************************************************
*【1】二维空间中,点的类模板
*【2】这个类定义了一个二维空间中的点,这个点的坐标可以被作为一个模板参数被指定.
*【3】这个类也有一些比较短的别名可以方便用户的使用,比如:
*     cv::Point, cv::Point2i, cv::Point2f and cv::Point2d
*
**********************************************************************************************/
//【1】这是一个典型的类模板
template class Point_
{
public:
    typedef _Tp value_type;

    // various constructors
	//【1】各种构造函数
    Point_();
    Point_(_Tp _x, _Tp _y);
    Point_(const Point_& pt);
    Point_(const CvPoint& pt);
    Point_(const CvPoint2D32f& pt);
    Point_(const Size_<_Tp>& sz);
    Point_(const Vec<_Tp, 2>& v);

    Point_& operator = (const Point_& pt);
    //! conversion to another data type
	//【2】函数模板--转换为另一种类型
    template operator Point_<_Tp2>() const;

    //! conversion to the old-style C structures
	//【3】转换为旧式风格的C的结构体
    operator CvPoint() const;
    operator CvPoint2D32f() const;
    operator Vec<_Tp, 2>() const;

    //! dot product
	//【4】点积运算
    _Tp dot(const Point_& pt) const;
    //! dot product computed in double-precision arithmetics
    double ddot(const Point_& pt) const;
    //! cross-product
	//【5】向量积运算
    double cross(const Point_& pt) const;
    //! checks whether the point is inside the specified rectangle
	//【6】判断当前这个点是否在指定的矩形之内
    bool inside(const Rect_<_Tp>& r) const;
    //【7】这是这个Point类模板最重要的两个信息------Point点的x和y坐标
    _Tp x, y; //< the point coordinates
};
typedef Scalar_ Scalar;
**********************************************************************************************
/**********************************************************************************************
*【1】Scalar类的--类模板
*【2】这是一个使用4个元素指定的特殊的Vec向量类模板的类模板
*【3】通常使用的是--cv::Scalar
*【3】其实也就是说---Scalar颜色类---是一个特殊的----向量类
**********************************************************************************************/
	template class Scalar_ : public Vec<_Tp, 4>
	{
	public:
		//! various constructors
		//【1】默认构造函数
		Scalar_();
		//【2】很重要的一个默认构造函数
		//【3】这个默认构造函数的四个参数分别表示RGB+Alpha颜色中的:
				//【1】v0---表示RGB中的------blue-----B---蓝色分量
				//【2】v1---表示RGB中的------Green----G---绿色分量
				//【3】v2---表示RGB中的------Red------R---红色分量
				//【4】v3---表示Alpha---------------------透明色分量
		Scalar_(_Tp v0, _Tp v1, _Tp v2=0, _Tp v3=0);
		Scalar_(const CvScalar& s);
		Scalar_(_Tp v0);

		//! returns a scalar with all elements set to v0
		//【2】------------------------------成员函数--------------------------------------
		//【1】返回一个用v0设置所有颜色的Scalar类
		static Scalar_<_Tp> all(_Tp v0);
		//! conversion to the old-style CvScalar
		operator CvScalar() const;

		//! conversion to another data type
		template operator Scalar_() const;

		//! per-element product
		Scalar_<_Tp> mul(const Scalar_<_Tp>& t, double scale=1 ) const;

		// returns (v0, -v1, -v2, -v3)
		Scalar_<_Tp> conj() const;

		// returns true iff v1 == v2 == v3 == 0
		bool isReal() const;
	};
********************************************************************************************
1)Point类
	Point数据结构表示了由其图像坐标x和y指定的2D点.可定义为:
	Point pt;
	pt.x=10;
	pt.y=8;
	或者:
	point pt=Point(10,8);
2)Scalar类
	Scalar表示了具有4个元素的数组,此类型在OpenCv中被大量用于传递像素值。
/*********************************************************************************************
程序功能:
基本绘图函数的示例程序1
编写环境:
OpenCv2.4.8+VS2010
地点时间:
陕西师范大学 2016.4.26
作者信息:
九月
**********************************************************************************************/
/********************************【头文件.命名空间包含部分】**********************************/
#include
#include
using namespace cv;
/***************************************【宏定义部分】****************************************/
#define WINDOW_NAME1 "【绘制图像1】"
#define WINDOW_NAEM2 "【绘制图像2】"
#define WINDOW_SIZE 500
/***************************************【全局函数声明部分】**********************************/
void DrawEllipse(Mat img,double angle);
void DrawFilledCircle(Mat img,Point center);
void DrawPolygon(Mat img);
void DrawLine(Mat img,Point start,Point end);
/********************************************【main函数】*************************************/
int main(int argc,char** argv)
{
//创建空白的图像
Mat atomImg=Mat::zeros(WINDOW_SIZE,WINDOW_SIZE,CV_8UC3);
Mat rookImg=Mat::zeros(WINDOW_SIZE,WINDOW_SIZE,CV_8UC3);
//------------------------------------绘制原子的示例图------------------------------------
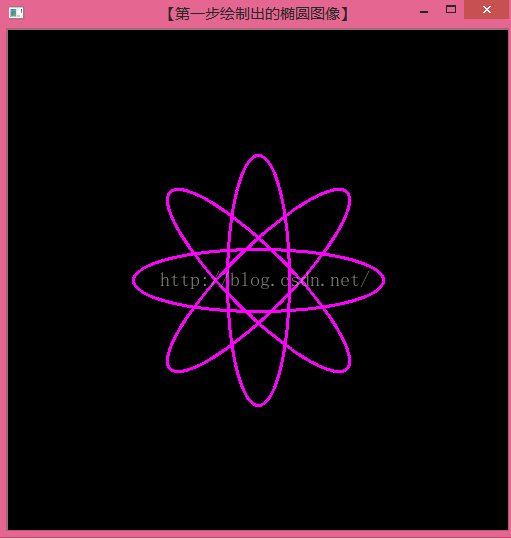
//【1】先绘制出椭圆
DrawEllipse(atomImg,90);
DrawEllipse(atomImg,0);
DrawEllipse(atomImg,45);
DrawEllipse(atomImg,-45);
imshow("【第一步绘制出的椭圆图像】",atomImg);
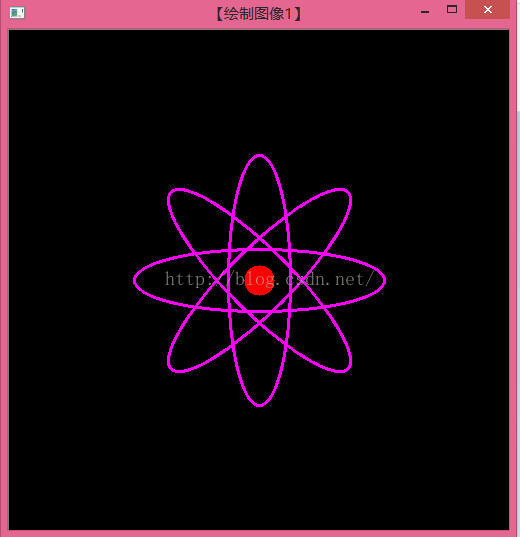
//【2】再绘制出圆心
DrawFilledCircle(atomImg,Point(WINDOW_SIZE/2,WINDOW_SIZE/2));
//-----------------------------------绘制组合图像----------------------------------------
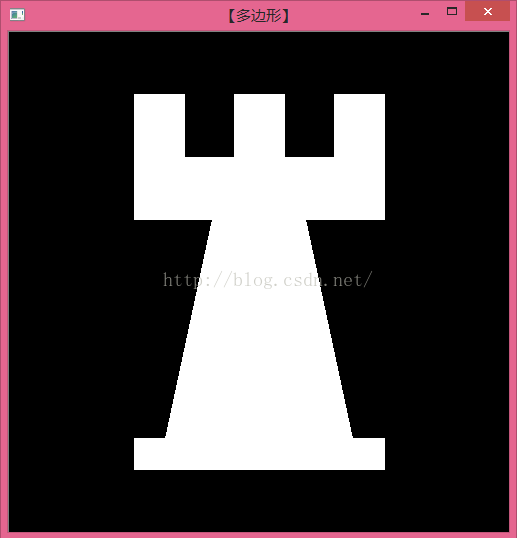
//【1】先绘制会多边形
DrawPolygon(rookImg);
imshow("【多边形】",rookImg);
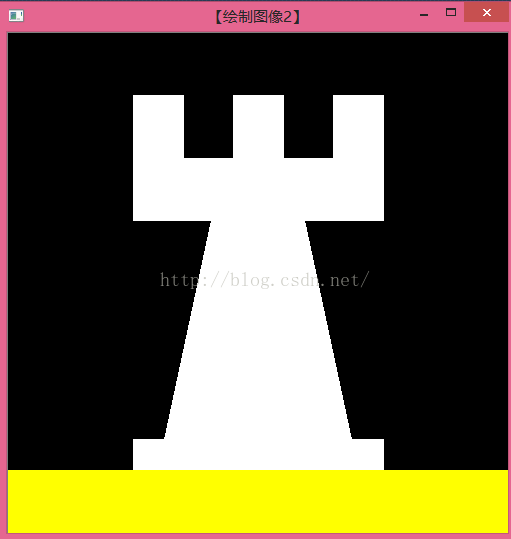
//【2】在绘制矩形
rectangle(rookImg,
Point(0,7*WINDOW_SIZE/8), //两个对角定点
Point(WINDOW_SIZE,WINDOW_SIZE),
Scalar(0,255,255), //矩阵颜色图像
-1, //由于线粗为-1,,此举真将被填充
8);
//-----------------------------------显示绘制出的图像-------------------------------------
imshow(WINDOW_NAME1,atomImg);
imshow(WINDOW_NAEM2,rookImg);
waitKey(0);
return 0;
}
/***************************************************************************************************
函数功能:
绘制一条直线
函数参数:
1---画一条从点start到点end的直线段
2---此线段将被滑到图像img上
3---线的颜色有Scalar(0,0,0)来定义
4---线的粗细由thickness设定
5---线的类型由lineType决定,此处为8连通
函数返回值:
无
***************************************************************************************************/
void DrawLine(Mat img,Point start,Point end)
{
int thickness=2;
int lineType=8;
line(img,start,end,Scalar(0,0,0),thickness,lineType);
}
/***************************************************************************************************
函数功能:
绘制一个椭圆
函数参数:
1---椭圆将被画到img图像上
2---椭圆的中心点为Point(WINDOW_SIZE/2.0,WINDOW_SIZE/2.0),并且大小位于矩阵
Size(WINDOW_SIZE/4.0,WINDOW_SIZE/16.0),
3---椭圆的旋转角度为angle
4---椭圆拓展的弧度为0到360度
5--图形颜色为Scalar(255,0,255)
6--椭圆的粗度为thickness
7--线条的类型为lineType---8连通域
函数返回值:
无
***************************************************************************************************/
void DrawEllipse(Mat img,double angle)
{
int thickness=2;
int lineType=8;
ellipse(img,
Point(WINDOW_SIZE/2.0,WINDOW_SIZE/2.0),
Size(WINDOW_SIZE/4.0,WINDOW_SIZE/16.0),
angle,
0,
360,
Scalar(255,0,255),
thickness,
lineType);
}
/***************************************************************************************************
函数功能:
绘制一个圆
函数参数:
1---圆将被画到img图像上
2---圆心由center定义
3---圆的半径为:WINDOW_SIZE/32.0
4---圆的颜色Scalar(0,0,255)
5---线的粗细为thickness=-1,因此,圆将被填充
函数返回值:
无
***************************************************************************************************/
void DrawFilledCircle(Mat img,Point center)
{
int thickness=-1;
int lineType=8;
circle(img,
center,
WINDOW_SIZE/32.0,
Scalar(0,0,255),
thickness,
lineType);
}
/***************************************************************************************************
函数功能:
绘制多边形
函数参数:
1---多边形将被画到img上
2---多边形的顶点集为ppt
3---要绘制的多边形定点数目为npt
4---要绘制的多边形数量为1
5---多边形的颜色定义为Scalar(255,255,255),即BGR的值为白色
函数返回值:
无
***************************************************************************************************/
void DrawPolygon(Mat img)
{
int lineType=0;
//创建一些点
Point rookPoints[1][20];
rookPoints[0][0] =Point( WINDOW_SIZE/4,7*WINDOW_SIZE/8);
rookPoints[0][1] =Point( 3*WINDOW_SIZE/4,7*WINDOW_SIZE/8);
rookPoints[0][2] = Point( 3*WINDOW_SIZE/4, 13*WINDOW_SIZE/16 );
rookPoints[0][3] = Point( 11*WINDOW_SIZE/16, 13*WINDOW_SIZE/16 );
rookPoints[0][4] = Point( 19*WINDOW_SIZE/32, 3*WINDOW_SIZE/8 );
rookPoints[0][5] = Point( 3*WINDOW_SIZE/4, 3*WINDOW_SIZE/8 );
rookPoints[0][6] = Point( 3*WINDOW_SIZE/4, WINDOW_SIZE/8 );
rookPoints[0][7] = Point( 26*WINDOW_SIZE/40, WINDOW_SIZE/8 );
rookPoints[0][8] = Point( 26*WINDOW_SIZE/40, WINDOW_SIZE/4 );
rookPoints[0][9] = Point( 22*WINDOW_SIZE/40, WINDOW_SIZE/4 );
rookPoints[0][10] = Point( 22*WINDOW_SIZE/40, WINDOW_SIZE/8 );
rookPoints[0][11] = Point( 18*WINDOW_SIZE/40, WINDOW_SIZE/8 );
rookPoints[0][12] = Point( 18*WINDOW_SIZE/40, WINDOW_SIZE/4 );
rookPoints[0][13] = Point( 14*WINDOW_SIZE/40, WINDOW_SIZE/4 );
rookPoints[0][14] = Point( 14*WINDOW_SIZE/40, WINDOW_SIZE/8 );
rookPoints[0][15] = Point( WINDOW_SIZE/4, WINDOW_SIZE/8 );
rookPoints[0][16] = Point( WINDOW_SIZE/4, 3*WINDOW_SIZE/8 );
rookPoints[0][17] = Point( 13*WINDOW_SIZE/32, 3*WINDOW_SIZE/8 );
rookPoints[0][18] = Point( 5*WINDOW_SIZE/16, 13*WINDOW_SIZE/16 );
rookPoints[0][19] = Point( WINDOW_SIZE/4, 13*WINDOW_SIZE/16 );
const Point* ppt[1]={rookPoints[0]};
int npt[]={20};
fillPoly(img,
ppt,
npt,
1,
Scalar(255,255,255),
lineType);
}


