前面我们说到 启动rails server。下面继续说后面的 这里命令说的很详细 我摘录下来 方便以后回顾,内容很多一天 消化不了.
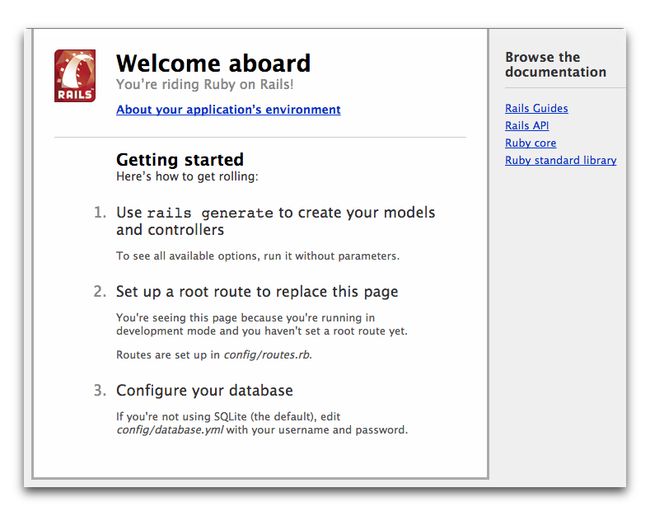
這將會啟動 WEBrick ,Ruby 內建的 web 伺服器。想看應用程式執行中的畫面,請打開瀏覽器並在網址列上輸入 http://localhost:3000。便會看到 Rails 的預設頁面。
如想停止 web 伺服器,請在已執行中的命令視窗按下 Ctrl+C 跳回命令提示字元就可以終止服務。 大多數類 UNIX 系統,其中也包含 Mac OS X 將會再次看到錢號 $。在開發模式中, Rails 通常是不會要求你重新起動服務;只要有修改過的檔案伺服器就會自動重新載入。
“Welcome aboard”這個頁面對於新建 Rails 應用程式來說是一個“煙霧測試”:測試設定上是否正確,來讓此頁面正確執行。你也可以透過點擊 About your application's environment 連結來看應用程式中環境相關資訊的摘要。
4.2 Rails 說 "Hello"
為了讓 Rails 可以顯示 "Hello",你必須先建立一個簡單的控制器和文件顯示層。
控制器的功能是去接收對於應用程式的 HTTP 請求。而 路由動作 (Routing) 則是決定由那一個控制器去接收請求,通常一個 控制器會有一個以上的路由 (route) 規則對應,藉由不同的 actions 來處理這些不同的路由 (routes) 所決定的請求。Action 的功能就是收集資訊並提供給 view 使用。
View 的功能是將資訊用普通人可讀的方式呈現出來。View 跟 controller 最大的差別就是 controller 負責資訊的收集,而 view 只是負責資訊的呈現。預設的 view template 是用 eRuby (Embedded Ruby) 所寫的,這部份在結果送到使用者之前就會被 Rails 中 request cycle (從 route 到 view 的一系列請求) 執行到。
要建立一個 controller ,你必需執行 controller 的產生器,並且附上 controller 名稱以及 action 名稱的參數,就像這樣:
$ bin/rails generate controller welcome index
|
Rails 會替你建立一個路由和幾個檔案。
create app/controllers/welcome_controller.rb
route get 'welcome/index'
invoke erb
create app/views/welcome
create app/views/welcome/index.html.erb
invoke test_unit
create test/controllers/welcome_controller_test.rb
invoke helper
create app/helpers/welcome_helper.rb
invoke assets
invoke coffee
create app/assets/javascripts/welcome.js.coffee
invoke scss
create app/assets/stylesheets/welcome.css.scss
|
這些檔案中最重要的當然是位於 app/controllers/welcome_controller.rb 的控制器以及位於 app/views/welcome/index.html.erb 的 View。
接下來用文字編輯器打開 app/views/welcome/index.html.erb ,並且將檔案所有內容替換成以下的程式碼:
<
h1
>Hello, Rails!
|
4.3 設置應用程式首頁
現在我們已經完成了控制器和 view ,再來就是決定什麼時候讓 Rails 秀出 "Hello, Rails!"。這個例子中,我們想在連結應用程式首頁 http://localhost:3000 來顯示這段訊息。不過目前畫面依舊是 "Welcome aboard"。
所以接下來,我們要告訴 Rails 正確首頁的所在位置。
首先用編輯器打開 config/routes.rb 檔案。
Rails.application.routes.draw
do
get
'welcome/index'
# The priority is based upon order of creation:
# first created -> highest priority.
#
# You can have the root of your site routed with "root"
# root 'welcome#index'
#
# ...
|
這個是應用程式的路由檔案,內容採用特殊的 DSL 撰寫,透過這些設定,可以告訴 Rails 要如何將連進來的請求對應到控制器和動作來處理。這個路由檔案包含許多已註解的路由規則範例,其中有一條規則是把連到網站根目錄的請求對應到特定的 controller 和 action 做處理。找到以 root 開頭的規則,去掉註解,看起來會像這樣:
root
'welcome#index'
|
這一行 root 'welcome#index' 是告訴 Rails 把要連應用程式根目錄的請求對應到 welcome controller 的 index action 作處理。而另一行 get 'welcome/index' 則是告訴 Rails 把要連http://localhost:3000/welcome/index 的請求對應到 welcome controller 的 index action 作處理。當你執行過 controller 產生器後 (rails generate controller welcome index) ,這些設定都會被新增到檔案中。
剛剛如果為了要執行產生器而關掉 web 伺服器的話,那就再次啟動 (rails server)。並且用瀏覽器連到 http://localhost:3000。你將會看到那些被你放在 app/views/welcome/index.html.erb 的訊息 "Hello, Rails!" ,這說明了這個新的路由規則 (route) 將這個請求交由 WelcomeController 的 index action 處理,並且將 view 正確的 render (算繪) 出來。
更多關於路由 (routing) 資訊,請參考 Rails Routing from the Outside In。
5 開始實作
現在你已經知道如何建立 controller、action 還有 view ,接下來我們要建立更實質的一些功能。
在這 Blog 應用程式中,你將需要創造新的 resource (資源)。Resource (資源) 是一個類似物件的集合,就像 articles (文章集)、people (人群) 或是 animals (動物群)。對於 resource (資源) 的項目你可以 create (建立)、read (讀取)、update (更新) 以及 destroy (刪除) ,而這些操作我們簡稱為 CRUD 操作。
Rails 提供一個 resources method ,這個 method 可以用來宣告一個標準的 REST resource。以下程式碼將示範如何在 config/routes.rb 宣告一個 article resource。
Rails.application.routes.draw
do
resources
:articles
root
'welcome#index'
end
|
如果你執行 rake routes ,你可以發現它對於標準 RESTful actions 已經定義了許多 routes。至於 prefix 欄 (以及其他欄位) 的意思我們稍候再看,但這裡有一點值得注意, Rails 對於單數型態的 article 有特別的解釋,而且對於複數型態有意義上的區別。
$ bin/rake routes
Prefix Verb URI Pattern Controller#Action
articles GET /articles(.:format) articles#index
POST /articles(.:format) articles#create
new_article GET /articles/new(.:format) articles#new
edit_article GET /articles/:id/edit(.:format) articles#edit
article GET /articles/:id(.:format) articles#show
PATCH /articles/:id(.:format) articles#update
PUT /articles/:id(.:format) articles#update
DELETE /articles/:id(.:format) articles#destroy
root GET / welcome#index
|
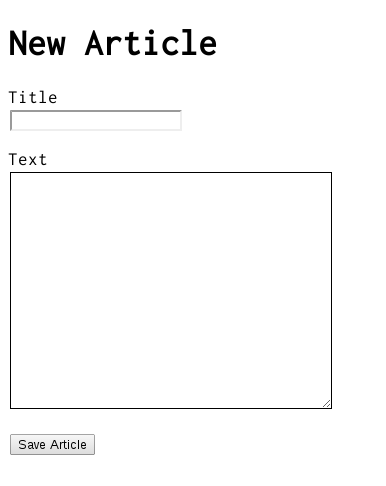
在下一個段落,你將可以在應用程式中新增和閱讀文章。這就是 CRUD 中的 "C" 跟 "R" : creation (建立) 以及 reading (檢視)。而新增文章的表單應該會是如此:
雖然現在看起來有些簡單,但是還可以使用。之後如有需要再來回頭改善樣式設計。

