ELK日志平台搭建
ELK日志分析平台搭建
elasticsearch kibana Logstash
安装elasticsearch
将下载好的elasticsearch放到服务器上。
使用命令将elasticsearch解压到指定目录
![]()
进入elasticsearch所在的目录将elasticsearch启动。
![]()
❹至此elasticsearch已经可以简单的使用了。
在命令行使用 curl http://localhost:9200 检验elasticsearch是否安装成功。
出现以下json数据表示安装成功
这样只能在本服务器通过localhost:9200访问。
修改配置文件使elasticsearch能在ping通此服务器的机器通过IP地址访问
vi config/elasticsearch.yml在配置文件中加上
这样的就可以在别的服务器通过URL 192.168.200.130:9200访问 elasticsearch。
❺安装kibana
通过tar将安装包解压到指定的目录。
vi conf/kibana.yml 在配置文件中加入![]() ,
,
使得kibana可以在其他服务器通过url访问可视化界面
http://192.168.200.130:5601
再在配置文件中加入
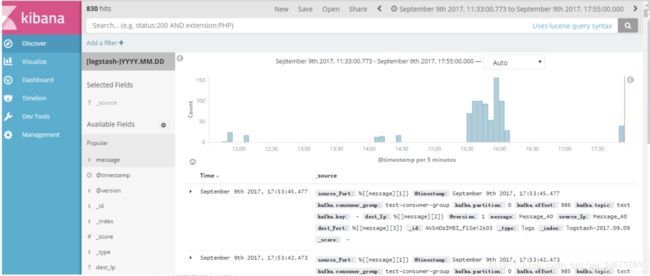
将Elasticsearch和kibana关联起来,这样Elasticsearch收集到的数据将会在页面上显示。
❻安装logstash
通过tar将安装包解压到指定的目录。
Logstash安装很方便,简单的使用不需要任何配置,直接启动就可以。
通过一下命令可以将控制台输入的东西,发送到Elasticsearch,然后就可在kibana可视化界面看到信息
bin/logstash -e 'input { stdin { } } output { elasticsearch { hosts => "192.168.200.130:9200" } }'
Es常见问题
注: 如果启动es事,不报错,但也未启动成功,可在启动时不添加 -f 参数。
elasticsearch5.0启动失败,出现如下提示:
1、Java HotSpot(TM) 64-Bit Server VM warning: INFO: os::commit_memory(0x0000000085330000, 2060255232, 0) failed; error='Cannot allocate memory' (errno=12)
由于elasticsearch5.0默认分配jvm空间大小为2g,修改jvm空间
* vi config/jvm.option
-Xms2g --> -Xms512g
-Xms2g --> -Xms512g
2、max number of threads [1024] for user [elasticsearch] is too low, increase to at least [2048]
修改 /etc/security/limits.d/90-nproc.conf
* soft nproc 1024
* soft nproc 2048
3、max virtual memory areas vm.max_map_count [65530] is too low, increase to at least [262144]
修改/etc/sysctl.conf配置文件,
cat /etc/sysctl.conf | grep vm.max_map_count
vm.max_map_count=262144
如果不存在则添加
echo "vm.max_map_count=262144" >>/etc/sysctl.conf
4、max file descriptors [65535] for elasticsearch process likely too low, increase to at least [65536]
ulimit -n 65536
以下是在5.5.1是踩过的坑
5、启动异常:ERROR: bootstrap checks failed
system call filters failed to install; check the logs and fix your configuration or disable system call filters at your own risk
问题原因:因为Centos6不支持SecComp,而ES默认bootstrap.system_call_filter为true进行检测,所以导致检测失败,失败后直接导致ES不能启动。详见 :https://github.com/elastic/elasticsearch/issues/22899
解决方法:在elasticsearch.yml中配置bootstrap.system_call_filter为false,注意要在Memory下面:bootstrap.memory_lock: false
bootstrap.system_call_filter: false


