flutter插件开发学习之旅(5)-------Flutter集成百度地图实现地图展示
Flutter集成百度地图实现地图展示
- 前言
- 准备工具
- 手动编写实战啦
- 展示效果
前言
经过上个实战,有人跟我说要弄一个集成百度地图的实战。我就放在心上了,花了一天的时候,终于把这个实战弄好了,网上是有一些资源的,但是我感觉还是有点不好,单单看他的文章是做不出来的,今天我就写的详细点。
准备工具
这套课程是采用Android Studio进行开发的。当前在此之前请准备好Flutter开发环境,我这里就不进行讲解了
手动编写实战啦
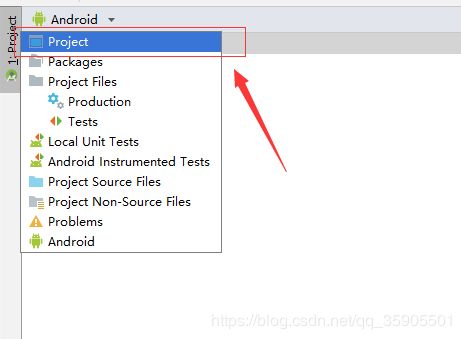
第一步 打开android底层
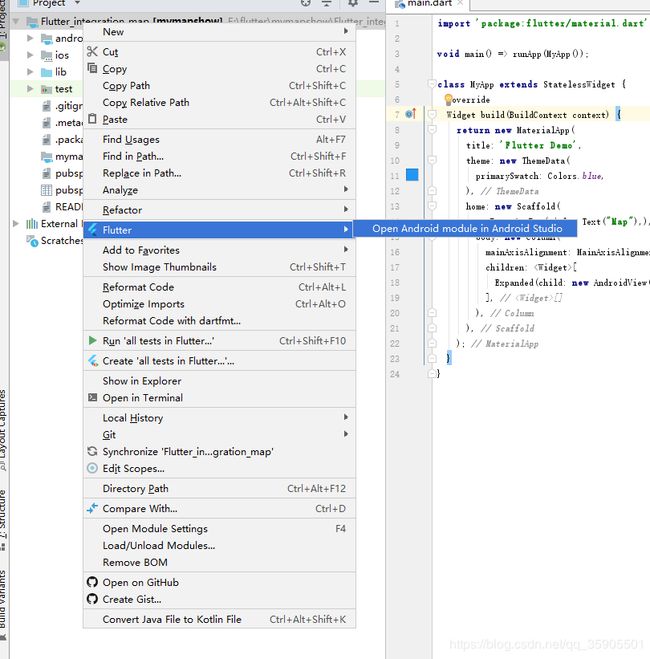
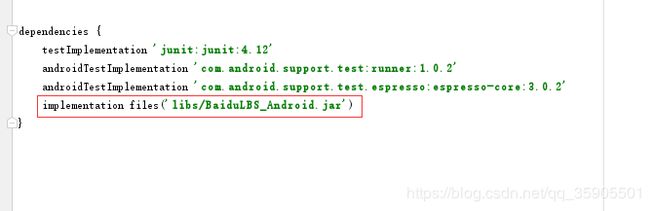
经过上面三步,你就进入Android底层开发了,接下来就是去集成百度地图api
请大家到Android 地图SDK去查阅有关配置,做到下面图片显示的时候,就说明集成成功了
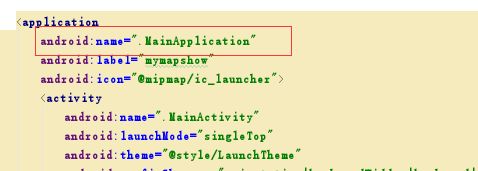
接下来设置权限 到AndroidManifest.xml文件下添加权限、百度key
	<manifest xmlns:android="http://schemas.android.com/apk/res/android"
    xmlns:tools="http://schemas.android.com/tools"
    package="com.example.mymapshow">

 	//添加权限
    <uses-permission android:name="android.permission.ACCESS_NETWORK_STATE"/>
    //获取设备网络状态,禁用后无法获取网络状态
    <uses-permission android:name="android.permission.INTERNET"/>
    //网络权限,当禁用后,无法进行检索等相关业务
    <uses-permission android:name="android.permission.READ_PHONE_STATE" />
    //读取设备硬件信息,统计数据
    <uses-permission android:name="com.android.launcher.permission.READ_SETTINGS" />
    //读取系统信息,包含系统版本等信息,用作统计
    <uses-permission android:name="android.permission.ACCESS_WIFI_STATE" />
    //获取设备的网络状态,鉴权所需网络代理
    <uses-permission android:name="android.permission.WRITE_EXTERNAL_STORAGE"/>
    //允许sd卡写权限,需写入地图数据,禁用后无法显示地图
    <uses-permission android:name="android.permission.WRITE_SETTINGS"
        tools:ignore="ProtectedPermissions" />
    //获取统计数据
    <uses-permission android:name="android.permission.CAMERA" />


    <application
        android:name=".MainApplication"
        android:label="mymapshow"
        android:icon="@mipmap/ic_launcher">
        <activity
            android:name=".MainActivity"
            android:launchMode="singleTop"
            android:theme="@style/LaunchTheme"
            android:configChanges="orientation|keyboardHidden|keyboard|screenSize|locale|layoutDirection|fontScale|screenLayout|density|uiMode"
            android:hardwareAccelerated="true"
            android:windowSoftInputMode="adjustResize">
            <!-- This keeps the window background of the activity showing
                 until Flutter renders its first frame. It can be removed if
                 there is no splash screen (such as the default splash screen
                 defined in @style/LaunchTheme). -->
            <meta-data
                android:name="io.flutter.app.android.SplashScreenUntilFirstFrame"
                android:value="true" />
            <intent-filter>
                <action android:name="android.intent.action.MAIN"/>
                <category android:name="android.intent.category.LAUNCHER"/>
            </intent-filter>
        </activity>

        <!-- 百度地图key -->
        <meta-data
            android:name="com.baidu.lbsapi.API_KEY"
            android:value="vYt9Olso8BcBn1gKoBnQre3vjZQ4vX68" />

    </application>
</manifest>
接下来编写底层代码
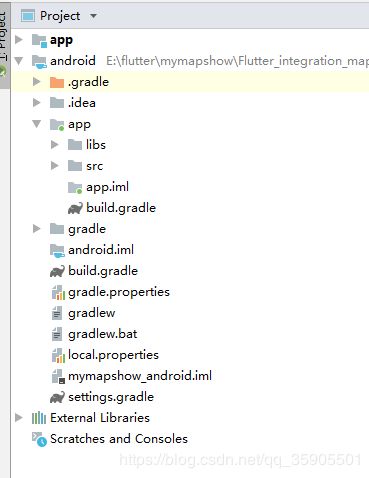
首先展示一个我们主要代码的结构
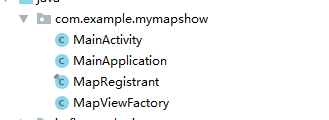
MainApplication 初始化百度地图 SDK
package com.example.mymapshow;

import com.baidu.mapapi.CoordType;
import com.baidu.mapapi.SDKInitializer;

import io.flutter.app.FlutterApplication;

public class MainApplication extends FlutterApplication {
    @Override
    public void onCreate() {
        super.onCreate();
        // 初始化百度地图 SDK
        SDKInitializer.initialize(this);
        SDKInitializer.setCoordType(CoordType.BD09LL);
    }
}
MapViewFactory 集成PlatformViewFactory,创建一个 View 并把它传给 Flutter
package com.example.mymapshow;

import android.content.Context;
import android.view.View;

import com.baidu.mapapi.map.MapView;

import io.flutter.plugin.common.MessageCodec;
import io.flutter.plugin.platform.PlatformView;
import io.flutter.plugin.platform.PlatformViewFactory;

public class MapViewFactory extends PlatformViewFactory {
    private MapView mapView;

    public MapViewFactory(MessageCodec<Object> createArgsCodec, MapView mapView) {
        super(createArgsCodec);
        this.mapView = mapView;
    }

    @Override
    public PlatformView create(final Context context, int i, Object o) {
        return new PlatformView() {
            @Override
            public View getView() {
                return mapView;
            }

            @Override
            public void dispose() {

            }
        };
    }
}
MapRegistrant 注册和实例化百度地图api
package com.example.mymapshow;

import com.baidu.mapapi.map.MapView;

import io.flutter.plugin.common.PluginRegistry;
import io.flutter.plugin.common.StandardMessageCodec;

public final class MapRegistrant {
    public static void registerWith(PluginRegistry registry, MapView mapView) {
        final String key = MapRegistrant.class.getCanonicalName();

        if (registry.hasPlugin(key)) return;

        PluginRegistry.Registrar registrar = registry.registrarFor(key);                //注册
        //返回百度地图api
        registrar.platformViewRegistry().registerViewFactory("MyMap", new MapViewFactory(new StandardMessageCodec(), mapView));
    }
}
在 MainActivity 中实例化地图并且注册以上添加的 ViewRegistrant 类。
package com.example.mymapshow;

import android.os.Bundle;

import com.baidu.mapapi.map.MapView;

import io.flutter.app.FlutterActivity;
import io.flutter.plugins.GeneratedPluginRegistrant;

public class MainActivity extends FlutterActivity {
  @Override
  protected void onCreate(Bundle savedInstanceState) {
    super.onCreate(savedInstanceState);
    // GeneratedPluginRegistrant.registerWith(this);
    MapView mapView = new MapView(this);
    MapRegistrant.registerWith(this, mapView);
  }
}
做到这步还要返回AndroidManifest.xml修改一个地方
接下来就时编写Flutter来调用底层的代码 这里主要是AndroidView
import 'package:flutter/material.dart';

void main() => runApp(MyApp());

class MyApp extends StatelessWidget {
  @override
  Widget build(BuildContext context) {
    return new MaterialApp(
      title: 'Flutter Demo',
      theme: new ThemeData(
        primarySwatch: Colors.blue,
      ),
      home: new Scaffold(
        appBar: AppBar(title: Text("集成百度地图"),),
        body: new Column(
          mainAxisAlignment: MainAxisAlignment.center,
          children: <Widget>[
            Expanded(child: new AndroidView(viewType: 'MyMap'))
          ],
        ),
      ),
    );
  }
}
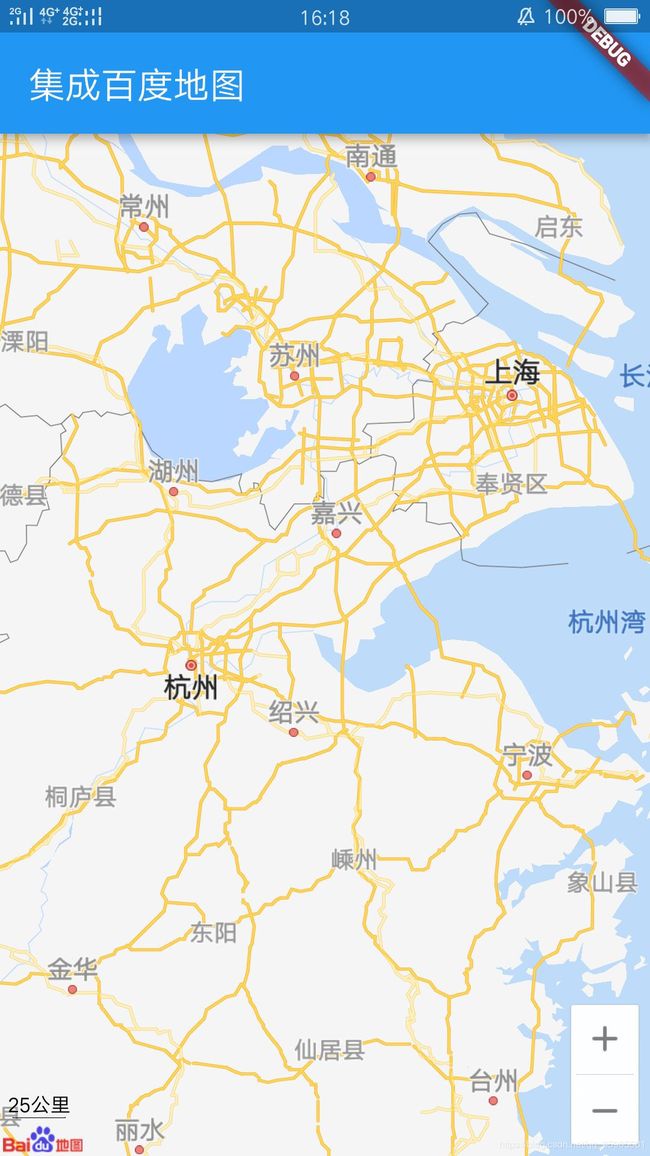
展示效果
完整的代码已经传到我的GitHub 方便大家下载观看我的github地址 编写不易,给小编一个赞和一个star