zabbix4.0详细安装文档,按步骤执行
zabbix4.0详细安装文档,按步骤执行
- 软件环境:
CENTOS 7 + Zabbix 4.0
- 前置组件要求
关闭selinux:vi /etc/selinux/config SELINUX=disabled
关闭firewalld:systemctl disable firewalld
安装Zabbix监控工具前,先安装必要的运行工具包
yum install gcc gcc-c++ make openssl-devel curl wget net-snmp net-snmp-utils net-snmp-libs net-snmp-devel gnutls gnutls-devel libxml2 libxml2-devel
-安装httpd
yum install -y mariadb-server mariadb #安装
systemctl start mariadb #启动MariaDB,即MySQL服务
设置mysql的root属性:
mysql_secure_installation
屏幕内容:
NOTE: RUNNING ALL PARTS OF THIS SCRIPT IS RECOMMENDED FOR ALL MariaDB
SERVERS IN PRODUCTION USE! PLEASE READ EACH STEP CAREFULLY!
In order to log into MariaDB to secure it, we’ll need the current
password for the root user. If you’ve just installed MariaDB, and
you haven’t set the root password yet, the password will be blank,
so you should just press enter here.
Enter current password for root (enter for none): 回车
OK, successfully used password, moving on…
Setting the root password ensures that nobody can log into the MariaDB
root user without the proper authorisation.
Set root password? [Y/n] y ## Enter Y and press Enter 输入Y
New password: ## Enter new password 输入ROOT 密码
Re-enter new password: ## Enter password again输入ROOT 密码
Password updated successfully!
Reloading privilege tables…
… Success!
By default, a MariaDB installation has an anonymous user, allowing anyone
to log into MariaDB without having to have a user account created for
them. This is intended only for testing, and to make the installation
go a bit smoother. You should remove them before moving into a
production environment.
Remove anonymous users? [Y/n] y ## Enter Y and press Enter输入Y
… Success!
Normally, root should only be allowed to connect from ‘localhost’. This
ensures that someone cannot guess at the root password from the network.
Disallow root login remotely? [Y/n] y ## Enter Y and press Enter输入Y
… Success!
By default, MariaDB comes with a database named ‘test’ that anyone can
access. This is also intended only for testing, and should be removed
before moving into a production environment.
Remove test database and access to it? [Y/n] y ## Enter Y and press Enter输入Y
- Dropping test database…
… Success! - Removing privileges on test database…
… Success!
Reloading the privilege tables will ensure that all changes made so far
will take effect immediately.
Reload privilege tables now? [Y/n] y ## Enter Y and press Enter输入Y
… Success!
Cleaning up…
All done! If you’ve completed all of the above steps, your MariaDB
installation should now be secure.
Thanks for using MariaDB!
- 安装PHP
安装PHP命令:
#最简单方法,如果想了解php构建过程,推荐手工打包安装
yum install -y php php-mysql php-gd php-pear
测试是否安装成功:
vi /var/www/html/testphp.php
写入代码:
需要重启服务器;
浏览php测试文件
http://{httpd_ip}/testphp.php
命令行测试:
Curl http://127.0.0.1/testphp.php
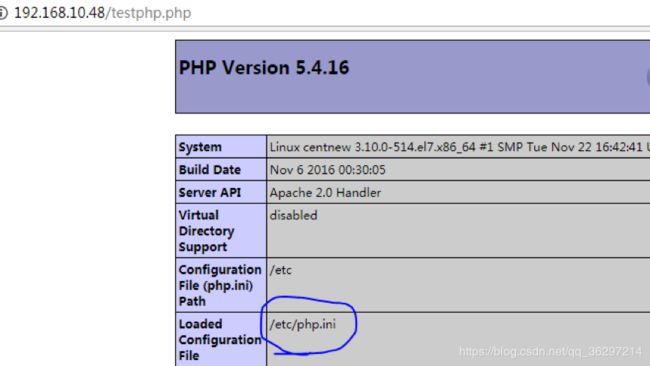
从testphp.php 页面确认php.ini 文件位置,然后设置php配置属性:
比如上图的配置文件,可执行:vi /etc/php.ini
post_max_size = 16M
max_execution_time = 300
max_input_time = 300
date.timezone = Asia/Shanghai
always_populate_raw_post_data = -1
- 安装Zabbix
#配置rpm包
rpm --import http://repo.zabbix.com/RPM-GPG-KEY-ZABBIX
rpm -i https://repo.zabbix.com/zabbix/4.0/rhel/7/x86_64/zabbix-release-4.0-1.el7.noarch.rpm
#安装
yum install mysql-server zabbix-server-mysql zabbix-web-mysql zabbix-agent zabbix-java-gateway
设置zabbix
vi /etc/httpd/conf.d/zabbix.conf
#设置zabbix的时区
php_value date.timezone Asia/Shanghai (这是需要用星号)
systemctl restart httpd #重启httpd
创建MySQL的Zabbix数据已经导入数据库结构与数据
systemctl start mariadb #启动数据库
mysql -u root –p #登陆数据库
MariaDB [(none)]> create database zabbix character set utf8; #创建数据库
Query OK, 1 row affected (0.05 sec)
MariaDB [(none)]> grant all privileges on zabbix.* to ‘root’@‘localhost’ identified by ‘admin’;
Query OK, 0 rows affected (0.21 sec)
MariaDB [(none)]> flush privileges; #刷新数据库配置
Query OK, 0 rows affected (0.00 sec)
MariaDB [(none)]> exit #退出数据库
Bye
导入数据
#导入数据库结构
zcat /usr/share/doc/zabbix-server-mysql*/create.sql.gz | mysql -uroot -p zabbix
启动Zabbix
systemctl restart httpd
systemctl restart mariadb
systemctl start zabbix-server
部署前端页面 (将解压文件复制到/var/www/html/)
#下载zabbix 包
cd /tmp #将安装包下载到tmp目录
wget https://sourceforge.net/projects/zabbix/files/ZABBIX Latest Stable/4.0.0/zabbix-4.0.0.tar.gz
tar xvf zabbix-4.0.0.tar.gz #解压
cd zabbix-4.0.0
cp -rf frontends/php/* /var/www/html/ #拷贝部署前端
systemctl restart httpd #重启httpd
在浏览器上,设置Zabbix。
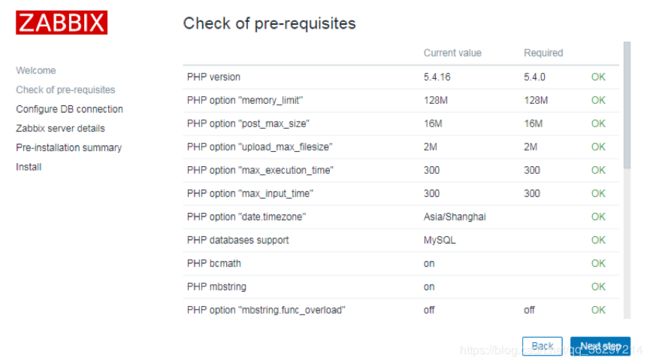 说明: 这里数据库地址修改为IP 地址,不能是127.0.0.1;端口:3306;数据库名:zabbix ;用户:必须用root ;密码:root 密码;如果提示无法连接数据库,可尝试grant all privileges on . to root@’%’ identified by “admin”;
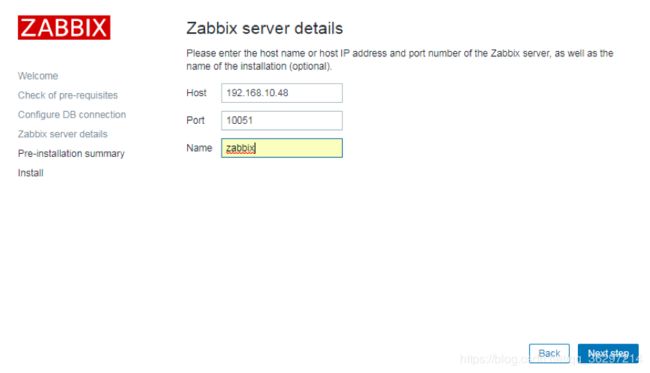
说明:zabbix 服务器设置 主机名可为localhost 或IP 地址, 不能是127.0.0.1;端口:保持默认;
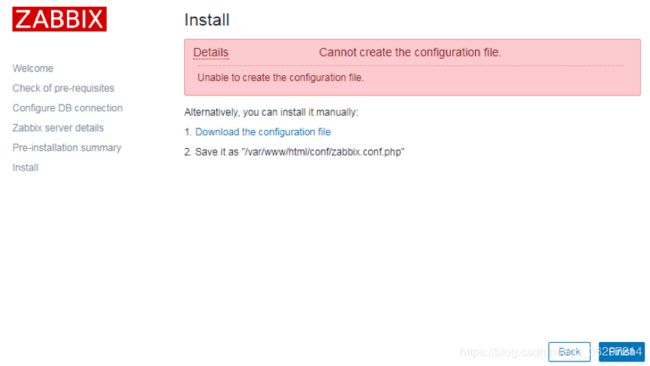
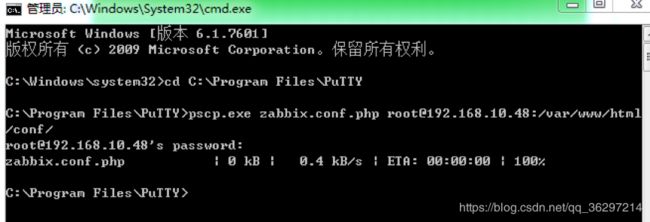
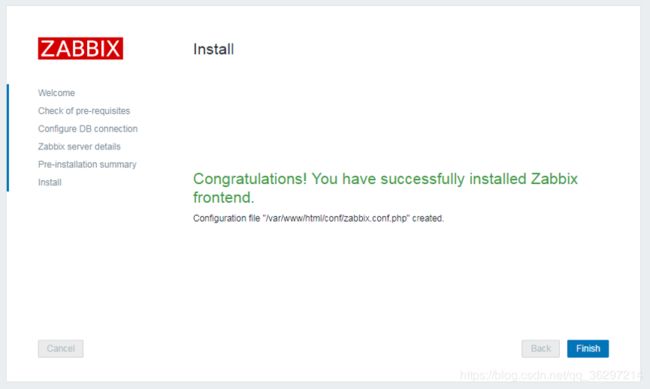
说明:自动创建配置文件会失败; 下载配置文件,然后可以通过PuTTY (64-bit) 工具的pscp.exe 命令将文件传送到服务器的 /var/www/html/conf/ 目录下;然后Finish 即可。
pscp.exe zabbix.conf.php [email protected]:/var/www/html/conf/
编辑zabbix_server.conf 文件
vim /etc/zabbix/zabbix_server.conf
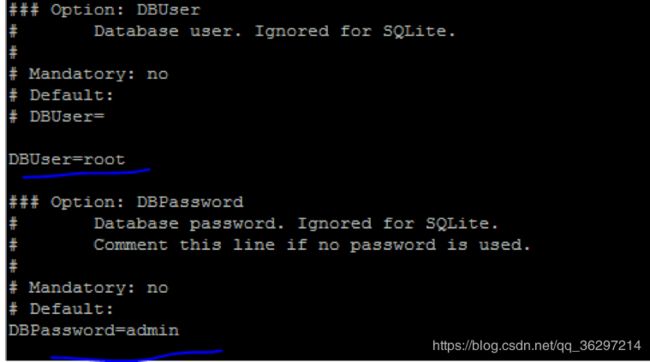
将用户和密码修改为拥有权限的账户,建议采用ROOT.
systemctl restart zabbix-server #重启一次zabbix-server
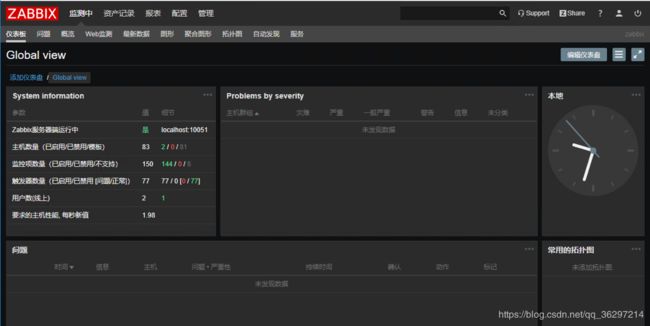
登陆zabbix,地址:http://192.168.x.x 用户名:Admin 注A大写 密码:zabbix
NOTES: 设置系统默认启动:
systemctl enable httpd
systemctl enable mariadb
systemctl enable zabbix-server
-中文乱码解决
Zabbix对中文的支持不是很好,在zabbix监控的web界面,图形图标下面的中文会显示一个个小方块,这样是不正确的,需要下载字体。
首先在Windows 上找到自己喜欢的字体,比如微软雅黑(也可以是其他字体):
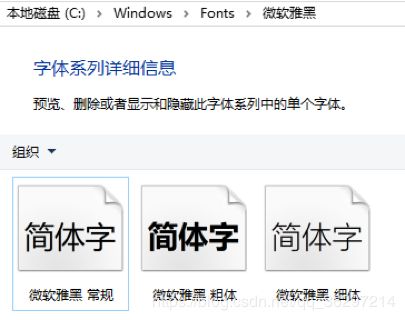
将微软雅黑 常规 复制到其他目录, 会发现文件名是:msyh.ttc;将文件名修改为msyh.ttf ,全部小写;
执行pscp.exe msyh.ttf [email protected]:/var/www/html/fonts 将字体文件上传到ZABBIX SERVER ;
执行vim /var/www/html/include/defines.inc.php修改文件中的两处:
define(‘ZBX_GRAPH_FONT_NAME’, ‘DejaVuSans’);
define(‘ZBX_FONT_NAME’, ‘DejaVuSans’);
改为
define(‘ZBX_GRAPH_FONT_NAME’, ‘msyh’);
define(‘ZBX_FONT_NAME’, ‘msyh’);
最后systemctl restart zabbix-server重启服务器即可。
-代理安装
cd /tmp
wget http://repo.zabbix.com/zabbix/4.0/rhel/7/x86_64/zabbix-agent-4.0.0-2.el7.x86_64.rpm
rpm -ivh --force --nodeps zabbix-agent-4.0.0-2.el7.x86_64.rpm
rpm -qa|grep zabbix-agent #确认安装版本
whereis zabbix
vim /etc/zabbix/zabbix_agentd.conf
编辑配置文件
vim /etc/zabbix/zabbix_agentd.conf
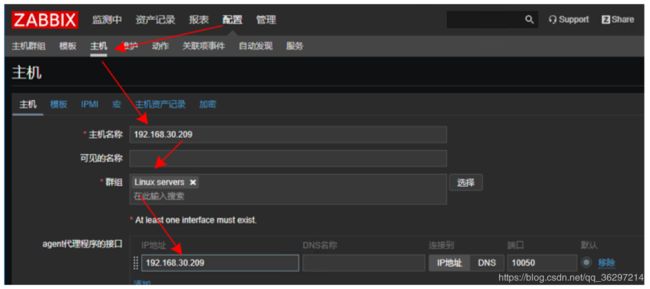
注意:这里的hostname 必须和ZABBIX WEB端hostname 一致:
Server=192.168.10.48
Hostname=192.168.10.47

注意: 这里hostname 必须和 管理端WEB hostname 一致,如下图:

启动并设置开机自启
systemctl restart zabbix-agent
systemctl enable zabbix-agent
查看zabbix-agent 状态
systemctl status zabbix-agent
重装AGENT 后,需要WEB端重新添加主机;
- 添加主机
配置=>主机=>创建主机:
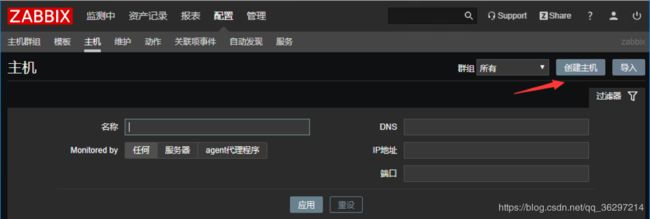
注意: host name 必须和Agent 端的hostname 一致:

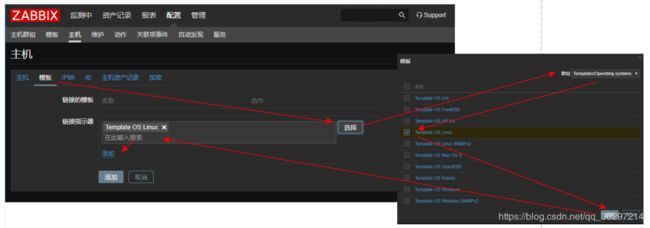
注意,这里有个坑,需要先点击”链接指示器”下方的”添加”,让模板出现在上方的”链接的模板”中,才能点击最下方的”添加”;
添加后的主机列表如下:
