Android热修复(3):Tinker的使用
github官网
Tinker的基本介绍
Tinker是微信官方的Android热补丁解决方案,它支持动态下发代码、So库以及资源,让应用能够在不需要重新安装的情况下实现更新。当然,你也可以使用Tinker来更新你的插件。
它主要包括以下几个部分:
1.gradle编译插件: tinker-patch-gradle-plugin
2.核心sdk库: tinker-android-lib
3.非gradle编译用户的命令行版本: tinker-patch-cli.jar
为什么使用Tinker
当前市面的热补丁方案有很多,其中比较出名的有阿里的AndFix、美团的Robust以及QZone的超级补丁方案。但它们都存在无法解决的问题,这也是正是我们推出Tinker的原因。

总的来说:
1.AndFix作为native解决方案,首先面临的是稳定性与兼容性问题,更重要的是它无法实现类替换,它是需要大量额外的开发成本的;
2.Robust兼容性与成功率较高,但是它与AndFix一样,无法新增变量与类只能用做的bugFix方案;
3.Qzone方案可以做到发布产品功能,但是它主要问题是插桩带来Dalvik的性能问题,以及为了解决Art下内存地址问题而导致补丁包急速增大的。
特别是在Android N之后,由于混合编译的inline策略修改,对于市面上的各种方案都不太容易解决。而Tinker热补丁方案不仅支持类、So以及资源的替换,它还是2.X-8.X(1.9.0以上支持8.X)的全平台支持。利用Tinker我们不仅可以用做bugfix,甚至可以替代功能的发布。Tinker已运行在微信的数亿Android设备上,那么为什么你不使用Tinker呢?
Tinker的已知问题
由于原理与系统限制,Tinker有以下已知问题:
1.Tinker不支持修改AndroidManifest.xml,Tinker不支持新增四大组件(1.9.0支持新增非export的Activity);
2.由于Google Play的开发者条款限制,不建议在GP渠道动态更新代码;
3.在Android N上,补丁对应用启动时间有轻微的影响;
4.不支持部分三星android-21机型,加载补丁时会主动抛出"TinkerRuntimeException:checkDexInstall failed";
5.对于资源替换,不支持修改remoteView。例如transition动画,notification icon以及桌面图标。
尽管Tinker有着这些“小缺点”,但也丝毫不影响Tinker在国内众多热修复方案中的地位,一方面Tinker是开源的(这意味着Tinker本身免费),另一方面则是Tinker已运行在微信的数亿Android设备上(说明该方案相当稳定)。下面开始进行对Tinker的集成与使用。
Tinker 接入指南
Tinker提供了命令行接入和gradle接入2种方式,gradle是推荐的接入方式。
官方文档接入指南
接入方式1:命令行接入
添加gradle依赖:Gradle版本大于2.3
 //tinker的核心库
    implementation('com.tencent.tinker:tinker-android-lib:1.9.1') { changing = true }
    //可选,用于生成application类
    annotationProcessor("com.tencent.tinker:tinker-android-anno:1.9.1") { changing = true }
    compileOnly('com.tencent.tinker:tinker-android-anno:1.9.1') { changing = true }
    //Tinker需要使用到MulitDex
    implementation 'com.android.support:multidex:1.0.1'
对Tinker进行封装
/**
 * Created by xiaoyehai on 2018/11/27 0027.
 * 对Tinker进行封装
 */

public class TinkerManager {

    //是否初始化Tinker
    private static boolean isInstalled = false;

    private static ApplicationLike mApplicationLike;

    /**
     * 初始化Tinker
     *
     * @param applicationLike
     */
    public static void inatallTinker(ApplicationLike applicationLike) {
        mApplicationLike = applicationLike;
        if (isInstalled) {
            return;
        }

        TinkerInstaller.install(mApplicationLike); //Tinker初始化
        isInstalled = true;
    }

    /**
     * 加载补丁文件
     *
     * @param path
     */
    public static void loadPatach(String path) {
        if (Tinker.isTinkerInstalled()) {
            TinkerInstaller.onReceiveUpgradePatch(getApplicationContext(), path);
        }
    }

    /**
     * 通过ApplicationLike获取Context
     *
     * @return
     */
    private static Context getApplicationContext() {
        if (mApplicationLike != null) {
            return mApplicationLike.getApplication().getApplicationContext();
        }
        return null;
    }
}
编写Application的代理类
程序启动时会加载默认的Application类,这导致补丁包无法对它做修改,Application无法动态修复,所以需要改代理类。
Tinker表示,Application无法动态修复,所以有两种选择:
1.使用「继承TinkerApplication + DefaultApplicationLike」。
2.使用「DefaultLifeCycle注解 + DefaultApplicationLike」。
第1种方式感觉比较鸡肋,这里使用第2种(Tinker官方推荐的方式):「DefaultLifeCycle注解 + DefaultApplicationLike」,DefaultLifeCycle注解生成Application,下面就用第2种方式来编写Application的代理类:
/**
 * 使用DefaultLifeCycle注解生成Application(这种方式是Tinker官方推荐的)
 *
 * Application的代理类:Tinker表示,Application无法动态修复,所以需要改代理类。
 *
 * 程序启动时会加载默认的Application类,这导致补丁包无法对它做修改。所以Tinker官方说不建议自己去实现Application,而是由Tinker自动生成。
 * 即需要创建一个TinkerApplicationLike类继承ApplicationLike,然后将我们自己的MyApplication中所有逻辑放在TinkerApplicationLike中的
 * onCreate()中或onBaseContextAttached()方法中。
 * Created by xiaoyehai on 2018/11/27 0027.
 */

@DefaultLifeCycle(application = "com.xiaoyehai.tinker_demo.MyApplication",  // application类名。只能用字符串,这个MyApplication文件是不存在的,但可以在AndroidManifest.xml的application标签上使用(name)
        flags = ShareConstants.TINKER_ENABLE_ALL, // tinkerFlags
        loaderClass = "com.tencent.tinker.loader.TinkerLoader",//loaderClassName, 我们这里使用默认即可!(可不写)
        loadVerifyFlag = false) //tinkerLoadVerifyFlag
public class TinkerApplicationLike extends DefaultApplicationLike {

    public TinkerApplicationLike(Application application, int tinkerFlags,
                                 boolean tinkerLoadVerifyFlag,
                                 long applicationStartElapsedTime,
                                 long applicationStartMillisTime,
                                 Intent tinkerResultIntent) {

        super(application, tinkerFlags, tinkerLoadVerifyFlag, applicationStartElapsedTime, applicationStartMillisTime, tinkerResultIntent);
    }

    @Override
    public void onCreate() {
        super.onCreate();

        //把项目中在自定义Application的操作移到TinkerApplicationLike的onCreate()或onBaseContextAttached()方法中。
    }

    @Override
    public void onBaseContextAttached(Context base) {
        super.onBaseContextAttached(base);

        initTinker(base);

        // 可以将之前自定义的Application中onCreate()方法所执行的操作搬到这里...
    }

    private void initTinker(Context base) {
        //使应用支持分包, tinker需要你开启MultiDex
        MultiDex.install(base);

        //初始化Tinker
        TinkerManager.inatallTinker(this);
    }
}
重新编译后自动生成的MyApplication
package com.xiaoyehai.tinker_demo;

import com.tencent.tinker.loader.app.TinkerApplication;

/**
 * Generated application for tinker life cycle
 */
public class MyApplication extends TinkerApplication {

    public MyApplication() {
        super(7,
                "com.xiaoyehai.tinker_demo.tinker.TinkerApplicationLike",
                "com.tencent.tinker.loader.TinkerLoader", false);
    }

}
然后,把项目中在自定义Application的操作移到TinkerApplicationLike的onCreate()或onBaseContextAttached()方法中。
清单文件中注册:
 <application
        android:name="com.lqr.tinker.MyApplication"
        android:allowBackup="true"
        android:icon="@mipmap/ic_launcher"
        android:label="@string/app_name"
        android:roundIcon="@mipmap/ic_launcher_round"
        android:supportsRtl="true"
        android:theme="@style/AppTheme">
    ...
    </application>
注意:
此时name属性会报红,因为项目源码中根本不存在MyApplication.java文件,但不必担心,因为它是动态生成的,Build一下项目就好了,不管它也无所谓。
在编译时我们需要将TINKER_ID插入到AndroidManifest.xml中。例如
<meta-data android:name="TINKER_ID" android:value="tinker_id_b168b32"/>
上面步骤都准备好了之后,来写案例
1.先准备一个release版本的apk:old.apk
public class MainActivity extends AppCompatActivity {
//补丁文件后缀名
private static final String FILE_END = ".apk";
//apatch文件路径
private String mPatchDir;
@Override
protected void onCreate(Bundle savedInstanceState) {
super.onCreate(savedInstanceState);
setContentView(R.layout.activity_main);
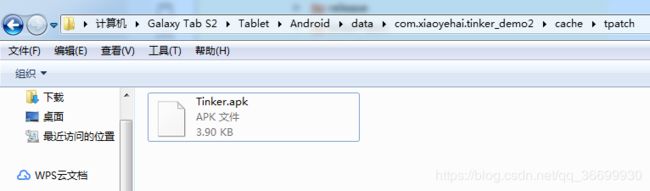
mPatchDir = getExternalCacheDir().getAbsolutePath() + "/tpatch/";
//创建文件夹
File file = new File(mPatchDir);
if (file == null || !file.exists()) {
file.mkdir();
}
}
/**
* 加载补丁文件
*
* @param view
*/
public void addPatach(View view) {
TinkerManager.loadPatach(getPatachPath());
}
private String getPatachPath() {
return mPatchDir.concat("Thinker").concat(FILE_END);
}
}
布局文件:
<?xml version="1.0" encoding="utf-8"?>
<LinearLayout xmlns:android="http://schemas.android.com/apk/res/android"
    xmlns:app="http://schemas.android.com/apk/res-auto"
    xmlns:tools="http://schemas.android.com/tools"
    android:layout_width="match_parent"
    android:layout_height="match_parent"
    android:orientation="vertical"
    tools:context="com.xiaoyehai.tinker_demo.MainActivity">

    <Button
        android:layout_width="match_parent"
        android:layout_height="wrap_content"
        android:onClick="addPatach"
        android:text="加载补丁" />
</LinearLayout>
2.准备一个修改后的apk:new.apk
修改后效果:布局新增一个按钮
<?xml version="1.0" encoding="utf-8"?>
<LinearLayout xmlns:android="http://schemas.android.com/apk/res/android"
    xmlns:app="http://schemas.android.com/apk/res-auto"
    xmlns:tools="http://schemas.android.com/tools"
    android:layout_width="match_parent"
    android:layout_height="match_parent"
    android:orientation="vertical"
    tools:context="com.xiaoyehai.tinker_demo.MainActivity">

    <Button
        android:layout_width="match_parent"
        android:layout_height="wrap_content"
        android:onClick="addPatach"
        android:text="加载补丁" />

    <Button
        android:layout_width="match_parent"
        android:layout_height="wrap_content"
        android:text="加载补丁后显示的按钮" />

</LinearLayout>
3.使用命令行来生成patch文件
命令行工具tinker-patch-cli.jar提供了基准包与新安装包做差异,生成补丁包的功能。
可以在该地址中提取工具tinker-patch-cli:https://github.com/Tencent/tinker/tree/master/tinker-build/tinker-patch-cli
大致的文件结构如下:

tinker_config.xml文件:里面包含tinker的配置,例如签名文件等。
需要修改的地方
1.文件最末尾的sing块,修改为自己的签名证书相关信息.
  <!--sign, if you want to sign the apk, and if you want to use 7zip, you must fill in the following data-->
    <issue id="sign">
        <!--the signature file path, in window use \, in linux use /, and the default path is the running location-->
        <path value="lantu.jks"/>
        <!--storepass-->
        <storepass value="123456"/>
        <!--keypass-->
        <keypass value="123456"/>
        <!--alias-->
        <alias value="lantu"/>
    </issue>
2.修改为自己的application:
<loader value="com.xiaoyehai.tinker_demo.MyApplication"/>
<issue id="dex">
        <!--only can be 'raw' or 'jar'. for raw, we would keep its original format-->
        <!--for jar, we would repack dexes with zip format.-->
        <!--if you want to support below 14, you must use jar-->
        <!--or you want to save rom or check quicker, you can use raw mode also-->
        <dexMode value="jar"/>

        <!--what dexes in apk are expected to deal with tinkerPatch-->
        <!--it support * or ? pattern.-->
        <pattern value="classes*.dex"/>
        <pattern value="assets/secondary-dex-?.jar"/>

        <!--Warning, it is very very important, loader classes can't change with patch.-->
        <!--thus, they will be removed from patch dexes.-->
        <!--you must put the following class into main dex.-->
        <!--Simply, you should add your own application {@code tinker.sample.android.SampleApplication}-->
        <!--own tinkerLoader {@code SampleTinkerLoader}, and the classes you use in them-->
        <loader value="com.tencent.tinker.loader.*"/>
        <loader value="com.xiaoyehai.tinker_demo.MyApplication"/>
    </issue>
生成patach文件命令:
java -jar tinker-patch-cli-1.7.7.jar -old old.apk -new new.apk -config tinker_config.xml -out output
生成的文件目录:

patch_signed.apk就是我们需要的补丁文件,改名后拷贝到我们的内存卡。
点击加载补丁文件,如果成功,应用默认会重启重启即可达到修复效果。
接入方式2:gradle接入
gradle是推荐的接入方式,也是实际开发中真正用到的方式,在gradle插件tinker-patch-gradle-plugin中我们帮你完成proguard、multiDex以及Manifest处理等工作。
在gradle中正确配置Tinker参数,在android studio中直接生成patach文件。
一、配置gradle
1,在项目的gradle.properties文件中添加Tinker的版本号:
TINKER_VERSION=1.9.1
2.在项目的build.gradle中,添加tinker-patch-gradle-plugin的依赖
dependencies {
        classpath 'com.android.tools.build:gradle:3.0.0'

        classpath("com.tencent.tinker:tinker-patch-gradle-plugin:${TINKER_VERSION}")


        // NOTE: Do not place your application dependencies here; they belong
        // in the individual module build.gradle files
    }
3.在app的gradle文件app/build.gradle,我们需要添加tinker的库依赖以及apply tinker的gradle插件.
Gradle版本小于2.3的这么写:
dependencies {
	//可选,用于生成application类
	provided("com.tencent.tinker:tinker-android-anno:${TINKER_VERSION}")
    //tinker的核心库
    compile("com.tencent.tinker:tinker-android-lib:${TINKER_VERSION}")
    //Tinker需要使用到MulitDex
    compile'com.android.support:multidex:1.0.1'
}
Gradle版本大于2.3的这么写:
 //tinker的核心库
    implementation("com.tencent.tinker:tinker-android-lib:${TINKER_VERSION}") { changing = true }
    //可选,用于生成application类
    annotationProcessor("com.tencent.tinker:tinker-android-anno:${TINKER_VERSION}") {
        changing = true
    }
    compileOnly("com.tencent.tinker:tinker-android-anno:${TINKER_VERSION}") { changing = true }
    //使应用支持分包, tinker需要你开启MultiDex
    implementation 'com.android.support:multidex:1.0.1'
应用tinker的gradle插件:
//apply tinker插件
apply plugin: 'com.tencent.tinker.patch'
4.在app的gradle文件app/build.gradle,添加tinker的相关配置
我们将原apk包称为基准apk包,tinkerPatch直接使用基准apk包与新编译出来的apk包做差异,得到最终的补丁包。
gradle配置的参数详细解释:
https://github.com/Tencent/tinker/wiki/Tinker-接入指南
具体的参数设置事例可参考sample中的app/build.gradle:
https://github.com/Tencent/tinker/blob/master/tinker-sample-android/app/build.gradle
在app的gradle文件app/build.gradle,添加tinker的相关配置
apply plugin: 'com.android.application'

android {
    signingConfigs {
        release {
            keyAlias 'lantu'
            keyPassword '123456'
            storeFile file('D:/as3.0workspace/HotRepair/lantu.jks')
            storePassword '123456'
        }
    }
    compileSdkVersion 26
    dexOptions {
        // 支持大工程模式
        jumboMode = true
    }
    defaultConfig {
        applicationId "com.xiaoyehai.tinker_demo2"
        minSdkVersion 15
        targetSdkVersion 26
        versionCode 1
        versionName "1.0"

        testInstrumentationRunner "android.support.test.runner.AndroidJUnitRunner"

        /**
         * you can use multiDex and install it in your ApplicationLifeCycle implement
         */
        multiDexEnabled true
        /**
         * buildConfig can change during patch!
         * we can use the newly value when patch
         */
        buildConfigField "String", "MESSAGE", "\"I am the base apk\""
//        buildConfigField "String", "MESSAGE", "\"I am the patch apk\""
        /**
         * client version would update with patch
         * so we can get the newly git version easily!
         */
        buildConfigField "String", "TINKER_ID", "\"${getTinkerIdValue()}\""
        buildConfigField "String", "PLATFORM", "\"all\""

    }
    buildTypes {
        release {
            minifyEnabled true //打开混淆才会生成mapping文件
            signingConfig signingConfigs.release
            proguardFiles getDefaultProguardFile('proguard-android.txt'), project.file('proguard-rules.pro')
        }
        debug {
            debuggable true
            minifyEnabled false
            signingConfig signingConfigs.debug
        }
    }
}

dependencies {
    implementation fileTree(include: ['*.jar'], dir: 'libs')
    implementation 'com.android.support:appcompat-v7:26.1.0'
    implementation 'com.android.support.constraint:constraint-layout:1.1.3'
    testImplementation 'junit:junit:4.12'
    androidTestImplementation 'com.android.support.test:runner:1.0.2'
    androidTestImplementation 'com.android.support.test.espresso:espresso-core:3.0.2'
    //Gradle版本小于2.3的这么写
    //可选,用于生成application类
    //provided('com.tencent.tinker:tinker-android-anno:1.9.1')
    //tinker的核心库
    //compile('com.tencent.tinker:tinker-android-lib:1.9.1')

    //Gradle版本大于2.3的这么写
    //tinker的核心库
    implementation("com.tencent.tinker:tinker-android-lib:${TINKER_VERSION}") { changing = true }
    //可选,用于生成application类
    annotationProcessor("com.tencent.tinker:tinker-android-anno:${TINKER_VERSION}") {
        changing = true
    }
    compileOnly("com.tencent.tinker:tinker-android-anno:${TINKER_VERSION}") { changing = true }
    //使应用支持分包, tinker需要你开启MultiDex
    implementation 'com.android.support:multidex:1.0.1'
}

def bakPath = file("${buildDir}/bakApk/")

ext {
    // 是否使用Tinker(当你的项目处于开发调试阶段时,可以改为false)
    tinkerEnabled = true
    // 基础包路径
    tinkerOldApkPath = "${bakPath}/tinker_demo2-release-1128-16-24-40.apk"
    // 基础包的mapping.txt文件路径(用于辅助混淆补丁包的生成,一般在生成release版app时会使用到混淆,
    // 所以这个mapping.txt文件一般也是用于release安装包补丁的生成)
    tinkerApplyMappingPath = "${bakPath}/tinker_demo2-release-1128-16-24-40-mapping.txt"
    // 基础包的R.txt文件路径(如果你的安装包中资源文件有改动,则需要使用该R.txt文件来辅助生成补丁包)
    tinkerApplyResourcePath = "${bakPath}/tinker_demo2-release-1128-16-24-40-R.txt"
    //只用于构建所有flavor,如果没有,就忽略这个字段(多渠道打包路径)
    tinkerBuildFlavorDirectory = "${bakPath}/"
}

//是否要使用Tinker
def buildWithTinker() {
    return hasProperty("TINKER_ENABLE") ? TINKER_ENABLE : ext.tinkerEnabled
}

//获取基准apk包的路径
def getOldApkPath() {
    return hasProperty("OLD_APK") ? OLD_APK : ext.tinkerOldApkPath
}

def getApplyMappingPath() {
    return hasProperty("APPLY_MAPPING") ? APPLY_MAPPING : ext.tinkerApplyMappingPath
}

def getApplyResourceMappingPath() {
    return hasProperty("APPLY_RESOURCE") ? APPLY_RESOURCE : ext.tinkerApplyResourcePath
}

def getTinkerIdValue() {
    return hasProperty("TINKER_ID") ? TINKER_ID : android.defaultConfig.versionName
}

//获取多渠道路径
def getTinkerBuildFlavorDirectory() {
    return ext.tinkerBuildFlavorDirectory
}

// 启用Tinker
if (buildWithTinker()) {
    //apply tinker插件
    apply plugin: 'com.tencent.tinker.patch'
    // 所有Tinker相关的参数配置项
    tinkerPatch {
        oldApk = getOldApkPath()        // 基准apk包的路径,必须输入,否则会报错。
        ignoreWarning = false           // 是否忽略有风险的补丁包。这里选择不忽略,当补丁包风险时会中断编译。
        useSign = true                  // 在运行过程中,我们需要验证基准apk包与补丁包的签名是否一致,我们是否需要为你签名。
        tinkerEnable = buildWithTinker()// 是否打开tinker的功能。

        // 编译相关的配置项
        buildConfig {
            // 可选参数;在编译新的apk时候,我们希望通过保持旧apk的proguard混淆方式,从而减少补丁包的大小。
            // 这个只是推荐设置,不设置applyMapping也不会影响任何的assemble编译。
            applyMapping = getApplyMappingPath()

            // 可选参数;在编译新的apk时候,我们希望通过旧apk的R.txt文件保持ResId的分配,这样不仅可以减少补丁包的大小,
            // 同时也避免由于ResId改变导致remote view异常。
            applyResourceMapping = getApplyResourceMappingPath()

            // 在运行过程中,我们需要验证基准apk包的tinkerId是否等于补丁包的tinkerId。这个是决定补丁包能运行在哪些基准包上面,
            // 一般来说我们可以使用git版本号、versionName等等。
            tinkerId = getTinkerIdValue()

            // 如果我们有多个dex,编译补丁时可能会由于类的移动导致变更增多。若打开keepDexApply模式,补丁包将根据基准包的类分布来编译。
            keepDexApply = false

            isProtectedApp = false // 是否使用加固模式,仅仅将变更的类合成补丁。注意,这种模式仅仅可以用于加固应用中。

            supportHotplugComponent = false // 是否支持新增非export的Activity(1.9.0版本开始才有的新功能)
        }

        // dex相关的配置项
        dex {
            // 只能是'raw'或者'jar'。 对于'raw'模式,我们将会保持输入dex的格式。对于'jar'模式,我们将会把输入dex重新压缩封装到jar。
            // 如果你的minSdkVersion小于14,你必须选择‘jar’模式,而且它更省存储空间,但是验证md5时比'raw'模式耗时。默认我们并不会
            // 去校验md5,一般情况下选择jar模式即可。
            dexMode = "jar"

            // 需要处理dex路径,支持*、?通配符,必须使用'/'分割。路径是相对安装包的,例如assets/...
            pattern = ["classes*.dex",
                       "assets/secondary-dex-?.jar"]

            loader = [
                    //加载patch需要用到的类
                    "com.xiaoyehai.tinker_demo2.MyApplication"
                    // 定义哪些类在加载补丁包的时候会用到。这些类是通过Tinker无法修改的类,也是一定要放在main dex的类。
                    // 如果你自定义了TinkerLoader,需要将它以及它引用的所有类也加入loader中;
                    // 其他一些你不希望被更改的类,例如Sample中的BaseBuildInfo类。这里需要注意的是,这些类的直接引用类也需要加入到loader中。
                    // 或者你需要将这个类变成非preverify。
            ]
        }

        //lib相关的配置项:用于.so替换
        lib {
            // 需要处理lib路径,支持*、?通配符,必须使用'/'分割。与dex.pattern一致, 路径是相对安装包的,例如assets/...
            pattern = ["lib/*/*.so", "src/main/jniLibs/*/*.so"]
        }

        // res相关的配置项:用于资源替换
        res {
            // 需要处理res路径,支持*、?通配符,必须使用'/'分割。与dex.pattern一致, 路径是相对安装包的,例如assets/...,务必注意的是,
            // 只有满足pattern的资源才会放到合成后的资源包。
            pattern = ["res/*", "assets/*", "resources.arsc", "AndroidManifest.xml"]

            //不替换的文件
            ignoreChange = [
                    // 支持*、?通配符,必须使用'/'分割。若满足ignoreChange的pattern,在编译时会忽略该文件的新增、删除与修改。
                    // 最极端的情况,ignoreChange与上面的pattern一致,即会完全忽略所有资源的修改。
                    "assets/sample_meta.txt"
            ]

            // 对于修改的资源,如果大于largeModSize,我们将使用bsdiff算法。这可以降低补丁包的大小,但是会增加合成时的复杂度。默认大小为100kb
            largeModSize = 100
        }

        // 用于生成补丁包中的'package_meta.txt'文件,表明patach文件的一些信息,不是必须,但实际开发中通常会用到
        packageConfig {
            // configField("key", "value"), 默认我们自动从基准安装包与新安装包的Manifest中读取tinkerId,并自动写入configField。
            // 在这里,你可以定义其他的信息,在运行时可以通过TinkerLoadResult.getPackageConfigByName得到相应的数值。
            // 但是建议直接通过修改代码来实现,例如BuildConfig。
            configField("platform", "all")
            configField("patchVersion", "1.0") //patach文件的版本号
            configField("patchMessage", "tinker is sample to use")
        }

        // 7zip路径配置项,执行前提是useSign为true,实际开发中通常不配置
        sevenZip {
            zipArtifact = "com.tencent.mm:SevenZip:1.1.10"
        }
    }

    List<String> flavors = new ArrayList<>();
    project.android.productFlavors.each { flavor ->
        flavors.add(flavor.name)
    }
    boolean hasFlavors = flavors.size() > 0
    def date = new Date().format("MMdd-HH-mm-ss")

    /**
     * bak apk and mapping
     */
    android.applicationVariants.all { variant ->
        /**
         * task type, you want to bak
         */
        def taskName = variant.name

        tasks.all {
            if ("assemble${taskName.capitalize()}".equalsIgnoreCase(it.name)) {

                it.doLast {
                    copy {
                        def fileNamePrefix = "${project.name}-${variant.baseName}"
                        def newFileNamePrefix = hasFlavors ? "${fileNamePrefix}" : "${fileNamePrefix}-${date}"

                        def destPath = hasFlavors ? file("${bakPath}/${project.name}-${date}/${variant.flavorName}") : bakPath
                        from variant.outputs.first().outputFile
                        into destPath
                        rename { String fileName ->
                            fileName.replace("${fileNamePrefix}.apk", "${newFileNamePrefix}.apk")
                        }

                        from "${buildDir}/outputs/mapping/${variant.dirName}/mapping.txt"
                        into destPath
                        rename { String fileName ->
                            fileName.replace("mapping.txt", "${newFileNamePrefix}-mapping.txt")
                        }

                        from "${buildDir}/intermediates/symbols/${variant.dirName}/R.txt"
                        into destPath
                        rename { String fileName ->
                            fileName.replace("R.txt", "${newFileNamePrefix}-R.txt")
                        }
                    }
                }
            }
        }
    }
    //多渠道包脚本
    project.afterEvaluate {
        //sample use for build all flavor for one time
        if (hasFlavors) {
            task(tinkerPatchAllFlavorRelease) {
                group = 'tinker'
                def originOldPath = getTinkerBuildFlavorDirectory()
                for (String flavor : flavors) {
                    def tinkerTask = tasks.getByName("tinkerPatch${flavor.capitalize()}Release")
                    dependsOn tinkerTask
                    def preAssembleTask = tasks.getByName("process${flavor.capitalize()}ReleaseManifest")
                    preAssembleTask.doFirst {
                        String flavorName = preAssembleTask.name.substring(7, 8).toLowerCase() + preAssembleTask.name.substring(8, preAssembleTask.name.length() - 15)
                        project.tinkerPatch.oldApk = "${originOldPath}/${flavorName}/${project.name}-${flavorName}-release.apk"
                        project.tinkerPatch.buildConfig.applyMapping = "${originOldPath}/${flavorName}/${project.name}-${flavorName}-release-mapping.txt"
                        project.tinkerPatch.buildConfig.applyResourceMapping = "${originOldPath}/${flavorName}/${project.name}-${flavorName}-release-R.txt"
                    }
                }
            }

            task(tinkerPatchAllFlavorDebug) {
                group = 'tinker'
                def originOldPath = getTinkerBuildFlavorDirectory()
                for (String flavor : flavors) {
                    def tinkerTask = tasks.getByName("tinkerPatch${flavor.capitalize()}Debug")
                    dependsOn tinkerTask
                    def preAssembleTask = tasks.getByName("process${flavor.capitalize()}DebugManifest")
                    preAssembleTask.doFirst {
                        String flavorName = preAssembleTask.name.substring(7, 8).toLowerCase() + preAssembleTask.name.substring(8, preAssembleTask.name.length() - 13)
                        project.tinkerPatch.oldApk = "${originOldPath}/${flavorName}/${project.name}-${flavorName}-debug.apk"
                        project.tinkerPatch.buildConfig.applyMapping = "${originOldPath}/${flavorName}/${project.name}-${flavorName}-debug-mapping.txt"
                        project.tinkerPatch.buildConfig.applyResourceMapping = "${originOldPath}/${flavorName}/${project.name}-${flavorName}-debug-R.txt"
                    }

                }
            }
        }
    }
}

task sortPublicTxt() {
    doLast {
        File originalFile = project.file("public.txt")
        File sortedFile = project.file("public_sort.txt")
        List<String> sortedLines = new ArrayList<>()
        originalFile.eachLine {
            sortedLines.add(it)
        }
        Collections.sort(sortedLines)
        sortedFile.delete()
        sortedLines.each {
            sortedFile.append("${it}\n")
        }
    }
}
二、自定义Application类
程序启动时会加载默认的Application类,这导致补丁包无法对它做修改。所以Tinker官方说不建议自己去实现Application,而是由Tinker自动生成。即需要创建一个SampleApplication类,继承DefaultApplicationLike,然后将我们自己的MyApplication中所有逻辑放在SampleApplication中的onCreate中。最后需要将我们项目中之前的MyApplication类删除。
这与上面第一种方式命令行接入方式完全一样,不再啰嗦。
测试Tinker热修复
这里只讲release版本。
一、按正常流程打包出带签名的APK,并装到手机上

二、将上面的三个文件路径复制到app.build中对应的位置,如图
ext {
    // 是否使用Tinker(当你的项目处于开发调试阶段时,可以改为false)
    tinkerEnabled = true
    // 基础包路径
    tinkerOldApkPath = "${bakPath}/tinker_demo2-release-1128-15-53-40.apk"
    // 基础包的mapping.txt文件路径(用于辅助混淆补丁包的生成,一般在生成release版app时会使用到混淆,
    // 所以这个mapping.txt文件一般也是用于release安装包补丁的生成)
    tinkerApplyMappingPath = "${bakPath}/tinker_demo2-release-1128-15-53-40-mapping.txt"
    // 基础包的R.txt文件路径(如果你的安装包中资源文件有改动,则需要使用该R.txt文件来辅助生成补丁包)
    tinkerApplyResourcePath = "${bakPath}/tinker_demo2-release-1128-15-53-40-R.txt"
    //只用于构建所有flavor,如果没有,就忽略这个字段(多渠道打包路径)
    tinkerBuildFlavorDirectory = "${bakPath}/"
}
三、修复bug(测试的时候随便改动一点代码)
四、运行补丁命令获取补丁包
运行补丁命令,单击AS右侧顶部gradle–>双击tinkerPatchRelease,如图:

运行完成会在build->outputs->apk->tinkerPatch->release文件夹中生成一个名为patch_signed_7zip.apk的补丁包,如图:

五、将该补丁包重命名后(patch_signed_7zip.apk)复制到之前加载补丁包中对应的SD卡路径。
六、运行项目发现bug并没有修复,因为tinker是不支持即时修复的,关掉APP重启。恭喜你!bug已修复!
把Tinker封装到服务中来实现
/**
 * 1.检查服务端是否有新的patch文件
 * 2.有:下载patch文件
 * 3.加载下载好的patch文件,修复bug或更新功能
 * 4.patach文件会在应用重启时生效
 * Created by xiaoyehai on 2018/11/27 0027.
 */

public class TinkerService extends Service {

    public static final String TAG = TinkerService.class.getSimpleName();

    private static final int DOWNLOAD_APATCH = 0x01;

    private static final int UPDATE_APATCH = 0x02;

    public static final String UPDATE_PATCH_URL = "";

    public static final String DOWNLOAD_PATCH_URL = "";

    //存放apatch文件的目录
    private String mPatchFileDir;

    private Handler mHandler = new Handler() {
        @Override
        public void handleMessage(Message msg) {
            super.handleMessage(msg);

            switch (msg.what) {
                case DOWNLOAD_APATCH: //下载patch文件
                    downloadPatch();
                    break;
                case UPDATE_APATCH: //检查服务端是否有新的patch文件
                    checkApatchUpdate();
                    break;
            }
        }
    };

    @Nullable
    @Override

    public IBinder onBind(Intent intent) {
        return null;
    }

    @Override
    public void onCreate() {
        super.onCreate();
        init();
    }

    @Override
    public int onStartCommand(Intent intent, int flags, int startId) {
        mHandler.sendEmptyMessage(UPDATE_APATCH);
        return START_NOT_STICKY; //服务被系统回收之后不会自动重启
    }

    private void init() {
        mPatchFileDir = getExternalCacheDir().getAbsolutePath() + "/apatch/";
        File patchDir = new File(mPatchFileDir);
        try {
            if (patchDir == null || !patchDir.exists()) {
                patchDir.mkdirs();
            }
        } catch (Exception e) {
            e.printStackTrace();
            stopSelf(); //停止服务
        }

    }

    /**
     * 检查服务端是否有新的apatch文件
     */
    private void checkApatchUpdate() {
        //获取服务器信息,判断是否有新的apatch文件
        OkHttpManager.getInstance().asyncJsonStringByURL(UPDATE_PATCH_URL, new OkHttpManager.StringCallback() {
            @Override
            public void onResponse(String result) {
                //有新的apatch文件,下载文件
                mHandler.sendEmptyMessage(DOWNLOAD_APATCH);

                //如果没有新文件
                //stopSelf();
            }

            @Override
            public void onFailure(IOException e) {
                stopSelf();
            }
        });
    }

    /**
     * 下载apatch文件
     */
    private void downloadPatch() {
        DownloadManager.getInstance().downloadFile(DOWNLOAD_PATCH_URL, mPatchFileDir, new DownloadManager.FileCallback() {
            @Override
            public void onSuccess(File file) {
                //文件下载成功,加载apatc文件,修复bug
                TinkerManager.loadPatach(file.getAbsolutePath());
            }

            @Override
            public void onProgress(int progress, long total) {
                Log.e(TAG, "onProgress: " + progress);
            }

            @Override
            public void onError(Call call, Exception e) {
                stopSelf();
            }
        });
    }
}
Tinker常用的一些高级功能
一. Tinker如何支持多渠道打包
命令行接入方式只能一个渠道一个渠道的打patch文件,所以强烈不建议使用这种方式。
gradle接入方式只需要简单的修改一下gradle脚本即可。
我们知道多渠道打包是采用productFlavors实现的。但是这种多渠道打包会造成20个渠道包的热更新就需要20个补丁,这样肯定是不合理的。那怎样才能实现20个渠道包只需要一个补丁包呢?Tinker官方也说了,推荐我们多渠道打包使用Walle,这样就能实现多个渠道包只使用一个补丁包了!
Walle的github地址
按照Walle的文档去集成,既可以实现多渠道打包。修改bug后和上面打patach文件的步骤一样,但只会生成一个补丁文件,这里的一个补丁包就适用于各个渠道包。
因我本人对Walle不熟悉,所以我就使用友盟的多渠道打包来讲解,但是友盟多渠道打包每个渠道包都会有一个补丁文件,熟悉Walle的最好使用Walle。
1.按照umeng的要求,manifest文件中需要有:
 <!--友盟统计相关meta-data-->
        <meta-data
            android:name="UMENG_APPKEY"
            android:value="你的appkey" />

        <meta-data
            android:name="UMENG_CHANNEL"
            android:value="${UMENG_CHANNEL_VALUE}" />
2,在module(一般也就是app)的build.gradle的android{}中添加如下内容:
 //多渠道脚本支持
    productFlavors {
        googleplayer {
            manifestPlaceholders = [UMENG_CHANNEL_VALUE: "googleplayer"]
        }

        xiaomi {
            manifestPlaceholders = [UMENG_CHANNEL_VALUE: "xiaomi"]
        }

        baidu {
            manifestPlaceholders = [UMENG_CHANNEL_VALUE: "baidu"]
        }

        productFlavors.all { flavor ->
            flavor.manifestPlaceholders = [UMENG_CHANNEL_VALUE: name]
        }
    }
3.AS3.0要加上defaultConfig:
 defaultConfig {
        applicationId "com.xiaoyehai.tinker_demo2"
        minSdkVersion 15
        targetSdkVersion 26
        versionCode 1
        versionName "1.0"


        // AS3.0之后:原因就是使用了productFlavors分包,解决方法就是在build.gradle中的defaultConfig中
        // 添加一个flavorDimensions "1"就可以了,后面的1一般是跟你的versionCode相同
        flavorDimensions "1"

        testInstrumentationRunner "android.support.test.runner.AndroidJUnitRunner"
        }
配置完毕,开始打包。
4.按正常流程打包出带签名的APK,并装到手机上:

5.将上面的文件夹路径复制到app.build中对应的位置:
ext {
    // 是否使用Tinker(当你的项目处于开发调试阶段时,可以改为false)
    tinkerEnabled = true
    // 基础包路径
    tinkerOldApkPath = "${bakPath}/tinker_demo2-1129-11-53-12"
    // 基础包的mapping.txt文件路径(用于辅助混淆补丁包的生成,一般在生成release版app时会使用到混淆,
    // 所以这个mapping.txt文件一般也是用于release安装包补丁的生成)
    tinkerApplyMappingPath = "${bakPath}/tinker_demo2-1129-11-53-12"
    // 基础包的R.txt文件路径(如果你的安装包中资源文件有改动,则需要使用该R.txt文件来辅助生成补丁包)
    tinkerApplyResourcePath = "${bakPath}/tinker_demo2-1129-11-53-12"
    //只用于构建所有flavor,如果没有,就忽略这个字段(多渠道打包路径)
    tinkerBuildFlavorDirectory = "${bakPath}/tinker_demo2-1129-11-53-12"
}
6.修复bug(测试的时候随便改动一点代码)
7.运行补丁命令获取补丁包
运行补丁命令,单击AS右侧顶部gradle–>双击tinkerPatchAllFlavorRelease,如图:

运行完成会在会为每个渠道生成一个补丁文件:

8.将该补丁包重修修改名字后发给后台。
二. 如何自定义Tinker行为
1.自定义PatachListener监听patach receive事件
/**
 * 自定义行为:自定义PatachListener箭头patach receive事件
 * Created by xiaoyehai on 2018/11/29 0029.
 */

public class CustomPatachListener extends DefaultPatchListener {

    public CustomPatachListener(Context context) {
        super(context);
    }


    @Override
    protected int patchCheck(String path, String patchMd5) {
        //可以在这个方法中做一些自定义行为,比如文件的合法性等
        //然后再加载patch文件的时候调用该方法
        return super.patchCheck(path, patchMd5);
    }
}
看看DefaultPatchListener中已经定义了很多行为,我们可以重写patchCheck()方法自定义一些行为:
  protected int patchCheck(String path, String patchMd5) {
        Tinker manager = Tinker.with(context);
        //check SharePreferences also
        if (!manager.isTinkerEnabled() || !ShareTinkerInternals.isTinkerEnableWithSharedPreferences(context)) {
            return ShareConstants.ERROR_PATCH_DISABLE;
        }
        File file = new File(path);

        if (!SharePatchFileUtil.isLegalFile(file)) {
            return ShareConstants.ERROR_PATCH_NOTEXIST;
        }

        //patch service can not send request
        if (manager.isPatchProcess()) {
            return ShareConstants.ERROR_PATCH_INSERVICE;
        }

        //if the patch service is running, pending
        if (TinkerServiceInternals.isTinkerPatchServiceRunning(context)) {
            return ShareConstants.ERROR_PATCH_RUNNING;
        }
        if (ShareTinkerInternals.isVmJit()) {
            return ShareConstants.ERROR_PATCH_JIT;
        }

        Tinker tinker = Tinker.with(context);

        if (tinker.isTinkerLoaded()) {
            TinkerLoadResult tinkerLoadResult = tinker.getTinkerLoadResultIfPresent();
            if (tinkerLoadResult != null && !tinkerLoadResult.useInterpretMode) {
                String currentVersion = tinkerLoadResult.currentVersion;
                if (patchMd5.equals(currentVersion)) {
                    return ShareConstants.ERROR_PATCH_ALREADY_APPLY;
                }
            }
        }

        if (!UpgradePatchRetry.getInstance(context).onPatchListenerCheck(patchMd5)) {
            return ShareConstants.ERROR_PATCH_RETRY_COUNT_LIMIT;
        }

        return ShareConstants.ERROR_PATCH_OK;
    }
2.自定义TinkeReceiveService改变patcah安装成功后行为
比如:实现成功加载patach文件后不让进程自动被杀死。
/**
 * 自定义行为:自定义TinkeReceiveService改变patcah安装成功后行为
 * 就是决定patach安装成功以后的后续操作,默认实现杀死进程
 * Created by xiaoyehai on 2018/11/29 0029.
 */

public class CustomReceiveService extends DefaultTinkerResultService {

    public static final String TAG = "CustomReceiveService";

    /**
     * 重写该方法,实现成功加载patach文件后不让进程自动被杀死
     *
     * @param result
     */
    @Override
    public void onPatchResult(PatchResult result) {
        if (result == null) {
            TinkerLog.e(TAG, "DefaultTinkerResultService received null result!!!!");
            return;
        }
        TinkerLog.i(TAG, "DefaultTinkerResultService received a result:%s ", result.toString());

        //first, we want to kill the recover process
        TinkerServiceInternals.killTinkerPatchServiceProcess(getApplicationContext());

        // if success and newPatch, it is nice to delete the raw file, and restart at once
        // only main process can load an upgrade patch!
        if (result.isSuccess) {
            deleteRawPatchFile(new File(result.rawPatchFilePath));

            //把杀死进程的代码删掉,就不会杀死进程
            /*if (checkIfNeedKill(result)) {
                android.os.Process.killProcess(android.os.Process.myPid());
            } else {
                TinkerLog.i(TAG, "I have already install the newly patch version!");
            }*/
        }
    }
}
CustomReceiveService是个服务,需要注册:
<service android:name=".tinker.CustomReceiveService" />
在TinkerManager中加入2个自定义行为:
/**
 * Created by xiaoyehai on 2018/11/27 0027.
 * 对Tinker进行封装
 */

public class TinkerManager {

    //是否初始化Tinker
    private static boolean isInstalled = false;

    private static ApplicationLike mApplicationLike;

    private static CustomPatachListener customPatachListener;

    /**
     * 初始化Tinker
     *
     * @param applicationLike
     */
    public static void installTinker(ApplicationLike applicationLike) {
        mApplicationLike = applicationLike;
        if (isInstalled) {
            return;
        }

        customPatachListener = new CustomPatachListener(getApplicationContext());
        //TinkerInstaller.install(mApplicationLike); //Tinker初始化

        DefaultLoadReporter loadReporter = new DefaultLoadReporter(getApplicationContext());
        DefaultPatchReporter patchReporter = new DefaultPatchReporter(getApplicationContext());

        AbstractPatch abstractPatch = new UpgradePatch();

        TinkerInstaller.install(
                mApplicationLike,
                loadReporter,
                patchReporter,
                customPatachListener,
                CustomReceiveService.class,
                abstractPatch);
        isInstalled = true;
    }

    /**
     * 加载补丁文件
     *
     * @param path
     */
    public static void loadPatach(String path, String patchMd5) {
        customPatachListener.patchCheck(path, patchMd5);
        if (Tinker.isTinkerInstalled()) {
            TinkerInstaller.onReceiveUpgradePatch(getApplicationContext(), path);
        }
    }

    /**
     * 通过ApplicationLike获取Context
     *
     * @return
     */
    private static Context getApplicationContext() {
        if (mApplicationLike != null) {
            return mApplicationLike.getApplication().getApplicationContext();
        }
        return null;
    }
}
使用过程中遇到的问题
1.tinker和android studio的Instant Run 不兼容。 所以啦!当你项目接入tinker热修复时,一定要把要把 instant run 给关掉。
否则就会报这个错误
Tinker does not support instant run mode, please trigger build by assembleDebug or disable instant run in ‘File->Settings…’.
在 设置里面找到Instant Run 取消箭头所指向的选中项。点击apply 就行了。

2.项目打包后有bak目录下有生成apk和R.txt文件,就是没有mapping文件,官网说打开混淆才会生成:
 release {
            minifyEnabled true
            signingConfig signingConfigs.release
            proguardFiles getDefaultProguardFile('proguard-android.txt'), project.file('proguard-rules.pro')
        }
Android热修复(1):热修复的介绍和原理解析
Android热修复(2):AndFix热修复框架的使用