idea+Springboot+SpringCloud- -Eureka服务的注册与发现
源码: https://github.com/15200001554/springboot-eureka-demo
微服务是什么
微服务是一种架构风格,是一种将单体应用开发为一组小型服务的方法,每个服务运行在自己的进程中,服务间通信采用轻量级通信机制(通常用HTTP资源API)。这些服务围绕业务能力构建并且可通过全自动部署机制独立部署。这些服务共用一个最小型的集中式的管理,服务可用不同的语言开发,使用不同的数据存储技术。
Spring Cloud是什么
Spring Cloud并不是一个具体的框架,可以理解为一个工具箱,它提供了各类工具,可以快速构建分布式系统。
Spring Cloud的各个项目基于Spring Boot,将Netflix的多个框架进行封装,并且通过自动配置的方式将这些框架绑定到Spring的环境中。
有了服务中心调用关系会有什么变化,画几个简图来帮忙理解


假设没有Eureka.当微服务模块比较多的时候.就会出现 改动一个项目,会牵连好几个项目跟着重启.比较麻烦而且容易出现问题,.那么,就出现了Eureka通过Eureka服务中心来获取服务你不需要关注你调用的项目IP地址,由几台服务器组成,每次直接去服务中心获取可以使用的服务去调用既可。
由于各种服务都注册到了服务中心,就有了去做很多高级功能条件。比如几台服务提供相同服务来做均衡负载;监控服务器调用成功率来做熔断,移除服务列表中的故障点;监控服务调用时间来对不同的服务器设置不同的权重等等。
Eureka的概念
Eureka 是 Netflix 开发的,一个基于 REST 服务的服务中心又称注册中心,管理各种服务功能包括服务的注册、发现、熔断、负载、降级等,比如dubbo admin后台的各种功能
它主要包括两个组件:Eureka Server 和 Eureka Client
- Eureka Client:一个Java客户端,用于简化与 Eureka Server 的交互(通常就是微服务中的客户端和服务端)
- Eureka Server:提供服务注册和发现的能力(通常就是微服务中的注册中心)
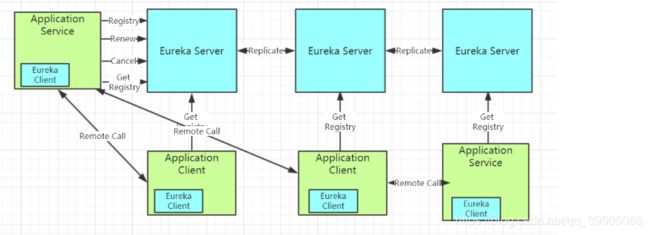
用一张图来认识以下:

各个微服务启动时,会通过 Eureka Client 向 Eureka Server 注册自己,Eureka Server 会存储该服务的信息
也就是说,每个微服务的客户端和服务端,都会注册到 Eureka Server,这就衍生出了微服务相互识别的话题
- 同步:每个 Eureka Server 同时也是 Eureka Client(逻辑上的) 多个 Eureka Server
之间通过复制的方式完成服务注册表的同步,形成 Eureka 的高可用 - 识别:Eureka Client 会缓存 Eureka Server 中的信息 即使所有 Eureka Server
节点都宕掉,服务消费者仍可使用缓存中的信息找到服务提供者(笔者已亲测) - 续约:微服务会周期性(默认30s)地向 Eureka Server 发送心跳以Renew(续约)信息(类似于heartbeat)
- 续期:Eureka Server 会定期(默认60s)执行一次失效服务检测功能
它会检查超过一定时间(默认90s)没有Renew的微服务,发现则会注销该微服务节点
Spring Cloud 已经把 Eureka 集成在其子项目 Spring Cloud Netflix 里面

上图简要描述了Eureka的基本架构,由3个角色组成:
(注意:Eureka是不會主动发起的)
- Eureka Server
提供服务注册和发现 - Service Provider
服务提供方
将自身服务注册到Eureka,从而使服务消费方能够找到 - Service Consumer
服务消费方
从Eureka获取注册服务列表,从而能够消费服务
下面我们就开始搭建项目:
便于方便,我们会创建一个聚合工程.
创建一个父项目,其他子项目(生产者、消费者、注册中心)均以module的形式在展示在项目目录中
- 开发工具: idea
- Springboot版本: 2.2.1.RELEASE
- Springcloud版本: Hoxton.RC2(版本号跟原来不同,以“英文单词SRX(X为数字)”的形式命名版本号。由伦敦地铁站的名字命名-详细信息自己查阅)
- 中间件: Eureka
版本对应:Spring Cloud版本与与子项目版本关系可查看
SpringCloud和SpringBoot的版本对应关系
(Greenwich builds and works with Spring Boot 2.1.x, and is not expected to work with Spring Boot 1.5.x.
例如,Greenwich 版本基本Spring Boot 2.1.x构建,不兼容之前版本,如Spring Boot 1.5.x。)

步骤:
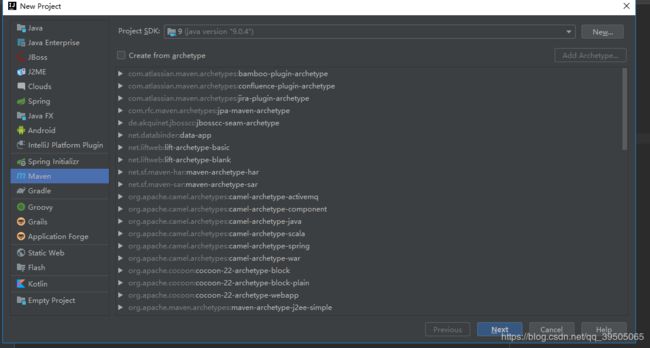
- 创建springboot-eureka-demo父工程
 <!--添加父工程打包方式 pom -->
    <packaging>pom</packaging>
- 配置maven
配置maven参考
在主类添加
/**
 * @author
 * 启动一个服务注册中心
 * 只需要一个注解@EnableEurekaServer
 */

@EnableEurekaServer
#配置端口号
server.port=7001
#spring.application.name 的优先级比 eureka.instance.appname 高
spring.application.name=springboot-eureka-server

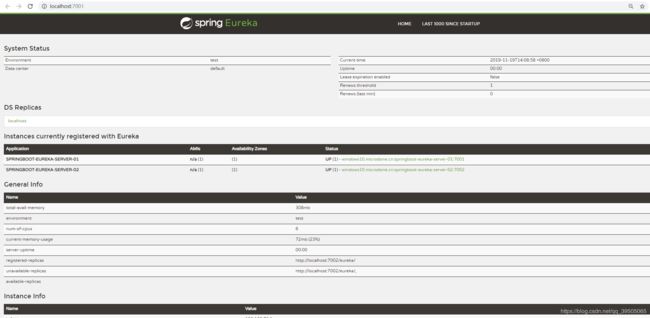
启动工程后,访问: http://localhost:7001/ 可以看到下面的页面,其中还没有发现任何服务

集群
注册中心这么关键的服务,如果是单点话,遇到故障就是毁灭性的。在一个分布式系统中,服务注册中心是最重要的基础部分,理应随时处于可以提供服务的状态。为了维持其可用性,使用集群是很好的解决方案。Eureka通过互相注册的方式来实现高可用的部署,所以我们只需要将Eureke Server配置其他可用的serviceUrl就能实现高可用部署
双节点注册中心
同上操作.重新创建一个server服务
- application.properties配置文件:
#配置端口号
server.port=7002
#spring.application.name 的优先级比 eureka.instance.hostname 高
spring.application.name=springboot-eureka-server
# 设置与Eureka Server交互的地址,查询服务和注册服务都需要依赖这个地址。默认是http://localhost:8761/eureka ;多个地址可使用 , 分隔。
eureka.client.serviceUrl.defaultZone=http://localhost:7001/eureka/

server1服务的application.properties配置文件:新增
# 设置与Eureka Server交互的地址,查询服务和注册服务都需要依赖这个地址。默认是http://localhost:8761/eureka ;多个地址可使用 , 分隔。
eureka.client.serviceUrl.defaultZone=http://localhost:7002/eureka/
- 启动两个服务: -两台的集群就搭建完成了.
分别访问 http://localhost:7001/ 和 http://localhost:7002/


eureka集群多节点注册中心的使用
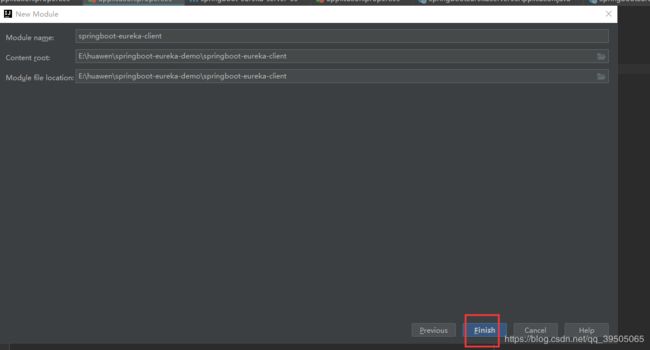
同上创建server项目
修改配置三个模块的 application.properties配置文件为:
- springboot-eureka-server-01项目:
#配置端口号
server.port=7001
#spring.application.name 的优先级比 eureka.instance.appname 高
spring.application.name=springboot-eureka-server-01
# 设置与Eureka Server交互的地址,查询服务和注册服务都需要依赖这个地址。默认是http://localhost:8761/eureka ;多个地址可使用 , 分隔。
eureka.client.serviceUrl.defaultZone=http://localhost:7002/eureka/, http://localhost:7003/eureka/
- springboot-eureka-server-02项目:
#配置端口号
server.port=7002
#spring.application.name 的优先级比 eureka.instance.hostname 高
spring.application.name=springboot-eureka-server-02
# 设置与Eureka Server交互的地址,查询服务和注册服务都需要依赖这个地址。默认是http://localhost:8761/eureka ;多个地址可使用 , 分隔。
eureka.client.serviceUrl.defaultZone=http://localhost:7001/eureka/,http://localhost:7003/eureka/
- springboot-eureka-server-03项目:
#配置端口号
server.port=7003
#spring.application.name 的优先级比 eureka.instance.hostname 高
spring.application.name=springboot-eureka-server-03
# 设置与Eureka Server交互的地址,查询服务和注册服务都需要依赖这个地址。默认是http://localhost:8761/eureka ;多个地址可使用 , 分隔。
eureka.client.serviceUrl.defaultZone=http://localhost:7001/eureka/,http://localhost:7002/eureka/
创建一个服务提供者 (eureka client)
@EnableEurekaClient
#配置端口号
server.port=7004
#spring.application.name 的优先级比 eureka.instance.appname 高
spring.application.name=springboot-eureka-client
# 设置与Eureka Server交互的地址,查询服务和注册服务都需要依赖这个地址。默认是http://localhost:8761/eureka ;多个地址可使用 , 分隔。
eureka.client.serviceUrl.defaultZone=http://localhost:7001/eureka/,http://localhost:7002/eureka/, http://localhost:7003/eureka/
- http://localhost:7001/
- http://localhost:7002/
- http://localhost:7003/
Spring cloud eureka 添加 spring-security
Eureka自带了一个管理界面,如果不加密,所有人都可以进行访问这个地址,这样安全问题就来了,所以需要对其进行加密认证:
那么该如何进行整合呢:
	 /**
     * 步骤为四步:
     *  1.添加security认证依赖
     *  2.WebSecurityConfig类  web安全配置类
     *  3.修改application.properties 配置文件  添加账号密码配置
     *  4. 修改客户端 添加 设置与Eureka Server交互的地址,eureka.client.serviceUrl.defaultZone
     */
- 添加security认证依赖
   <!--security认证依赖-->
       <dependency>
            <groupId>org.springframework.boot</groupId>
            <artifactId>spring-boot-starter-security</artifactId>
        </dependency>
- springboot-eureka-server-01新增WebSecurityConfig类 web安全配置类
import org.springframework.security.config.annotation.web.builders.HttpSecurity;
import org.springframework.security.config.annotation.web.configuration.EnableWebSecurity;
import org.springframework.security.config.annotation.web.configuration.WebSecurityConfigurerAdapter;

/**
新版本的spring-cloud2.0中: Spring Security默认开启了CSRF攻击防御
CSRF会将微服务的注册也给过滤了,虽然不会影响注册中心,但是其他客户端是注册不了的
解决方案:
关闭csrf攻击:
 */
@EnableWebSecurity
public class WebSecurityConfig extends WebSecurityConfigurerAdapter {
    @Override
    protected void configure(HttpSecurity http) throws Exception {
        http.csrf().disable().authorizeRequests().anyRequest().authenticated().and().httpBasic();
    }
}
- springboot-eureka-server-01修改application.properties 配置文件 添加账号密码配置
#配置eureka账号密码
spring.security.user.name=admin
spring.security.user.password=123456
- springboot-eureka-client 修改客户端 添加 设置与Eureka Server交互的地址, eureka.client.serviceUrl.defaultZone
http://admin:123456@localhost:7001/eureka
~ .~ 完成!!!
最好的礼物就是见你一面


