face_recognition的5个应用实例
Face Recognition 是一个基于 Python 的人脸识别库,它还提供了一个命令行工具,让你通过命令行对任意文件夹中的图像进行人脸识别操作。
该库使用 dlib 顶尖的深度学习人脸识别技术构建,在户外脸部检测数据库基准(Labeled Faces in the Wild benchmark)上的准确率高达 99.38%。
在网上找到了很多关于face_recognition的有趣程序,这里进行一下汇总。
安装:
- 人脸检测基于dlib,dlib依赖Boost和cmake
- 在windows中如果要使用dlib还是比较麻烦的,最好使用anaconda中安装,这样可以减少很多麻烦
执行:pip install face_recognition
这是安装好的face_recognition,可以看见所依赖的库!
如果安装的过程遇到缺少库的话,缺少哪个就安装哪个!!!
应用1:
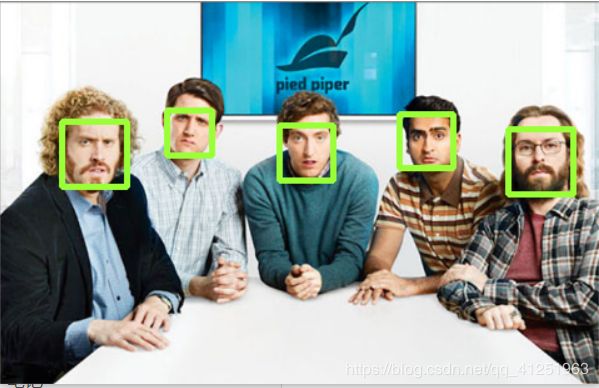
检测给定图像中的所有人脸
# -*- coding: utf-8 -*-


# 检测人脸
import face_recognition
import cv2

# 读取图片并识别人脸
img = face_recognition.load_image_file("1.png")
face_locations = face_recognition.face_locations(img)
print (face_locations)

# 调用opencv函数显示图片
img = cv2.imread("1.png")
cv2.namedWindow("原图")
cv2.imshow("原图", img)

# 遍历每个人脸,并标注
faceNum = len(face_locations)
for i in range(0, faceNum):
    top =  face_locations[i][0]
    right =  face_locations[i][1]
    bottom = face_locations[i][2]
    left = face_locations[i][3]

    start = (left, top)
    end = (right, bottom)

    color = (55,255,155)
    thickness = 3
    cv2.rectangle(img, start, end, color, thickness)

# 显示识别结果
cv2.namedWindow("识别")
cv2.imshow("识别", img)

cv2.waitKey(0)
cv2.destroyAllWindows()
用到的图片1.png
运行结果:
应用2:
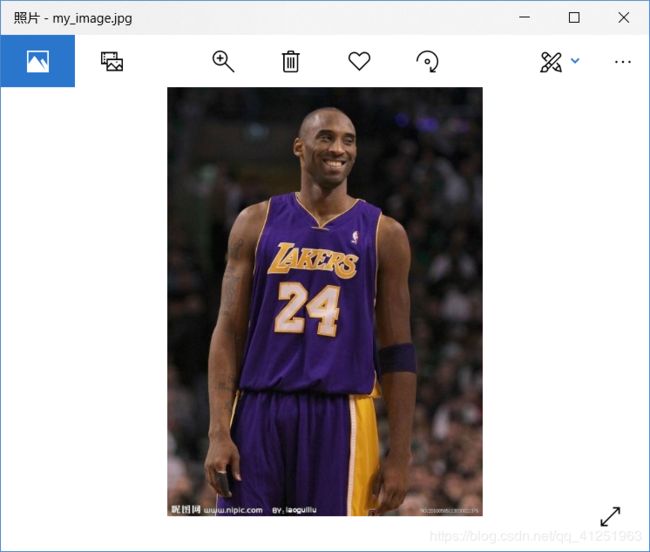
识别图像中的人脸
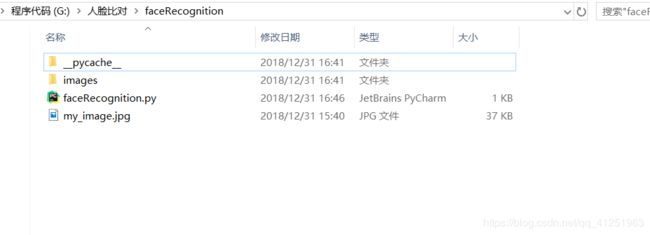
文件夹结构:
images文件夹中的文件
my_image.jpg
代码 :faceRecognition.py
# 导入库
import os
import face_recognition
# 制作所有可用图像的列表
images = os.listdir('images')
# 加载图像
image_to_be_matched = face_recognition.load_image_file('my_image.jpg')

# 将加载图像编码为特征向量

image_to_be_matched_encoded = face_recognition.face_encodings(

   image_to_be_matched)[0]

# 遍历每张图像
for image in images:
   # 加载图像
   current_image = face_recognition.load_image_file("images/" + image)
   # 将加载图像编码为特征向量
   current_image_encoded = face_recognition.face_encodings(current_image)[0]

   # 将你的图像和图像对比,看是否为同一人

   result = face_recognition.compare_faces(

       [image_to_be_matched_encoded], current_image_encoded)

   # 检查是否一致

   if result[0] == True:

       print ("Matched: " + image)

   else:

       print ("Not matched: " + image)
运行结果:
代码中利用face_recognition将要查看的图片加载,并将图片编码为特征向量。然后遍历images文件中的每一张图片都加载为特征向量,并进行比较,输出结果。
应用3:
实时人脸识别
代码:
# -*- coding: utf-8 -*-
import face_recognition
import cv2

video_capture = cv2.VideoCapture(0)

obama_img = face_recognition.load_image_file("lq.jpg")
obama_face_encoding = face_recognition.face_encodings(obama_img)[0]

face_locations = []
face_encodings = []
face_names = []
process_this_frame = True

while True:
    ret, frame = video_capture.read()


    small_frame = cv2.resize(frame,(0,0),fx=0.25, fy=0.25)

    if process_this_frame:
        face_locations = face_recognition.face_locations(small_frame)
        face_encodings = face_recognition.face_encodings(small_frame, face_locations)

        face_names = []
        for face_encoding in face_encodings:
            match = face_recognition.compare_faces([obama_face_encoding], face_encoding)

            if match[0]:
                name = "lq"
            else:
                name = "unkonwn"

            face_names.append(name)

    process_this_frame = not process_this_frame

    for (top, right, bottom, left), name in zip(face_locations, face_names):
        top *= 4
        right *= 4
        bottom *= 4
        left *= 4

        cv2.rectangle(frame, (left, top), (right, bottom), (0, 0, 255),  2)

        cv2.rectangle(frame, (left, bottom - 35), (right, bottom), (0, 0, 255), 2)
        font = cv2.FONT_HERSHEY_DUPLEX
        cv2.putText(frame, name, (left+6, bottom-6), font, 1.0, (255, 255, 255), 1)

    cv2.imshow('Video', frame)
    #按Q退出,结束程序
    if cv2.waitKey(1) & 0xFF == ord('q'):
        break

video_capture.release()
cv2.destroyAllWindows()
运行结果:
应用4:
检测和标记图像中的人脸特征:
代码:
# -*- coding: utf-8 -*-
# 自动识别人脸特征
from PIL import Image, ImageDraw
import face_recognition

# 将jpg文件加载到numpy 数组中
image = face_recognition.load_image_file("my_image.jpg")

#查找图像中所有面部的所有面部特征
face_landmarks_list = face_recognition.face_landmarks(image)
#打印发现的脸张数
print("I found {} face(s) in this photograph.".format(len(face_landmarks_list)))

for face_landmarks in face_landmarks_list:

   #打印此图像中每个面部特征的位置
    facial_features = [
        'chin',
        'left_eyebrow',
        'right_eyebrow',
        'nose_bridge',
        'nose_tip',
        'left_eye',
        'right_eye',
        'top_lip',
        'bottom_lip'
    ]

    for facial_feature in facial_features:
        print("The {} in this face has the following points: {}".format(facial_feature, face_landmarks[facial_feature]))

   #让我们在图像中描绘出每个人脸特征!
    pil_image = Image.fromarray(image)
    d = ImageDraw.Draw(pil_image)

    for facial_feature in facial_features:
        d.line(face_landmarks[facial_feature], width=5)

    pil_image.show()
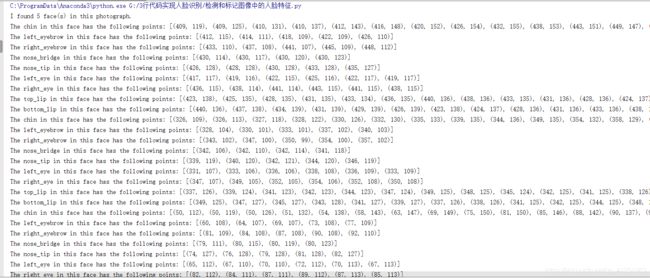
结果:
如果用上文中的1.png,就会发现5张脸,会标记每一张脸的特征。
应用5:
识别人脸并美颜
代码 :
# -*- coding: utf-8 -*-
from PIL import Image, ImageDraw
import face_recognition

#将jpg文件加载到numpy数组中
image = face_recognition.load_image_file("3.jpg")

#查找图像中所有面部的所有面部特征
face_landmarks_list = face_recognition.face_landmarks(image)

for face_landmarks in face_landmarks_list:
    pil_image = Image.fromarray(image)
    d = ImageDraw.Draw(pil_image, 'RGBA')

    #让眉毛变成了一场噩梦
    d.polygon(face_landmarks['left_eyebrow'], fill=(68, 54, 39, 128))
    d.polygon(face_landmarks['right_eyebrow'], fill=(68, 54, 39, 128))
    d.line(face_landmarks['left_eyebrow'], fill=(68, 54, 39, 150), width=5)
    d.line(face_landmarks['right_eyebrow'], fill=(68, 54, 39, 150), width=5)


    #光泽的嘴唇
    d.polygon(face_landmarks['top_lip'], fill=(150, 0, 0, 128))
    d.polygon(face_landmarks['bottom_lip'], fill=(150, 0, 0, 128))
    d.line(face_landmarks['top_lip'], fill=(150, 0, 0, 64), width=8)
    d.line(face_landmarks['bottom_lip'], fill=(150, 0, 0, 64), width=8)

    #闪耀眼睛
    d.polygon(face_landmarks['left_eye'], fill=(255, 255, 255, 30))
    d.polygon(face_landmarks['right_eye'], fill=(255, 255, 255, 30))

    #涂一些眼线
    d.line(face_landmarks['left_eye'] + [face_landmarks['left_eye'][0]], fill=(0, 0, 0, 110), width=6)
    d.line(face_landmarks['right_eye'] + [face_landmarks['right_eye'][0]], fill=(0, 0, 0, 110), width=6)

    pil_image.show()
这个就不放运行的截图了,哈哈,感兴趣可以自己找一张图片运行!!!


