基于OpenCV的手势识别完整项目(Python3.7)
这是我的本科毕设题目,刚开始接触机器学习这方面,感谢CSDN和GitHub上的大佬,网上类似项目很多,方法也有很多,自己顺带进行了整理,边做毕设边分享一下自己学习心得吧,也算是梳理一下所学知识,各大佬有什么好的建议还请指出,不吝赐教。
项目简介:基于Win10 + Python3.7的环境,利用Python的OpenCV、Sklearn和PyQt5等库搭建了一个较为完整的手势识别系统,用于识别日常生活中1-10的静态手势。
整个项目的资源:https://download.csdn.net/download/qq_41562704/11471042(包含手势库和已训练的模型,可以直接运行使用)
环境:Win10 + Python3.7 + OpenCV3.4.5,各个库的安装就不多说了
最终的效果图如图所示:
整个项目分为四个部分,即预处理,特征提取,模型训练,界面设计
预处理
1.获取手势
2.图像预处理
2.1去噪
2.2 肤色检测 + 二值化处理
2.3 形态学处理
2.4 轮廓提取
特征提取
3 傅里叶算子提取
4 建立特征库
4.1 数据增强
4.2 计算手势库的特征
模型训练
5 训练SVM模型
界面设计
6 PyQt设计界面
预处理
这部分需要完成摄像头录制手势后,提取出手的轮廓线
这部分参考资料:
https://blog.csdn.net/ifruoxi/article/details/78091954(获取手势,基于Python)
https://blog.csdn.net/qq_22527639/article/details/81501565(肤色检测:方法全,理论介绍的也很全面,基于C++)
https://blog.csdn.net/shadow_guo/article/details/43602051(基于RGB空间肤色检测,基于Python)
https://blog.csdn.net/weixin_40893939/article/details/84527037(基于HSV空间和YCrCb空间肤色检测,基于Python)
https://blog.csdn.net/Eastmount/article/details/83581277(腐蚀膨胀理论介绍,基于Python)
https://blog.csdn.net/dz4543/article/details/80655067(轮廓提取,基于Python)
1.获取手势
主要是调用OpenCV,创建main.py和 picture.py
main.py 当前负责录像,picture负责处理图像
main.py
import cv2
import picture as pic

font = cv2.FONT_HERSHEY_SIMPLEX #设置字体
size = 0.5 #设置大小

width, height = 300, 300 #设置拍摄窗口大小
x0,y0 = 300, 100 #设置选取位置

cap = cv2.VideoCapture(0) #开摄像头

if __name__ == "__main__":
	while(1):
		ret, frame = cap.read() #读取摄像头的内容
		frame = cv2.flip(frame, 2)
		roi = pic.binaryMask(frame, x0, y0, width, height) #取手势所在框图并进行处理
		key = cv2.waitKey(1) & 0xFF#按键判断并进行一定的调整
		#按'j''l''u''j'分别将选框左移,右移,上移,下移
		#按'q'键退出录像
		if key == ord('i'):
			y0 += 5
		elif key == ord('k'):
			y0 -= 5
		elif key == ord('l'):
			x0 += 5
		elif key == ord('j'):
			x0 -= 5
		if key == ord('q'):
			break
		cv2.imshow('frame', frame) #播放摄像头的内容
	cap.release()
	cv2.destroyAllWindows() #关闭所有窗口
2.图像预处理
预处理在picture.py中完成。
预处理的主要步骤为:去噪 -> 肤色检测 -> 二值化 -> 形态学处理 -> 轮廓提取,其中最麻烦的两项为肤色检测和轮廓提取。
2.1去噪
即滤波,主要是为了实现对图像噪声的消除,增强图像的效果,其实个人感觉这里滤波的作用不是很明显,也可以选择不滤波,在肤色检测后会有二次滤波。
#以3*3的模板进行均值滤波
blur = cv2.blur(roi, (3,3))
#以3*3的模板进行高斯滤波,最后一个参数表示x与y方向的标准差,给0的话,函数会自己运算
blur = cv2.GaussianBlur(roi, (3,3), 0)
#中值滤波
blur = cv2.medianBlur(roi,5)
#双边滤波,9为区域的直径,后面两个参数是空间高斯函数标准差和灰度值相似性高斯函数标准差
blur = cv2.bilateralFilter(img,9,75,75)
均值滤波器、高斯滤波器、中值滤波器、双边滤波器都可以进行使用。推荐使用双边滤波器,该滤波器考虑了图像的空间关系,也考虑图像的灰度关系。双边滤波同时使用了空间高斯权重和灰度相似性高斯权重,确保了边界不会被模糊掉。不过我在处理中直接省去了去噪这个过程。
2.2 肤色检测 + 二值化处理
picture.py
方法一:基于RGB颜色空间
判断条件:
在均匀光照下,R>95 AND G>40 B>20 AND MAX(R,G,B)-MIN(R,G,B)>15 AND ABS(R-G)>15 AND R>G AND R>B;
在侧光拍摄环境下,R>220 AND G>210 AND B>170 AND ABS(R-G)<=15 AND R>B AND G>B
import cv2
import numpy as np

def binaryMask(frame, x0, y0, width, height):
	cv2.rectangle(frame,(x0,y0),(x0+width, y0+height),(0,255,0)) #画出截取的手势框图
	roi = frame[y0:y0+height, x0:x0+width] #获取手势框图
	cv2.imshow("roi", roi) #显示手势框图
	res = skinMask(roi) #进行肤色检测
	cv2.imshow("res", res) #显示肤色检测后的图像
	return res

##########方法一###################
##########BGR空间的手势识别#########
def skinMask(roi):
	rgb = cv2.cvtColor(roi, cv2.COLOR_BGR2RGB) #转换到RGB空间
	(R,G,B) = cv2.split(rgb) #获取图像每个像素点的RGB的值,即将一个二维矩阵拆成三个二维矩阵
	skin = np.zeros(R.shape, dtype = np.uint8) #掩膜
	(x,y) = R.shape #获取图像的像素点的坐标范围
	for i in range(0, x):
		for j in range(0, y):
			#判断条件,不在肤色范围内则将掩膜设为黑色,即255
			if (abs(R[i][j] - G[i][j]) > 15) and (R[i][j] > G[i][j]) and (R[i][j] > B[i][j]):
				if (R[i][j] > 95) and (G[i][j] > 40) and (B[i][j] > 20) \
						and (max(R[i][j],G[i][j],B[i][j]) - min(R[i][j],G[i][j],B[i][j]) > 15):
					skin[i][j] = 255
				elif (R[i][j] > 220) and (G[i][j] > 210) and (B[i][j] > 170):
					skin[i][j] = 255
	res = cv2.bitwise_and(roi,roi, mask = skin) #图像与运算
	return res
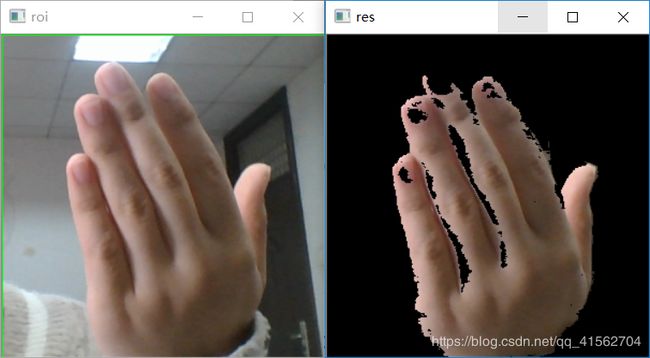
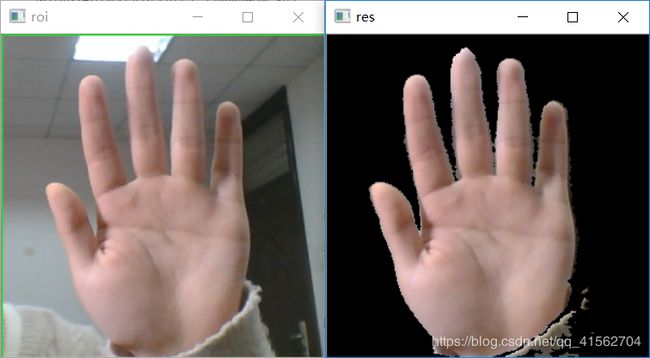
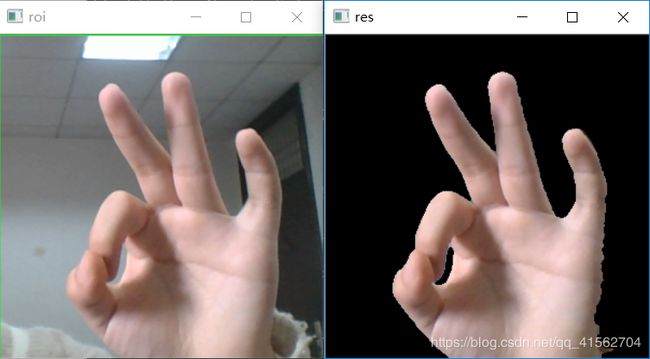
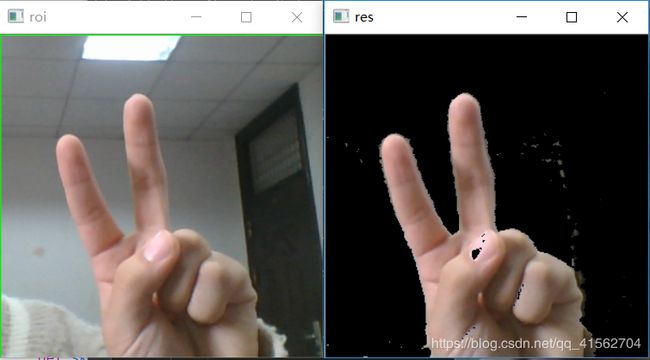
效果图:
方法二:基于HSV颜色空间
判断条件:0<=H<=20,S>=48,V>=50
肤色检测的方式不同影响的是skinMask,之后的代码只是修改skinMask函数,picture.py中其他代码不需要改动。
##########方法二###################
########HSV颜色空间H范围筛选法######
def skinMask(roi):
	low = np.array([0, 48, 50]) #最低阈值
	high = np.array([20, 255, 255]) #最高阈值
	hsv = cv2.cvtColor(roi, cv2.COLOR_BGR2HSV) #转换到HSV空间
	mask = cv2.inRange(hsv,low,high) #掩膜,不在范围内的设为255
	res = cv2.bitwise_and(roi,roi, mask = mask) #图像与运算
	return res
效果图:
方法三:椭圆肤色检测模型
在YCrCb空间,肤色像素点会聚集到一个椭圆区域。先定义一个椭圆模型,然后将每个RGB像素点转换到YCrCb空间比对是否在椭圆区域,是的话判断为皮肤。
##########方法三###################
#########椭圆肤色检测模型##########
def skinMask(roi):
	skinCrCbHist = np.zeros((256,256), dtype= np.uint8)
	cv2.ellipse(skinCrCbHist, (113,155),(23,25), 43, 0, 360, (255,255,255), -1) #绘制椭圆弧线
	YCrCb = cv2.cvtColor(roi, cv2.COLOR_BGR2YCR_CB) #转换至YCrCb空间
	(y,Cr,Cb) = cv2.split(YCrCb) #拆分出Y,Cr,Cb值
	skin = np.zeros(Cr.shape, dtype = np.uint8) #掩膜
	(x,y) = Cr.shape
	for i in range(0, x):
		for j in range(0, y):
			if skinCrCbHist [Cr[i][j], Cb[i][j]] > 0: #若不在椭圆区间中
				skin[i][j] = 255
	res = cv2.bitwise_and(roi,roi, mask = skin)
	return res
效果图:
方法四:YCrCb颜色空间的Cr分量+Otsu法阈值分割算法
针对YCrCb中Cr分量的处理,对CR通道单独进行Otsu处理,Otsu方法opencv里用threshold,Otsu算法是对图像的灰度级进行聚类。
################方法四####################
####YCrCb颜色空间的Cr分量+Otsu法阈值分割算法
def skinMask(roi):
	YCrCb = cv2.cvtColor(roi, cv2.COLOR_BGR2YCR_CB) #转换至YCrCb空间
	(y,cr,cb) = cv2.split(YCrCb) #拆分出Y,Cr,Cb值
	cr1 = cv2.GaussianBlur(cr, (5,5), 0)
	_, skin = cv2.threshold(cr1, 0, 255, cv2.THRESH_BINARY + cv2.THRESH_OTSU) #Ostu处理
	res = cv2.bitwise_and(roi,roi, mask = skin)
	return res
效果图:
方法五:Cr,Cb范围筛选法
该方法与方法一、二类似,不同的只是颜色空间不相同
判断条件:133<=Cr<=173 77<=Cb<=127
##########方法五###################
########Cr,Cb范围筛选法###########
def skinMask(roi):
	YCrCb = cv2.cvtColor(roi, cv2.COLOR_BGR2YCR_CB) #转换至YCrCb空间
	(y,cr,cb) = cv2.split(YCrCb) #拆分出Y,Cr,Cb值
	skin = np.zeros(cr.shape, dtype = np.uint8)
	(x,y) = cr.shape
	for i in range(0, x):
		for j in range(0, y):
			#每个像素点进行判断
			if(cr[i][j] > 130) and (cr[i][j] < 175) and (cb[i][j] > 77) and (cb[i][j] < 127):
				skin[i][j] = 255
	res = cv2.bitwise_and(roi,roi, mask = skin)
	return res
效果图:
方法六:OpenCV自带AdaptiveSkinDetector
关于该函数的使用可以参考http://www.cnblogs.com/tornadomeet/archive/2012/11/20/2778740.html
最终方案选择:在几种方式中选择效果比较好的,RGB和HSV的效果一般,而且曝光的话,效果更差,YCrCb是一个单独把亮度分离开来的颜色模型,使用这个颜色模型的话,像肤色不会受到光线亮度而发生改变,方法三和四均可。
2.3 形态学处理
即便是比较好的肤色检测算法,分割出来的手势,也难免有黑点,或者背景有白点,这时候需要对分割出来的手势图进行进一步处理,主要是腐蚀膨胀两个操作。
腐蚀和膨胀是针对白色部分(高亮部分而言)。从数学角度来说,膨胀或者腐蚀操作就是将图像(或图像的一部分区域,称之为A)与核(称之为B)进行卷积。
膨胀就是求局部最大值操作,即计算核B覆盖的区域的像素点的最大值,并把这个最大值赋值给参考点指定的像素,这样就会使图像中的高亮区域逐渐增长。
腐蚀就是求局部最小值操作,即计算核B覆盖的区域的像素点的最小值,并把这个最小值赋值给参考点指定的像素,这样就会使图像中的高亮区域逐渐减少。
开运算:先腐蚀后膨胀,去除孤立的小点,毛刺
闭运算:先膨胀后腐蚀,填平小孔,弥合小裂缝
在binaryMask函数中return前面添加以下代码,进行开运算
kernel = np.ones((3,3), np.uint8) #设置卷积核
erosion = cv2.erode(res, kernel) #腐蚀操作
cv2.imshow("erosion",erosion)
dilation = cv2.dilate(erosion, kernel)#膨胀操作
cv2.imshow("dilation",dilation)
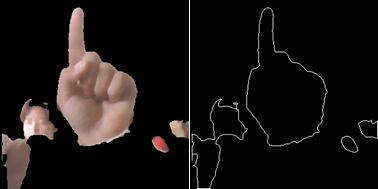
效果如图:
可以看到背景杂质点去掉了
2.4 轮廓提取
在binaryMask函数中return前面添加以下代码,对肤色检测后的图像提取手势区域
binaryimg = cv2.Canny(res, 50, 200) #二值化,canny检测
h = cv2.findContours(binaryimg,cv2.RETR_TREE,cv2.CHAIN_APPROX_NONE) #寻找轮廓
contours = h[1] #提取轮廓
ret = np.ones(res.shape, np.uint8) #创建黑色幕布
cv2.drawContours(ret,contours,-1,(255,255,255),1) #绘制白色轮廓
cv2.imshow("ret", ret)
特征提取
这部分主要任务是对第一部分提取的轮廓点坐标提取出他们的傅里叶描述子,建立手势特征库
参考资料:
https://github.com/timfeirg/Fourier-Descriptors(提取特征代码比较完整)
https://github.com/alessandroferrari/elliptic-fourier-descriptors(椭圆傅里叶描述子的提取)
https://www.cnblogs.com/edie0902/p/3658174.html(傅里叶算子的数学思想)
3 傅里叶算子提取
将picture.py中的提取轮廓点部分删去,添加
import fourierDescriptor as fd
ret, fourier_result = fd.fourierDesciptor(res)
创建fourierDescriptor.py
在这个文件中完成对轮廓点坐标的傅里叶描述子的提取,具体代码如下:
import cv2
import numpy as np

MIN_DESCRIPTOR = 32  # surprisingly enough, 2 descriptors are already enough

##计算傅里叶描述子
def fourierDesciptor(res):
    #Laplacian算子进行八邻域检测
    gray = cv2.cvtColor(res, cv2.COLOR_BGR2GRAY)
    dst = cv2.Laplacian(gray, cv2.CV_16S, ksize = 3)
    Laplacian = cv2.convertScaleAbs(dst)
    contour = find_contours(Laplacian)#提取轮廓点坐标
    contour_array = contour[0][:, 0, :]#注意这里只保留区域面积最大的轮廓点坐标
    ret_np = np.ones(dst.shape, np.uint8) #创建黑色幕布
    ret = cv2.drawContours(ret_np,contour[0],-1,(255,255,255),1) #绘制白色轮廓
    contours_complex = np.empty(contour_array.shape[:-1], dtype=complex)
    contours_complex.real = contour_array[:,0]#横坐标作为实数部分
    contours_complex.imag = contour_array[:,1]#纵坐标作为虚数部分
    fourier_result = np.fft.fft(contours_complex)#进行傅里叶变换
    #fourier_result = np.fft.fftshift(fourier_result)
    descirptor_in_use = truncate_descriptor(fourier_result)#截短傅里叶描述子
    #reconstruct(ret, descirptor_in_use)
    return ret, descirptor_in_use

def find_contours(Laplacian):
    #binaryimg = cv2.Canny(res, 50, 200) #二值化,canny检测
    h = cv2.findContours(Laplacian,cv2.RETR_EXTERNAL,cv2.CHAIN_APPROX_NONE) #寻找轮廓
    contour = h[1]
    contour = sorted(contour, key = cv2.contourArea, reverse=True)#对一系列轮廓点坐标按它们围成的区域面积进行排序
    return contour

#截短傅里叶描述子
def truncate_descriptor(fourier_result):
    descriptors_in_use = np.fft.fftshift(fourier_result)

    #取中间的MIN_DESCRIPTOR项描述子
    center_index = int(len(descriptors_in_use) / 2)
    low, high = center_index - int(MIN_DESCRIPTOR / 2), center_index + int(MIN_DESCRIPTOR / 2)
    descriptors_in_use = descriptors_in_use[low:high]

    descriptors_in_use = np.fft.ifftshift(descriptors_in_use)
    return descriptors_in_use

##由傅里叶描述子重建轮廓图
def reconstruct(img, descirptor_in_use):
    #descirptor_in_use = truncate_descriptor(fourier_result, degree)
    #descirptor_in_use = np.fft.ifftshift(fourier_result)
    #descirptor_in_use = truncate_descriptor(fourier_result)
    #print(descirptor_in_use)
    contour_reconstruct = np.fft.ifft(descirptor_in_use)
    contour_reconstruct = np.array([contour_reconstruct.real,
                                    contour_reconstruct.imag])
    contour_reconstruct = np.transpose(contour_reconstruct)
    contour_reconstruct = np.expand_dims(contour_reconstruct, axis = 1)
    if contour_reconstruct.min() < 0:
        contour_reconstruct -= contour_reconstruct.min()
    contour_reconstruct *= img.shape[0] / contour_reconstruct.max()
    contour_reconstruct = contour_reconstruct.astype(np.int32, copy = False)

    black_np = np.ones(img.shape, np.uint8) #创建黑色幕布
    black = cv2.drawContours(black_np,contour_reconstruct,-1,(255,255,255),1) #绘制白色轮廓
    cv2.imshow("contour_reconstruct", black)
    #cv2.imwrite('recover.png',black)
    return black
这里需要注意:
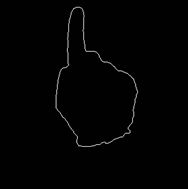
轮廓提取后进行了二次去噪,即只保留区域面积最大的曲线,效果如图
其次关于利用傅里叶算子重建轮廓图,在实际使用过程中并不需要,仅仅为了在测试阶段检验效果
取32项傅里叶算子的时候,重建效果如下,基本可以还原手势形状。
4 建立特征库
这个部分的任务是采集手势1-10,同时利用旋转平移等操作对得到的手势库进行扩充。然后对整个手势库中的每张照片中的手势轮廓线计算傅里叶描述子并保存。我采取的方案是每个手势采集20份,然后扩充为200份,这里的数目可以自己调节。保存格式为"x_i",表示手势_x的第i张图片
4.1 数据增强
在数据增强前,先采集手势,在项目文件夹中创建一个“image”文件夹保存样本库,"test_image"保存测试库(看需求,可以不用)
创建data_augmention.py
对测试库进行操作的时候仅仅需要修改一下path及相关的数字
import random
import cv2
path = './' + 'image' + '/'

#旋转
def rotate(image, scale=0.9):
    angle = random.randrange(-90, 90)#随机角度
    w = image.shape[1]
    h = image.shape[0]
    #rotate matrix
    M = cv2.getRotationMatrix2D((w/2,h/2), angle, scale)
    #rotate
    image = cv2.warpAffine(image,M,(w,h))
    return image

if __name__ == "__main__":
    for i in range(5, 6):

        cnt = 21#计数
        for j in range(1, 21):
            roi = cv2.imread(path + str(i) + '_' + str(j)+'.png')
            for k in range(12):
                img_rotation = rotate(roi)#旋转
                cv2.imwrite(path + str(i) + '_' + str(cnt)+ '.png',img_rotation)
                cnt += 1
                img_flip = cv2.flip(img_rotation,1)#翻转
                cv2.imwrite(path + str(i) + '_' + str(cnt)+ '.png',img_flip)
                cnt += 1
            print(i,'_',j,'完成')
4.2 计算手势库的特征
创建loadData.py文件
import fourierDescriptor as fd
import cv2
import numpy as np

path = './' + 'feature' + '/'
path_img = './' + 'image' + '/'

if __name__ == "__main__":
    for i in range(1, 11):
        for j in range(1, 201):
            roi = cv2.imread(path_img + str(i) + '_' + str(j) + '.png')

            descirptor_in_use = abs(fd.fourierDesciptor(roi))

            fd_name = path + str(i) + '_' + str(j) + '.txt'
            # fd_name = path + str(i) + '.txt'
            with open(fd_name, 'w', encoding='utf-8') as f:
                temp = descirptor_in_use[1]
                for k in range(1, len(descirptor_in_use)):
                    x_record = int(100 * descirptor_in_use[k] / temp)
                    f.write(str(x_record))
                    f.write(' ')
                f.write('\n')
            print(i, '_', j, '完成')
对手势库中10个手势的200份图片一一进行操作,保存的特征的格式与图片格式一致,用txt文件进行保存
模型训练
这个部分的主要任务是利用已有的样本库训练SVM模型并保存
这部分参考资料:
https://cuijiahua.com/blog/2017/11/ml_8_svm_1.html(SVM的原理)
https://cuijiahua.com/blog/2017/11/ml_9_svm_2.html(sklearn的使用)
https://blog.csdn.net/qysh123/article/details/80063447(SVM调参)
5 训练SVM模型
使用网格搜索法进行调参,利用joblib模块保存模型
import numpy as np
from os import listdir
from sklearn.externals import joblib
from functools import reduce
from sklearn.svm import SVC
from sklearn.model_selection import GridSearchCV
import matplotlib.pyplot as plt

path = './' + 'feature' + '/'
model_path = "./model/"
test_path = "./test_feature/"

test_accuracy = []

#读txt文件并将每个文件的描述子改为一维的矩阵存储
def txtToVector(filename, N):
	returnVec = np.zeros((1,N))
	fr = open(filename)
	lineStr = fr.readline()
	lineStr = lineStr.split(' ')
	for i in range(N):
		returnVec[0, i] = int(lineStr[i])
	return returnVec

def tran_SVM(N):
	svc = SVC()
	parameters = {'kernel':('linear', 'rbf'),
	              'C':[1, 3, 5, 7, 9, 11, 13, 15, 17, 19],
	              'gamma':[0.00001, 0.0001, 0.001, 0.1, 1, 10, 100, 1000]}#预设置一些参数值
	hwLabels = []#存放类别标签
	trainingFileList = listdir(path)
	m = len(trainingFileList)
	trainingMat = np.zeros((m,N))
	for i in range(m):
		fileNameStr = trainingFileList[i]
		classNumber = int(fileNameStr.split('_')[0])
		hwLabels.append(classNumber)
		trainingMat[i,:] = txtToVector(path+fileNameStr,N)#将训练集改为矩阵格式
	print("数据加载完成")
	clf = GridSearchCV(svc, parameters, cv=5, n_jobs=8)#网格搜索法,设置5-折交叉验证
	clf.fit(trainingMat,hwLabels)
	print(clf.return_train_score)
	print(clf.best_params_)#打印出最好的结果
	best_model = clf.best_estimator_
	print("SVM Model save...")
	save_path = model_path + "svm_efd_" + "train_model.m"
	joblib.dump(best_model,save_path)#保存最好的模型

def test_SVM(clf,N):
	testFileList = listdir(test_path)
	errorCount = 0#记录错误个数
	mTest = len(testFileList)
	for i in range(mTest):
		fileNameStr = testFileList[i]
		classNum = int(fileNameStr.split('_')[0])
		vectorTest = txtToVector(test_path+fileNameStr,N)
		valTest = clf.predict(vectorTest)
		#print("分类返回结果为%d\t真实结果为%d" % (valTest, classNum))
		if valTest != classNum:
			errorCount += 1
	print("总共错了%d个数据\n错误率为%f%%" % (errorCount, errorCount/mTest * 100))


####训练 + 验证#####
if __name__ == "__main__":
	tran_SVM(31)
	clf = joblib.load(model_path + "svm_efd_" + "train_model.m")
	test_SVM(clf,31)
训练结果如图:
界面设计
字面意思,这部分的任务就是设计一个界面可以实时调用已经训练好的模型预测手势
小声嘀咕一句:原来Python有这么好用的写界面的库呀(。-ω-)zzz
这个部分也不是必须的,只不过为了稍微好看那么一点,可以直接修改main.py,使得按p的时候就进行预测
import classfier as cf
......
		elif key == ord('p'):
			descirptor_in_use = abs(fourier_result)
			fd_test = np.zeros((1,31))
			temp = descirptor_in_use[1]
			for k in range(1,len(descirptor_in_use)):
				fd_test[0,k-1] = int(100 * descirptor_in_use[k] / temp)
			test_svm = cf.test_fd(fd_test)
			print("test_svm =",test_svm)
			test_svm_efd = cf.test_efd(efd_test)
			print("test_svm_efd =",test_svm_efd)
		cv2.imshow('frame', frame) #播放摄像头的内容
这部分参考资料:
https://blog.csdn.net/niuyongjie/article/details/81161559(PyQt安装,我安装的是5.11.3版本)
http://code.py40.com/pyqt5/16.html(PyQt教程)
6 PyQt设计界面
创建myGUI.py文件
第一次用PyQt这个库,所以尺寸方面的控制用来最古老的方式(数字控制)还请大家见谅(╥╯^╰╥)
import sys
from PyQt5.QtWidgets import QApplication, QWidget, QToolTip, \
     QPushButton,QMessageBox,QDesktopWidget, QLabel
from PyQt5.QtGui import QFont,QIcon,QPixmap,QImage
from PyQt5.QtCore import QTimer
import cv2
import picture as pic
import classify as cf
import numpy as np


class myWindow(QWidget):
    def __init__(self,parent = None):
        super(myWindow,self).__init__(parent)

        self.timer_camera = QTimer()
        self.cap = cv2.VideoCapture()
        self.initUI()
        self.slot_init()


    def initUI(self):

        self.mylabel()
        self.myButton()
        self.myLabelPic()

        self.setFixedSize(670,520)
        self.center()
        self.setWindowIcon(QIcon('icon.jpg'))
        self.setWindowTitle('gesture recognition')


    def mylabel(self):

        label_roi = QLabel('原图',self)
        label_roi.setStyleSheet("QLabel{font-size:18px;}")
        label_roi.resize(60,30)
        label_roi.move(120,15)

        label_res = QLabel('轮廓线', self)
        label_res.setStyleSheet("QLabel{font-size:18px;}")
        label_res.resize(60, 30)
        label_res.move(480, 15)

        label_pre = QLabel('预测', self)
        label_pre.setStyleSheet("QLabel{font-size:20px;}")
        label_pre.resize(50,30)
        label_pre.move(400,400)

        label_result = QLabel('结果', self)
        label_result.setStyleSheet("QLabel{font-size:20px;}")
        label_result.resize(50, 30)
        label_result.move(400,430)

    def myLabelPic(self):
        self.label_show_roi = QLabel(self)
        self.label_show_roi.setFixedSize(301,301)
        self.label_show_roi.move(20,50)
        self.label_show_roi.setStyleSheet("QLabel{background:white;}")
        self.label_show_roi.setAutoFillBackground(True)

        self.label_show_ret = QLabel(self)
        self.label_show_ret.setFixedSize(301, 301)
        self.label_show_ret.move(350, 50)
        self.label_show_ret.setStyleSheet("QLabel{background:white;}")
        self.label_show_ret.setAutoFillBackground(True)

        self.label_show_recognition = QLabel('0',self)
        self.label_show_recognition.setStyleSheet("QLabel{background:white;}")
        self.label_show_recognition.setStyleSheet("QLabel{font-size:50px;}")
        self.label_show_recognition.setFixedSize(100,100)
        self.label_show_recognition.move(500, 380)
        self.label_show_recognition.setAutoFillBackground(True)

    def myButton(self):
        QToolTip.setFont(QFont('SansSerif', 10))

        self.button_open_camera = QPushButton('打开相机', self)
        self.button_open_camera.setToolTip('按i,k,j,l可以进行上下左右调整')
        self.button_open_camera.resize(100,30)
        self.button_open_camera.move(100, 400)

        self.butoon_recognition = QPushButton('开始预测', self)
        self.butoon_recognition.setFixedSize(100, 30)
        self.butoon_recognition.move(100, 450)


    def slot_init(self):
        self.button_open_camera.clicked.connect(self.button_open_camera_click)
        self.butoon_recognition.clicked.connect(self.button_recognition_click)
        self.timer_camera.timeout.connect(self.show_camera)

    def button_open_camera_click(self):
        if self.timer_camera.isActive() == False:
            self.cap.open(0)
            self.timer_camera.start(30)
            self.button_open_camera.setText(u'关闭相机')
        else:
            self.timer_camera.stop()
            self.cap.release()
            self.label_show_roi.clear()
            self.label_show_ret.clear()
            self.label_show_recognition.setText('0')
            self.button_open_camera.setText(u'打开相机')

    def button_recognition_click(self):
        descirptor_in_use = abs(self.fourier_result)
        fd_test = np.zeros((1, 31))
        temp = descirptor_in_use[1]
        for k in range(1, len(descirptor_in_use)):
            fd_test[0, k - 1] = int(100 * descirptor_in_use[k] / temp)
        efd_test = np.zeros((1, 15))
        for k in range(1, len(self.efd_result)):
            temp = np.sqrt(self.efd_result[k][0] ** 2 + self.efd_result[k][1] ** 2) + np.sqrt(
                self.efd_result[k][2] ** 2 + self.efd_result[k][3] ** 2)
            efd_test[0, k - 1] = (int(1000 * temp))
        test_knn, test_svm = cf.test_fd(fd_test)
        print("test_knn =", test_knn)
        print("test_svm =", test_svm)
        test_knn_efd, test_svm_efd = cf.test_efd(efd_test)
        print("test_knn_efd =", test_knn_efd)
        print("test_svm_efd =", test_svm_efd)
        num = [0]*11
        num[test_knn[0]] += 1
        num[test_svm[0]] += 1
        num[test_knn_efd[0]] += 1
        num[test_svm_efd[0]] += 1
        res = 0
        for i in range(1, 11):
            if num[i] >= 2:
                res = i
                break
        print(res)
        self.label_show_recognition.setText(str(res))


    def show_camera(self):
        width, height = 300, 300  # 设置拍摄窗口大小
        x0, y0 = 300, 100  # 设置选取位置
        flag, frame = self.cap.read()
        roi, res, ret, self.fourier_result, self.efd_result = pic.binaryMask(frame, x0, y0, width, height)
        roi = cv2.cvtColor(roi, cv2.COLOR_BGR2RGB)
        show_roi = QImage(roi.data, roi.shape[1], roi.shape[0], QImage.Format_RGB888)
        show_ret = QImage(ret.data, ret.shape[1], ret.shape[0], QImage.Format_Grayscale8)
        self.label_show_roi.setPixmap(QPixmap.fromImage(show_roi))
        self.label_show_ret.setPixmap(QPixmap.fromImage(show_ret))


    def closeEvent(self, QCloseEvent):
        reply = QMessageBox.question(self, 'Message',"Are you sure to quit?",
                                     QMessageBox.Yes |QMessageBox.No, QMessageBox.No)
        if reply == QMessageBox.Yes:
            if self.cap.isOpened():
                self.cap.release()
            if self.timer_camera.isActive():
                self.timer_camera.stop()
            QCloseEvent.accept()
        else:
            QCloseEvent.ignore()

    def center(self):
        qr = self.frameGeometry()
        cp = QDesktopWidget().availableGeometry().center()
        qr.moveCenter(cp)
        self.move(qr.topLeft())

if __name__ == "__main__":
    app = QApplication(sys.argv)
    win = myWindow()
    win.show()
    sys.exit(app.exec())
后面几个部分由于时间关系,讲得不如前面的详细,向大家表示歉意,一些细节部分建议大家下载我的源码来看。有问题的地方欢迎讨论~源码中另外也用了椭圆傅里叶描述子作为特征。

