数据分析三剑客之 Matplotlib 基础教程
其余两剑客:
数据分析三剑客之 Numpy 基础教程
数据分析三剑客之 Pandas 基础教程
目录
- 0.1 先导条件:
- 0.2 前言:matplotlib字体安装
- 1 画布(figure):
- 1.1 基本演示:
- 1.2 多张画布:
- 1.3 一张画布多个子图:
- 1.3.1 基本方法:
- 1.3.2 进阶方法:
- 1.3.2.1 方法一:
- 1.3.2.2 方法二:
- 2 轴/子图(axes):
- 2.1 基本演示:
- 2.2 添加轴子图:
- 2.2.1 基本方法:
- 2.2.2 快捷方法:
- 2.3 共享轴子图:
- 2.4 图中图:
- 3 最基本的连线函数:
- 3.1 基本演示:
- 3.2 常见函数演示:
- 4 坐标轴:
- 4.1 设置坐标轴名称:(label)
- 4.2 设置坐标轴上下限:
- 4.3 自定义刻度:
- 4.3.1自定义分格数量:
- 4.3.2 自定义刻度label:
- 4.3.3隐藏坐标轴刻度:
- 4.4 边界操作:
- 4.5 分片:(可能也就我这么叫...)
- 4.6 双Y轴:(次坐标轴)
- 5 图例(legend):
- 6 标注(annotation):
- 7 坐标轴能见度:
- 8 散点图(Scatter):
- 8.1 基本演示:
- 8.1.1 也可以画基本图形:
- 8.2 散点图连线:
- 9 柱状图(Bar):
- 9.1基本演示:
- 9.1.1 正常的柱状图是向上的:
- 9.1.2 我们也可以让它向下:
- 9.2 其他形式:
- 9.2.1 并行柱状图:
- 9.2.2 堆叠柱状图:
- 9.2.3 柱状图上显示数值:
- 9.2.4 水平柱状图:
- 10 直方图(hist):
- 10.1 基本演示:
- 10.2 各种参数演示:
- 10.3 在直方图上绘制折线:
- 10.4 一些基本分布的频率分布直方图的演示:
- 11 饼状图(pie):
- 11.1 基本演示:
- 11.2 各种参数演示:
- 12 等高线图(contour/contourf):
- 12.1 基本演示:
- 12.1.1 contour:
- 12.1.2 contourf:
- 12.2 contour高级演示:
- 12.3 contourf高级演示:
- 13 图像(image):
- 13.1 基本用法:
- 13.2 DIY:
- 13.2.1 最简单的照猫画虎以及cmap演示:
- 13.2.2 连续的图像:
- 14 3D图像(axes3d):
- 14.1 3D散点图:
- 14.2 3D曲线图:
- 14.3 3D柱状图:
- 14.4 3D线框图:
- 14.5 3D曲面图:
- 15 动画(animation):
- 15.1 FuncAnimation:
- 15.2 ArtistAnimation:
- 16 地图(basemap):
0.1 先导条件:
import numpy as np
import matplotlib.pyplot as plt
0.2 前言:matplotlib字体安装
方便matplotlib显示中文,不需要的可以无视,参考:
https://blog.csdn.net/u014465934/article/details/80377470
1 画布(figure):
plt.figure(
    figsize=None,     #Figure的大小,单位是英寸

    dpi=None,        #分辨率(每英寸的点数)

    facecolor=None,     #修饰的颜色

    edgecolor=None,     #边界颜色

    linewidth=0.0,     #线条宽度

    figtext:         # 文本

    frameon=None,     #布尔值,是否绘制框架(Frame)

    subplotpars=None,     #子图的参数

    tight_layout=None,     #取值布尔或者字典,缺省自动布局,False 使用 subplotpars参数,True就使用tight_layout,如果是字典,则包含如下字段:pad, w_pad, h_pad, 与 rect

    constrained_layout=None     #True就使用constrained_layout,会自动调整plot的位置。
)
1.1 基本演示:
plt.figure(figsize=(9, 9),  # 大小
           dpi=80,  # 分辨率
           facecolor='r',  # 修饰颜色
           edgecolor='g',  # 边框颜色
           linewidth=10,  # 线条宽度
           )
plt.show()
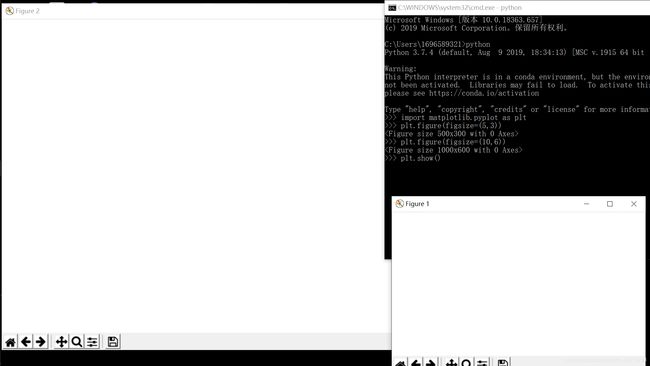
1.2 多张画布:
plt.figure(figsize=(5, 3))
# 在第一张画布上做你想做的
plt.figure(figsize=(10, 6))
# 在第二张画布上做你想做的
plt.show()
1.3 一张画布多个子图:
1.3.1 基本方法:
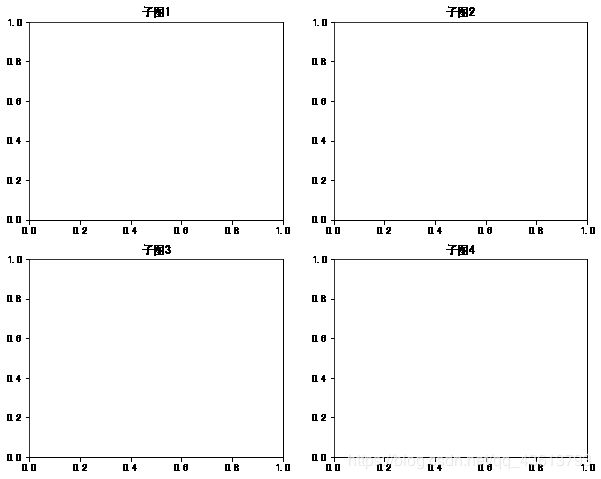
fig = plt.figure(figsize=(10, 8))

plt.subplot(221)  # 分解成2×2=4个子图,这里是第一个
plt.title("子图1")
plt.subplot(222)
plt.title("子图2")

# 另一种方式:
fig.add_subplot(223)
plt.title("子图3")
fig.add_subplot(224)
plt.title("子图4")

plt.show()
我们还可以设计出这样的排版:
plt.figure(figsize=(15, 7))
plt.subplot(211)  # 分两行,第一行只有一块
plt.subplot(234)  # 第二行分三块,但是因为第一行的一块相当于第二行三块的位置,所以,第二行要从4开始
plt.subplot(235)
plt.subplot(236)
plt.show()
1.3.2 进阶方法:
1.3.2.1 方法一:
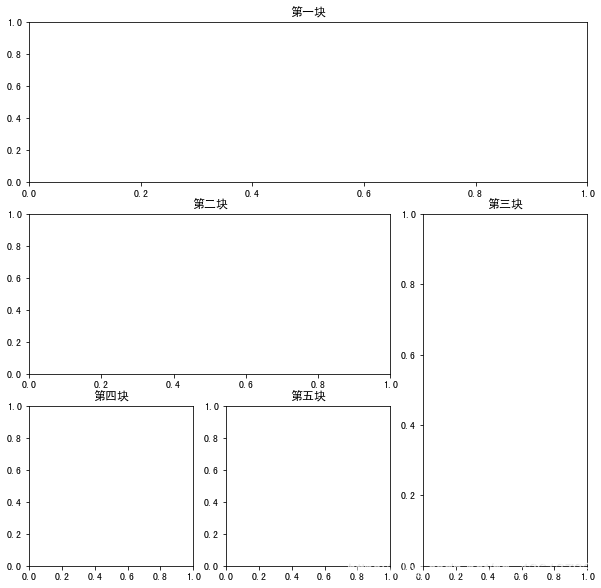
plt.figure(figsize=(10, 10))
ax1 = plt.subplot2grid((3, 3),  # 总体效果:三行三列(9×9)
                       (0, 0),  # 从原点开始(0行0列)
                       colspan=3,  # 第一块宽3个格子
                       rowspan=1,  # 高1个格子
                       )
ax1.set(title=("第一块"))
# 如法炮制
ax2 = plt.subplot2grid((3, 3), (1, 0), colspan=2, rowspan=1)
ax2.set(title=("第二块"))
ax3 = plt.subplot2grid((3, 3), (1, 2), colspan=1, rowspan=2)
ax3.set(title=("第三块"))
ax4 = plt.subplot2grid((3, 3), (2, 0), colspan=1, rowspan=1)
ax4.set(title=("第四块"))
ax5 = plt.subplot2grid((3, 3), (2, 1), colspan=1, rowspan=1)
ax5.set(title=("第五块"))
plt.show()
1.3.2.2 方法二:
import matplotlib.gridspec as gridspec

plt.figure(figsize=(10, 10))
gs = gridspec.GridSpec(3, 3)  # 三行三列
ax1 = plt.subplot(gs[0, :])  # 第一块占第一(0)行全部
ax1.set(title=("第一块"))
ax2 = plt.subplot(gs[1, :2])  # 第二块占第二(1)行前两个
ax2.set(title=("第二块"))
ax3 = plt.subplot(gs[1:, 2])  # 第三块占第二(1)行,最后一列两个
ax3.set(title=("第三块"))
ax4 = plt.subplot(gs[-1, 0])  # 第四块占最后一行第一个
ax4.set(title=("第四块"))
ax5 = plt.subplot(gs[-1, -2])  # 第五块占最后一行倒数第二个(-2),因为倒数第一个(-1)被第三块拿走了
ax5.set(title=("第五块"))
plt.show()
2 轴/子图(axes):
也可以理解为真正的作图区域
虽然一般作图都会有自适应的默认轴,但是这种只适用于简单的、快速的作图,如果想要精细作图的话,还是需要axes的
2.1 基本演示:
fig = plt.figure()
ax = fig.add_subplot(111)
ax.set(xlim=[0.5, 4.5], ylim=[-2, 8],
       title='An Example Axes', ylabel='Y', xlabel='X')
plt.show()
2.2 添加轴子图:
2.2.1 基本方法:
fig = plt.figure()
ax1 = fig.add_subplot(331)
ax2 = fig.add_subplot(335)
ax3 = fig.add_subplot(339)
这种方法一个一个添加是不是太麻烦了,而且看上去也很蠢…
2.2.2 快捷方法:
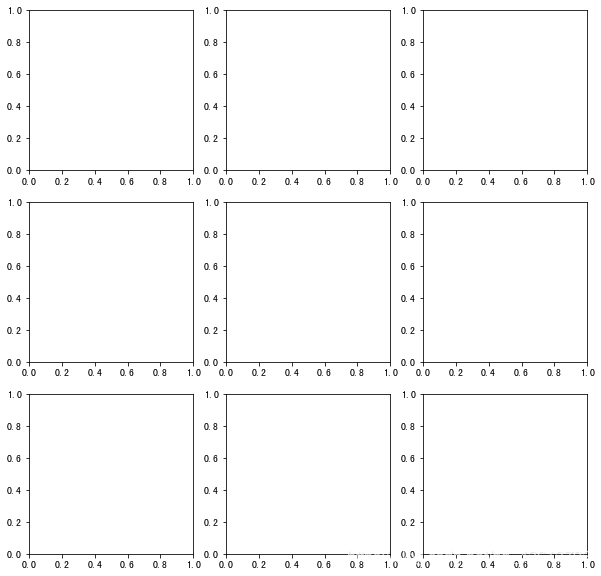
一句话就够了
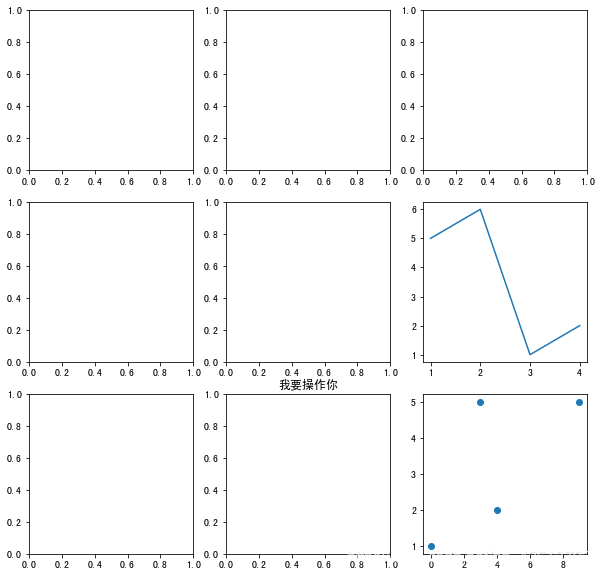
fig, axes = plt.subplots(nrows=3, ncols=3, figsize=(10, 10))
如果你想要对其中的某个图进行操作
fig, axes = plt.subplots(nrows=3, ncols=3, figsize=(10, 10))
axes[2, 1].set(title="我要操作你")
axes[1, 2].plot([1, 2, 3, 4], [5, 6, 1, 2])
axes[2, 2].scatter([9, 0, 3, 4], [5, 1, 5, 2])
plt.show()
是不是很方便
2.3 共享轴子图:
fig, ax = plt.subplots(3, 3, sharex=True, sharey=True)
# 举例
ax[1, 2].plot([_ for _ in range(4)], [_ for _ in range(4)])
ax[2, 1].scatter([1, 2, 3, 4], [1, 2, 3, 4])
ax[0, 0].set(title="000")

plt.tight_layout()  # 自动布局
plt.show()
2.4 图中图:
fig = plt.figure()
x = [1, 2, 3, 4, 5, 6, 7]
y = [7, 6, 5, 4, 3, 2, 1]
# 第一张大子图
ax1 = fig.add_axes([0.1,  # left 距离画布左边10%
                    0.1,  # bottom 距离画布下面10%
                    0.8,  # width 宽度占画布宽度的80%
                    0.8,  # height 高度占画布的80%
                    ]
                   )
# 在第一张大子图上作画
ax1.plot([_ for _ in range(10)], [_ for _ in range(10, 0, -1)], 'r')
ax1.set_xlabel("X1")
ax1.set_ylabel("Y1")
ax1.set_title("子图1")

# 其他如法炮制
ax2 = fig.add_axes([0.2,  0.2, 0.25, 0.25])
ax2.plot([_ for _ in range(10, 0, -1)], [_ for _ in range(10)], 'g')
ax2.set_xlabel("X2")
ax2.set_ylabel("Y2")
ax2.set_title("子图2")

# 另一种方法
plt.axes([0.6,  0.6, 0.25, 0.25])
plt.plot([_ for _ in range(10, 0, -1)], [_ for _ in range(10)], 'b')
plt.xlabel("X3")
plt.xlabel("Y3")
plt.title("子图3")
plt.show()
3 最基本的连线函数:
plt.plot(x, y, ‘xxx’, label=, linewidth=)
参数1:位置参数,点的横坐标,可迭代对象
参数2:位置参数,点的纵坐标,可迭代对象
参数3:位置参数,点和线的样式,字符串
参数 4:label 关键字参数,设置图例,需要调用 plt 或子图的 legend 方法
参数 5:linewidth 关键字参数,设置线的粗细
一般调用形式:
plot([x], y, [fmt], data=None, **kwargs) # 单条线
plot([x], y, [fmt], [x2], y2, [fmt2], …, **kwargs) # 多条线
可选参数[fmt] 是一个字符串来定义图的基本属性如:颜色(color),点型(marker),线型(linestyle),
具体形式 fmt = ‘[color][marker][line]’
fmt接收的是每个属性的单个字母缩写,例如:
plot(x, y, ‘bo-’) # 蓝色圆点实线
若属性用的是全名则不能用fmt参数来组合赋值,应该用关键字参数对单个属性赋值如:
plot(x,y2,color=‘green’, marker=‘o’, linestyle=‘dashed’, linewidth=1, markersize=6)
plot(x,y3,color=’#900302’,marker=’+’,linestyle=’-’)
常见颜色参数:
=============    ===============================
character        color
=============    ===============================
``'b'``          blue 蓝
``'g'``          green 绿
``'r'``          red 红
``'c'``          cyan 蓝绿
``'m'``          magenta 洋红
``'y'``          yellow 黄
``'k'``          black 黑
``'w'``          white 白
=============    ===============================
常见点型参数:
=============    ===============================
character        description
=============    ===============================
``'.'``          point marker
``','``          pixel marker
``'o'``          circle marker
``'v'``          triangle_down marker
``'^'``          triangle_up marker
``'<'``          triangle_left marker
``'>'``          triangle_right marker
``'1'``          tri_down marker
``'2'``          tri_up marker
``'3'``          tri_left marker
``'4'``          tri_right marker
``'s'``          square marker
``'p'``          pentagon marker
``'*'``          star marker
``'h'``          hexagon1 marker
``'H'``          hexagon2 marker
``'+'``          plus marker
``'x'``          x marker
``'D'``          diamond marker
``'d'``          thin_diamond marker
``'|'``          vline marker
``'_'``          hline marker
=============    ===============================
常见线型参数:
=============    ===============================
character        description
=============    ===============================
``'-'``          solid line style 实线
``'--'``         dashed line style 虚线
``'-.'``         dash-dot line style 点画线
``':'``          dotted line style 点线
=============    ===============================
3.1 基本演示:
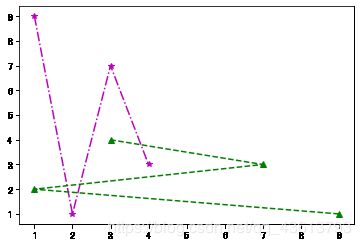
plt.plot([1, 2, 3, 4],
         [9, 1, 7, 3], 'm*-.')
plt.plot([9, 1, 7, 3],
         [1, 2, 3, 4], 'g^--')
plt.show()
3.2 常见函数演示:
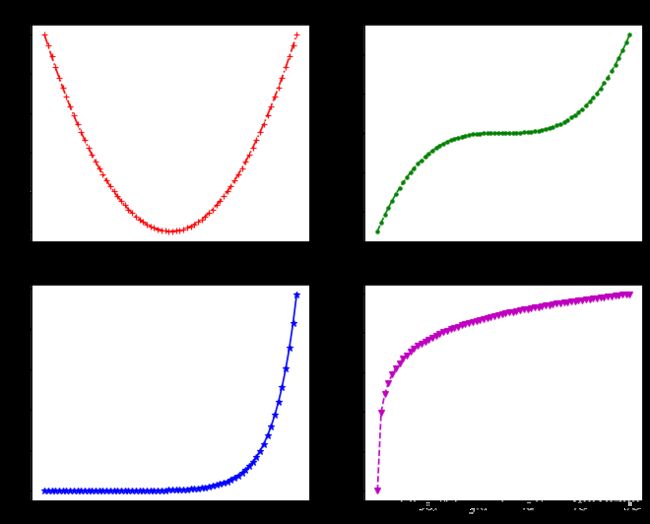
plt.figure(figsize=(10, 8), dpi=80)

plt.subplot(221)
x = np.linspace(-5, 5, 70)
plt.plot(x, x**2, 'r-.+')
plt.title("二次函数")

plt.subplot(222)
x = np.linspace(-5, 5, 70)
plt.plot(x, x**3, 'g--.')
plt.title("三次函数")

plt.subplot(223)
x = np.linspace(-5, 5, 70)
plt.plot(x, 3**x, 'b-*')
plt.title("指数函数")

plt.subplot(224)
x = np.linspace(1, 1000, 70)
plt.plot(x, [np.log2(_) for _ in list(x)], 'm--v')
plt.title("对数函数")

plt.show()
4 坐标轴:
4.1 设置坐标轴名称:(label)
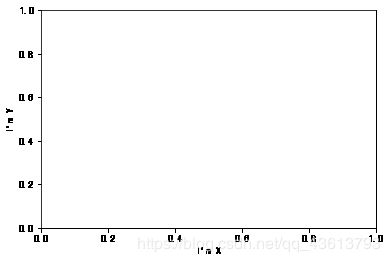
plt.xlabel("I'm X")
plt.ylabel("I'm Y")
plt.show()
# 注意,这里x、y不设限的话默认0~1
4.2 设置坐标轴上下限:
注意,与其他例子对比一下,这里的原点时紧紧贴合的
plt.xlim(0, 10000)
plt.ylim(0, 100)
plt.show()
4.3 自定义刻度:
4.3.1自定义分格数量:
xticks = np.linspace(-90, 100, 9)
plt.xticks(xticks)
yticks = np.linspace(90, 300, 9)
plt.yticks(yticks)
plt.show()
4.3.2 自定义刻度label:
支持lateX语法
plt.xticks([40, 60, 80, 100],
           ['label1', 'label2', '刻度3', '刻度4'])
plt.yticks([60, 80, 90, 100],
           ['$\lambda$', r'$\beta$', '$\gamma$', '$\\alpha$'])
# 注意,\a、\b 等关键字,既可以用两个反斜杠将其转义,(像 alpha)
#                       也可以在前面加个 r 正则转义   (像 beta )
plt.show()
4.3.3隐藏坐标轴刻度:
plt.xticks(())
plt.yticks(())
plt.show()
4.4 边界操作:
ax = plt.gca()
ax.spines['right'].set_color('none')  # 设置右边框为透明,(隐藏右边框)
ax.spines['top'].set_color('red')  # 设置上边框为红色
plt.show()
4.5 分片:(可能也就我这么叫…)
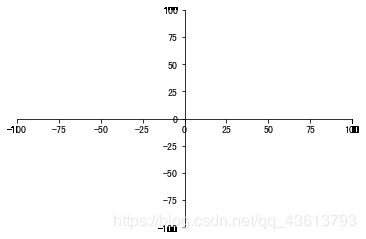
注意到没,上面的所有例子中,无论xy的范围是多少,显示出来只有一块(类似第一象限)
但这有时不是我们想要的效果
有时我们想这样:
plt.xlim(-100, 100)
plt.ylim(-100, 100)
ax = plt.gca()
ax.spines['right'].set_color('none')
ax.spines['top'].set_color('none')
ax.xaxis.set_ticks_position('bottom')  # 刻度位置
ax.yaxis.set_ticks_position('left')
ax.spines['bottom'].set_position(('data', 0))  # x的某一点对应y的某一点(此处为原点)
ax.spines['left'].set_position(('data', 0))  # y的某一点对应x的某一点(此处为原点)
plt.show()
或者这样:
plt.xlim(-100, 100)
plt.ylim(-100, 100)
ax = plt.gca()
ax.spines['left'].set_color('none')
ax.spines['bottom'].set_color('none')
ax.xaxis.set_ticks_position('top')
ax.yaxis.set_ticks_position('right')
ax.spines['top'].set_position(('data', 100))
ax.spines['right'].set_position(('data', 100))
plt.show()
4.6 双Y轴:(次坐标轴)
fig, ax1 = plt.subplots()
x = np.linspace(1, 100, 1000)
ax2 = ax1.twinx()
ax1.plot(x, 1/x, 'r')
ax1.set_xlabel("X",color='black')
ax1.set_ylabel("反比例函数用轴",color='r')

ax2.plot(x, np.log2(x), 'g')
ax2.set_ylabel("对数函数用轴",color='g')

plt.show()
5 图例(legend):
plt.legend(
    loc:图例位置,默认'best',可取(‘best’, ‘upper right’, ‘upper left’, ‘lower left’, ‘lower right’, ‘right’, ‘center left’, ‘center , right’, ‘lower center’, ‘upper center’, ‘center’) ;(若是使用了bbox_to_anchor,则这项就无效了)

    fontsize: 字体大小

    frameon: 是否显示图例边框

    ncol: 图例的列的数量,一般为1

    title: 为图例添加标题

    shadow: 为图例边框添加阴影

    markerfirst: True表示图例标签在句柄右侧,false反之

    markerscale: 图例标记为原图标记中的多少倍大小

    numpoints: 表示图例中的句柄上的标记点的个数,一般设为1

    fancybox: 是否将图例框的边角设为圆形

    framealpha: 控制图例框的透明度

    borderpad: 图例框内边距

    labelspacing: 图例中条目之间的距离

    handlelength: 图例句柄的长度

    bbox_to_anchor: (横向看右,纵向看下),如果要自定义图例位置或者将图例画在坐标外边,用它,比如bbox_to_anchor=(1.4,0.8),这个一般配合着ax.get_position(),set_position([box.x0, box.y0, box.width*0.8 , box.height])

   )
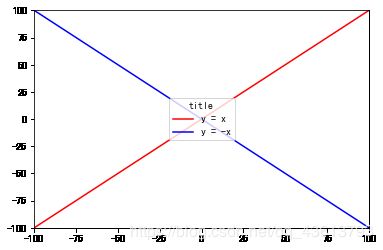
plt.xlim(-100, 100)
plt.ylim(-100, 100)
x = np.linspace(-100, 100, 100)
plt.plot(x, x, 'r', label="y = x")
plt.plot(x, -x, 'b', label="y = -x")
plt.legend(loc="center", title="title")
plt.show()
6 标注(annotation):
plt.annptation(
s 为注释文本内容

xy 为被注释的坐标点

xytext 为注释文字的坐标位置

xycoords 参数如下:

    figure points:图左下角的点
    figure pixels:图左下角的像素
    figure fraction:图的左下部分
    axes points:坐标轴左下角的点
    axes pixels:坐标轴左下角的像素
    axes fraction:左下轴的分数
    data:使用被注释对象的坐标系统(默认)
    polar(theta,r):if not native ‘data’ coordinates t

weight 设置字体线型 {‘ultralight’, ‘light’, ‘normal’, ‘regular’, ‘book’, ‘medium’, ‘roman’, ‘semibold’, ‘demibold’, ‘demi’, ‘bold’, ‘heavy’, ‘extra bold’, ‘black’}

color 设置字体颜色
    {‘b’, ‘g’, ‘r’, ‘c’, ‘m’, ‘y’, ‘k’, ‘w’}
    ‘black’,'red’等
    [0,1]之间的浮点型数据
    RGB或者RGBA, 如: (0.1, 0.2, 0.5)、(0.1, 0.2, 0.5, 0.3)等

arrowprops  #箭头参数,参数类型为字典dict

    width:箭头的宽度(以点为单位)
    headwidth:箭头底部以点为单位的宽度
    headlength:箭头的长度(以点为单位)
    shrink:总长度的一部分,从两端“收缩”
    facecolor:箭头颜色

bbox给标题增加外框 ,常用参数如下:

    boxstyle:方框外形
    facecolor:(简写fc)背景颜色
    edgecolor:(简写ec)边框线条颜色
    edgewidth:边框线条大小
)
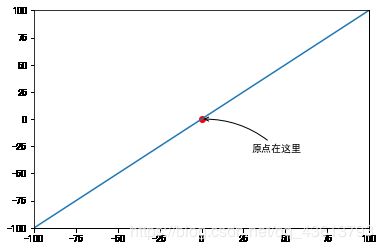
plt.xlim(-100, 100)
plt.ylim(-100, 100)
x = np.linspace(-100, 100, 100)
plt.plot(x, x)
plt.scatter(0, 0, color='r')
plt.annotate("原点在这里",  # 标记文本
             xy=(0, 0),  # 初始位置
             xytext=(+30, -30),  # 移动(右30,下30)
             arrowprops=dict(arrowstyle='->',  # 箭头
                             connectionstyle='arc3,rad=.2'  # 设置样式,角度弧度
                             )
             )
plt.show()
7 坐标轴能见度:
有时线条太粗或坐标轴刻度太密的话会被线条遮挡,所以…
plt.xlim(-10, 10)
plt.ylim(-10, 10)
plt.plot(x, x, linewidth=40,
         zorder=0
         # zorder设置线条、坐标轴刻度、坐标轴出现顺序
         # zorder=0 or 1,线条在最下方
         # zorder=2,线条在坐标轴下方刻度上方
         # zorder≥3,线条在最上方
         )
ax = plt.gca()
ax.spines['right'].set_color('none')
ax.spines['top'].set_color('none')
ax.xaxis.set_ticks_position('bottom')
ax.yaxis.set_ticks_position('left')
ax.spines['bottom'].set_position(('data', 0))
ax.spines['left'].set_position(('data', 0))
for label in ax.get_xticklabels()+ax.get_yticklabels():
    label.set_bbox(dict(facecolor='white',  # 背景色为白色
                        edgecolor='none',  # 不显示边框
                        alpha=0.7)  # 透明度
                   )

plt.show()
8 散点图(Scatter):
plt.scatter(
x,y:array_like,shape(n,)
    输入数据

s:标量或array_like,shape(n,),可选
    大小以点数^2。默认是rcParams ['lines.markersize'] ** 2。

c:颜色,顺序或颜色顺序,可选,默认:'b'
    c可以是单个颜色格式的字符串,也可以是一系列颜色
    规范的长度为N,或一系列N数字
    使用通过kwargs指定的cmap和norm映射到颜色
    (见下文)。请注意,c不应该是单个数字RGB或
    RGBA序列,因为这与数组无法区分
    值将被彩色映射。 c可以是一个二维数组,其中的
    行是RGB或RGBA,但是,包括单个的情况
    行为所有点指定相同的颜色。

marker:matplotlib.markers.MarkerStyle,可选,默认值:'o'
    请参阅matplotlib.markers以获取有关不同的更多信息
    标记分散支持的样式。 marker可以是
    该类的实例或特定文本的简写
    标记。

cmap:matplotlib.colors.Colormap,可选,默认:无
    一个matplotlib.colors.Colormap实例或注册名称。
    cmap仅在c是浮点数组时使用。如果没有,
    默认为rcimage.cmap。

norm:matplotlib.colors.Normalize,可选,默认:无
    matplotlib.colors.Normalize实例用于缩放
    亮度数据为0,1。norm只有在c是一个数组时才被使用
    彩车。如果'None',则使用默认值:func:normalize。

vmin,vmax:标量,可选,默认值:无
    vmin和vmax与norm结合使用来标准化
    亮度数据。如果其中任何一个都是'无',那么最小和最大的
    使用颜色数组。请注意,如果你通过一个“规范”实例,你的
    vmin和vmax的设置将被忽略。

alpha:标量,可选,默认值:无
    alpha混合值,介于0(透明)和1(不透明)之间,

linewidths:标量或array_like,可选,默认值:无
    如果无,则默认为(lines.linewidth,)。

verts:(x,y)的序列,可选
    如果`marker`为None,这些顶点将用于
    构建标记。标记的中心位于
    在(0,0)为标准化单位。整体标记重新调整
    由s完成。

 edgecolors :颜色或颜色顺序,可选,默认值:无
    如果无,则默认为'face'

    如果'face',边缘颜色将永远是相同的
    脸色。

    如果它是'none',补丁边界不会
    被画下来。

    对于未填充的标记,“edgecolors”kwarg
    被忽视并被迫在内部“面对”。
)
8.1 基本演示:
plt.figure(figsize=(17, 5))
plt.xlim(0, 1000)
plt.ylim(0, 1000)
marks = ['o', '*', '^', '+', 'x', 's', '.',
         'd', 'v', '<', '>', 'p', 'h']  # 基本点型
colors = ['r', 'g', 'b', 'y', 'm', 'c', 'w', 'k']  # 基本颜色
for i in range(300):  # 随机选择颜色、大小、形状、透明度
    x = np.random.randint(500)
    y = np.random.randint(1000)
    plt.scatter(x, y, c=np.random.choice(colors), s=np.random.randint(20, 100),
                marker=np.random.choice(marks), alpha=np.random.random())
x = np.random.randint(500, 1000, size=200)
y = np.random.randint(1000, size=200)
plt.scatter(x, y, c=np.arctan2(y, x))  # 反正切色系
plt.xticks(())
plt.yticks(())  # 隐藏刻度
plt.show()
8.1.1 也可以画基本图形:
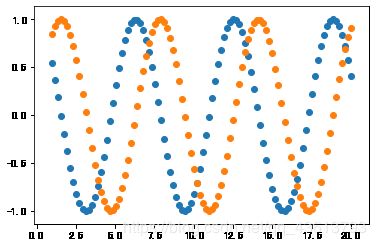
x = np.linspace(1, 20, 100)
plt.scatter(x, np.cos(x))
plt.scatter(x, np.sin(x))
plt.show()
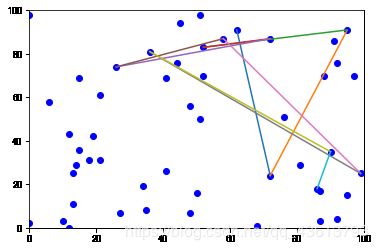
8.2 散点图连线:
plt.xlim(0, 100)
plt.ylim(0, 100)
lists = []
for i in range(50):
    slist = []
    x = np.random.randint(100)
    y = np.random.randint(100)
    plt.scatter(x, y, c='b')
    slist.append(x)
    slist.append(y)
    lists.append(slist)
for i in range(10):  # 取前10对点连线
    a1, a2 = lists[i]
    b1, b2 = lists[i+1]
    plt.plot([a1, b1], [a2, b2])
plt.show()
一个更加成熟的散点图连线例子:
Python分治法解决凸包问题并用matplotlib实现可视化
9 柱状图(Bar):
plt.bar(
    left        每个柱x轴左边界

    bottom      每个柱y轴下边界

    height      柱高度(Y轴方向)

    width       柱宽度(X轴方向)

    以上参数可以设置为数值或者list
    但要保证如果为list, len(list)要一致
    绘制的方形为:
        X: left   --- left+width
        Y: bottom --- bottom+height
    返回值:
        matplotlib.patches.Rectangle

    柱状图使用bottom扩展即可化为甘特图 Gantt Chart

    color       Bar颜色

    edgecolor   Bar边界线颜色

    linewidth(lw)   Bar边界线宽度

    align       可选['left'(default) | 'center']
                决定整个bar图分布
                默认left表示默认从左边界开始绘制,center会将图绘制在中间位置

    xerr        x方向error bar

    yerr        y方向error bar

    ecolor      error bar颜色

    capsize     error bar横线宽度(default 3)
)
9.1基本演示:
9.1.1 正常的柱状图是向上的:
plt.bar(range(1, 17), range(1, 17), alpha=0.5, width=0.7,
        color='yellow', edgecolor='red',  linewidth=1)
plt.show()
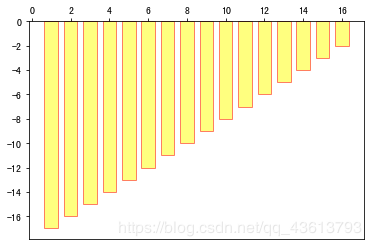
9.1.2 我们也可以让它向下:
ax = plt.gca()
ax.xaxis.set_ticks_position('top')
plt.bar(range(1, 17), [-_ for _ in range(17, 1, -1)], alpha=0.5, width=0.7,
        color='yellow', edgecolor='red',  linewidth=1)
plt.show()
9.2 其他形式:
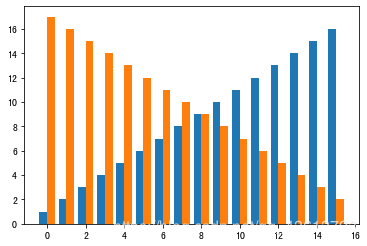
9.2.1 并行柱状图:
bar_width = 0.4
plt.bar(np.arange(16)-bar_width/2, range(1, 17), width=bar_width)
plt.bar(np.arange(16)+bar_width/2, range(17, 1, -1),   width=bar_width)
plt.show()
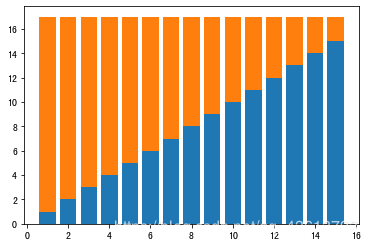
9.2.2 堆叠柱状图:
plt.bar(range(1, 16), range(1, 16))
plt.bar(range(1, 16), range(16, 1, -1), bottom=range(1, 16))

plt.show()
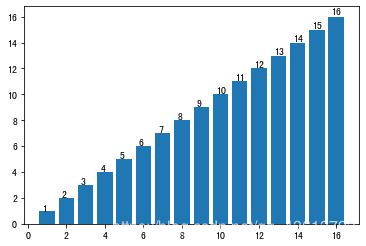
9.2.3 柱状图上显示数值:
items = plt.bar(range(1, 17), range(1, 17))


def add_labels(items):
    for item in items:
        height = item.get_height()
        plt.text(x=item.get_x()+item.get_width()/5, y=height*1.01, s=height)
        item.set_edge_color = "none"


add_labels(items)
plt.show()
9.2.4 水平柱状图:
plt.barh(range(1, 16), range(1, 16))
plt.show()
10 直方图(hist):
直方图与柱状图外观表现很相似,用来展现连续型数据分布特征的统计图形(柱状图主要展现离散型数据分布)
plt.hist(
    x: 数据集,最终的直方图将对数据集进行统计

    bins: 统计的区间分布

    range: tuple, 显示的区间

    width:  宽度

    rwidth:  宽度(最大为1)

    density: bool,默认为false,显示的是频数统计结果,为True则显示频率统计结果,这里需要注意,频率统计结果=区间数目/(总数*区间宽度),和normed效果一致,官方推荐使用density

    histtype: 可选{'bar', 'barstacked', 'step', 'stepfilled'}之一,默认为bar,推荐使用默认配置,step使用的是梯状,stepfilled则会对梯状内部进行填充,效果与bar类似

    align: 可选{'left', 'mid', 'right'}之一,默认为'mid',控制柱状图的水平分布,left或者right,会有部分空白区域,推荐使用默认

    log: bool,默认False,即y坐标轴是否选择指数刻度

    stacked: bool,默认为False,是否为堆积状图
)
10.1 基本演示:
# 直方图会进行统计各个区间的数值
plt.hist(x=np.random.randint(0, 100, 100),  # 生成 0~100 之间的100个数据,即数据集
         bins=np.arange(0, 101, 10),  # 设置连续的边界值,即直方图的分布区间[0,10],[10,20]...
         )
plt.show()
10.2 各种参数演示:
plt.hist(x=np.random.randint(0, 100, 100),
         bins=np.arange(0, 101, 10),
         alpha=0.5,  # 透明度
         density=True,  # 频率
         color='green',  # 颜色
         width=8  # 宽度    <=>   rwidth=0.8
         )
plt.show()
10.3 在直方图上绘制折线:
bins = np.arange(0, 101, 10)
width = 8
s1 = plt.hist(x=np.random.randint(0, 100, 100),
              bins=bins,
              alpha=0.5,  # 透明度
              density=True,  # 频率
              color='green',  # 颜色
              width=width
              )
plt.plot(bins[1:]-width/2, s1[0])
plt.show()
10.4 一些基本分布的频率分布直方图的演示:
def normal(mu, sigma, color):
    plt.hist(np.random.normal(mu, sigma, 1000), alpha=0.6, color=color,
             density=True, label='$\mu = {},\sigma = {}$'.format(mu, sigma))


def binomial(n, p, color):
    plt.hist(np.random.binomial(n, p, 1000), color=color,
             density=True, alpha=0.6, label="n = {},p = {}".format(n, p))


def poisson(lam, color):
    plt.hist(np.random.poisson(lam, 1000), color=color,
             label="$\lambda = {}$".format(lam), alpha=0.6, density=True)


def beta(alpha, beta_, color):
    plt.hist(np.random.beta(alpha, beta_, 1000), color=color,
             label="$\\alpha = {},\\beta $ = {}".format(alpha, beta_), alpha=0.6, density=True)


plt.figure(figsize=(20, 12), dpi=80)

plt.subplot(221)
normal(4, 0.8, 'r')
normal(-3, 0.5, 'g')
normal(0, 1, 'b')
plt.legend()
plt.title("正态分布")

plt.subplot(222)
poisson(200, 'r')
poisson(400, 'g')
poisson(600, 'b')
plt.legend()
plt.title("伯努利分布")

plt.subplot(223)
poisson(200, 'r')
poisson(400, 'g')
poisson(600, 'b')
plt.legend()
plt.title("泊松分布")

plt.subplot(224)
beta(1, 3, 'r')
beta(10, 30, 'g')
beta(20, 20, 'b')
plt.legend()
plt.title("贝塔分布")

plt.show()
11 饼状图(pie):
plt.pie(
    x :(每一块)的比例,如果sum(x) > 1会使用sum(x)归一化;

    labels  :(每一块)饼图外侧显示的说明文字;

    explode :(每一块)离开中心距离;

    startangle :起始绘制角度,默认图是从x轴正方向逆时针画起,如设定=90则从y轴正方向画起;

    shadow  :在饼图下面画一个阴影。默认值:False,即不画阴影;

    labeldistance :label标记的绘制位置,相对于半径的比例,默认值为1.1, 如<1则绘制在饼图内侧;

    autopct :控制饼图内百分比设置,可以使用format字符串或者format function
            '%1.1f'指小数点前后位数(没有用空格补齐);

    pctdistance :类似于labeldistance,指定autopct的位置刻度,默认值为0.6;

    radius  :控制饼图半径,默认值为1;

    counterclock :指定指针方向;布尔值,可选参数,默认为:True,即逆时针。将值改为False即可改为顺时针。

    wedgeprops :字典类型,可选参数,默认值:None。参数字典传递给wedge对象用来画一个饼图。例如:wedgeprops={'linewidth':3}设置wedge线宽为3。

    textprops :设置标签(labels)和比例文字的格式;字典类型,可选参数,默认值为:None。传递给text对象的字典参数。

    center :浮点类型的列表,可选参数,默认值:(0,0)。图标中心位置。

    frame :布尔类型,可选参数,默认值:False。如果是true,绘制带有表的轴框架。

    rotatelabels :布尔类型,可选参数,默认为:False。如果为True,旋转每个label到指定的角度。
)
11.1 基本演示:
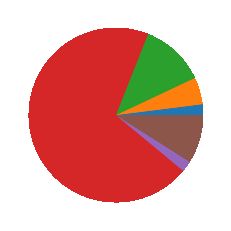
plt.pie([2, 5, 12, 70, 2, 9])
plt.show()
11.2 各种参数演示:
plt.pie(x=[_ for _ in range(1, 21)],
        explode=[_*0.05 for _ in [_ for _ in range(1, 21)]],  # 挨个突出
        startangle=100,  # 起始角度
        shadow=True,  # 阴影
        labels=[_ for _ in range(1, 21)],
        autopct='%1.1f%%',  # 显示比例
        )
plt.show()
12 等高线图(contour/contourf):
contour和contourf都是画三维等高线图的,不同点在于contourf会对等高线间的区域进行填充
plt.contour([X, Y,] Z, [levels], ** kwargs)
plt.contourf([X, Y,] Z, [levels], ** kwargs)
X,Y : array-like,可选值Z的坐标。
X和Y必须都是2-D,且形状与Z相同,或者它们必须都是1-d,这样len(X)== M是Z中的列数,len(Y)== N是Z中的行数。
Z : array-like(N,M)
绘制轮廓的高度值。
levels: int或类似数组,可选
确定轮廓线/区域的数量和位置。
如果int Ñ,使用Ñ数据间隔; 即绘制n + 1个等高线。水平高度自动选择。
如果是数组,则在指定的级别绘制轮廓线。值必须按递增顺序排列。
12.1 基本演示:
12.1.1 contour:
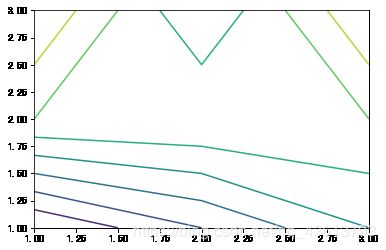
x = np.array([1, 2, 3])
y = np.array([1, 2, 3])
z = np.array([[-3, -2, -1], [0, 0, 0], [1, -1, 1]])
plt.contour(x, y, z)
plt.show()
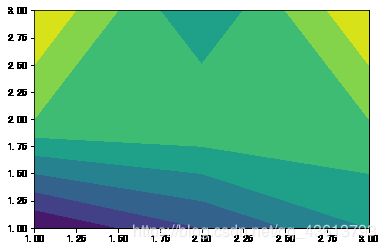
12.1.2 contourf:
plt.contourf(x, y, z)
plt.show()
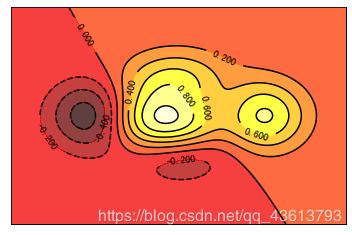
12.2 contour高级演示:
参考:https://blog.csdn.net/qq_42505705/article/details/88771942
delta = 0.025
x = np.arange(-3.0, 3.0, delta)
y = np.arange(-3.0, 3.0, delta)
X, Y = np.meshgrid(x, y)
Z1 = np.exp(-X**2 - Y**2)
Z2 = np.exp(-(X - 1)**2 - (Y - 1)**2)
Z = (Z1 - Z2) * 2
fig, ax = plt.subplots()
CS = ax.contour(X, Y, Z)
ax.clabel(CS, inline=1, fontsize=10)
plt.xticks(())
plt.yticks(())
plt.show()
12.3 contourf高级演示:
参考:https://www.bilibili.com/video/av16378354?p=12
def f(x, y):
    # the height function
    return (1 - x / 2 + x**5 + y**3) * np.exp(-x**2 - y**2)


n = 256
x = np.linspace(-3, 3, n)
y = np.linspace(-3, 3, n)
X, Y = np.meshgrid(x, y)
plt.contourf(X, Y, f(X, Y), 8, alpha=.75, cmap=plt.cm.hot)
C = plt.contour(X, Y, f(X, Y), 8, colors='black')
plt.clabel(C, inline=True, fontsize=10)
plt.xticks(())
plt.yticks(())
plt.show()
13 图像(image):
plt.imshow(
    X, # 存储图像,可以是浮点型数组、unit8数组以及PIL图像,如果其为数组,则需满足一下形状:
        (1) M*N   此时数组必须为浮点型,其中值为该坐标的灰度;
        (2) M*N*3  RGB(浮点型或者unit8类型)
        (3) M*N*4  RGBA(浮点型或者unit8类型)


    cmap=None, # 用于设置热图的Colormap
            hot 从黑平滑过度到红、橙色和黄色的背景色,然后到白色。
            cool 包含青绿色和品红色的阴影色。从青绿色平滑变化到品红色。
            gray 返回线性灰度色图。
            bone 具有较高的蓝色成分的灰度色图。该色图用于对灰度图添加电子的视图。
            white 全白的单色色图。
            spring 包含品红和黄的阴影颜色。
            summer 包含绿和黄的阴影颜色。
            autumn 从红色平滑变化到橙色,然后到黄色。
            winter 包含蓝和绿的阴影色。

    norm=None,    # 默认"None",可设为 Normalize
                “Normalize(标准化)”,将2-D的X浮点值转化到[0, 1]区间,再作为cmap的输入值;
                 如果norm是"None",则使用默认功能:normilize(标准化)
                 如果norm是比如"NoNorm",X必须是直接指向camp的查询表的整数数组

    aspect=None,    # 控制轴的纵横比。该参数可能使图像失真,即像素不是方形的。
                ‘equal’:确保宽高比为1,像素将为正方形。
                   (除非像素大小明确地在数据中变为非正方形,坐标使用 extent )。
                ‘auto’: 更改图像宽高比以匹配轴的宽高比。通常,这将导致非方形像素。

    interpolation=None,  #默认"None",可用字符串类型命令设定
                    可设定的字符串命令为:
                    'none','nearest','bilinear','bicubic',
                    ‘spline16', 'spline36', 'hanning', 'hamming',
                    'hermite', 'kaiser','quadric','catrom',
                    'gaussian','bessel','mitchell', 'sinc','lanczos'

    alpha=None,    # 透明度

    vmin=None,

    vmax=None,

    origin=None,

    extent=None,

    shape=None,

    filternorm=1,

    filterrad=4.0,

    imlim=None,

    resample=None,

    url=None,

    hold=None,

    data=None,

    **kwargs
)
13.1 基本用法:
import matplotlib.image as mpimg

# 打开一张图片
img= mpimg.imread('C:\\Users\\1696589321\\Desktop\\cat.jpg')
imgplot=plt.imshow(img)
接下来我们print一下这张图片试试看;
print(img)
[[[141 123  99]
  [152 136 113]
  [148 133 112]
  ...
  [173 165 152]
  [176 168 155]
  [177 169 156]]

 [[167 149 125]
  [150 134 109]
  [126 111  88]
  ...
  [175 167 154]
  [176 168 155]
  [175 167 154]]

 [[162 142 117]
  [123 105  81]
  [ 90  74  51]
  ...
  [170 162 149]
  [170 162 149]
  [168 160 147]]

 ...

 [[181  98  48]
  [181  98  48]
  [181  98  48]
  ...
  [190 174 148]
  [191 175 149]
  [191 175 149]]

 [[181  98  48]
  [181  98  48]
  [181  98  48]
  ...
  [190 174 148]
  [191 175 149]
  [191 175 149]]

 [[181  98  48]
  [181  98  48]
  [181  98  48]
  ...
  [190 174 148]
  [191 175 149]
  [191 175 149]]]
可以看到这是一个多维数组,这就是它的工作原理,每一个数字都代表一个像素点,这样我们就可以DIY自己的图片了
(PS:虽然说是DIY,但是真的不能叫图片哈哈…真正的图片,就算画质比较差的,像素点也成千上万了,而且每个值都代表不同的颜色…所以我们在这里就仅仅随便搞搞… :)
13.2 DIY:
13.2.1 最简单的照猫画虎以及cmap演示:
X = np.array([1, 2, 3, 4, 5, 6, 7, 8, 9]).reshape(3, 3)

fig = plt.figure()

ax = fig.add_subplot(231)
im = ax.imshow(X, cmap=plt.cm.hot, origin='urpper')  # c热
plt.colorbar(im, cax=None, ax=None,
             shrink=0.5  # 右边的Bar的比例
             )
plt.xticks(())
plt.yticks(())

ax = fig.add_subplot(232)
im = ax.imshow(X, cmap=plt.cm.cool, origin='urpper')  # 冷
plt.colorbar(im, cax=None, ax=None, shrink=0.5)
plt.xticks(())
plt.yticks(())

ax = fig.add_subplot(233)
im = ax.imshow(X, cmap=plt.cm.spring, origin='urpper')  # 春
plt.colorbar(im, cax=None, ax=None, shrink=0.5)
plt.xticks(())
plt.yticks(())

ax = fig.add_subplot(234)
im = ax.imshow(X, cmap=plt.cm.summer, origin='urpper')  # 夏
plt.colorbar(im, cax=None, ax=None, shrink=0.5)
plt.xticks(())
plt.yticks(())

ax = fig.add_subplot(235)
im = ax.imshow(X, cmap=plt.cm.autumn, origin='urpper')  # 秋
plt.colorbar(im, cax=None, ax=None, shrink=0.5)
plt.xticks(())
plt.yticks(())

ax = fig.add_subplot(236)
im = ax.imshow(X, cmap=plt.cm.winter, origin='urpper')  # 冬
plt.colorbar(im, cax=None, ax=None, shrink=0.5)

plt.xticks(())
plt.yticks(())
plt.show()
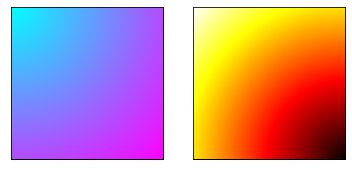
13.2.2 连续的图像:
points = np.arange(0, 10, 0.01)
xs, ys = np.meshgrid(points, points)

fig = plt.figure()

ax = fig.add_subplot(121)
ax.imshow(np.sqrt(xs**2 + ys**2), cmap=plt.cm.cool)
plt.xticks(())
plt.yticks(())

points = np.arange(-10, 0, 0.01)
xs, ys = np.meshgrid(points, points)
ax = fig.add_subplot(122)
ax.imshow(np.sqrt(xs**2 + ys**2), cmap=plt.cm.hot)
plt.xticks(())
plt.yticks(())

plt.show()
14 3D图像(axes3d):
前提:from mpl_toolkits.mplot3d import Axes3D
14.1 3D散点图:
from mpl_toolkits.mplot3d.axes3d import Axes3D
x = np.random.randint(0, 100, size=100)
y = np.random.randint(0, 100, size=100)
z = np.random.randint(-100, 0, size=100)
fig = plt.figure(figsize=(6, 4))
ax = Axes3D(fig)
ax.scatter3D(x, y, z, s=100, c=np.arctan2(y, z))
ax.set_xlabel("X")
ax.set_ylabel("Y")
ax.set_zlabel("Z")
plt.show()
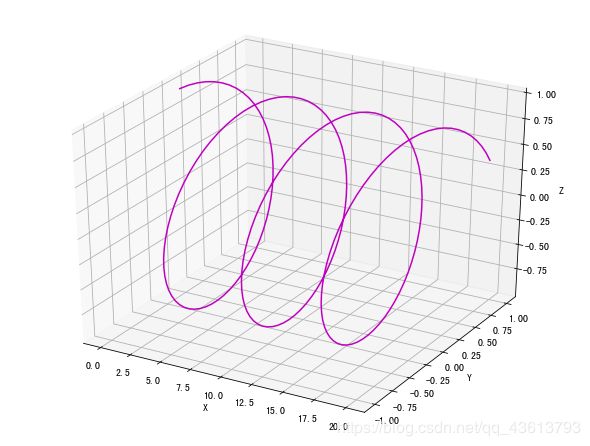
14.2 3D曲线图:
x = np.linspace(0, 20, 200)
y = np.sin(x)
z = np.cos(x)
fig = plt.figure(figsize=(8, 6))
ax = Axes3D(fig)
ax.plot(x, y, z, color='m')
ax.set_xlabel("X")
ax.set_ylabel("Y")
ax.set_zlabel("Z")
plt.show()
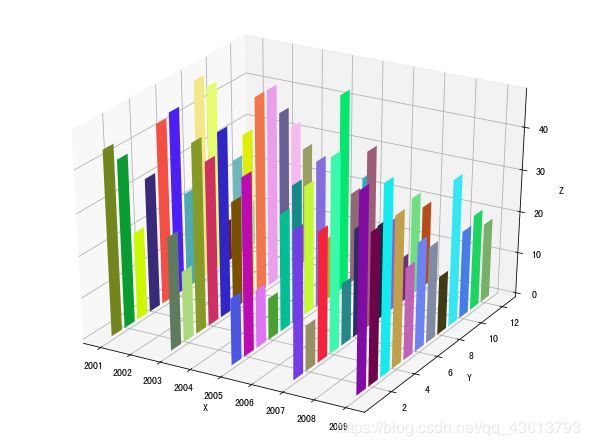
14.3 3D柱状图:
x = np.array([2001, 2003, 2005, 2007, 2009])
y = np.arange(1, 13)
fig = plt.figure(figsize=(8, 6))
ax = Axes3D(fig)
for year in x:
    z = np.random.randint(10, 50, size=12)
    ax.bar(y, z, zs=year, zdir='x', color=np.random.rand(12, 3))
ax.set_xlabel("X")
ax.set_ylabel("Y")
ax.set_zlabel("Z")
plt.show()
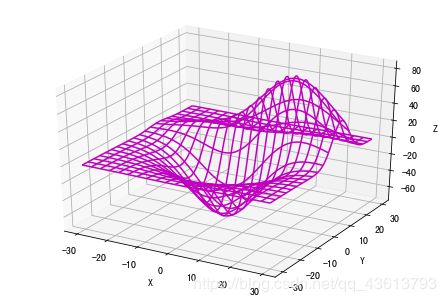
14.4 3D线框图:
from mpl_toolkits.mplot3d import axes3d
fig = plt.figure()
ax = Axes3D(fig)
X, Y, Z = axes3d.get_test_data(0.03)
ax.plot_wireframe(X, Y, Z,
                  rstride=10,  # rstride(row)指定行的跨度
                  cstride=10,  # cstride(column)指定列的跨度
                  color='m'
                  )
ax.set_xlabel("X")
ax.set_ylabel("Y")
ax.set_zlabel("Z")
plt.show()
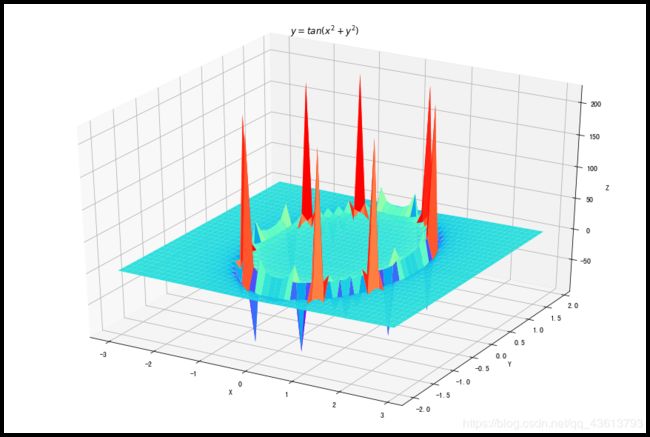
14.5 3D曲面图:
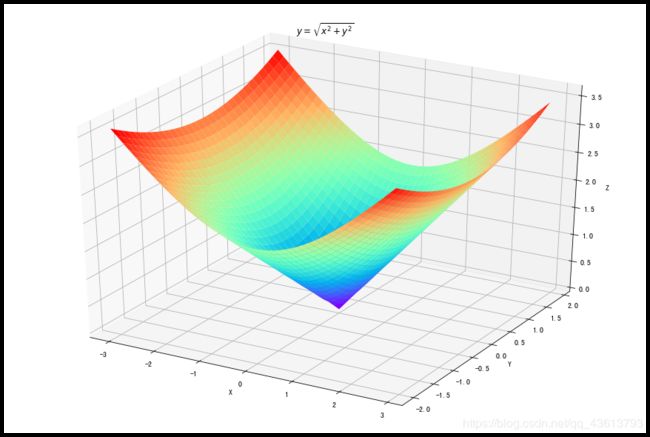
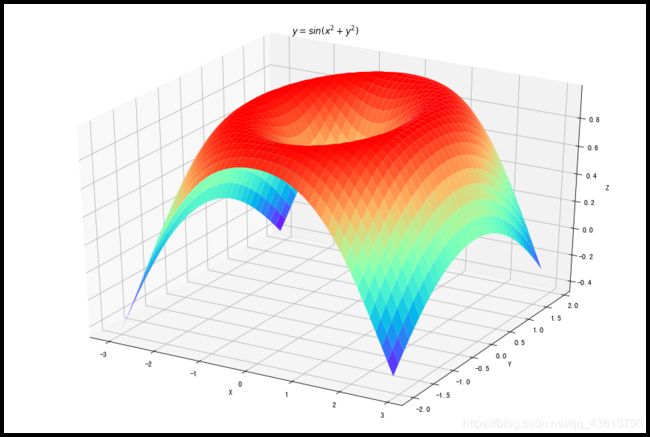
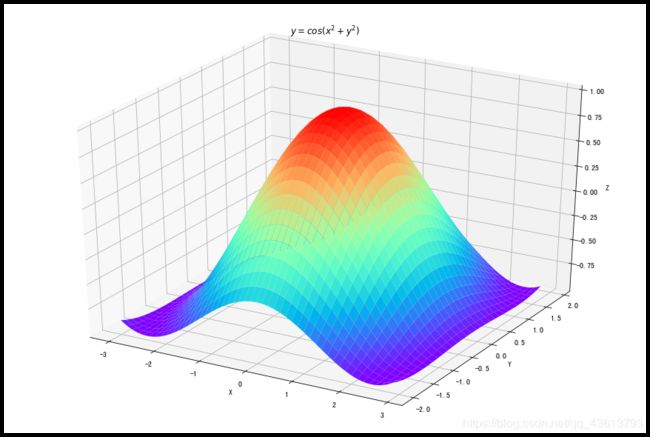
3D曲面图可以帮我们理解一些抽象的三维数学函数
fig = plt.figure(figsize=(12, 8))
ax = Axes3D(fig)
delta = 0.125
x = np.arange(-3.0, 3.0, delta)
y = np.arange(-2.0, 2.0, delta)
X, Y = np.meshgrid(x, y)
Z = X**2+Y**2
ax.plot_surface(X, Y, Z,
                rstride=1,
                cstride=1,
                cmap=plt.get_cmap('rainbow')  # 设置颜色映射
                )
ax.set_xlabel("X")
ax.set_ylabel("Y")
ax.set_zlabel("Z")
plt.title("$y=x^2+y^2$")
plt.show()
fig = plt.figure(figsize=(12, 8))
ax = Axes3D(fig)
delta = 0.125
x = np.arange(-3.0, 3.0, delta)
y = np.arange(-2.0, 2.0, delta)
X, Y = np.meshgrid(x, y)
Z = np.sqrt(X**2+Y**2)
ax.plot_surface(X, Y, Z,
                rstride=1,
                cstride=1,
                cmap=plt.get_cmap('rainbow')
                )
ax.set_xlabel("X")
ax.set_ylabel("Y")
ax.set_zlabel("Z")
plt.title("$y=\sqrt{x^2+y^2}$")
plt.show()
fig = plt.figure(figsize=(12, 8))
ax = Axes3D(fig)
delta = 0.125
x = np.arange(-3.0, 3.0, delta)
y = np.arange(-2.0, 2.0, delta)
X, Y = np.meshgrid(x, y)
Z = np.sin(np.sqrt(X**2+Y**2))
ax.plot_surface(X, Y, Z,
                rstride=1,
                cstride=1,
                cmap=plt.get_cmap('rainbow')
                )
ax.set_xlabel("X")
ax.set_ylabel("Y")
ax.set_zlabel("Z")
plt.title("$y=sin(x^2+y^2)$")
plt.show()
fig = plt.figure(figsize=(12, 8))
ax = Axes3D(fig)
delta = 0.125
x = np.arange(-3.0, 3.0, delta)
y = np.arange(-2.0, 2.0, delta)
X, Y = np.meshgrid(x, y)
Z = np.cos(np.sqrt(X**2+Y**2))
ax.plot_surface(X, Y, Z,
                rstride=1,
                cstride=1,
                cmap=plt.get_cmap('rainbow')
                )
ax.set_xlabel("X")
ax.set_ylabel("Y")
ax.set_zlabel("Z")
plt.title("$y=cos(x^2+y^2)$")
plt.show()
fig = plt.figure(figsize=(12, 8))
ax = Axes3D(fig)
delta = 0.125
x = np.arange(-3.0, 3.0, delta)
y = np.arange(-2.0, 2.0, delta)
X, Y = np.meshgrid(x, y)
Z = np.tan(np.sqrt(X**2+Y**2))
ax.plot_surface(X, Y, Z,
                rstride=1,
                cstride=1,
                cmap=plt.get_cmap('rainbow')
                )
ax.set_xlabel("X")
ax.set_ylabel("Y")
ax.set_zlabel("Z")
plt.title("$y=tan(x^2+y^2)$")
plt.show()
15 动画(animation):
前提:from matplotlib import animation
FuncAnimationnc: Makes an animation by repeatedly calling a function fun.
(通过反复调用函数来实现一个动画)
ArtistAnimation: Animation using a fixed set of Artist objects.
(使用一组固定的Artist对象进行动画处理。)
15.1 FuncAnimation:
animation.FuncAnimation(
    fig,     # 动画所在的图

    func,    # 动画函数,第一个参数是下一帧的值, 其他参数由fargs传递

    frames=None,      # 动画帧数

    init_func=None,    # 初始化函数,用于清空图形,如果不设置,则使用func中第一帧图像

    fargs=None,         # 一个字典类型的数据,会作为func函数的参数

    save_count=None,     # 缓冲的动画帧数量

    *,
    cache_frame_data=True,
    **kwargs
       |- interval:间隔时间; 单位milliseconds毫秒1/1000
       |- repeat:是否重复播放;
       |- 其他参数参考文档。
)
from matplotlib import animation

fig, ax = plt.subplots()
x = np.arange(0, 2*np.pi, 0.01)
line, = ax.plot(x, np.sin(x))


def funcs(i):
    line.set_ydata(np.sin(x+i/10))
    return line,


def inits():
    line.set_ydata(np.sin(x))
    return line,


ani = animation.FuncAnimation(fig=fig, func=funcs, frames=100, interval=20)
plt.show()
ani.save('FuncAnamiation.gif', writer='pillow', fps=10)  # 保存到本地
一个更加成熟并完美应用的例子:
利用matplotlib画出凸包问题分治递归策略实现过程动态图
15.2 ArtistAnimation:
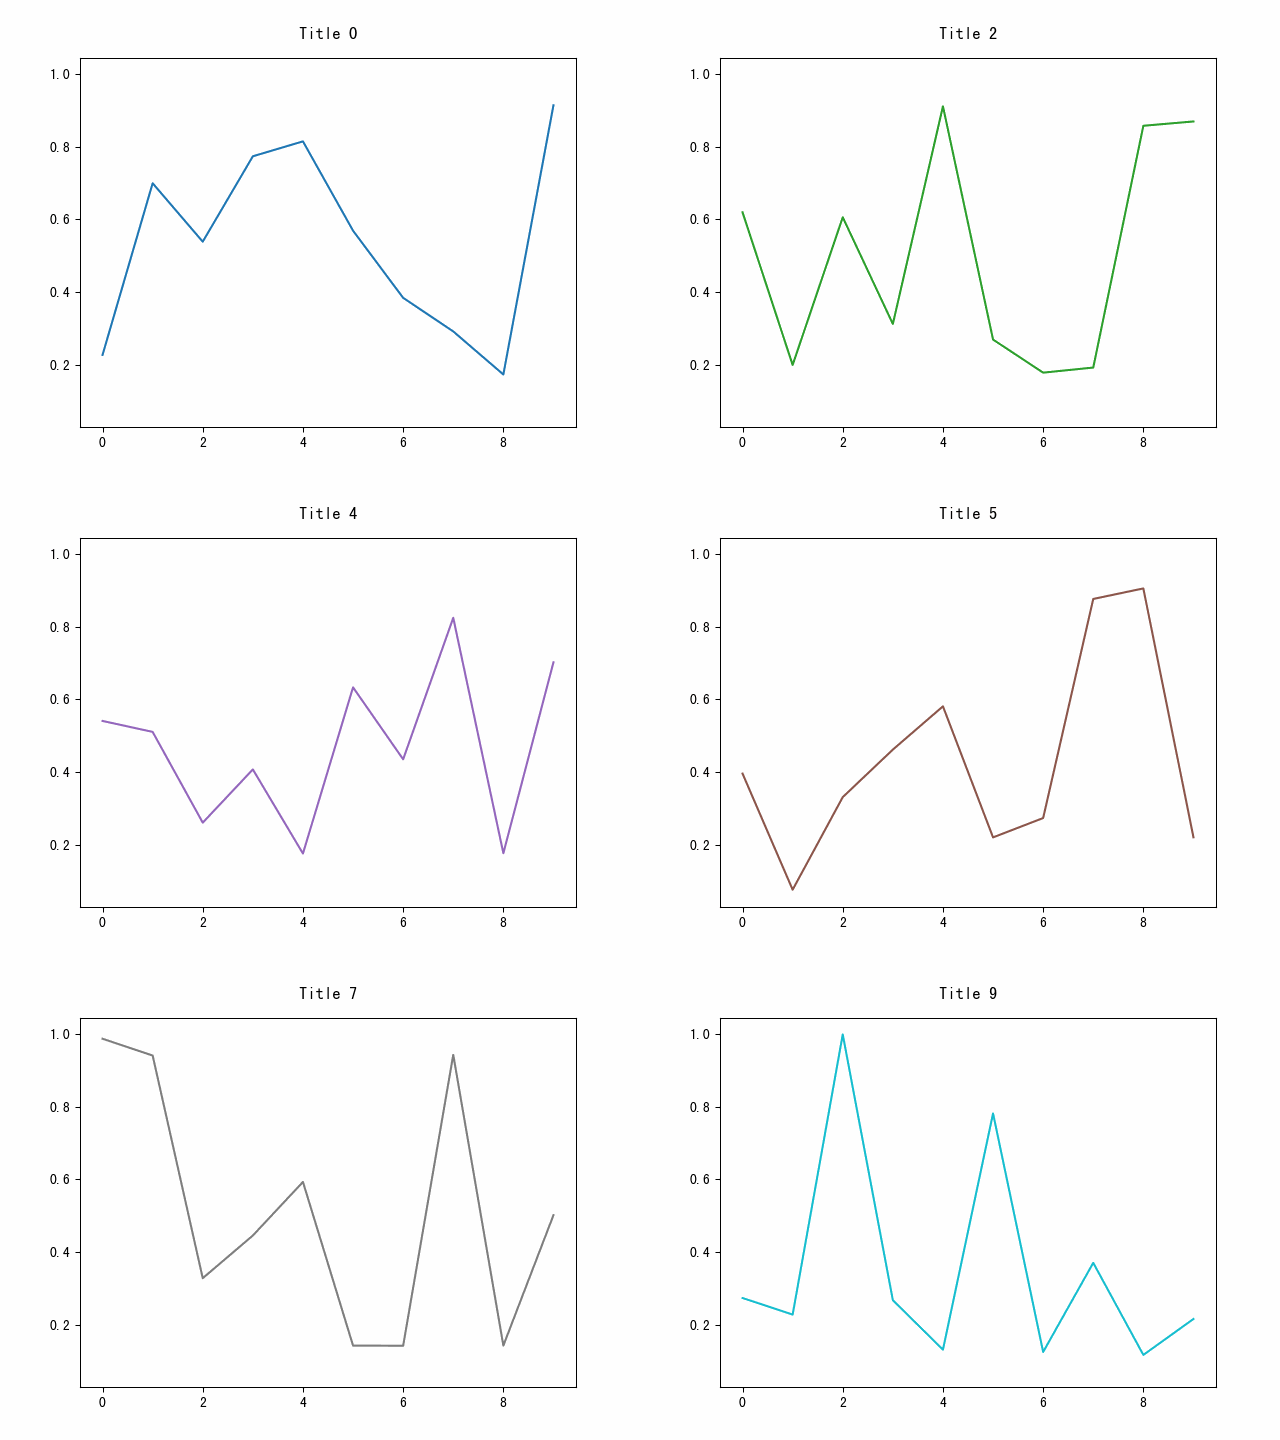
animation.ArtistAnimation(
      fig, # 用来展示figure,用plt.figure()生成

      ims,           # list格式,每一个元素是一个完全由artists 类组成的collection ,代表一帧,并且只在这一帧显示(过了这一帧会被擦除)

      interval=200,  # 更新频率,以ms计

      repeat_delay=None,   # 每显示一次动画后间隔多长时间重复

      repeat = True,     # 是否重复动画

      blit=False      # # 选择更新所有点,还是仅更新产生变化的点。应选择True,但mac用户请选择False,否则无法显示
)
a = np.random.rand(10, 10)

fig, ax = plt.subplots()
container = []

for i in range(a.shape[1]):
    line, = ax.plot(a[:, i])
    title = ax.text(0.5, 1.05, "Title {}".format(i),
                    size=plt.rcParams["axes.titlesize"],
                    ha="center", transform=ax.transAxes)
    container.append([line, title])

ani = animation.ArtistAnimation(fig, container, interval=200, blit=False)
ani.save('ArtistAnamiation.gif', writer='pillow', fps=10)  # 保存到本地
plt.show()
16 地图(basemap):
这个太多了,也不是入门看的,如果想玩的话,就去这里看:
https://basemaptutorial.readthedocs.io/en/latest/
说实话是因为我没用过…
(我画地图都是用的pyecharts,比如这篇:
pyecharts-Map3D实现新冠肺炎疫情全国数据立体可视化)


