用Spring Boot+Vue做微人事项目第十一天
用Spring Boot+Vue做微人事项目第十一天
前两天做了微人事登录的前端页面和后端接口,第三天则实现了前后端接口的对接,输入正确的用户名和密码之后,成功的跳转到home页。第四天做了Home页的Title制作和下拉菜单,下拉菜单有三个选项,个人中心、设置和注销登录,还做了注销登录,点击注销登录会出现提示:“此操作将注销登录,是否继续”,点是就重新跳转到登录页面,第五天做的是左边的导航菜单,第六天是做的服务端菜单接口的设计,第七天是Vuex的介绍、安装和配置、第八天是不写代码,第九天谈一谈前后端分离开发,权限管理的一些思路,是后端接口权限设计,第十天写业务代码,从系统管理的基础信息设置开始写,先写前端页面,今天开始写系统管理的基础信息设置的后端接口了
①:把Position实体类里面的createdate属性的date改成大写的Date并修改该属性的getter和setter方法
public class Position implements Serializable {
    private Integer id;

    /**
     * 职位
     */
    private String name;

    private Date createDate;

    private Boolean enabled;
②:把PositionMapper.xml里面和createdate相关的全部修改成createDate
③:在controller包里面新建system包,再在system包里面新建basic包,再在basic包里面创建PositionController类,在定义PositionController类的接口的时候,一定要与数据库的menu中的url地址到一致,不然会出现没有权限访问的问题
@RestController
@RequestMapping("/system/basic/pos")
public class PositionController {

    @Autowired
    PositionService positionService;

    @GetMapping("/")
    public List getAllPositions(){
        return positionService.getAllPositions();
    }

}
PositionService类
@Service
public class PositionService {

    @Autowired
    PositionMapper positionMapper;

    public List getAllPositions() {
        return positionMapper.getAllPositions();
    }
}
PositionMapper接口
@Repository
public interface PositionMapper {
    int deleteByPrimaryKey(Integer id);

    int insert(Position record);

    int insertSelective(Position record);

    Position selectByPrimaryKey(Integer id);

    int updateByPrimaryKeySelective(Position record);

    int updateByPrimaryKey(Position record);

    List getAllPositions();
}
PositionMapper.xml
id, `name`, createDate, enabled
delete from position
where id = #{id,jdbcType=INTEGER}
insert into position (id, `name`, createDate,
enabled)
values (#{id,jdbcType=INTEGER}, #{name,jdbcType=VARCHAR}, #{createDate,jdbcType=TIMESTAMP},
#{enabled,jdbcType=BIT})
insert into position
id,
`name`,
createDate,
enabled,
#{id,jdbcType=INTEGER},
#{name,jdbcType=VARCHAR},
#{createDate,jdbcType=TIMESTAMP},
#{enabled,jdbcType=BIT},
update position
`name` = #{name,jdbcType=VARCHAR},
createDate = #{createDate,jdbcType=TIMESTAMP},
enabled = #{enabled,jdbcType=BIT},
where id = #{id,jdbcType=INTEGER}
update position
set `name` = #{name,jdbcType=VARCHAR},
createDate = #{createDate,jdbcType=TIMESTAMP},
enabled = #{enabled,jdbcType=BIT}
where id = #{id,jdbcType=INTEGER}
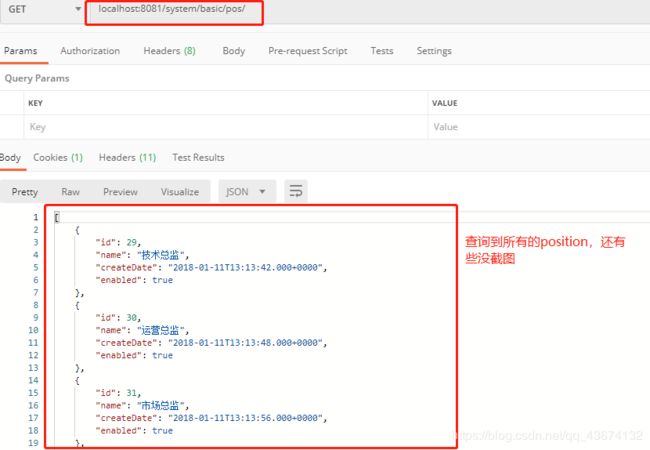
打开Postman测试查询所有的position,效果如下图:
再把position的增删改三个接口也给写一下
PositionController
@RestController
@RequestMapping("/system/basic/pos")
public class PositionController {

    @Autowired
    PositionService positionService;

    @GetMapping("/")
    public List getAllPositions(){
        return positionService.getAllPositions();
    }

    @PostMapping("/")
    public RespBean addPosition(@RequestBody Position position){
        if (positionService.addPosition(position)==1){
         return RespBean.ok("添加成功!");
        }
        return RespBean.error("添加失败!");
    }

    @PutMapping("/")
    public RespBean updatePositions(@RequestBody Position position){
        if (positionService.updatePositions(position)==1){
            return RespBean.ok("修改成功!");
        }
        return RespBean.error("修改失败!");

    }

    @DeleteMapping("/{id}")
    public RespBean deletePositionById(@PathVariable Integer id){
        if(positionService.deletePositionById(id)==1){
            return RespBean.ok("删除成功!");
        }
        return RespBean.error("删除失败");
    }
}
PositionService
@Service
public class PositionService {

    @Autowired
    PositionMapper positionMapper;

    public List getAllPositions() {
        return positionMapper.getAllPositions();
    }

    public Integer addPosition(Position position) {
        position.setEnabled(true);
        position.setCreateDate(new Date());
        return positionMapper.insertSelective(position);
    }

    public Integer updatePositions(Position position) {
        return positionMapper.updateByPrimaryKeySelective(position);
    }

    public Integer deletePositionById(Integer id) {
        return positionMapper.deleteByPrimaryKey(id);
    }
}
PositionMapper接口和PositionMapper.xml和前面那个是一样的,测试的添加效果如下图所示:
测试的修改如下图所示:
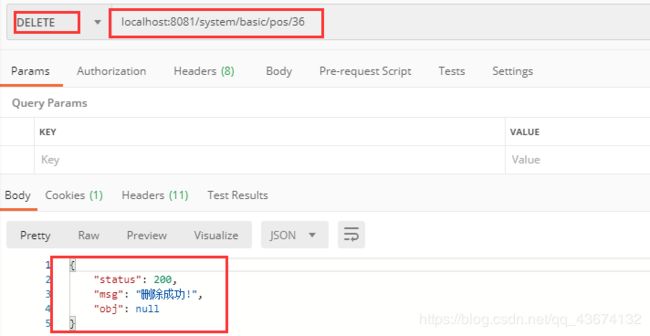
测试的删除如下图所示:
至此: 系统管理的基础信息设置的后端接口已写完


