ansible实现自动化运维
一、知识剖析
1.ansible简介:
ansible是新出现的自动化运维工具,基于Python开发,集合了众多运维工具(puppet、cfengine、chef、func、fabric)的优点,实现了批量系统配置、批量程序部署、批量运行命令等功能。
ansible是基于模块工作的,本身没有批量部署的能力。真正具有批量部署的是ansible所运行的模块,ansible只是提供一种框架。
2.ansible特性:
模块化:调用特定的模块,完成特定任务
有Paramiko,PyYAML,Jinja2(模板语言)三个关键模块
支持自定义模块
基于Python语言实现
部署简单,基于python和SSH(默认已安装),agentless
安全,基于OpenSSH
支持playbook编排任务
幂等性:一个任务执行1遍和执行n遍效果一样,不因重复执行带来意外情况
无需代理不依赖PKI(无需ssl)
可使用任何编程语言写模块
YAML格式,编排任务,支持丰富的数据结构
较强大的多层解决方案
由以下几个核心组件构成:
ansible(主体):ansible的核心程序,提供一个命令行接口给用户对ansible进行管理操作;
Host Inventory(主机清单):为Ansible定义了管理主机的策略。一般小型环境下我们只需要在host文件中写入主机的IP地址即可,但是到了中大型环境我们有可能需要使用静态inventory或者动态主机清单来生成我们所需要执行的目标主机。
Core Modules(核心模块):Ansible执行命令的功能模块,多数为内置的核心模块。
Custom Modules(拓展模块):如何ansible自带的模块无法满足我么你的需求,用户可自定义相应的模块来满足自己的需求。
Connection Plugins(连接插件):模块功能的补充,如连接类型插件、循环插件、变量插件、过滤插件等,该功能不常用
Playbook(任务剧本):编排定义ansible任务集的配置文件,由ansible顺序依次执行,通常是JSON格式的* YML文件
API:供第三方程序调用的应用程序编程接口
4.Ansible工作原理:
管理端支持local 、ssh、zeromq 三种方式连接被管理端,默认使用基于ssh的连接---这部分对应基本架构图中的连接模块;
可以按应用类型等方式进行Host Inventory(主机群)分类,管理节点通过各类模块实现相应的操作---单个模块,单条命令的批量执行,我们可以称之为ad-hoc;
管理节点可以通过playbooks 实现多个task的集合实现一类功能,如web服务的安装部署、数据库服务器的批量备份等。playbooks我们可以简单的理解为,系统通过组合多条ad-hoc操作的配置文件 。
二、ansible的安装
ansible的配置文件:
/etc/ansible/ansible.cfg 主配置文件,配置ansible工作特性
/etc/ansible/hosts 主机清单
/etc/ansible/roles/ 存放角色的目录
1.安装软件
[root@server1 ~]# cd ansible/
[root@server1 ansible]# ls
ansible-2.7.8-1.el7.noarch.rpm
ansible-tower-setup-bundle-3.4.2-1.el7.tar.gz
libtomcrypt-1.17-25.el7.x86_64.rpm
libtommath-0.42.0-5.el7.x86_64.rpm
python2-crypto-2.6.1-13.el7.x86_64.rpm
python2-jmespath-0.9.0-1.el7.noarch.rpm
python-httplib2-0.9.2-0.1.el7.noarch.rpm
python-keyczar-0.71c-2.el7.noarch.rpm
python-paramiko-2.1.1-0.9.el7.noarch.rpm
sshpass-1.06-1.el7.x86_64.rpm
[root@server1 ansible]# yum install -y *.rpm
2.配置主机清单
[root@server1 ansible]# useradd devops
[root@server1 ansible]# passwd devops
[root@server1 ansible]# su - devops
[devops@server1 ~]$ mkdir ansible
[devops@server1 ~]$ cd ansible/
[devops@server1 ansible]$ ls
[devops@server1 ansible]$ vim ansible.cfg
[defaults]

inventory	= inventory			##默认读取文件
[devops@server1 ansible]$ vim inventory
[test]					##组
server2					##组内的主机

[db]
server3

[webservers:children]			##将两个组相连
test
db
3.在server2和server3上添加devops用户并,制作免密连接
[root@server2 ~]# useradd devops
[root@server2 ~]# passwd devops
[root@server3 ~]# useradd devops
[root@server3 ~]# passwd devops
[devops@server1 ansible]$ ssh-keygen
Generating public/private rsa key pair.
Enter file in which to save the key (/home/devops/.ssh/id_rsa):
Enter passphrase (empty for no passphrase):
Enter same passphrase again:
Your identification has been saved in /home/devops/.ssh/id_rsa.
Your public key has been saved in /home/devops/.ssh/id_rsa.pub.
The key fingerprint is:
e0:93:98:17:c3:ac:54:ab:93:25:90:5e:25:de:aa:cc devops@server1
The key's randomart image is:
+--[ RSA 2048]----+
|  ....o          |
|  .o.* .         |
| . .+ X          |
|  .. @ =         |
|    O = S        |
| o . o .         |
|  E              |
|                 |
|                 |
+-----------------+
[devops@server1 ansible]$ ssh-copy-id server1
The authenticity of host 'server1 (172.25.26.1)' can't be established.
ECDSA key fingerprint is 0d:6c:e1:1e:ff:c7:14:43:94:87:34:b1:15:bb:cf:94.
Are you sure you want to continue connecting (yes/no)? yes
/bin/ssh-copy-id: INFO: attempting to log in with the new key(s), to filter out any that are already installed
/bin/ssh-copy-id: INFO: 1 key(s) remain to be installed -- if you are prompted now it is to install the new keys
devops@server1's password:

Number of key(s) added: 1

Now try logging into the machine, with:   "ssh 'server1'"
and check to make sure that only the key(s) you wanted were added.

[devops@server1 ansible]$ ssh-copy-id server2
/bin/ssh-copy-id: INFO: attempting to log in with the new key(s), to filter out any that are already installed
/bin/ssh-copy-id: INFO: 1 key(s) remain to be installed -- if you are prompted now it is to install the new keys
devops@server2's password:

Number of key(s) added: 1

Now try logging into the machine, with:   "ssh 'server2'"
and check to make sure that only the key(s) you wanted were added.

[devops@server1 ansible]$ ssh-copy-id server3
The authenticity of host 'server3 (172.25.26.3)' can't be established.
ECDSA key fingerprint is 0d:6c:e1:1e:ff:c7:14:43:94:87:34:b1:15:bb:cf:94.
Are you sure you want to continue connecting (yes/no)? yes
/bin/ssh-copy-id: INFO: attempting to log in with the new key(s), to filter out any that are already installed
/bin/ssh-copy-id: INFO: 1 key(s) remain to be installed -- if you are prompted now it is to install the new keys
devops@server3's password:

Number of key(s) added: 1

Now try logging into the machine, with:   "ssh 'server3'"
and check to make sure that only the key(s) you wanted were added.
测试
[devops@server1 ansible]$ ansible all --list-hosts		##查看所有主机
  hosts (2):
    server2
    server3
[devops@server1 ansible]$ ansible all -m ping		##对所有主机使用ping命令
server2 | SUCCESS => {
    "changed": false,
    "ping": "pong"
}
server3 | SUCCESS => {
    "changed": false,
    "ping": "pong"
}
[devops@server1 ansible]$ ansible all -m setup			##查看所有主机信息

对文件的操作
[devops@server1 ansible]$  ansible test -m copy -a 'src=/etc/passwd dest=/tmp/passwd'		##复制文件
server2 | CHANGED => {
    "changed": true,
    "checksum": "815c4a8ccee5d46e3d0f826b422eda8ddb9d04ab",
    "dest": "/tmp/passwd",
    "gid": 1000,
    "group": "devops",
    "md5sum": "9d76d1d8e8ad5c6a53a0596b1b2534cd",
    "mode": "0664",
    "owner": "devops",
    "size": 1406,
    "src": "/home/devops/.ansible/tmp/ansible-tmp-1560264295.55-76461045259210/source",
    "state": "file",
    "uid": 1000
}
[devops@server1 ansible]$ ansible test -a 'ls /tmp/passwd'		##查看是否复制成功
server2 | CHANGED | rc=0 >>
/tmp/passwd

[devops@server1 ansible]$ ansible test -a 'ls -l /tmp/passwd'		##查看文件权限
server2 | CHANGED | rc=0 >>
-rw-rw-r-- 1 devops devops 1406 Jun 11 22:44 /tmp/passwd

[devops@server1 ansible]$ ansible test -m file -a 'dest=/tmp/passwd mode=600'			##修改文件权限
server2 | CHANGED => {
    "changed": true,
    "gid": 1000,
    "group": "devops",
    "mode": "0600",
    "owner": "devops",
    "path": "/tmp/passwd",
    "size": 1406,
    "state": "file",
    "uid": 1000
}
[devops@server1 ansible]$ ansible test -a 'ls -l /tmp/passwd'		##查看是否修改成功
server2 | CHANGED | rc=0 >>
-rw------- 1 devops devops 1406 Jun 11 22:44 /tmp/passwd

软件安装
server2 server3添加免密root
[root@server2 ~]# vim /etc/sudoers
[root@server3 ~]# vim /etc/sudoers
devops  ALL=(ALL)       NOPASSWD: ALL

[devops@server1 ansible]$ ansible test -m yum -a 'name=httpd state=present' -b			##以root用户身份安装httpd

[devops@server1 ansible]$ ansible test -a 'rpm -q httpd'		##查看版本号
 [WARNING]: Consider using the yum, dnf or zypper module rather than running 'rpm'.  If
you need to use command because yum, dnf or zypper is insufficient you can add 'warn:
false' to this command task or set 'command_warnings=False' in ansible.cfg to get rid of
this message.

server2 | CHANGED | rc=0 >>
httpd-2.4.6-45.el7.x86_64
为了方便起见我们直接在默认配置文件里加入默认root身份
[devops@server1 ansible]$ vim ansible.cfg
[defaults]

inventory	= inventory

[privilege_escalation]
become=True
become_method=sudo
become_user=root
become_ask_pass=False
测试:
现在可以不加-b
[devops@server1 ansible]$ ansible test -m yum -a 'name=httpd state=present'
server2 | SUCCESS => {
    "ansible_facts": {
        "pkg_mgr": "yum"
    },
    "changed": false,
    "msg": "",
    "rc": 0,
    "results": [
        "httpd-2.4.6-45.el7.x86_64 providing httpd is already installed"
    ]
}

present 安装 absent 卸载
[devops@server1 ansible]$ ansible webservers -m yum -a 'name=httpd state=present'

[devops@server1 ansible]$ ansible test -m yum -a 'name=httpd state=absent'
[root@server2 ~]# rpm -q httpd			##无法查询表示卸载成功
package httpd is not installed

生成httpd的默认配置页
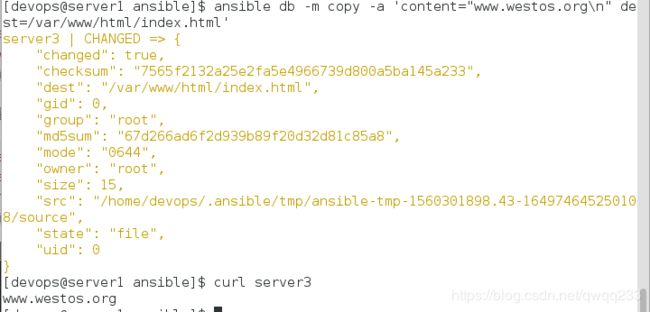
[devops@server1 ansible]$ ansible db -m copy -a 'content="www.westos.org\n" dest=/var/www/html/index.html'
server3 | CHANGED => {
    "changed": true,
    "checksum": "7565f2132a25e2fa5e4966739d800a5ba145a233",
    "dest": "/var/www/html/index.html",
    "gid": 0,
    "group": "root",
    "md5sum": "67d266ad6f2d939b89f20d32d81c85a8",
    "mode": "0644",
    "owner": "root",
    "size": 15,
    "src": "/home/devops/.ansible/tmp/ansible-tmp-1559877393.73-162896785022350/source",
    "state": "file",
    "uid": 0
}
[devops@server1 ansible]$ curl server3
www.westos.org
设置防火墙
[devops@server1 ansible]$ ansible db -m service -a 'name=firewalld state=started enabled=true'
[devops@server1 ansible]$ curl server3		##这时访问httpd被拒绝
curl: (7) Failed connect to server3:80; No route to host
设置防火墙策略让http通过
[devops@server1 ansible]$ ansible db -m firewalld -a 'service=http state=enabled permanent=yes immediate=yes'
server3 | CHANGED => {
    "changed": true,
    "msg": "Permanent and Non-Permanent(immediate) operation, Changed service http to enabled"
}
[devops@server1 ansible]$ curl server3
www.westos.org

playbook
因为playbook默认使用的yml文件,而此文件又对缩进有严格的要求
所以为了方便期间我们设定tab键时的空格数目为每次两个
[devops@server1 ansible]# vim ~/.vimrc
autocmd filetype yaml setlocal ai ts=2 sw=2 et
编写playbook文件(自动安装httpd)
[devops@server1 ansible]$ mkdir files
[devops@server1 ansible]$ cd files/
[devops@server1 files]$ scp server3:/etc/httpd/conf/httpd.conf .		##再次存放httpd的默认配置文件
httpd.conf                                                  100%   11KB  11.5KB/s   00:00
[devops@server1 files]$ ll			##查看文件权限
total 12
-rw-r--r-- 1 devops devops 11753 Jun  7 12:44 httpd.conf


[devops@server1 ansible]$ vim playbook.yml
---
# deploy apache
- hosts: webservers
  tasks:
    - name: install httpd			##安装httpd
      yum:
        name: httpd
        state: latest

    - name: create index.html			##httpd的默认页
      copy:
        content: "www.westos.org\n"
        dest: /var/www/html/index.html

    - name: configure httpd			##指定httpd的默认配置文件
      copy:
        src: files/httpd.conf
        dest: /etc/httpd/conf/httpd.conf
        owner: root
        group: root
        mode: 644
      notify: restart httpd			##设置触发器,如果更改了httpd.conf就触发

    - name: start httpd
      service:
        name: httpd
        state: started
        enabled: true

  handlers:					##触发器,name一定要和notify后面的一致
    - name: restart httpd
      service:
	name: httpd
        state: restarted
测试
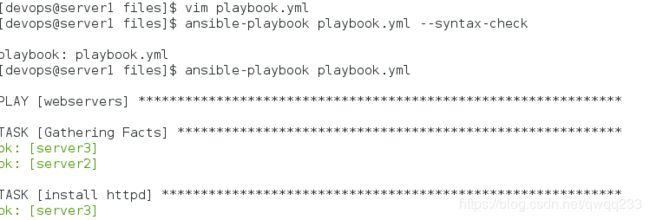
[devops@server1 ansible]$ ansible-playbook playbook.yml --syntax-check		#检查语法

playbook: playbook.yml

执行
[devops@server1 ansible]$ ansible-playbook playbook.yml

更改配置文件,将端口设置成8080再测试(测试触发器)
[devops@server1 ansible]$ md5sum files/httpd.conf
f5e7449c0f17bc856e86011cb5d152ba  files/httpd.conf

[devops@server1 ansible]$ vim files/httpd.conf
Listen 8080

[devops@server1 ansible]$ md5sum files/httpd.conf
04e9239e7bd5d5b9b85864226d60eee5  files/httpd.conf

[devops@server1 ansible]$ ansible-playbook playbook.yml


添加自动部署防火墙的功能
添加防火墙
[devops@server1 ansible]$ vim playbook.yml
添加
    - name: start firewalld				##开启火墙
      service:
        name: firewalld
        state: started
        enabled: true

    - name: configure firewalld			##允许http服务可以通过火墙
      firewalld:
        service: http
        state: enabled
        permanent: yes
        immediate: yes

  handlers:
    - name: restart httpd
      service:
        name: httpd
        state: restarted
[devops@server1 ansible]$ ansible-playbook playbook.yml --syntax-check
[devops@server1 ansible]$ ansible-playbook playbook.yml
[devops@server1 ansible]$ curl server2
www.westos.org
[devops@server1 ansible]$ curl server3
www.westos.org

使用变量名
[devops@server1 ansible]$ vim playbook.yml
- name: create index.html
  copy:
    content: "{{ ansible_facts['hostname'] }}\n"或者ansible_facts.hostname
    dest: /var/www/html/index.html
[devops@server1 ansible]$ ansible-playbook playbook.yml
[devops@server1 ansible]$ curl server2
server2
[devops@server1 ansible]$ curl server3
server3
添加更多变量
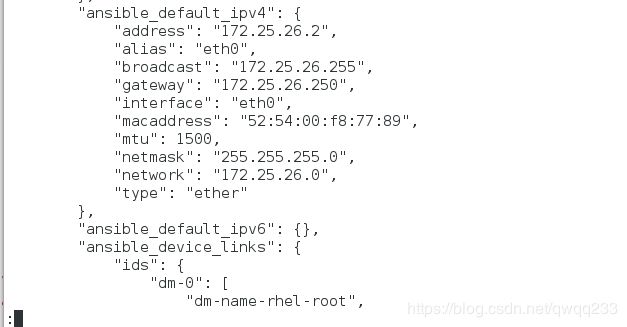
[devops@server1 ansible]$ ansible webservers -m setup | less ##查看信息
"ansible_default_ipv4": {
"address": "172.25.26.2",
"alias": "eth0",
"broadcast": "172.25.26.255",
"gateway": "172.25.26.250",
"interface": "eth0",
"macaddress": "52:54:00:22:c0:c9",
"mtu": 1500,
"netmask": "255.255.255.0",
"network": "172.25.20.0",
"type": "ether"
[devops@server1 ansible]$ vim playbook.yml
- name: create index.html
copy:
content: "{{ ansible_facts['hostname'] }} {{ ansible_facts['default_ipv4']['address'] }}\n"
dest: /var/www/html/index.html
[devops@server1 ansible]$ ansible-playbook playbook.yml
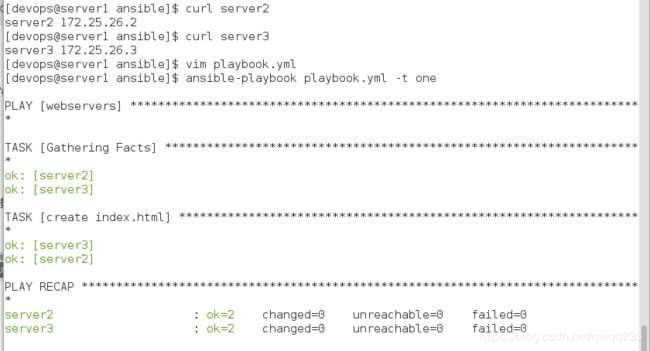
[devops@server1 ansible]$ curl server2
server2 172.25.26.2
[devops@server1 ansible]$ curl server3
server3 172.25.26.3

添加标记
执行指定标记的任务
[devops@server1 ansible]$ vim playbook.yml
- name: create index.html
  copy:
    content: "{{ ansible_facts['hostname'] }} {{ ansible_facts['default_ipv4']['address'] }}\n"
    dest: /var/www/html/index.html
  tags: one

[devops@server1 ansible]$ ansible-playbook playbook.yml -t one
模板j2
[devops@server1 ansible]$ cd files/
[devops@server1 files]$ mv httpd.conf httpd.conf.j2
[devops@server1 ansible]$ vim playbook.yml

- hosts: webservers
  vars:
    http_port: 80			##指定端口


    - name: configure httpd
      template:
        src: files/httpd.conf.j2
        dest: /etc/httpd/conf/httpd.conf
        owner: root
        group: root
        mode: 644
      notify: restart httpd

[devops@server1 ansible]$ vim files/httpd.conf.j2
Listen {{ http_port }}			##读取指定端口
[devops@server1 ansible]$ ansible-playbook playbook.yml##查看是否成功

模板
[devops@server1 ansible]$ mkdir templates
[devops@server1 ansible]$ vim playbook.yml
- name: configure httpd
      template:
        src: templates/httpd.conf.j2
        dest: /etc/httpd/conf/httpd.conf
        owner: root
        group: root
        mode: 644
      notify: restart httpd
[devops@server1 ansible]$ cp files/httpd.conf.j2 templates/
[devops@server1 ansible]$ ansible-playbook playbook.yml
自动获取指定信息
[devops@server1 ansible]$ vim hostinfo.yml
---
- hosts: all
tasks:
- name: create infofile
template:
src: templates/info.j2
dest: /mnt/hostinfo
[devops@server1 ansible]$ cd templates/
[devops@server1 templates]$ vim info.j2
主机名: {{ ansible_facts['hostname'] }}
主机IP地址: {{ ansible_facts['default_ipv4']['address'] }}
根分区大小: {{ ansible_facts['devices']['dm-0']['size'] }}
系统内核: {{ ansible_facts['distribution_version'] }}
DNS: {{ ansible_facts['dns']['nameservers'] }}
[devops@server1 ansible]$ ansible-playbook hostinfo.yml --syntax-check
playbook: hostinfo.yml
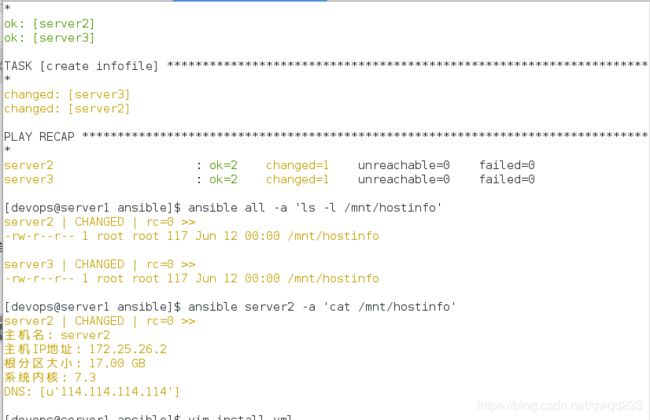
[devops@server1 ansible]$ ansible-playbook hostinfo.yml
[devops@server1 ansible]$ ansible all -a 'ls -l /mnt/hostinfo'
server2 | CHANGED | rc=0 >>
-rw-r--r-- 1 root root 117 Jun 12 00:00 /mnt/hostinfo
server3 | CHANGED | rc=0 >>
-rw-r--r-- 1 root root 117 Jun 12 00:00 /mnt/hostinfo
[devops@server1 ansible]$ ansible server2 -a 'cat /mnt/hostinfo'
server2 | CHANGED | rc=0 >>
主机名: server2
主机IP地址: 172.25.26.2
根分区大小: 17.00 GB
系统内核: 7.3
DNS: [u'114.114.114.114']
指定主机安装指定软件
[devops@server1 ansible]$ vim install.yml
---
- hosts: all
  tasks:
    - name: install pkgs
      yum:
        name: "{{ item }}"
        state: present
      when: ansible_facts['hostname'] == 'server2'
      loop:
        - httpd
        - mariadb
        - php
        - php-mysql

    - name: install mariadb
      yum:
        name: mariadb
        state: present
      when: ansible_facts['hostname'] == 'server3'
[devops@server1 ansible]$ ansible-playbook install.yml --syntax-check

playbook: install.yml
[devops@server1 ansible]$ ansible-playbook install.yml

PLAY [all] *********************************************************************************************************************************

TASK [Gathering Facts] *********************************************************************************************************************
ok: [server3]
ok: [server2]

TASK [install pkgs] ************************************************************************************************************************
skipping: [server3] => (item=httpd)
skipping: [server3] => (item=mariadb)
skipping: [server3] => (item=php)
skipping: [server3] => (item=php-mysql)
ok: [server2] => (item=httpd)
ok: [server2] => (item=mariadb)
ok: [server2] => (item=php)
ok: [server2] => (item=php-mysql)

TASK [install mariadb] *********************************************************************************************************************
skipping: [server2]
ok: [server3]

PLAY RECAP *********************************************************************************************************************************
server2                    : ok=2    changed=0    unreachable=0    failed=0
server3                    : ok=2    changed=0    unreachable=0    failed=0
自动生成主机解析
[devops@server1 ansible]$ vim hostinfo.yml
---
- hosts: all
  tasks:
    - name: create infofile
      template:
        src: templates/info.j2
        dest: /mnt/hostinfo

    - name: create hosts
      template:
        src: templates/hosts.j2
        dest: /etc/hosts
        owner: root
        group: root
        mode: 0644
[devops@server1 ansible]$ vim templates/hosts.j2
127.0.0.1   localhost localhost.localdomain localhost4 localhost4.localdomain4
::1         localhost localhost.localdomain localhost6 localhost6.localdomain6
{% for host in groups['webservers'] %}
     {{ hostvars[host]['ansible_facts']['eth0']['ipv4']['address'] }}{{ hostvars[host]['ansible_facts']['hostname'] }}
{% endfor %}

[devops@server1 ansible]$ vim inventory
[devops@server1 ansible]$ cat inventory
[test]
server2
server1

[db]
server3

[webservers:children]
test
db

[root@server1 ansible]# vim /etc/sudoers
devops  ALL=(ALL)       NOPASSWD: ALL


[devops@server1 ansible]$ ansible-playbook hostinfo.yml

PLAY [all] *******************************************************************************************************************************************

TASK [Gathering Facts] *******************************************************************************************************************************
ok: [server2]
ok: [server3]
ok: [server1]

TASK [create infofile] *******************************************************************************************************************************
ok: [server2]
ok: [server3]
ok: [server1]

TASK [create hosts] **********************************************************************************************************************************
changed: [server2]
changed: [server3]
changed: [server1]

PLAY RECAP *******************************************************************************************************************************************
server1                    : ok=3    changed=1    unreachable=0    failed=0
server2                    : ok=3    changed=1    unreachable=0    failed=0
server3                    : ok=3    changed=1    unreachable=0    failed=0


[root@server2 ~]# cat /etc/hosts		##查看效果
127.0.0.1   localhost localhost.localdomain localhost4 localhost4.localdomain4
::1         localhost localhost.localdomain localhost6 localhost6.localdomain6
     172.25.26.3server3
     172.25.26.2server2
     172.25.26.1server1
还原环境
[devops@server1 ansible]$ cat inventory
[test]
server2

[db]
server3

[webservers:children]
test
db
添加用户,防止用户密码明文
[devops@server1 ansible]$ mkdir vars
[devops@server1 ansible]$ cd vars/
[devops@server1 vars]$ vim userlist.yml
---
  userlist:
    - user1: user1
      pass: westos
    - user2: user2
      pass: redhat
[devops@server1 vars]$ ansible-vault encrypt userlist.yml ##文件加密
[devops@server1 vars]$ cat userlist.yml
$ANSIBLE_VAULT;1.1;AES256
39666162623534363036633264613930303834623433646439646364393765396333376333636461
6564666462656264623061623435356432386239626235620a633137646363353464326165346232
63323161656334626563643135346631636339663531373433623239333338313666356363636566
6333366662333464340a633961643138336531656661623962376638363938383136643832643365
35323932656130643934656364363933623736663034623539376563613866333336383537326434
64376463303031663531626530663863373936616138633863663734623231613839383932626562
30313531333663353962663962343237616264373739626232363061373236326435353566616162
33333063633530303630656632333134346536333865353436323661646433613036373562383065
3532
[devops@server1 vars]$ ansible-vault view userlist.yml 	##输入密码查看文件
Vault password:
---
userlist:
  - user: user1
    pass: westos
  - user: user2
    pass: redhat

[devops@server1 ansible]$ vim adduser.yml
---
- hosts: all
  vars_files:
    - vars/userlist.yml
  tasks:
    - name: create users
      user:
        name: "{{ item.user }}"
        state: present
        password: "{{ item.pass }}"
      loop: "{{ userlist }}"
[devops@server1 ansible]$ ansible-playbook adduser.yml --ask-vault-pass
[devops@server1 ansible]$ ansible test -a 'cat /etc/shadow'	##查看是否生效

这时我们发现这里的密码时明文未加密
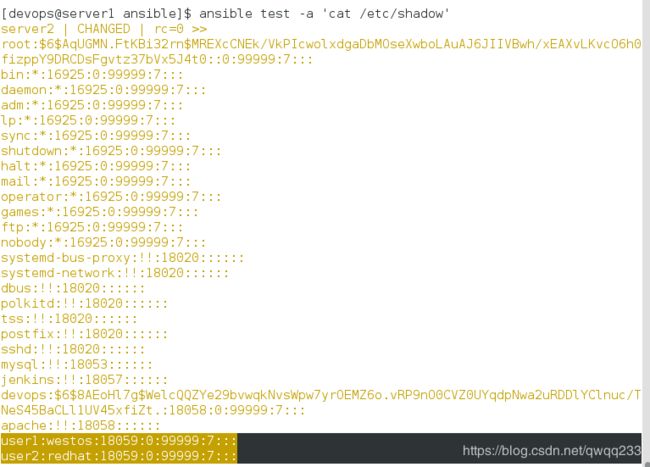
为了让密码加密存储,我们修改一下playbook的文件
[devops@server1 ansible]$ vim adduser.yml
---
- hosts: all
  vars_files:
    - vars/userlist.yml
  tasks:
    - name: create users
      user:
        name: "{{ item.user }}"
        state: present
        password: "{{ item.pass | password_hash('sha512','mysecretsalt')}}"	##加密存储
      loop: "{{ userlist }}"
执行之后,发现user1和user2的密码以sha512加密保存

解密
[devops@server1 vars]$  ansible-vault decrypt userlist.yml ##解密文件
Vault password:
Decryption successful
[devops@server1 vars]$ cat userlist.yml		##查看效果
---
userlist:
  - user: user1
    pass: westos
  - user: user2
    pass: redhat