Opengl ES系列学习--glBlendFunc API使用
本节我们来看一下glBlendFunc API的使用,对应的代码是OpenGL\learn\src\main\java\com\opengl\learn\GlBlendFuncRender.java文件。
所有实例均有提供源码,下载地址:Opengl ES Source Code。
API中文说明:GLES2.0中文API-glBlendFunc。
glBlendFunc API是用来混合的,上面的API说明已经介绍了很多了,作为入门学习,有几个基本知识我们需要知道:1、混合时,要画上去的为源颜色,先画上去的为目标颜色,执行两者的混合,比如调用glBlendFunc(GL_ONE, GL_ZERO),前面的GL_ONE表示取要画上去的,而后面的GL_ZERO指原来已经画上去的;2、必须在源颜色调用glDrawArrays、glDrawElements接口之前调用glEnable(GL_BLEND)开启混合,在绘制完成的最后调用glDisable(GL_BLEND)关闭混合,否则可能会出现源颜色不显示、透明背景黑色等等问题;3、使用混合绘制水印等透明效果时,需要特别注意,水印背景下面不能是白色,否则也会出现各种效果异常问题,本节最后我们有对此作实验;4、既然是混合,就必须是两层之间的混合,所以如果我们只调用一次glDrawArrays、glDrawElements接口绘制了一层,那根本不需要使用混合,这个我一开始也一直没搞清楚。
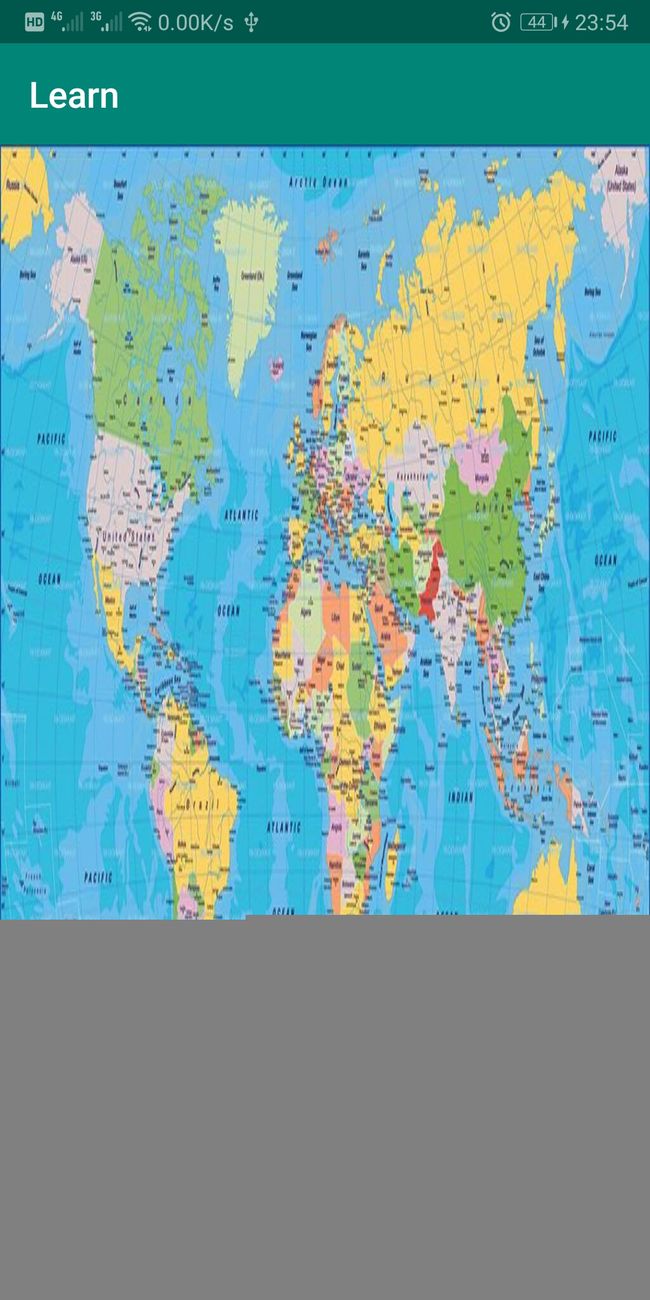
好了,本节来看一下我们要实现的效果,如下图:
大家看下,我们在最左下角绘制了一个水印。代码实现中因为绘制了两层,所以为了更好的解耦,我们把原来上一节GlActiveTextureRender中的内容封装成Map类,本节新增了Watermark.java类。Watermark.java类的所有代码如下:
package com.opengl.learn.blend;

import android.content.Context;
import android.util.Log;

import com.lime.common.ESShader;
import com.lime.common.TextureHelper;
import com.opengl.learn.R;

import java.nio.ByteBuffer;
import java.nio.ByteOrder;
import java.nio.FloatBuffer;
import java.nio.ShortBuffer;

import javax.microedition.khronos.opengles.GL10;

import static android.opengl.GLES20.GL_ARRAY_BUFFER;
import static android.opengl.GLES20.GL_BLEND;
import static android.opengl.GLES20.GL_ELEMENT_ARRAY_BUFFER;
import static android.opengl.GLES20.GL_FLOAT;
import static android.opengl.GLES20.GL_ONE;
import static android.opengl.GLES20.GL_STATIC_DRAW;
import static android.opengl.GLES20.GL_TEXTURE0;
import static android.opengl.GLES20.GL_TEXTURE_2D;
import static android.opengl.GLES20.GL_TRIANGLES;
import static android.opengl.GLES20.GL_UNSIGNED_SHORT;
import static android.opengl.GLES20.GL_ZERO;
import static android.opengl.GLES20.glActiveTexture;
import static android.opengl.GLES20.glBindBuffer;
import static android.opengl.GLES20.glBindTexture;
import static android.opengl.GLES20.glBlendFunc;
import static android.opengl.GLES20.glBufferData;
import static android.opengl.GLES20.glClearColor;
import static android.opengl.GLES20.glDisable;
import static android.opengl.GLES20.glDisableVertexAttribArray;
import static android.opengl.GLES20.glDrawElements;
import static android.opengl.GLES20.glEnable;
import static android.opengl.GLES20.glEnableVertexAttribArray;
import static android.opengl.GLES20.glGenBuffers;
import static android.opengl.GLES20.glGetAttribLocation;
import static android.opengl.GLES20.glGetUniformLocation;
import static android.opengl.GLES20.glUniform1i;
import static android.opengl.GLES20.glUseProgram;
import static android.opengl.GLES20.glVertexAttribPointer;
import static android.opengl.GLES20.glViewport;

public class Watermark {
    private static final String TAG = Watermark.class.getSimpleName();
    private static final int BYTES_PER_FLOAT = 4;
    private static final int BYTES_PER_SHORT = 2;
    private static final int POSITION_COMPONENT_SIZE = 3;
    private final float[] mVerticesData =
            {
                    -1.0f, 0.5f, 0.0f, // v0
                    -1.0f, -0.5f, 0.0f, // v1
                    1.0f, -0.5f, 0.0f,  // v2
                    1.0f, 0.5f, 0.0f,  // v3
            };

    private final short[] mIndicesData =
            {
                    0, 1, 2,
                    0, 2, 3,
            };

    private final float[] mTexturePosiontData =
            {
                    0.0f, 0.0f,
                    0.0f, 1.0f,
                    1.0f, 1.0f,
                    1.0f, 0.0f
            };

    private Context mContext;
    private int mBlendProgram;
    private int mWidth, mHeight;
    private FloatBuffer mVertices;
    private FloatBuffer mTextureBuffer;
    private ShortBuffer mIndices;
    private int aBlendPosition, aBlendTexturePosition, uBlendTextureUnit;

    private int[] mVBOIds = new int[4];
    private int mBlendTexture;

    public Watermark(Context context) {
        mContext = context;
        mVertices = ByteBuffer.allocateDirect(mVerticesData.length * BYTES_PER_FLOAT)
                .order(ByteOrder.nativeOrder()).asFloatBuffer();
        mVertices.put(mVerticesData).position(0);

        mTextureBuffer = ByteBuffer.allocateDirect(mTexturePosiontData.length * BYTES_PER_FLOAT)
                .order(ByteOrder.nativeOrder()).asFloatBuffer();
        mTextureBuffer.put(mTexturePosiontData).position(0);

        mIndices = ByteBuffer.allocateDirect(mIndicesData.length * BYTES_PER_SHORT)
                .order(ByteOrder.nativeOrder()).asShortBuffer();
        mIndices.put(mIndicesData).position(0);
    }

    public void onSurfaceCreated() {
        loadWatermark();
    }

    private void loadWatermark() {
        String vShaderStr = ESShader.readShader(mContext, "blendfunc_vertexShader.glsl");
        String fShaderStr = ESShader.readShader(mContext, "blendfunc_fragmentShader.glsl");

        // Load the shaders and get a linked program object
        mBlendProgram = ESShader.loadProgram(vShaderStr, fShaderStr);

        aBlendPosition = glGetAttribLocation(mBlendProgram, "aBlendPosition");
        aBlendTexturePosition = glGetAttribLocation(mBlendProgram, "aBlendTexturePosition");
        uBlendTextureUnit = glGetUniformLocation(mBlendProgram, "uBlendTextureUnit");

        glGenBuffers(3, mVBOIds, 0);
        Log.e(TAG, "0: " + mVBOIds[0] + ", 1: " + mVBOIds[1] + ", 2: " + mVBOIds[2]);

        // mVBOIds[0] - used to store vertex position
        mVertices.position(0);
        glBindBuffer(GL_ARRAY_BUFFER, mVBOIds[0]);
        glBufferData(GL_ARRAY_BUFFER, BYTES_PER_FLOAT * mVerticesData.length,
                mVertices, GL_STATIC_DRAW);

        mTextureBuffer.position(0);
        glBindBuffer(GL_ARRAY_BUFFER, mVBOIds[1]);
        glBufferData(GL_ARRAY_BUFFER, BYTES_PER_FLOAT * mTexturePosiontData.length,
                mTextureBuffer, GL_STATIC_DRAW);

        // mVBOIds[2] - used to store element indices
        mIndices.position(0);
        glBindBuffer(GL_ELEMENT_ARRAY_BUFFER, mVBOIds[2]);
        glBufferData(GL_ELEMENT_ARRAY_BUFFER, BYTES_PER_SHORT * mIndicesData.length, mIndices, GL_STATIC_DRAW);

        mBlendTexture = TextureHelper.loadTexture(mContext, R.mipmap.watermark);
    }

    public void onSurfaceChanged(GL10 gl, int width, int height) {
        mWidth = width;
        mHeight = height;
    }

    public void onDrawFrame() {
        glViewport(0, 0, 288, 144);
        glEnable(GL_BLEND);
        glBlendFunc(GL_ONE, GL_ZERO);
        drawWatermark();
        glDisable(GL_BLEND);
    }

    private void drawWatermark() {
        glUseProgram(mBlendProgram);
        glBindBuffer(GL_ARRAY_BUFFER, mVBOIds[0]);
        glEnableVertexAttribArray(aBlendPosition);
        glVertexAttribPointer(aBlendPosition, POSITION_COMPONENT_SIZE,
                GL_FLOAT, false, 0, 0);

        glBindBuffer(GL_ARRAY_BUFFER, mVBOIds[1]);
        glEnableVertexAttribArray(aBlendTexturePosition);
        glVertexAttribPointer(aBlendTexturePosition, 2,
                GL_FLOAT, false, 0, 0);

        glActiveTexture(GL_TEXTURE0);
        glBindTexture(GL_TEXTURE_2D, mBlendTexture);
        glUniform1i(mBlendTexture, 0);

        glBindBuffer(GL_ELEMENT_ARRAY_BUFFER, mVBOIds[2]);

        glDrawElements(GL_TRIANGLES, mIndicesData.length, GL_UNSIGNED_SHORT, 0);

        glDisableVertexAttribArray(aBlendPosition);
        glDisableVertexAttribArray(aBlendTexturePosition);

        glBindBuffer(GL_ARRAY_BUFFER, 0);
        glBindBuffer(GL_ELEMENT_ARRAY_BUFFER, 0);
    }
}
其中大部分都是和Map基本相同的,因为我们不需要color颜色了,所以把颜色相关的都删除掉,我们需要的是水印的顶点坐标、水印的纹理坐标、水印的索引属性,所以VBO的数组长度为3,drawWatermark方法中的逻辑和Map中也基本相同,都是使能顶点属性,然后赋值,绑定纹理uniform,最后绘制。
有一个不同的,就是在onDrawFrame方法中的第一行调用glViewport(0, 0, 288, 144)。我们最开始时候已经讲过,glViewport API可以指定我们当前绘制的目标窗口位置和大小,所以我们可以使用它来控制水印绘制的位置。另外,因为我们是两个对象,所以两个顶点着色器、两个片段着色器,分别组合生成两个Program对象,所以它们俩是不相干的,就是说完全可以取相同名字、相同类型的变量,也都可以正常使用,而且glActiveTexture(GL_TEXTURE0)激活纹理时,都是激活0号纹理,因为它们不在同一个Program中,所以不会冲突,也不会出错。
最后,我们把Map中顶点数组的值改为如下来看看效果:
    private final float[] mVerticesData =
            {
                    -1.0f, 0.5f, 0.0f, // v0
                    -1.0f, -0.5f, 0.0f, // v1
                    1.0f, -0.5f, 0.0f,  // v2
                    1.0f, 0.5f, 0.0f,  // v3
            };
对应的效果如下:
可以看到,左下角的水印没了,看不到了。
我们把顶点数组还原回去,把glBlendFunc混合接口注释掉:
    @Override
    public void onDrawFrame(GL10 gl) {
        glClear(GL_COLOR_BUFFER_BIT);
        mMap.onDrawFrame();
//        glEnable(GL_BLEND);
//        glBlendFunc(GL_ONE, GL_ONE);
        mWatermark.onDrawFrame();
//        glDisable(GL_BLEND);
    }
效果如下:
左下角的水印背景是黑色的,反正就是各种不对,所以我们必须要掌握要点,才能保证水印能正确的画出来。好了,本节的内容就讲这么多,大家可以下载代码自己去试。


