vue中使用tinymce富文本编辑器
怎么安装大家都知道吧,这里就不做介绍啦,不知道的可以直接去问度娘~
假装你们已经安装好了,那便开始吧。。。
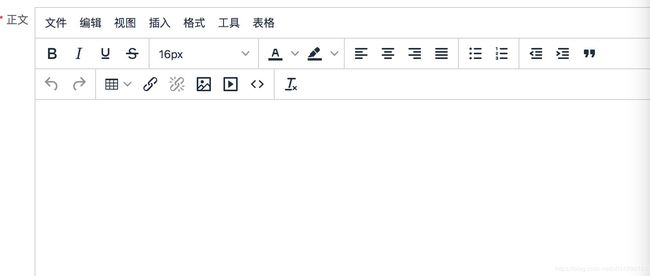
这里先看下效果吧
我目前遇到的需要注意的点有这么几个(后期遇到再加吧^_^)
- 字体默认是pt
- 上传视频(如何实现上传视频以及上传视频后再编辑器中无法播放的问题)
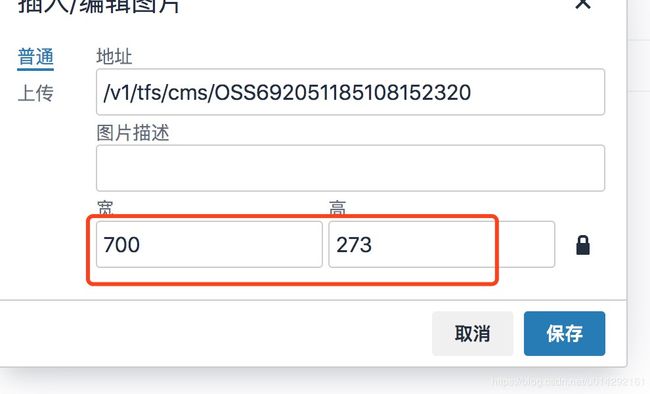
- 上传图片(有个需求是需要设置默认的上传图片宽度)
那就一个一个来说下吧
- 字体如果不设置的话默认单位是pt,可以按照下面的代码这样去设置
2.上传图片,原本上传图片的时候上传的是图片本身的大小,为了运营人员的方便,直接统一图片的宽度,然后让图片自适应,在网上找了好久,没有找到解决的答案,所以就翻了一下源码,可以修改下(tinymce/plugins/image/plugin.js)
找到 img.onload 这个方法,就可以开始修改了
//img.onload这个方法中原本是这样的,可以看出这里取出的就是图片本身的宽高
var width = parseIntAndGetMax(img.width, img.clientWidth);
var height = parseIntAndGetMax(img.height, img.clientHeight);

//我这里需要把图片宽度默认为700,然后让他的高度自适应,看下代码
var defaultWidth = 700
var autoHeight = img.height * defaultWidth / img.width
//这个parseIntAndGetMax可以不要,主要是为了取整
var width = parseIntAndGetMax(defaultWidth, defaultWidth);
var height = parseIntAndGetMax(autoHeight, autoHeight);
var dimensions = {
  width: width,
  height: height
};3.上传视频,直接上代码吧
按照上面的配置上传视频就可以完成了,现在还有一个问题就是在编辑器中,会把视频替换成一个img标签,不能播放,现在就来解决这个问题吧。答案也是需要修改源码,这是也是看别人的博客的,但是做了修改,修改(tinymce/plugins/media/plugin.js)
在这个方法中 placeHolderConverter 可以看到没有专门对video的处理,所以需要在这个方法中加一个对video的处理,看下代码
//需要对这个方法进行修改
var videoSource = ''; //搞一个全局变量,来存上传视频后返回的路径
var placeHolderConverter = function(editor){
  return function(nodes) {
   ...
   //新增这部分代码
   if (node.name === 'video' && Settings.hasLiveEmbeds(editor) && global$8.ceFalse)
    {
      if (node.attributes['map'] && node.attributes['map'].src) {
        videoSource = node.attributes['map'].src
      } else {
        for (var ii = 0; ii < node.attributes.length; ii++) {
          if (node.attributes[ii].name == "src") {
             videoSource = node.map.node.attributes[ii].value
          }
        }
      }
      if (node.firstChild && node.firstChild.value) {
        //我看别人的代码是这样的,这里的$(node.firstChild.value)是把一个字符串转化成一个dom对象,这里用到了jquery,但是我用的是vue,没有引入jquery,所以就换了下面一种方法
        var elel=node.firstChild && $(node.firstChild.value)
        videoSource = elel.attr('src')
        ....
        ....

        //这是我写的主要是为了获取上传视频后返回的路径(比较low),大家有好办法欢迎分享
        videoSource = node.firstChild.value.split('src="')[1].split('" />')[0]
      }
      node.replace(createPreviewIframeNode(editor, node));
    }
  }
}
接下来还有一个地方需要修改createPreviewIframeNode这个方法
var createPreviewIframeNode = function(editor, node) {
  ...
  previewNode.attr({
    src: node.attr('src'),
    allowfullscreen: node.attr('allowfullscreen'),
    style: node.attr('style'),
    class: node.attr('class'),
    width: node.attr('width'),
    height: node.attr('height'),
    frameborder: '0',
    src:videoSource || node.attr('src'),//这是增加的属性,videoSource是从第三步来的
    controls:'controls'//新增的
  });
  videoSource = "";//这个也是新增的
}
好了,到这里就ok了,就可以再编辑器中播放视频了,后期遇到采坑的再继续加吧~

