opencv-霍夫线变换
参考:
1、http://docs.opencv.org/3.3.0/ 官方文档api
2、http://docs.opencv.org/3.3.0/d6/d00/tutorial_py_root.html 官方英文教程
3、https://opencv-python-tutroals.readthedocs.io/en/latest/py_tutorials/py_tutorials.html
4、https://github.com/makelove/OpenCV-Python-Tutorial# 进阶教程
5、https://docs.opencv.org/3.3.0/index.html 官方英文教程
6、https://github.com/abidrahmank/OpenCV2-Python-Tutorials
7、https://www.learnopencv.com/
8、http://answers.opencv.org/questions/ OpenCV论坛
9、https://github.com/opencv/opencv 官方github
10、https://github.com/abidrahmank/OpenCV2-Python-Tutorials
注:安装的版本 opencv_python-3.3.0-cp36-cp36m-win_amd64.whl
参考:https://opencv-python-tutroals.readthedocs.io/en/latest/py_tutorials/py_tutorials.html
目标
- In this chapter,
-
- We will understand the concept of Hough Tranform.
- We will see how to use it detect lines in an image.
- We will see following functions: cv2.HoughLines(), cv2.HoughLinesP()
-
OpenCV中的霍夫线变换
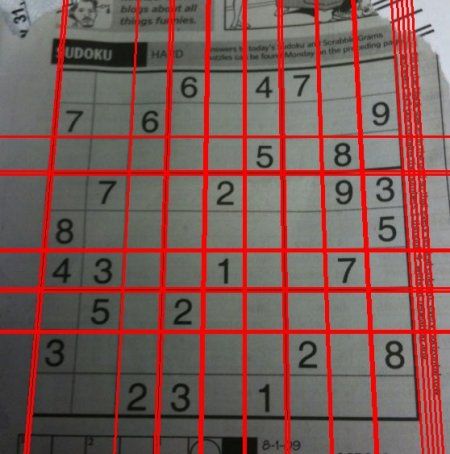
上面解释的一切都封装在OpenCV函数cv2.HoughLines()中。 它只返回一个数组 import cv2 import numpy as np img = cv2.imread('dave.jpg') gray = cv2.cvtColor(img,cv2.COLOR_BGR2GRAY) edges = cv2.Canny(gray,50,150,apertureSize = 3) lines = cv2.HoughLines(edges,1,np.pi/180,200) for rho,theta in lines[0]: a = np.cos(theta) b = np.sin(theta) x0 = a*rho y0 = b*rho x1 = int(x0 + 1000*(-b)) y1 = int(y0 + 1000*(a)) x2 = int(x0 - 1000*(-b)) y2 = int(y0 - 1000*(a)) cv2.line(img,(x1,y1),(x2,y2),(0,0,255),2) # cv2.imwrite('houghlines3.jpg',img) cv2.imshow('img',img) cv2.waitKey(0) cv2.destroyAllWindows()

概率霍夫变换
在hough变换中,你可以看到即使是一个有两个参数的行,它需要大量的计算。 概率霍夫变换是我们看到的霍夫变换的优化。 它不考虑所有要点,而只采取点的随机子集,并且足以用于线检测。 只是我们必须降低门槛。 参见下图,比较霍夫变换和概率霍夫变换在霍夫空间。 (图片提供:Franck Bettinger的主页
OpenCV实现基于 Robust Detection of Lines Using the Progressive Probabilistic Hough Transform by Matas, J. and Galambos, C. and Kittler, J.V..。使用的函数是cv2.HoughLinesP()。 它有两个新的论点。
- minLineLength - 最小线长。 短于此的线段被拒绝。
- maxLineGap - 线段之间允许的最大间隔,将它们视为单行。
最好的是,它直接返回两个端点。 在以前的情况下,你只得到线的参数,你必须找到所有的点。 在这里,一切都是直接和简单的。
import cv2
import numpy as np

img = cv2.imread('dave.jpg')
gray = cv2.cvtColor(img,cv2.COLOR_BGR2GRAY)
edges = cv2.Canny(gray,50,150,apertureSize = 3)
minLineLength = 100
maxLineGap = 10
lines = cv2.HoughLinesP(edges,1,np.pi/180,100,minLineLength,maxLineGap)
for x1,y1,x2,y2 in lines[0]:
    cv2.line(img,(x1,y1),(x2,y2),(0,255,0),2)

# cv2.imwrite('houghlines5.jpg',img)

cv2.imshow('img',img)
cv2.waitKey(0)
cv2.destroyAllWindows()
Additional Resources
- Hough Transform on Wikipedia