FasterRunner安装教程(Windows版)
github拉代码
如果安装了git,则用git命令拉取:
git clone [email protected]:yinquanwang/FasterRunner.git
git clone [email protected]:yinquanwang/FasterWeb.git
如果本地没有安装git,可以直接页面上下载zip包解压:
后端:https://github.com/HttpRunner/FasterRunner
前端:https://github.com/HttpRunner/FasterWeb

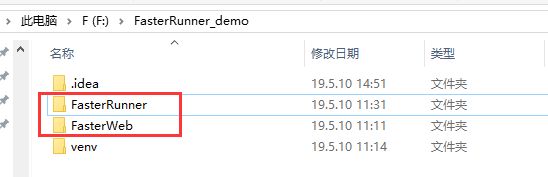
分2个文件夹存放
前端部署:
1、安装node.js
https://nodejs.org/dist/v12.2.0/node-v12.2.0-x64.msi
2、修改FasterWeb/config 下的index.js文件,ip修改为0.0.0.0,以便可以远程访问

3、修改FasterWeb\src\restful下的api.js文件,ip修改为服务器的ip(本地安装就用自己电脑的ip)

4、cmd进入FasterWeb目录
执行 npm install
执行 npm start
成功的话出现如下,保持窗口不要关闭:

后端部署:
1、安装项目依赖 :
修改FasterRunner目录下的equirements.txt文件,用下面的内容覆盖
Django == 2.1.3
django-cors-headers == 2.4.0
djangorestframework == 3.8.2
HttpRunner == 1.5.15
mysqlclient == 1.4.2.post1
beautifulsoup4 == 4.6.3 t
ornado == 5.1.1
django-celery == 3.2.2
然后在FasterRunner目录下执行:
pip install -r requirements.txt
安装过程可能遇到的问题:
如果pip安装慢的话,参考文末修改国内安装源
如果是64位系统安装了32位的Python,安装mysqlclient会报错,参考文章解决:https://blog.csdn.net/songlh1234/article/details/82664604
2、创建对应的数据库,并修改配置
在mysql数据库中创建一个库fastrunner
修改 FasterRunner/settings.py
DATABASES = {

'default': { 'ENGINE': 'django.db.backends.mysql',

'NAME': 'fastrunner', # 数据库名

'USER': 'fastrunner', # 数据库登录名

'PASSWORD': 'fastrunner', # 数据库登录密码

'HOST': '127.0.0.1', # 数据库所在服务器ip地址

'PORT': '3306', # 监听端口 默认3306即可 }

}
3、FasterRunner目录下创建logs文件夹
4、cmd进入FasterRunner目录,执行Django数据库迁移脚本
python manage.py makemigrations fastrunner fastuser # 生成数据库迁移脚本
python manage.py migrate # 执行数据库迁移脚本
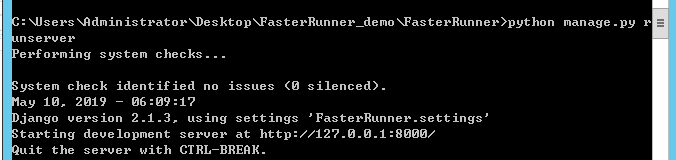
5、启动django服务(开启远程访问)注意这里是8000,不是8080
python manage.py runserver 0.0.0.0:8000
出现如下就是成功了,保持窗口不要关闭
部署成功
本地登录地址:http://127.0.0.1:8080/fastrunner/login
也可以远程访问:http://服务器IP:8080/fastrunner/login
注册并登陆账号

附录:
修改国内源:
1、 在windows文件管理器路径栏,输入 %APPDATA%
2、 新建pip文件夹,然后到pip文件夹里面新建pip.ini文件
3、 pip.ini文件内容为:
[global]
timeout= 6000
index-url= http://pypi.douban.com/simple
trusted-host= pypi.douban.com
[list]
format=columns
4、重新打开cmd窗口就生效了