课程设计需要实现上传文件模块,本来ASP.NET是有内置的控件,但是ASP.NET MVC没有,所以就有两种方法:自定义和采用第三方插件。由于时间的关系,故采用第三方插件:uploadify。
uploadify的使用必须下载相应的文件,下载地址:http://www.uploadify.com/download/。
先是视图:
<asp:Content ID="Content3" ContentPlaceHolderID="head" runat="server">
    <script src="/Scripts/swfobject.js" type="text/javascript">script>
    <script src="/Scripts/jquery-1.4.1.min.js" type="text/javascript">script>
    <script src="/Scripts/jquery.uploadify.v2.1.0.min.js" type="text/javascript">script>
    <link href="/Content/uploadify.css" rel="stylesheet" type="text/css" />

    <style type="text/css">
        .SuccessText
        {
            color: Red;
            font-weight: bold;
        }

        .FaileText
        {
            color: Green;
            font-weight: bold;
        }
    style>

    <script type="text/javascript">
        $(function () {
            $('#fileInput1').uploadify({
                'uploader': '/Content/uploadify.swf',
                'script': '/Home/LoadFile',
                'folder': '/UploadFiles',
                'cancelImg': '/Content/cancel.png',
                'sizeLimit': 1024 * 1024 * 4, //4M
                'multi': true,
                'onComplete': Complete
            });

        });
        function Complete(event, queueID, fileObj, response, data) {
            if (response != "") {
                showInfo("成功上传" + response, true);
            }
            else {
                showInfo("文件上传出错!", false);
            }
        }
        //显示提示信息,SuccessText为绿色,即上传成功;FalseText为红色,即上传失败        function showInfo(msg, type) {
            var msgClass = type == true ? "SuccessText" : "FaileText";
            $("#result").removeClass();
            $("#result").addClass(msgClass);
            $("#result").html(msg);
        }
        //如果点击‘导入文件’时选择文件为空,则提示
        function checkLoad() {
            if ($.trim($('#fileInput1Queue').html()) == "") {
                alert('请先选择要上传的文件!');
                return false;
            }
            return true;
        }
    script>
asp:Content>

<asp:Content ID="Content2" ContentPlaceHolderID="MainContent" runat="server">

    <div>
        <p>
            <input id="fileInput1" name="fileInput1" type="file" />
        p>
        <p style="margin-top: 5px; font-size: 14px; font-weight: bold;">
            <a href="javascript:if(checkLoad()){$('#fileInput1').uploadifySettings('scriptData',{'name':$('#test').val()});$('#fileInput1').uploadifyUpload();}">上传a>
        p>
        <p style="margin-top: 5px; font-size: 14px; font-weight: bold;"><span id="result">span>p>
    div>
asp:Content>
考虑到其他人的工作是基于ASP.NET引擎的,所以我的视图也是采用该视图引擎。
视图中最重要的部分就是javascript代码部分:
uploader:就是uploadify.swf文件的相对路径,所谓的swf文件就是一个带有文字("浏览")的按钮,该按钮点开就是一个文件对话框,供用户选择要上传的文件。
script:后台处理程序的相对路径,也就是我们用户处理上传文件数据的Action。
folder:上传文件存放的目录。
cancelImg:该图片点击可以取消上传。
sizeLimit:上传文件的大小限制。
multi:设置为true时可以同时上传多个文件。
onComplete:文件上传完后的触发事件,一共有5个参数,重点在于后面两个:response为后台处理程序返回的值,如果为空,说明文件上传失败。data有两个属性:fileCount表示剩余没有上传完成的文件的个数,speed表示文件上传的平均速率(kb/s)。我们这里的onComplete函数很简单,就是简单的判断文件是否上传成功。
还有两个很重要的属性:fileExt和fileDesc。它们必须一起使用,并且值是一样的,因为它们规定的就是选择上传的文件类型。fileExt设置可以选择的文件类型,其实就是文件的扩展名。fileDesc用来设置选择文件对话框中的提示文本,也就是我们一般在选择文件的时候,都会有一个文件类型,而fileDesc能人为规定该文件类型是什么。这里之所以没有用到这两个属性,是因为我默认选择所有文件,但如果模块只要求上传图片格式,那么我们就可以通过这两个属性达到文件过滤了。
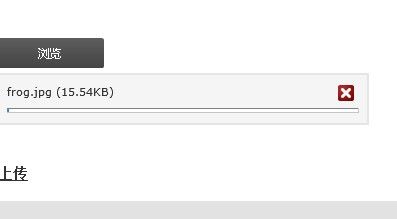
效果图:
值得注意的是,如果出现这样的界面:
说明swfobject.js没有添加正确。
如果是这样:
则是jquery-1.4.1.min.js或者jquery.uploadify.v2.1.0.min.js没有添加正确。这种情况可以选择文件,但是无法上传,之前出现这样的错误,导致我以为是我的浏览器无法上传文件,以致走了很多弯路,搞了很多配置,其实就是没有正确导入相应的js文件。
接着就是Action:
       [HttpPost]
        public ContentResult LoadFile(HttpPostedFileBase FileData, string folder, string name)
        {
            string result = "";
            if (null != FileData)
            {
                try
                {
                    result = Path.GetFileName(FileData.FileName);//获得文件名
                    string extension = Path.GetExtension(FileData.FileName);//获得文件扩展名
                    string saveName = FileData.FileName + extension;//实际保存文件名
                    saveFile(FileData, folder, saveName);//保存文件
                }
                catch
                {
                    result = "";
                }
            }
            return Content(result);
        }

        [NonAction]
        private void saveFile(HttpPostedFileBase postedFile, string filepath, string saveName)
        {
            string phyPath = Request.MapPath("~" + filepath + "/");
            if (!Directory.Exists(phyPath))
            {
                Directory.CreateDirectory(phyPath);
            }
            try
            {
                postedFile.SaveAs(phyPath + saveName);
            }
            catch (Exception e)
            {
                throw new ApplicationException(e.Message);

            }
        }
这部分的内容很简单,就是从FileData中取出文件名和扩展名,然后保存起来而已。由于涉及到文件I/O,所以需要添加命名空间System.IO。
大概就是这样,具体的大家还是得去看官方文档。


