文档信息
目 的:搭建一套完整的OpenLDAP系统,实现账号的统一管理。
1:OpenLDAP服务端的搭建
2:PhpLDAPAdmin的搭建
3:OpenLDAP的打开日志信息
4:OpenLDAP与migrationtools实现导入系统账号的相关信息
5:OpenLDAP客户端的配置
6:OpenLDAP与SSH
7:OpenLDAP限制用户登录系统
8:OpenLDAP强制用户一登录系统更改密码
9:OpenLDAP与系统账号结合Samba
10:OpenLDAP的主从
11:OpenLDAP的双主
操作系统:CentOS release 6.7
基础的环境准备:
关闭防火墙:/etc/init.d/iptables stop && chkconfig iptables off
关闭NetworkManager:/etc/init.d/NetworkManager stop && chkconfig NetworkManager off
SeLinux设为disabled:getenforce 是否为Disabled,若不是,则修改:
1:临时的生效 setenforce 0,再getenforce的时候为permissive
2:修改配置文件,然后重启 vim /etc/sysconfig/selinux 把SELINUX=disabled
yum源仓库的配置:
1)mkdir /yum
2)vim /etc/yum.repos.d/ll.repo
[local]
name = local
baseurl = file:///yum
gpgcheck = 0
enabled = 1
3)挂载 mount /mnt/hgfs/软件/CentOS-6.7-x86_64-bin-DVD1to2/CentOS-6.7-x86_64-bin-DVD1.iso /yum -o loop
4)yum clean all 清除缓存
5)yum makecache 创建缓存
一:OpenLDAP服务器的搭建
1)安装OpenLDAP的相关
yum -y install openldap openldap-servers openldap-clients openldap-devel compat-openldap 其中compat-openldap这个包与主从有很大的关系
安装完后,可以看到自动创建了ldap用户:

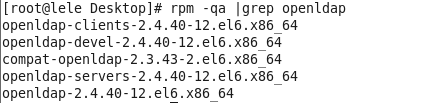
可以通过rpm -qa |grep openldap查看安装了哪些包:
2)OpenLDAP的相关配置文件信息
/etc/openldap/slapd.conf:OpenLDAP的主配置文件,记录根域信息,管理员名称,密码,日志,权限等
/etc/openldap/slapd.d/*:这下面是/etc/openldap/slapd.conf配置信息生成的文件,每修改一次配置信息,这里的东西就要重新生成
/etc/openldap/schema/*:OpenLDAP的schema存放的地方
/var/lib/ldap/*:OpenLDAP的数据文件
/usr/share/openldap-servers/slapd.conf.obsolete 模板配置文件
/usr/share/openldap-servers/DB_CONFIG.example 模板数据库配置文件
OpenLDAP监听的端口:
默认监听端口:389(明文数据传输)
加密监听端口:636(密文数据传输)
3)初始化OpenLDAP的配置
cp /usr/share/openldap-servers/DB_CONFIG.example /var/lib/ldap/DB_CONFIG
cp /usr/share/openldap-servers/slapd.conf.obsolete /etc/openldap/slapd.conf
4)修改配置文件
首先,slappasswd生成密文密码123456,拷贝这个到/etc/openldap/slapd.conf里

这里的rootpw必须顶格写,而且与后面的密码文件用
Tab键隔开

修改对应的

5)重新生成配置文件信息文件
先检测/etc/openldap/slapd.conf是否有错误:slaptest -f /etc/openldap/slapd.conf

这里报错是因为在第三步后没有重新生成配置文件,启动slapd。而是直接修改配置文件去了。先启动slapd:/etc/init.d/slapd restart

这里又报错,这是因为没有给/var/lib/ldap授权,授权后chown -R ldap.ldap /var/lib/ldap/,再重启slapd,/etc/init.d/slapd restart,可以看到成功的

接着回到检测/etc/openldap/slapd.conf是否有错误:slaptest -f /etc/openldap/slapd.conf

可以看到没问题,然后重新生成配置文件的配置信息:
先删除最先的配置文件生成的信息:rm -rf /etc/openldap/slapd.d/*
重新生成:slaptest -f /etc/openldap/slapd.conf -F /etc/openldap/slapd.d/
查看是否生成的是自己修改的配置文件信息:cat /etc/openldap/slapd.d/cn\=config/olcDatabase\=\{2\}bdb.ldif

授权:chown -R ldap.ldap /etc/openldap/slapd.d/
重启:/etc/init.d/slapd restart

到这里为止,OpenLDAP服务端基本上完成了,我们可以通过PhpLDAPAdmin来登录看一下,那先得安装PhpLDAPAdmin
二:PhpLDAPAdmin的搭建
1)安装EPEL仓库,镜像里没有PhpLDAPAdmin这个的安装包,所以得安装EPEL仓库
rpm -ivh http://mirrors.ukfast.co.uk/sites/dl.fedoraproject.org/pub/epel/6/x86_64/epel-release-6-8.noarch.rpm
yum clean all
yum makecache
2)安装PhpLDAPAdmin
yum install -y phpldapadmin
3)修改phpldapadmin的配置文件,访问控制权限vim /etc/httpd/conf.d/phpldapadmin.conf,允许谁访问

4)修改配置文件:vim /etc/phpldapadmin/config.php
$servers->setValue('login','attr','dn'); 这一行的注释去掉
//$servers->setValue('login','attr','uid'); 这一行注释掉

5)重启httpd服务/etc/init.d/httpd restart
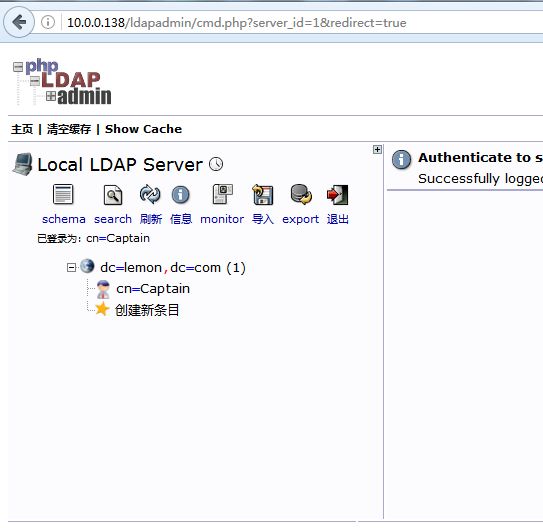
6)在浏览器输入OpenLDAP服务端的IP 10.0.0.138/ldapadmin
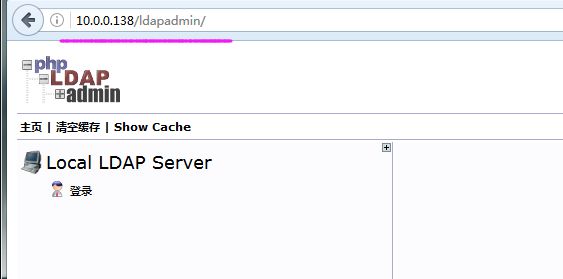
7)登录,输入管理员的DN,也就是配置文件里配置的

8)认证,报错
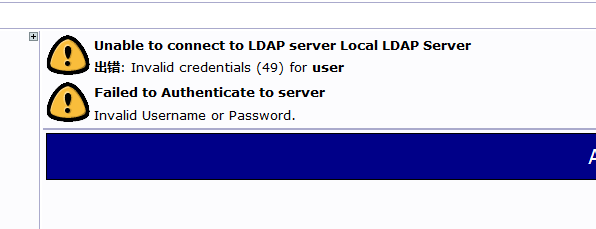
这是因为在第一步搭建OpenLDAP服务端的时候,并没有把管理员的账号信息导入,编辑root.ldif,然后导入
dn: dc=lemon,dc=com
objectclass: dcObject
objectclass: organization
o: Yunzhi,Inc.
dc: lemon
dn: cn=Captain,dc=lemon,dc=com
objectclass: organizationalRole
cn: Captain
这里得注意每一个属性:
后必须有空格,但是值的后面不能有任何空格
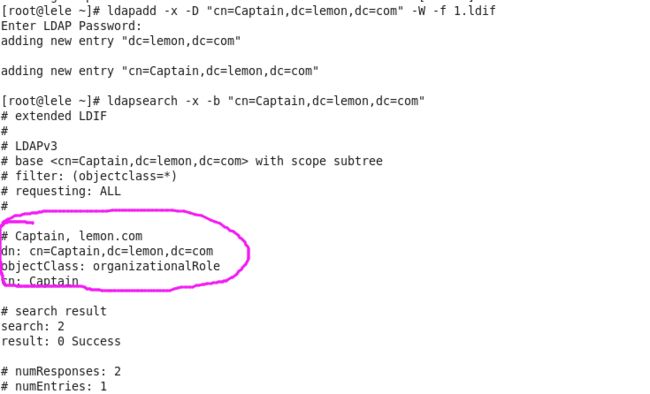
然后导入:ldapadd -x -D "cn=Captain,dc=lemon,dc=com" -W -f root.ldif

然后再通过浏览器去访问的话:
也可以通过命令行查询:
ldapsearch -x -b "cn=Captain,dc=lemon,dc=com"
到这里,PhpLDAPAdmin搭建完了,接下来,咱们得把
日志打开,这样的话好排错,嘿嘿嘿
三:OpenLDAP的打开日志信息
1:现在配置文件里加上日志行 ,这里的日志级别有很多种,-1的话会记录很多日志信息
vim /etc/openldap/slapd.conf 加上
loglevel -1

这里修改了配置文件,所有得重新生成配置文件的信息
rm -rf /etc/openldap/slapd.d/*
slaptest -f /etc/openldap/slapd.conf -F /etc/openldap/slapd.d/
chown -R ldap.ldap /etc/openldap/slapd.d/
2:在 vim /etc/rsyslog.conf加上
local4.* /var/log/slapd/slapd.log

然后重启/etc/init.d/rsyslog restart
3:创建日志文件目录,授权
mkdir /var/log/slapd
chmod 755 /var/log/slapd/
chown ldap.ldap /var/log/slapd/
4:重启slapd服务,/etc/init.d/slapd restart
5:就可以看到日志信息了cat /var/log/slapd/slapd.log
四
:OpenLDAP与migrationtools实现导入系统账号的相关信息
1:安装migrationtools
yum -y install migrationtools
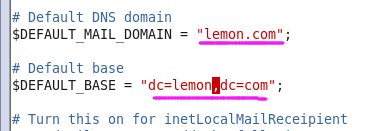
2:修改migrationtools的配置文件,在/usr/share/migrationtools/这个目录下有很多migrationtools的文件
vim /usr/share/migrationtools/migrate_common.ph 修改以下的两个地方
3:生成基础的数据文件,可以自己修改这个生成的base.ldif文件,把不需要的去掉
/usr/share/migrationtools/migrate_base.pl > base.ldif

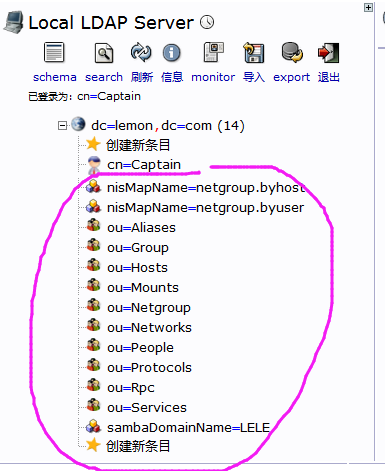
4:把base.ldif导入OpenLDAP
ldapadd -x -D "cn=Captain,dc=lemon,dc=com" -W -f base.ldif

这里会报错,我们
可以通过-c参数强制加入

导入之后,通过PhpLdapAdmin可以看到已经导入进来了:
5:把系统的用户生成ldif文件
cd /usr/share/migrationtools
./migrate_passwd.pl /etc/passwd passwd.ldif
./migrate_group.pl /etc/group group.ldif

可以看到生成的文件,然后根据自己需要修改这两个ldif文件:
passwd.ldif只留一个test1测试用户:

group.ldif留对应的test1:

把用户导入进去:
ldapadd -x -D "cn=Captain,dc=lemon,dc=com" -W -f passwd.ldif

把组导进去:
ldapadd -x -D "cn=Captain,dc=lemon,dc=com" -W -f group.ldif

然后就可以看到:

在这里就已经完成把系统的账号属性导入了OpenLDAP,然后就通过添加OpenLDAP用户,来进行验证,所以得先做好客户端的设置
五:OpenLDAP客户端的配置
1:停掉sssd服务 service sssd stop && chkconfig sssd off
2:安装nslcd服务 yum install nss-pam-ldapd
3:修改vim /etc/nslcd.conf这个配置文件

4:修改vim /etc/pam_ldap.conf


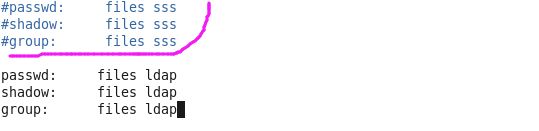
5: vim /etc/pam.d/system-auth 修改,把sss行的注释掉,改成ldap的

6:vim /etc/nsswitch.conf 修改nsswitch.conf配置文件,修改后,默认登录的用户通过本地配置文件进行查找并匹配。当匹配不到用户信息时,会通过后端配置的LDAP认证服务进行匹配
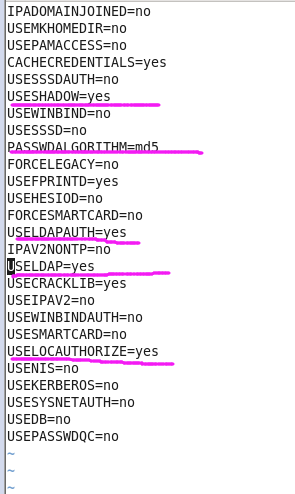
7:vim /etc/sysconfig/authconfig 确保标记的已打开为yes
USESHADOW=yes 启用密码验证
USELDAPAUTH=yes 启用OpenLDAP验证
USELOCAUTHORIZE=yes 启用本地验证
USELDAP=yes 启用LDAP认证协议
8:重启nslcd服务
/etc/init.d/nslcd restart
9:验证,先通过OpenLDAP增加一个用户,在test1的基础上,复制一个test2的条目
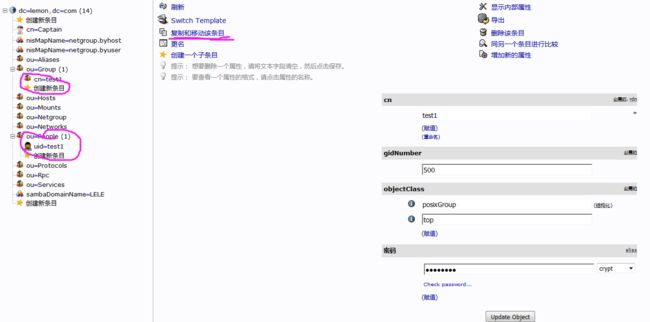

后面的根据自己的修改
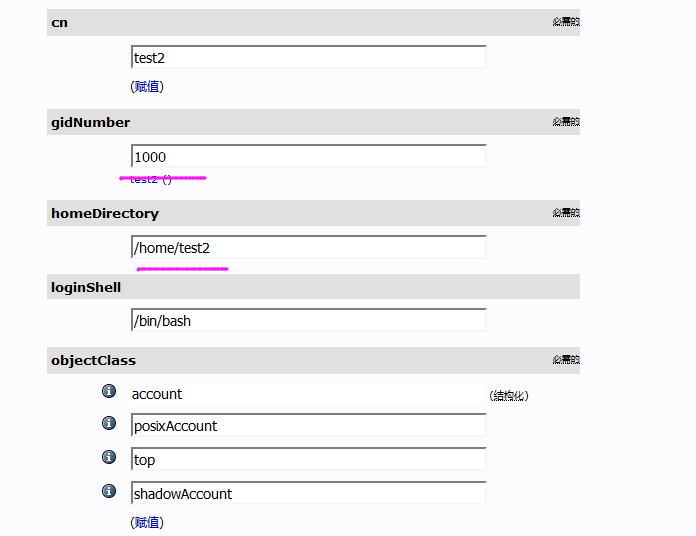
可以看到已经成功的添加了test2的用户,这是OpenLDAP添加的,在本地是没有的,用cat /etc/passwd 看是没有test2用户的
测试:su - test2

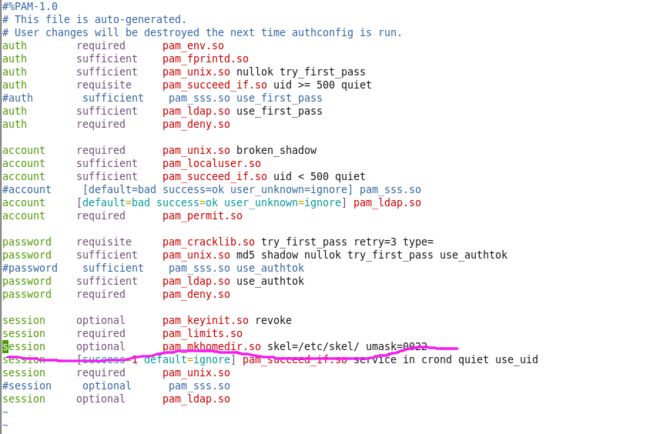
在/etc/pam.d/system-auth配置文件里添加这一行:
session optional pam_mkhomedir.so skel=/etc/skel/ umask=0022
重启 /etc/init.d/nslcd restart
在进行测试:就可以了

查看系统用户列表:
服务端查询:
ldapsearch -x -b "ou=People,dc=lemon,dc=com" |grep dn
客户端查询:
ldapsearch -H ldap://10.0.0.138 -x -b "ou=People,dc=lemon,dc=com" |grep dn

查询单个用户:
ldapsearch -x -b "uid=test1,ou=People,dc=lemon,dc=com" |grep dn

客户端的配置到这里ok啦。有账号肯定要能通过ssh登录系统
六:OpenLDAP与SSH
1:vim /etc/ssh/sshd_config

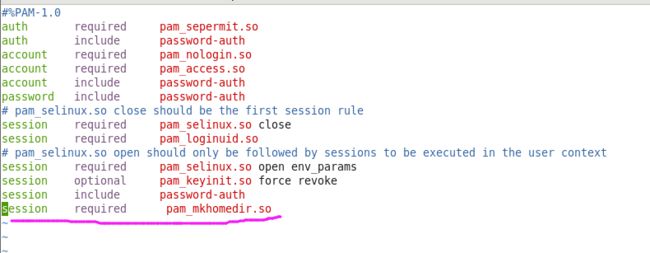
2:vim /etc/pam.d/sshd 用于第一次登陆的账户自动创建家目录
3:vim /etc/pam.d/password-auth

4:重启sshd
七:OpenLDAP限制用户登录系统
在账号中,不能让每个用户都能登录系统,所以要限制用户登录
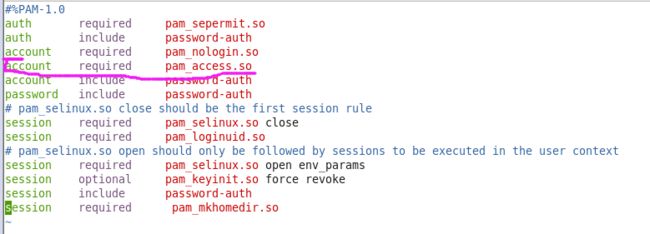
1:vim /etc/pam.d/sshd 在这里加上pam_access.so模块
2:vim /etc/security/access.conf 这里限制test2用户ssh登录系统

测试:可以看到就只有test2登录不上

八:OpenLDAP强制用户一登录系统更改密码
1:修改配置文件
在前面打开注释
moduleload ppolicy.la
modulepath /usr/lib/openldap
modulepath /usr/lib64/openldap
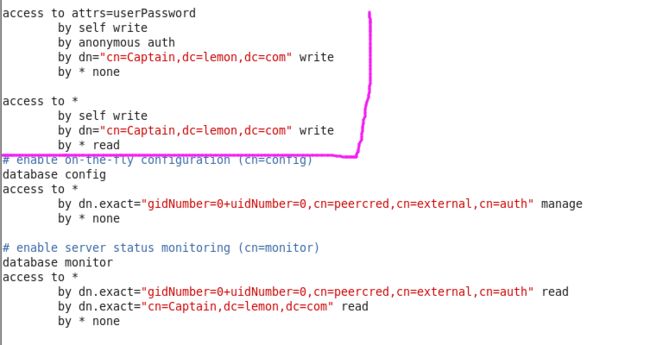
还要在database config前面加上这两段
access to attrs=userPassword
by self write
by anonymous auth
by dn="cn=Captain,dc=lemon,dc=com" write
by * none
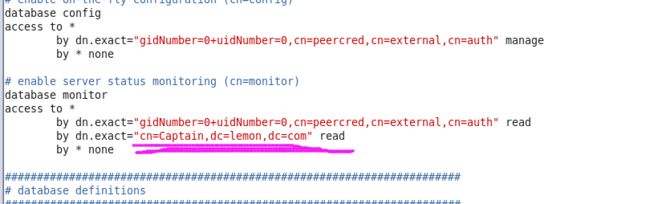
access to *
by self write
by dn="cn=Captain,dc=lemon,dc=com" write
by * read
在文件的末尾添加:
overlay ppolicy
ppolicy_default cn=Captain,ou=pwpolicies,dc=lemon,dc=com

2:重新生成配置文件数据库:
[root@lele openldap]# vim /etc/openldap/slapd.conf
[root@lele openldap]# rm -rf /etc/openldap/slapd.d/*
[root@lele openldap]# slaptest -f /etc/openldap/slapd.conf -F /etc/openldap/slapd.d
config file testing succeeded
[root@lele openldap]# chown -R ldap.ldap /etc/openldap/slapd.d/
[root@lele openldap]# /etc/init.d/slapd restart
Stopping slapd: [ OK ]
Starting slapd: [ OK ]
可以通过配置文件的数据信息看到ppolicy模块已经加进来了
cat /etc/openldap/slapd.d/cn\=config/cn\=module\{0\}.ldif

3:编辑
cat 1.ldif
dn: ou=pwpolicies,dc=lemon,dc=com
objectClass: organizationalUnit
ou: pwpolicies
4:ldapadd -x -D "cn=Captain,dc=lemon,dc=com" -W -f 1.ldif
添加进去

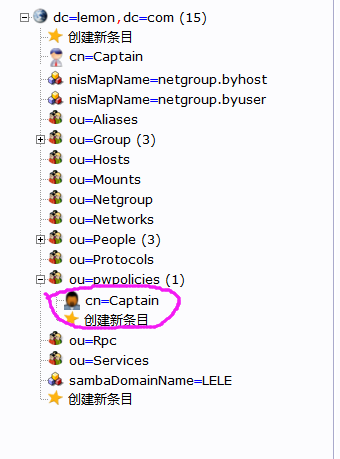
可以在PhpLdapAdmin上看到:

5:
添加cn=Captain,ou=pwpolicies,dc=lemon,dc=com这个的一些属性值
[root@ll ~]# cat 2.ldif

dn: cn=Captain,ou=pwpolicies,dc=lemon,dc=com
cn: Captain
objectClass: pwdPolicy
objectClass: person
pwdAllowUserChange: TRUE
pwdAttribute: userPassword
pwdExpireWarning: 259200
pwdFailureCountInterval: 0
pwdGraceAuthNLimit: 5
pwdInHistory: 5
pwdLockout: TRUE
pwdLockoutDuration: 300
pwdMaxAge: 2592000
pwdMaxFailure: 5
pwdMinAge: 0
pwdMinLength: 8
pwdMustChange: TRUE
pwdSafeModify: TRUE
sn: dummy value
把属性值添加进去

在PhpLdapAdmin可以看到:
6:在vim /etc/pam_ldap.conf中的末尾添加:使得客户端能识别服务端的密码策略
pam_password md5
bind_policy soft
pam_lookup_policy yes
pam_password clear_remove_old
7:重启nslcd
/etc/init.d/nslcd restart
8:测试
修改用户的属性,用test3做测试
[root@ll ~]# cat modify.ldif
dn: uid=test3,ou=people,dc=lemon,dc=com
changetype: modify
replace: pwdReset
pwdReset: TRUE
ldapmodify -x -D "cn=Captain,dc=le,dc=com" -W -f modify.ldif 导入

ldapwhoami -x -D uid=test3,ou=people,dc=lemon,dc=com -W -e ppolicy -v 查看test3用户的策略信息

这里显示输入test3 的原始密码,然后输入新修改的密码
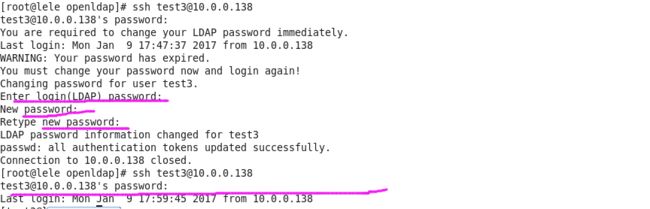
当修改完后,就没有必须改变密码的那一句话了

这里可以啦
九:OpenLDAP与系统账号结合Samba
默认的Samba服务器支持本地系统用户(smbpasswd添加后)访问Samba资源,不支持OpenLDAP服务器账号访问Samba共享资源,配置完后,OpenLDAP每新增一个用户,就自动支持Samba,就可以用这个账号直接访问Samba,不需要存在于本地用户,不用smbpasswd用户
1:安装samba
yum -y install samba
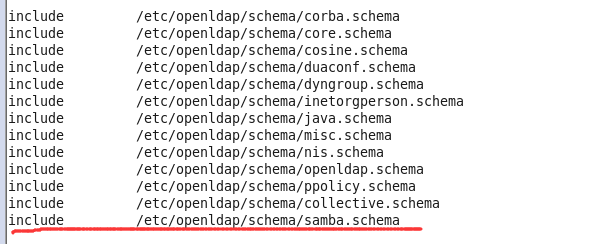
2:把Samba.schema文件拷贝到LDAP的schema目录下,把原来的覆盖掉
cp /usr/share/doc/samba-3.6.23/LDAP/samba.schema /etc/openldap/schema/
3:修改配置文件vim /etc/openldap/slapd.conf
在include的地方,加上Samba的schema
3:修改了配置文件,就有重新生成配置文件数据
rm -rf /etc/openldap/slapd.d/*
slaptest -f /etc/openldap/slapd.conf -F /etc/openldap/slapd.d/
config file testing succeeded
chown -R ldap.ldap /etc/openldap/slapd.d/
/etc/init.d/slapd restart
4:修改Samba的配置文件
添加:
security = user
passdb backend = ldapsam:ldap://10.0.0.138
ldap suffix = "dc=lemon,dc=com"
ldap group suffix = "cn=group"
ldap user suffix = "ou=people"
ldap admin dn = "cn=Captain,dc=lemon,dc=com"
ldap delete dn = no
pam password change = yes
ldap passwd sync = yes
ldap ssl = no
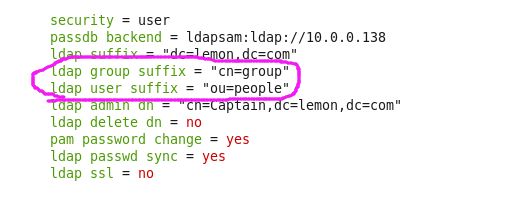
对应这里的

在最后的时候添加共享的文件:
[public]
comment = Public Stuff
path = /tmp/lile
public = yes
writable = yes
printable = no
5:创建共享文件夹,并且授权
mkdir /tmp/lile
chmod 777 /tmp/lile/
6:把OpenLDAP的密码传给Samba,
smbpasswd -w 123456 这里的密码是OpenLDAP的管理员密码

若不加,会报错:

7:重启smb
/etc/init.d/smb restart
/etc/init.d/nmb restart
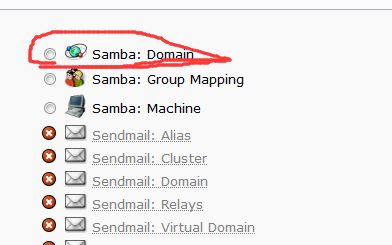
8: Samba开通之后,可以看到这里的开关也打开了
9:测试
先把系统用户test1用smbpasswd -a test1 加到Samba的用户下,就可以看到:
test1用户下多了Samba的特性,原来是没有的
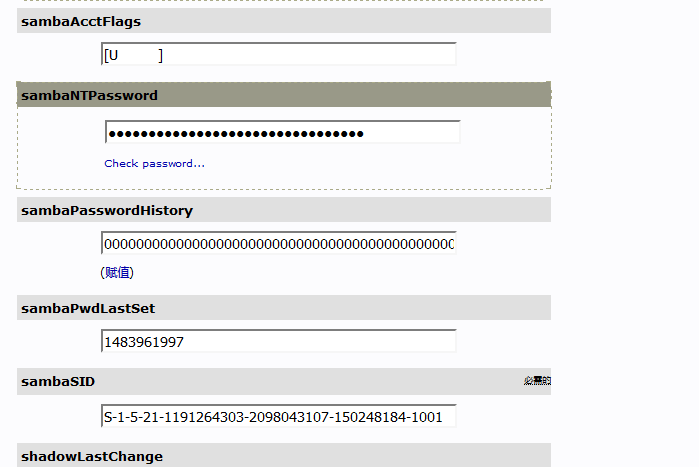
然后基于test1,在PhpLdapAdmin添加test2用户,不用smbpasswd,就只是OpenLDAP用户,复制的时候一定要重新改一下这里的密码,要不然登不进,


然后,就可以用windos去访问了,这里有一个概念就是
OpenLDAP添加了的用户,不要再用smbpasswd去添加了,可以直接登录Samba
十:OpenLDAP的主从
1:做主从和双主的时候,一定要确认安装了
compat-openldap这个包
2:
在主上的配置文件 10.0.0.138:
备份原来的配置文件:cp /etc/openldap/slapd.conf /etc/openldap/slapd.bak
先停掉服务 /etc/init.d/slapd stop
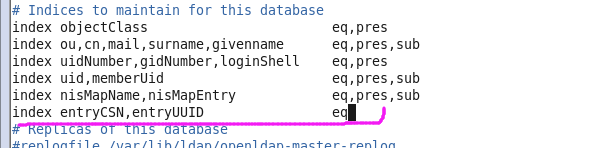
vim /etc/openldap/slapd.conf 修改配置文件
添加 index entryCSN,entryUUID eq
这里的注释去掉:


在文件的最后添加:
overlay syncprov 后端工作再overlay模式
syncprov-checkpoint 100 10 当满足修改100个条目或者10分钟的条件时主动以推的方式执行
syncprov-sessionlog 100 会话日志条目的最大数量

然后重新生成配置文件的数据文件:
rm -rf /etc/openldap/slapd.d/*
slaptest -f /etc/openldap/slapd.conf -F /etc/openldap/slapd.d/
chown -R ldap.ldap /etc/openldap/slapd.conf
chown -R ldap.ldap /etc/openldap/slapd.d
/etc/init.d/slapd restart
3:
导出主的数据文件 ldapsearch -x -b 'dc=lemon,dc=com' > root.ldif,拷贝到从上
scp scp root.ldif 10.0.0.140:~/
4:
把主的配置文件slapd.conf 拷贝到从10.0.0.140上 用scp /etc/openldap/slapd.conf 10.0.0.140:~/
5:从上从主上拷贝了配置文件,
去掉:
overlay syncprov
syncprov-checkpoint 100 10
syncprov-sessionlog 100
然后再加上

syncrepl rid=003
provider=ldap://10.0.0.138:389/
type=refreshOnly
retry="60 10 600 +" 尝试时间
interval=00:00:00:10 设置同步更新时间(日:时:分:秒)
searchbase="dc=lemon,dc=com"
scope=sub 匹配根域所有条目
schemachecking=off 同步更新时是否开启schema语法检测
bindmethod=simple 同步验证模式为简单模式(即明文)
binddn="cn=Captain,dc=lemon,dc=com" 使用Captain用户读取目录树信息
attrs="*,+" 同步所有属性信息
credentials=123456 管理员密码
重新生成数据配置文件
rm -rf /etc/openldap/slapd.d/*
slaptest -f /etc/openldap/slapd.conf -F /etc/openldap/slapd.d/
chown -R ldap.ldap /etc/openldap/slapd.conf
chown -R ldap.ldap /etc/openldap/slapd.d
/etc/init.d/slapd restart
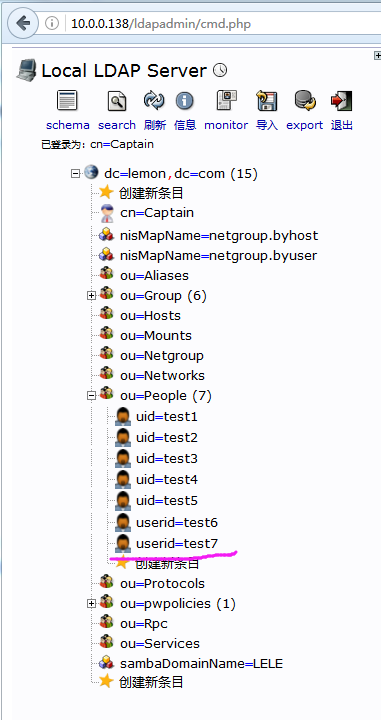
6:测试
在主的10.0.0.138上添加一个test7的用户,在从上刷新一下,是同步到的

十一:OpenLDAP的双主
在主从的基础上,修改配置,
这是主的
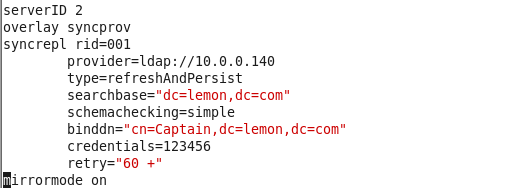
serverID 2
overlay syncprov
syncrepl rid=001
(这里的格式一定要注意,中间这一段要用Tab键Tab一下,如果不的话会报错如下)
provider=ldap://10.0.0.140
type=refreshAndPersist
searchbase="dc=lemon,dc=com"
schemachecking=simple
binddn="cn=Captain,dc=lemon,dc=com"
credentials=123456
retry="60 +"
mirrormode on

这是从的:
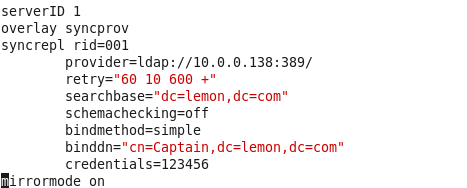
serverID 1
overlay syncprov
syncrepl rid=001
(这里的格式一定要注意,中间这一段要用Tab键Tab一下)
provider=ldap://10.0.0.138:389/
retry="60 10 600 +"
searchbase="dc=lemon,dc=com"
schemachecking=off
bindmethod=simple
binddn="cn=Captain,dc=lemon,dc=com"
credentials=123456
mirrormode on
测试:在两台机上分别新建一个用户,看是否在对方能刷新到,主从与双主都只是备份的关系,若一台挂了,立即切换到另一台,则需做高可用和负载均衡