SpringBoot 集成RabbitMQ集群及简单操作
RabbitMQ集群搭建参考:https://blog.csdn.net/weixin_42465125/article/details/88368784
在Spring官网的生成器,生成两个Maven工程:

rabbit-producer-demo:
Pom文件生成者和消费者一致
	4.0.0

		org.springframework.boot
		spring-boot-starter-parent
		2.1.3.RELEASE


	cn.cuit.rabbit
	rabbit-producer-demo
	0.0.1-SNAPSHOT
	rabbit-producer-demo
	Demo project for Spring Boot


		1.8


			org.springframework.boot
			spring-boot-starter-amqp


			org.springframework.boot
			spring-boot-starter-web


			org.springframework.boot
			spring-boot-starter-test
			test


				org.springframework.boot
				spring-boot-maven-plugin
properties文件也是一致的:
spring.application.name=spirng-boot-rabbitmq-producer

# 配置集群的VIP # 192.168.174.150:5672
spring.rabbitmq.addresses=192.168.174.150:5672
# 配置真实IP也可以
#spring.rabbitmq.addresses=192.168.174.140:5672,192.168.174.141:5672

spring.rabbitmq.username=cuit
spring.rabbitmq.password=cuit

spring.rabbitmq.connection-timeout=15000

# confirm模式
spring.rabbitmq.publisher-confirms=true
# return机制
spring.rabbitmq.publisher-returns=true
# 与return机制结合配置次属性
spring.rabbitmq.template.mandatory=true
配置一个队列:
package cn.cuit.rabbit.one2one.producer;

import org.springframework.amqp.core.Queue;
import org.springframework.context.annotation.Bean;
import org.springframework.context.annotation.Configuration;

@Configuration
public class RabbitConfig {
	@Bean
	public Queue queue() {
		return new Queue("q_hello");
	}
}
消息生成者:
package cn.cuit.rabbit.one2one.producer;
import java.text.SimpleDateFormat;
import java.util.Date;
import org.springframework.amqp.core.AmqpTemplate;
import org.springframework.beans.factory.annotation.Autowired;
import org.springframework.stereotype.Component;
/**
* 简单队列
*
* 更多例子参考
* https://blog.csdn.net/hellozpc/article/details/81436980#8SpringbootRabbitMQ_1267
* https://blog.csdn.net/aa1215018028/article/details/81325082
*/
@Component
public class HelloSender {
@Autowired
private AmqpTemplate rabbitTemplate;
public void send() {
String date = new SimpleDateFormat("yyyy-MM-dd HH:mm:ss").format(new Date());// 24小时制
String context = "hello " + date;
System.out.println("Sender : " + context);
// 简单对列的情况下routingKey即为Q名
this.rabbitTemplate.convertAndSend("q_hello", context);
}
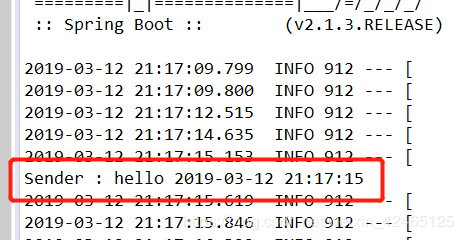
}生产者发送消息测试:
package cn.cuit.rabbit.one2one.producer;

import org.junit.Test;
import org.junit.runner.RunWith;
import org.springframework.beans.factory.annotation.Autowired;
import org.springframework.boot.test.context.SpringBootTest;
import org.springframework.test.context.junit4.SpringRunner;

@RunWith(SpringRunner.class)
@SpringBootTest
public class RabbitMqHelloTest {

	@Autowired
	private HelloSender helloSender;

	@Test
	public void hello() throws Exception {
		helloSender.send();
	}
}
运行测试,然后观察在RabbitMQ的web界面去看看:
可以看到我们刚刚代码中创建的q_hello队列

查看消息:
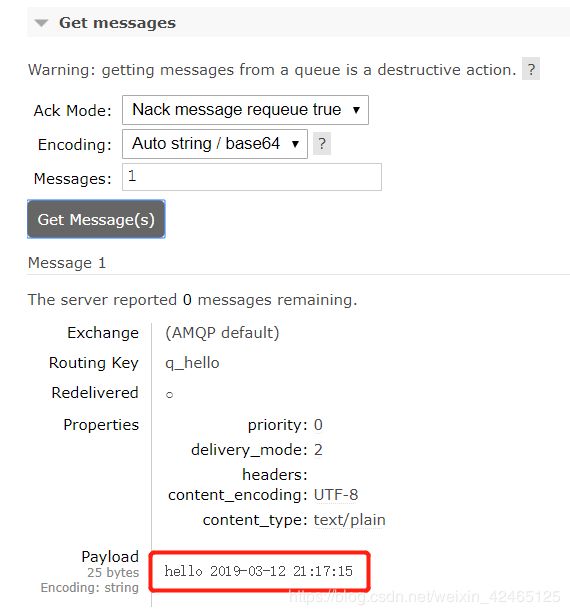
下面来消费端是否可以在RabbitMQ中获取到这个消息
消费端:
package cn.cuit.rabbit.one2one.consumer;

import org.springframework.amqp.rabbit.annotation.RabbitHandler;
import org.springframework.amqp.rabbit.annotation.RabbitListener;
import org.springframework.stereotype.Component;

@Component
@RabbitListener(queues = "q_hello")
public class HelloReceiver {

	@RabbitHandler
	public void process(String hello) {
		System.out.println("Receiver  : " + hello);
	}
}
启动类:
package cn.cuit.rabbit;

import org.springframework.boot.SpringApplication;
import org.springframework.boot.autoconfigure.SpringBootApplication;

@SpringBootApplication
public class RabbitConsumerDemoApplication {

	public static void main(String[] args) {
		SpringApplication.run(RabbitConsumerDemoApplication.class, args);
	}

}
启动消费端SpringBoot程序,观察控制台输出:
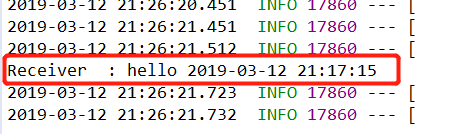
OK的,消费者从RabbitMQ中获取到刚刚的消息了,RabbitMQ有好几种发送消息的模式和消费消息的模式,更多例子参考代码中的链接
********************************* 不积跬步无以至千里,不积小流无以成江海 *********************************