SpringBoot父子工程搭建详解
SpringBoot父子工程搭建详解
- 新建父项目
- 新建子项目
- 启动springboot父子工程
- 进一步测试
新建父项目

选中Maven,点击next,注意看SDK版本。当前为1.8。
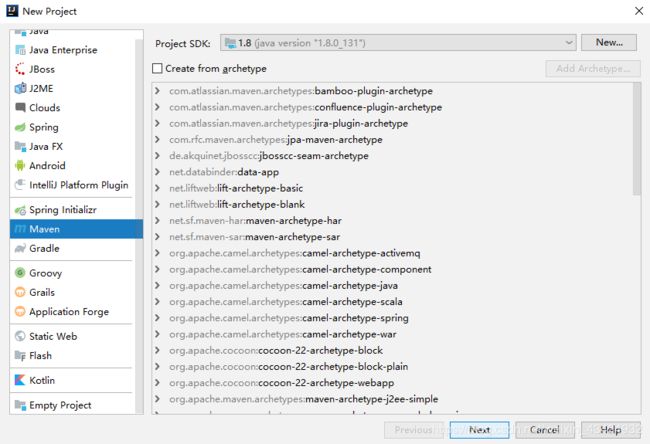
输入包名com.parent,项目名com-parent。点击next。

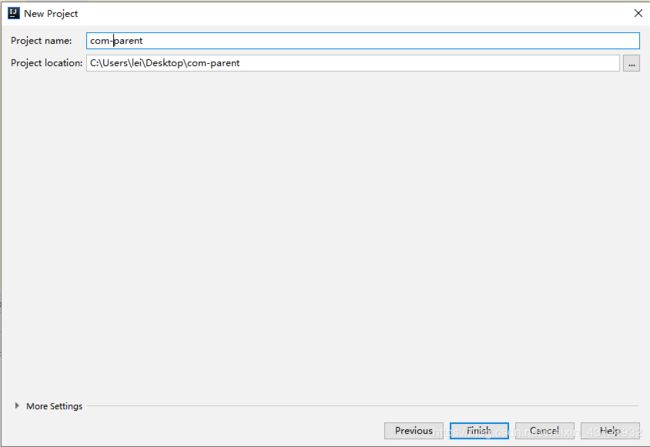
还是修改项目名为com-parent,还可以修改项目存放位置,当前直接放到了桌面。点击finish完成创建。
创建完成的父项目原始结构和pom文件内容:

接下来删掉整个 src 文件。

新建子项目
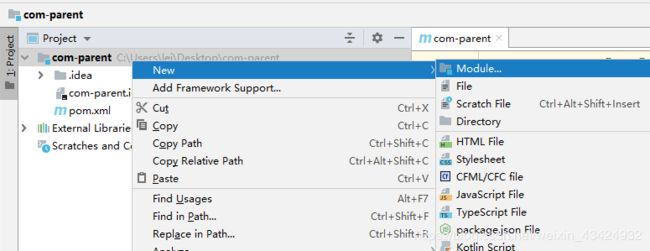
右键 com-parent 父项目 ,选择新建Module。
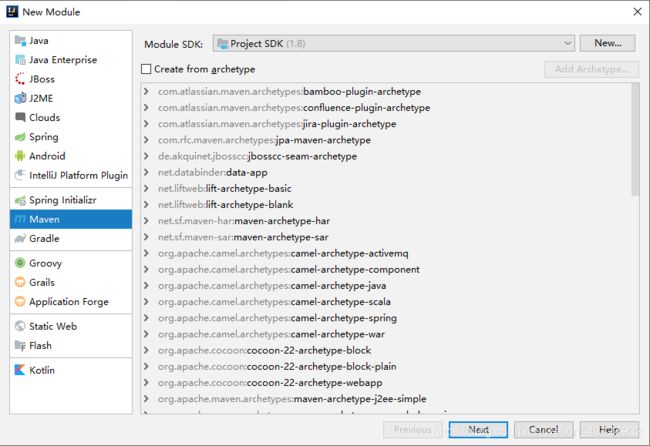
按照刚才新建父项目的套路走一遍即可。当前点击next。
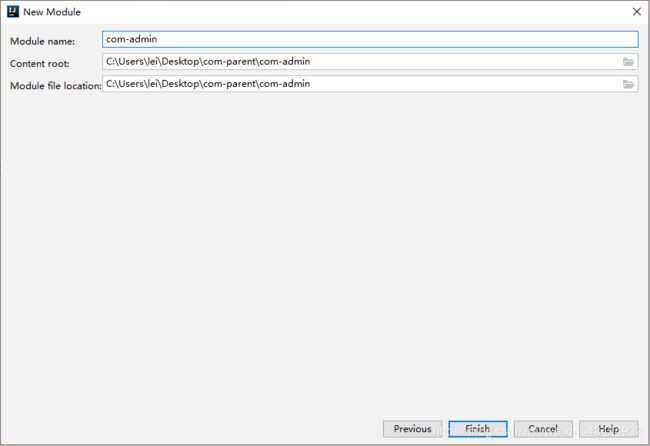
确认一下父项目信息,输入子项目名com-admin。点击next。

确认子项目名为com-admin。点击 finish完成创建。
整体文件结构和com-admin子项目pom文件:

整体文件结构和com-parent父项目pom文件(对比原始父项目发现已经自动引入了子项目module):

启动springboot父子工程
现在这个项目还不是springboot项目,接下来引入springboot相关配置。
修改父项目pom文件,添加如下配置:
<parent>
    <groupId>org.springframework.bootgroupId>
    <artifactId>spring-boot-starter-parentartifactId>
    <version>2.2.4.RELEASEversion>
parent>

<dependencies>

    <dependency>
        <groupId>org.springframework.bootgroupId>
        <artifactId>spring-boot-starter-webartifactId>
    dependency>
dependencies>
这里附上完整的父项目pom文件:
<project xmlns="http://maven.apache.org/POM/4.0.0"
         xmlns:xsi="http://www.w3.org/2001/XMLSchema-instance"
         xsi:schemaLocation="http://maven.apache.org/POM/4.0.0 http://maven.apache.org/xsd/maven-4.0.0.xsd">
    <modelVersion>4.0.0modelVersion>

    <groupId>com.parentgroupId>
    <artifactId>com-parentartifactId>
    <packaging>pompackaging>
    <version>1.0-SNAPSHOTversion>

    <parent>
        <groupId>org.springframework.bootgroupId>
        <artifactId>spring-boot-starter-parentartifactId>
        <version>2.2.4.RELEASEversion>
    parent>

    <dependencies>

        <dependency>
            <groupId>org.springframework.bootgroupId>
            <artifactId>spring-boot-starter-webartifactId>
        dependency>
    dependencies>

    <modules>
        <module>com-adminmodule>
    modules>

project>
在 src/main/java 路径下新建包com.admin,包中新建启动类AdminApplication。
package com.admin;

import org.springframework.boot.SpringApplication;
import org.springframework.boot.autoconfigure.SpringBootApplication;

@SpringBootApplication
public class AdminApplication {

    public static void main(String[] args) {
        SpringApplication.run(AdminApplication.class, args);
    }

}
当前工程结构:

运行启动类,springboot启动成功如下图:

到此为止springboot新建父子工程就基本完成了,下面来小试一波牛刀。
进一步测试
再新建一个子项目,项目名为com-service,不用创建启动类。具体步骤和上一个子项目一样。
新建完成后的工程结构和com-service子项目pom文件内容:

在子项目中创建包com.service。创建一个业务类HelloService,并在类中写一个 hello() 方法。
package com.service;

import org.springframework.stereotype.Service;

@Service
public class HelloService {

    public String hello(){
        return "HelloWorld!";
    }
}
整体工程结构和业务类:

下面我们来实现在com-admin子项目中写一个接口,并让它调用com-service子项目中的这个 hello() 方法。实际项目应该不会这么做,这里只是为了方便测试。
首先在有启动类的子项目com-admin的pom文件中引入com-service。
<dependencies>

    <dependency>
        <groupId>com.parentgroupId>
        <artifactId>com-serviceartifactId>
        <version>1.0-SNAPSHOTversion>
    dependency>

dependencies>
附上完整的com-admin子项目pom文件:
<project xmlns="http://maven.apache.org/POM/4.0.0"
         xmlns:xsi="http://www.w3.org/2001/XMLSchema-instance"
         xsi:schemaLocation="http://maven.apache.org/POM/4.0.0 http://maven.apache.org/xsd/maven-4.0.0.xsd">
    <parent>
        <artifactId>com-parentartifactId>
        <groupId>com.parentgroupId>
        <version>1.0-SNAPSHOTversion>
    parent>
    <modelVersion>4.0.0modelVersion>

    <artifactId>com-adminartifactId>

    <dependencies>

        <dependency>
            <groupId>com.parentgroupId>
            <artifactId>com-serviceartifactId>
            <version>1.0-SNAPSHOTversion>
        dependency>
    dependencies>

project>
然后在com-admin子项目中新建包com.admin.controller,包中新建HelloController类,写一个hello接口。
package com.admin.controller;

import com.service.HelloService;
import org.springframework.beans.factory.annotation.Autowired;
import org.springframework.stereotype.Controller;
import org.springframework.web.bind.annotation.GetMapping;
import org.springframework.web.bind.annotation.ResponseBody;

@Controller
public class HelloController {

    @Autowired
    HelloService helloService;

    @GetMapping("hello")
    @ResponseBody
    public String hello(){
        return helloService.hello();
    }
}
整体工程结构和Controller类如下:

最后,由于使用的是依赖注入方式,所以需在启动类@SpringBootApplication注解的scanBasePackages属性中填入要扫描的包。
当前表示扫描所有com下的包。
package com.admin;

import org.springframework.boot.SpringApplication;
import org.springframework.boot.autoconfigure.SpringBootApplication;

@SpringBootApplication(scanBasePackages="com")
public class AdminApplication {

    public static void main(String[] args) {
        SpringApplication.run(AdminApplication.class, args);
    }

}
接下来启动项目,请求hello接口。

请求成功,到此为止springboot父子工程搭建及测试完成。
最后附上代码资源链接 https://download.csdn.net/download/weixin_43424932/12152357。