【OpenCV】【python】车道线提取(HLS颜色空间)(sobel滤波)
课程目录
- API使用流程
- 参考文章
- 完整代码
- 遇到的问题
- 效果展示
>>> 点击进入:OpenCV专栏<<<
API使用流程
颜色空间转换——》边缘检测——》颜色阈值—》合并并且使用L通道进行白的区域的抑制
参考文章
Python+opencv利用sobel进行边缘检测(细节讲解)
无人驾驶之车道线检测(一)
完整代码
# -*- coding:utf-8 -*-
'''
@Author: knocky
@Blog: https://blog.csdn.net/zzx188891020
@E-mail: [email protected]
@File: pipeline.py
@CreateTime: 2020/6/9 19:34
'''

import numpy as np
import cv2
import matplotlib.pyplot as plt

# 车道线提取
# 颜色空间转换——》边缘检测——》颜色阈值—》合并并且使用L通道进行白的区域的抑制
def pipeline(img, s_thresh=(170, 255), sx_thresh=(40, 200)):
    # 复制原图像
    img = np.copy(img)
    # 颜色空间转换
    # print(img.shape)  # 如果能正确显示(720, 1280, 3),说明读取成功,如果()说明路径错误
    hls = cv2.cvtColor(img, cv2.COLOR_RGB2HLS).astype(np.float)
    # hls = cv2.cvtColor(img, cv2.COLOR_BGR2HLS).astype(np.float)
    h_channel = hls[:, :, 0]
    l_channel = hls[:, :, 1]
    s_channel = hls[:, :, 2]

    # sobel边缘检测
    # 利用Sobel方法可以进行sobel边缘检测
    # img表示源图像,即进行边缘检测的图像
    # cv2.CV_64F表示64位浮点数即64float。
    # 这里不使用numpy.float64,因为可能会发生溢出现象。用cv的数据则会自动
    # 第三和第四个参数分别是对X和Y方向的导数(即dx,dy),对于图像来说就是差分,这里1表示对X求偏导(差分),0表示不对Y求导(差分)。其中,X还可以求2次导。
    # 注意:对X求导就是检测X方向上是否有边缘。
    # 第五个参数ksize是指核的大小。
    sobelx = cv2.Sobel(l_channel, cv2.CV_64F, 1, 0)
    # print(sobelx.shape)# 这里是单通道 (720, 1280)

    # 求绝对值
    # 这里求出的梯度是有方向的,所以求绝对值以后,只要是有梯度就会高亮显示
    abs_sobelx = np.absolute(sobelx)
    cv2.imwrite('pipline_img/abs_sobelx.jpg',abs_sobelx)
    # 将其转化为8bit的整数
    scaled_sobel = np.uint8(255 * abs_sobelx / np.max(abs_sobelx))
    # 对边缘提取结果进行二值化
    sxbinary = np.zeros_like(scaled_sobel)
    sxbinary[(scaled_sobel >= sx_thresh[0]) & (scaled_sobel <= sx_thresh[1])] = 1
    cv2.imwrite('pipline_img/sxbinary.jpg', sxbinary*255)
    plt.figure()
    plt.imshow(sxbinary, cmap='gray')
    plt.title("sobel")
    plt.show()

    # L通道阈值处理
    l_binary = np.zeros_like(l_channel)
    l_binary[(l_channel > 100)] = 1
    cv2.imwrite('pipline_img/l_binary.jpg', l_binary * 255)


    # s通道阈值处理
    s_binary = np.zeros_like(s_channel)
    s_binary[(s_channel >= s_thresh[0]) & (s_channel <= s_thresh[1])] = 1
    cv2.imwrite('pipline_img/s_binary.jpg', s_binary*255)
    plt.figure()
    plt.imshow(s_binary, cmap='gray')
    plt.title("schanel")
    plt.show()
    # 结合边缘提取结果和颜色的结果,
    color_binary = np.zeros_like(sxbinary)
    color_binary[((sxbinary == 1) | (s_binary == 1)) & (l_channel > 100)] = 1
    cv2.imwrite('pipline_img/color_binary.jpg', color_binary*255)
    return color_binary

if __name__ == '__main__':
    img = cv2.imread('../test/test1_undistort.jpg')
    binary_img = pipeline(img)
    cv2.imshow('img',binary_img*255)
    cv2.waitKey(0)
遇到的问题
无法安装moviepy,查各种博客,给出的建议就是无视
pip install moviepy --ignore-installed ,使用了这个命令,发现并没有那么有效果。

pip install moviepy --ignore-installed --user,感觉像是搞定了,至少Pycharm不报错了
图片显示的是纯黑色,由于这里是阈值判断,得到的为0或1,但是opencv的值域范围是0-255
所以这里直接把图片乘以255,得到了最终的效果。这里是灰度图,所以只有一个通道。
imwrite不需要设置通道,会按照图片自带的通道,自动保存成对应的格式。
图下图,纯黑的,就不截图了。主要是0或1的亮度太低,误认为纯黑
为什么不在正前方增加mask
- 因为没有使用到深度学习,所以不会学习到背景信息
- 因为会转换为鸟瞰图,所以其他区域的位置将被剪裁掉
效果展示
原图像:
对梯度求绝对值
abs_sobelx.jpg
对图片abs_sobelx进行对边缘进行二值化处理,阈值范围 sx_thresh=(40, 200)
这里是阈值是对梯度大小大绝对值进行筛选,梯度过大或过小的,将被删除。
sxbinary[(scaled_sobel >= sx_thresh[0]) & (scaled_sobel <= sx_thresh[1])] = 1
可以看出很多浅色细节被删除,由于S通道几乎可以提取全部需要的信息,这里的边缘仅仅用来补充细节,让车道线白色像素更多
sxbinary.jpg
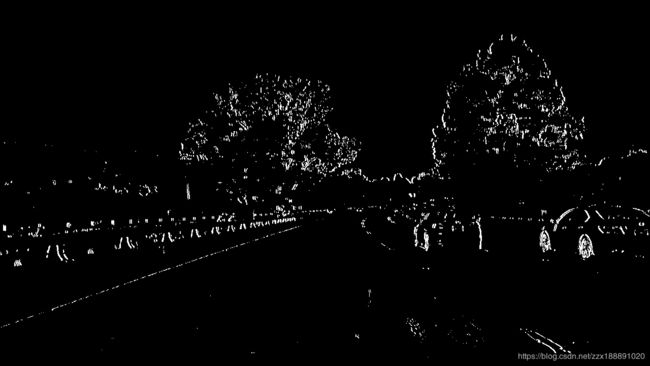
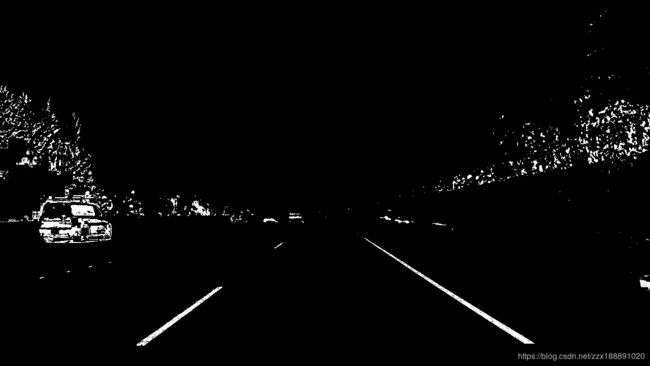
再对S通道s_channel阈值处理:s_thresh=(170, 255)
s_binary[(s_channel >= s_thresh[0]) & (s_channel <= s_thresh[1])] = 1
很清晰的得到了车道线,因为车道线的颜色鲜艳或者是纯白,导致饱和度很高。
s_binary.jpg

查看L通道的抑制效果 (l_channel > 100)
L通道是亮度通道,应该是用来填充缝隙的
l_binary.jpg
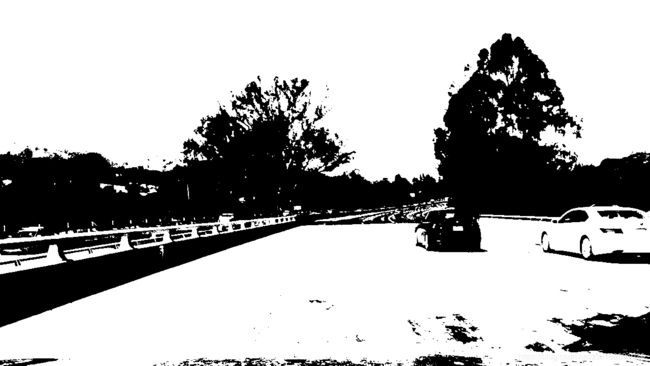
组合各个图片的效果
color_binary[((sxbinary == 1) | (s_binary == 1)) & (l_channel > 100)] = 1
color_binary.jpg

换另外一个图看看效果:
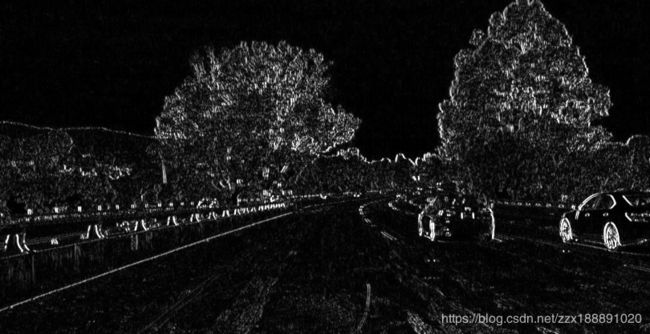
abs_sobelx.jpg
sobel算子提取x的效果,非常明显的边沿特征提取
sxbinary.jpg
梯度阈值筛选,发现噪点少了很多


