Python微信跳一跳自动化脚本
Python微信跳一跳自动化脚本
- 前言
- 准备
- 模块及版本
- 思路与流程
- 详细步骤
- 总结
前言
这是我在CSDN上的第一篇文章,以后会陆续记录我的学习生涯,希望我的知识能帮助到更多的朋友~
准备
这篇将详细讲述如何利用Python中相关模块,来完成微信跳一跳的自动化脚本,该技术只作为交流,其中有些知识点都是借鉴了很多大佬的经验。
模块及版本
| 模块 | 版本 |
|---|---|
| Python | 3.7.2 |
| PIP | 20.0.2 |
| opencv | 4.2.0.32 |
| numpy | 1.18.1 |
思路与流程
通过adb连接手机
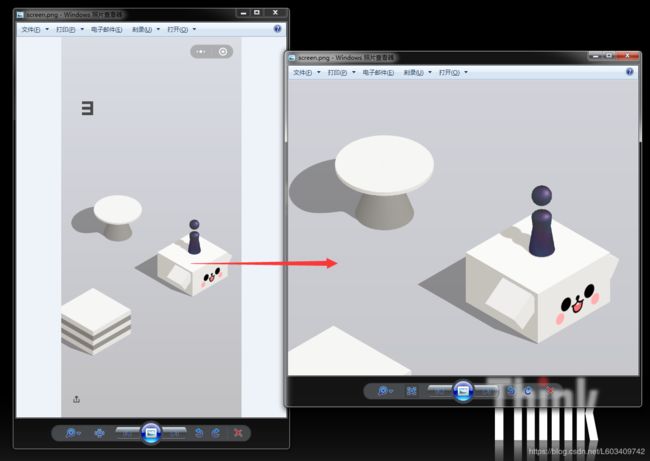
获取游戏截图
图片裁剪
计算玩家位置
计算落脚点位置
计算玩家和落脚点距离
计算模拟点击时间
模拟点击屏幕
详细步骤
1.所需要的的模块
import cv2 as cv
import numpy as np
import math
import os
import threading
import random
2.获取手机屏幕截图
# 获取手机屏幕截图,xxx代表adb.exe所在路径
# 如果使用PyCharm的话没办识别adb命令,配置了环境变量页没用,不知道咋回事
os.system('xxx/adb shell screencap -p /sdcard/screen.png')
# 将截图保存到当前项目路径下
os.system('xxx/adb pull /sdcard/screen.png')
# 先读取游戏画面截图
img = cv.imread("图片文件")
# 对图片上下部分进行切片操作,缩小目标区域
up_cut = int(img .shape[0]*0.3)
down_cut = int(img .shape[0]*0.7)
img = img [up_cut:down_cut]
# 将图片色彩空间转换为hsv
img_hsv = cv.cvtColor(img,cv.COLOR_BGR2HSV)
# 根据目标小人的身体颜色范围,提取目标小人,注意:这里面的颜色范围格式是hsv
color_min = np.int32([105,30,30])
color_max = np.int32([200,200,120])
color_mask = cv.inRange(img_hsv,color_min,color_max)
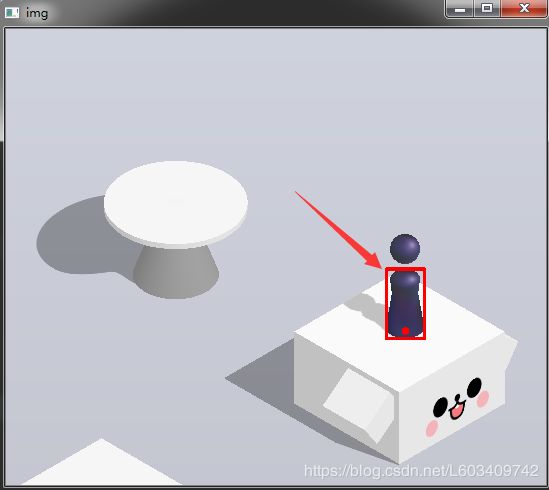
# 勾画目标小人边缘,返回的第一个参数是轮廓信息
contours = cv.findContours(color_mask,cv.RETR_EXTERNAL,cv.CHAIN_APPROX_SIMPLE)[0]
# 绘制目标小人坐标信息
max_contours = max(contours,key=cv.contourArea)
max_contours = cv.convexHull(max_contours)
rect = cv.boundingRect(max_contours)
x,y,w,h = rect
point_pos = (x+int(w/2),y+h-15)
cv.rectangle(img, (x,y), (x+w,y+h), (0, 0, 255), 5)
cv.circle(img, point_pos, 8, (0, 0, 255), -1)
# 高斯模糊,为了去除一些噪点
img_blur = cv.GaussianBlur(img, (5, 5), 0)
# 边缘检测
canny_img = cv.Canny(img_blur, 1, 15)
7.对像素进行修正,去除玩家小人附近的像素点,防止之后的干扰
# 将图片色彩空间转换为hsv
img_hsv = cv.cvtColor(img,cv.COLOR_BGR2HSV)
# 根据目标小人的身体颜色范围,提取目标小人,注意:这里面的颜色范围格式是hsv
color_min = np.int32([105,30,30])
color_max = np.int32([200,200,120])
color_mask = cv.inRange(img_hsv,color_min,color_max)
# 勾画目标小人边缘,返回的第一个参数是轮廓信息
contours = cv.findContours(color_mask,cv.RETR_EXTERNAL,cv.CHAIN_APPROX_SIMPLE)[0]
max_contours = max(contours,key=cv.contourArea)
max_contours = cv.convexHull(max_contours)
rect = cv.boundingRect(max_contours)
# 移除小人头部附近像素
r_x,r_y,r_w,r_h = rect
for y in range(r_y-150, r_y+r_h):
	for x in range(r_x-20, r_x+r_w+20):
		canny_img[y][x] = 0
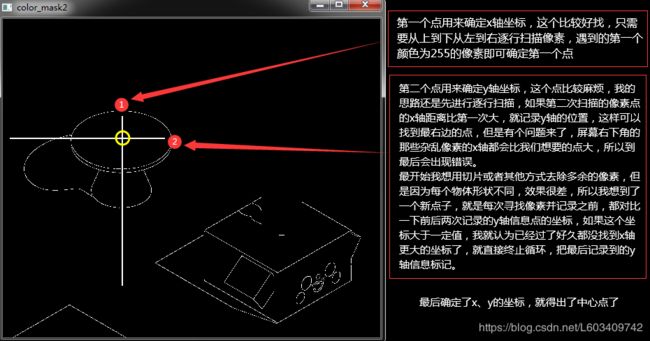
 # 计算目标中心点
crop_h, crop_w = canny_img.shape
center_x, center_y = 0, 0
max_x = 0
for y in range(crop_h):
    for x in range(crop_w):
        if canny_img[y, x] == 255:
            if center_x == 0:
                center_x = x
            if x > max_x:
                # 如果发现两次y轴的像素点间隔超过了一定值,就认为已经找到中心点了
                if(center_y!=0 and y-center_y>50):
                    point_pos = (center_x, center_y)
                    if(show_data):
                        cv.circle(img, point_pos, 5,(0,0,255), -1)
                        cv.circle(canny_img, point_pos, 5,255, -1)
                        showImg("canny_img",canny_img)
                    return point_pos
                else:
                    cv.circle(img, (center_x, center_y), 1,(255,0,0), -1)
                    center_y = y
                    max_x = x
point_pos = (center_x, center_y)
# 创建np数组,这里其实不需要abs,正数和负数无关紧要
distance = np.array("第一个点的信息")-np.array("第二个点的信息")
# 用hypot函数进行计算距离
distance = int(math.hypot(distance[0],distance[1]))
10.根据距离计算点击时间长度
# 这个1.35别问我咋来的,一点点试出来的 	o(゚Д゚)っ!
click_time = int(distance * 1.35)
11.模拟点击屏幕
# 原本想用input的,后来发现input去模拟长按特别麻烦,就在网上找到了swipe
# swipe本来是滑动的意思,不过这个里面可以设置时间~~~
os.system('xxx/adb shell input swipe 367 469 367 469 '+str(time))
12.收尾
- 主要是我不喜欢11这个数字,所以写了个12,其他的技术点也没什么特别的了,无非就是创建一个死循环,开个线程之类的。
- 不过要提别注意的是,如果写循环的话,不能用time.sleep()这个函数,opencv自带的cv2.waitKey()函数中的参数可以代表每个周期的刷新时间~
总结
作者很懒,懒得写总结了。。。源码在最上面。。。


