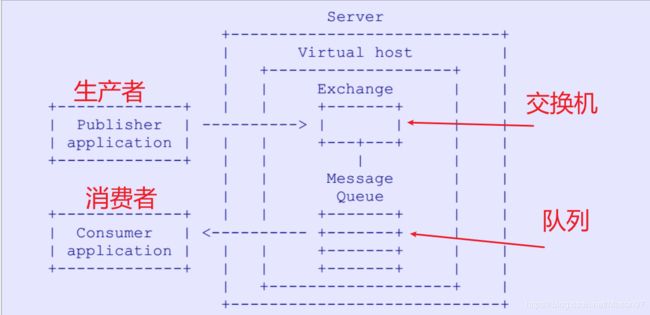
RabbitMQ 消息队列
https://blog.csdn.net/qq_35387940/article/details/100514134
https://www.bilibili.com/video/BV1gW411H7Az?p=1
目录
- 0. 官方手册及所有模型
- 0.5 AMQP协议
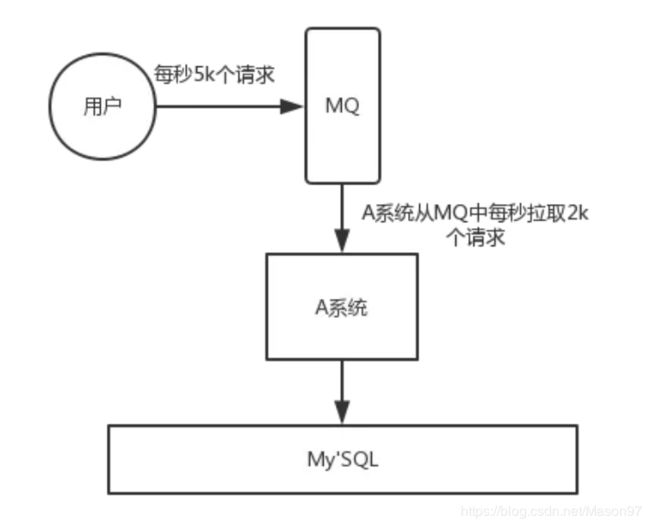
- 1. 消息队列的作用:解耦;削峰;异步
- 1.1 解耦:不需要考虑消费者的问题。
- 1.2 异步:更节省时间。
- 1.3 削峰:减轻数据库压力。
- 2. RabbitMQ的安装:
- 2.1 下载Erlang
- 2.2 下载RabbitMQ
- 2.3 添加用户
- 2.4 添加Virtual Hosts
- 2.5 对用户进行授权
- 3. RabbitMQ 之 简单队列
- 3.1 简单队列的模型
- 3.2 代码演示,生产者,消费者
- 3.3 简单队列的缺点
- 4. RabbitMQ 之 工作队列
- 4.1 工作队列的模型
- 4.2 为什么出现工作队列
- 4.3 轮询分发方式(一人一个不要抢,大锅饭)
- 4.4 公平分发方式 (fair dipatch)(能者多劳)
- 4.5 各种参数
- 4.5.1 自动应答
- 4.5.2 消息的持久化
- 5. RabbitMQ 之 发布订阅模式
- 5.1 模型图 及 解读
- 5.2 代码
- 6. Exchange (交换机 转发器)
- 6.1 fanout(不处理路由键)
- 6.2 direct(处理路由键)
- 6.3 topic
- 7. RabbitMQ 之 路由模式
- 7.1 模式图
- 7.2 代码实现
- 7.2.1 生产者
- 7.2.2 消费者1
- 7.2.2 消费者2
- 7.3 现象分析
- 8. RabbitMQ 之 topic模式(和路由模式差别不大)
- 8.1 模式图
- 8.2 代码实现
- 8.2.1 生产者
- 8.2.2 消费者1
- 8.2.3 消费者2
- 8.3 现象分析
- 9. RabbitMQ的消息确认机制
- 9.1 事务机制
- 9.2 confirm模式
- 10. 结合SpringBoot
- 10.1 绑定键名(一个队列)(两个队列)【轮询方式】
- 10.2 topic模式
- 10.3 Fanout 扇型交换机
0. 官方手册及所有模型
https://www.rabbitmq.com/getstarted.html
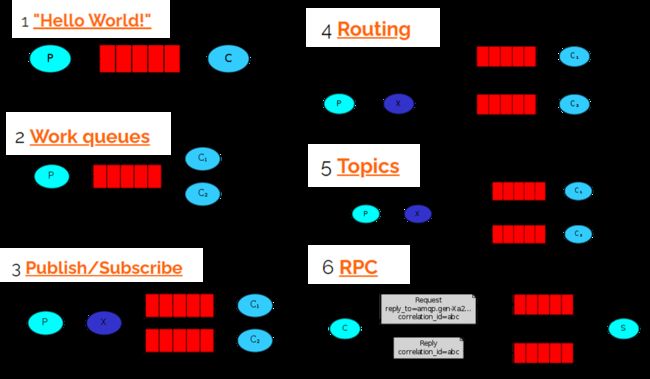
0.5 AMQP协议
1. 消息队列的作用:解耦;削峰;异步
1.1 解耦:不需要考虑消费者的问题。
1.2 异步:更节省时间。
1.3 削峰:减轻数据库压力。
2. RabbitMQ的安装:
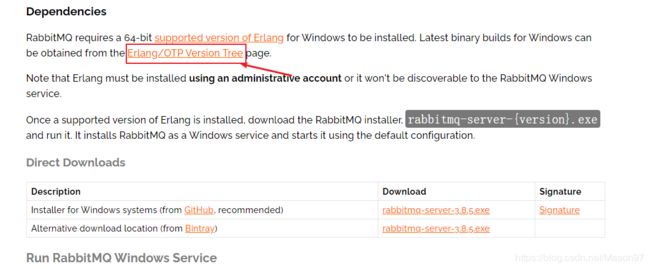
2.1 下载Erlang
- erlang安装完成需要配置erlang环境变量: ERLANG_HOME=D:\xxxxxxx\erl9.3
- 在path中添加%ERLANG_HOME%\bin
2.2 下载RabbitMQ
https://www.rabbitmq.com/install-windows.html#installer
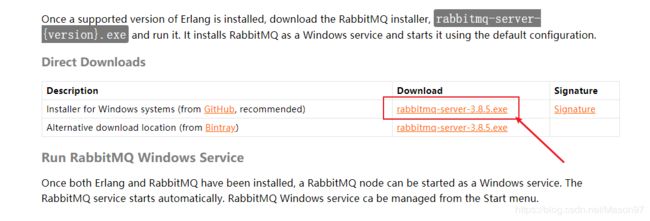
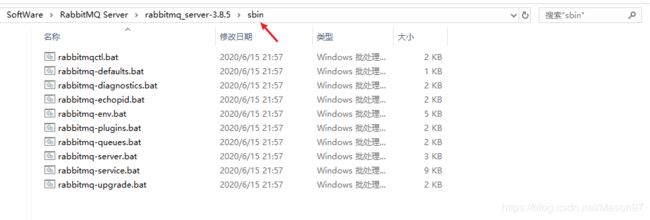
- cmd命令:激活web插件
rabbitmq-plugins enable rabbitmq_management

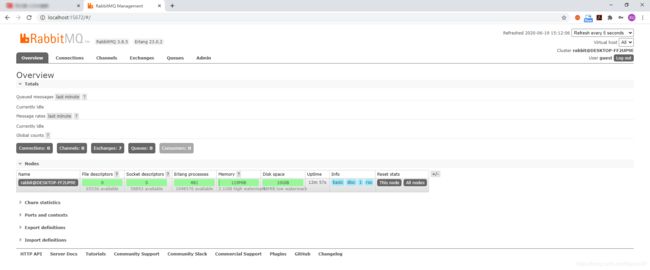
- 进入管理后台:http://localhost:15672
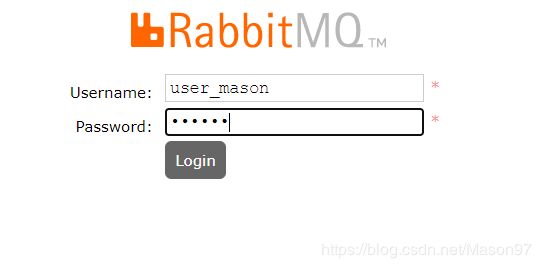
- 输入用户名:guest,密码:guest
2.3 添加用户
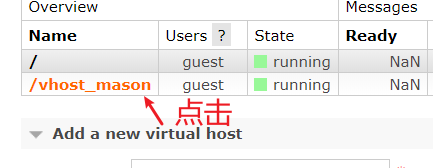
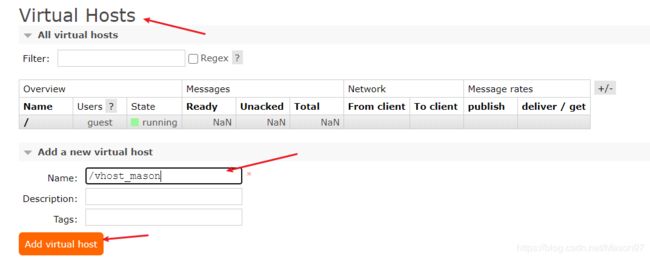
2.4 添加Virtual Hosts
- 就相当于添加数据库。
- 像mysql有数据库的概念并且可以指定用户对库和表等操作的权限。那RabbitMQ呢?
- RabbitMQ也有类似的权限管理。在RabbitMQ中可以虚拟消息服务器VirtualHost
- 每个VirtualHost相当月一个相对独立的RabbitMQ服务器,每个VirtualHost之间是相互隔离的。exchange、queue、message不能互通。
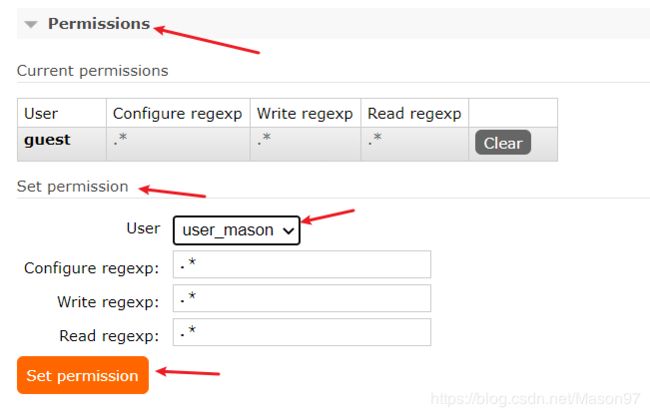
2.5 对用户进行授权
3. RabbitMQ 之 简单队列
3.1 简单队列的模型
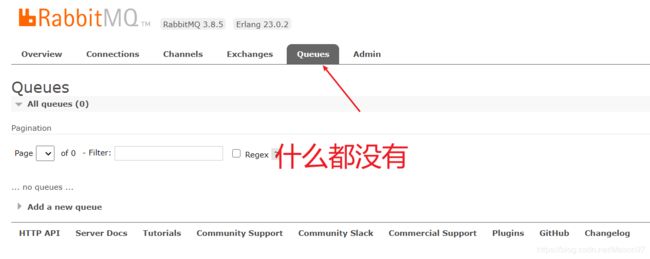
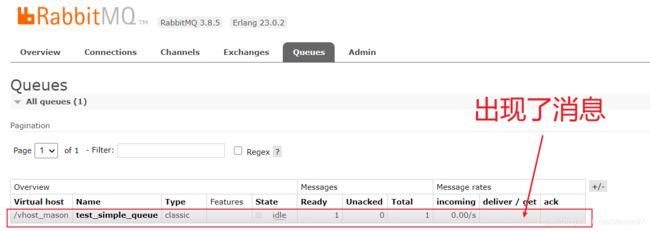
3.2 代码演示,生产者,消费者
- maven,pom文件中的依赖。
<dependencies>
        <dependency>
            <groupId>com.rabbitmq</groupId>
            <artifactId>amqp-client</artifactId>
            <version>4.0.2</version>
        </dependency>

        <dependency>
            <groupId>org.slf4j</groupId>
            <artifactId>slf4j-api</artifactId>
            <version>1.7.10</version>
        </dependency>

        <dependency>
            <groupId>org.slf4j</groupId>
            <artifactId>slf4j-log4j12</artifactId>
            <version>1.7.5</version>
        </dependency>

        <dependency>
            <groupId>log4j</groupId>
            <artifactId>log4j</artifactId>
            <version>1.2.17</version>
        </dependency>

        <dependency>
            <groupId>junit</groupId>
            <artifactId>junit</artifactId>
            <version>4.11</version>
        </dependency>
    </dependencies>
- 创建一个工具类:
public class ConnectionUtils {
    public static Connection getConnection() throws IOException, TimeoutException {
        // 定义一个连接工厂
        ConnectionFactory factory = new ConnectionFactory();
        // 服务地址
        factory.setHost("127.0.0.1");
        factory.setPort(5672); // AMQP 5672
        factory.setVirtualHost("/vhost_mason");
        factory.setUsername("user_mason");
        factory.setPassword("123456");
        return factory.newConnection(); // 获取连接
    }
}
public class Send {
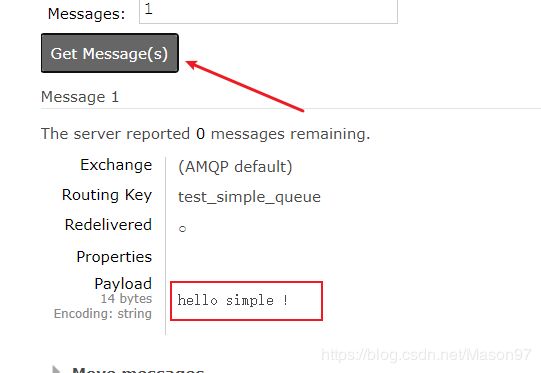
    private static final String QUEUE_NAME = "test_simple_queue";

    public static void main(String[] args) throws IOException, TimeoutException {
        Connection connection = ConnectionUtils.getConnection();// 获取连接
        Channel channel = connection.createChannel(); // 从连接中获取通道
        channel.queueDeclare(QUEUE_NAME, false, false, false, null);
        String msg = "hello simple !";
        channel.basicPublish("", QUEUE_NAME, null, msg.getBytes());
        System.out.println("--send msg:" + msg);
        channel.close();
        connection.close();
    }
}
public class Receive {
    private static final String QUEUE_NAME = "test_simple_queue";

    public static void main(String[] args) throws IOException, TimeoutException {
        Connection connection = ConnectionUtils.getConnection(); // 获取连接
        Channel channel = connection.createChannel();
        // 队列声明
        channel.queueDeclare(QUEUE_NAME, false, false, false, null);
        // 定义消费者
        DefaultConsumer consumer = new DefaultConsumer(channel) {
            // 获取到达的消息
            @Override
            public void handleDelivery(String consumerTag, Envelope envelope, AMQP.BasicProperties properties,
                                       byte[] body) throws IOException {
                String msgString = new String(body, "utf-8");
                System.out.println("recv:" + msgString);
            }
        };
        // 监听队列。
        channel.basicConsume(QUEUE_NAME, true, consumer);
    }
}
3.3 简单队列的缺点
4. RabbitMQ 之 工作队列
4.1 工作队列的模型
4.2 为什么出现工作队列
4.3 轮询分发方式(一人一个不要抢,大锅饭)
- 生产者:
public class Send {
    private static final String QUEUE_NAME = "test_work_queue";

    public static void main(String[] args) throws IOException, TimeoutException, InterruptedException {
        Connection connection = ConnectionUtils.getConnection();
        Channel channel = connection.createChannel();
        channel.queueDeclare(QUEUE_NAME, false, false, false, null);
        for (int i = 0; i < 50; i++) {
            String msg = "hello " + i;
            System.out.println("[Work Queue] send:" + msg);
            channel.basicPublish("", QUEUE_NAME, null, msg.getBytes());
            Thread.sleep(i * 20);
        }
        channel.close();
        connection.close();
    }
}
- 消费者1
public class Receive1 {
    private static final String QUEUE_NAME = "test_work_queue";

    public static void main(String[] args) throws IOException, TimeoutException {
        Connection connection = ConnectionUtils.getConnection(); // 获取连接
        Channel channel = connection.createChannel();
        // 队列声明
        channel.queueDeclare(QUEUE_NAME, false, false, false, null);
        // 定义消费者
        DefaultConsumer consumer = new DefaultConsumer(channel) {
            // 获取到达的消息
            @Override
            public void handleDelivery(String consumerTag, Envelope envelope, AMQP.BasicProperties properties,
                                       byte[] body) throws IOException {
                String msgString = new String(body, "utf-8");
                System.out.println("[1] Recv:" + msgString);
                try {
                    Thread.sleep(2000);
                } catch (InterruptedException e) {
                    e.printStackTrace();
                } finally {
                    System.out.println("[1] done ");
                }
            }
        };
        // 监听队列。
        channel.basicConsume(QUEUE_NAME, true, consumer);
    }
}
- 消费者2
public class Receive2 {
    private static final String QUEUE_NAME = "test_work_queue";

    public static void main(String[] args) throws IOException, TimeoutException {
        Connection connection = ConnectionUtils.getConnection(); // 获取连接
        Channel channel = connection.createChannel();
        // 队列声明
        channel.queueDeclare(QUEUE_NAME, false, false, false, null);
        // 定义消费者
        DefaultConsumer consumer = new DefaultConsumer(channel) {
            // 获取到达的消息
            @Override
            public void handleDelivery(String consumerTag, Envelope envelope, AMQP.BasicProperties properties,
                                       byte[] body) throws IOException {
                String msgString = new String(body, "utf-8");
                System.out.println("[2] Recv:" + msgString);
                try {
                    Thread.sleep(1000); // 比1快
                } catch (InterruptedException e) {
                    e.printStackTrace();
                } finally {
                    System.out.println("[2] done ");
                }
            }
        };
        // 监听队列。
        channel.basicConsume(QUEUE_NAME, true, consumer);
    }
}
4.4 公平分发方式 (fair dipatch)(能者多劳)
- 对于生产者:

- 消费者代码的改动:
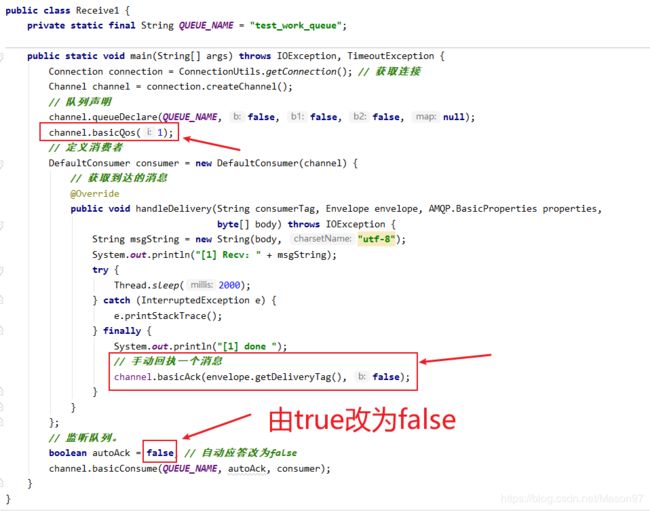
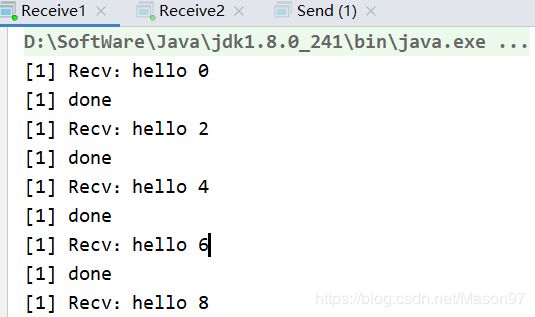
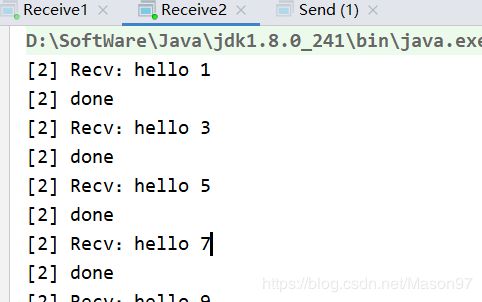
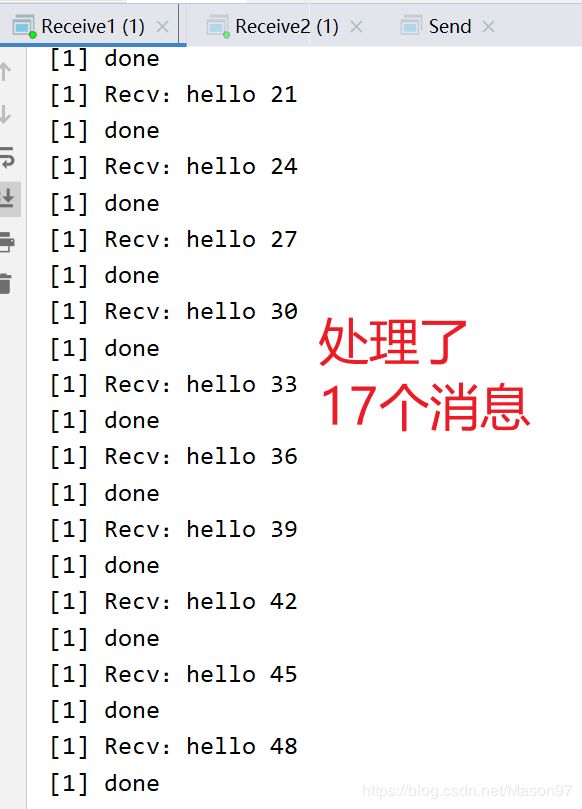
- 观察结果,我们看到不是轮询的方式进行消息的分发了。而是用公平分发的方式。
- 【消费者2处理消息的速度更快,手动回执的频率更高,回执一次就会分发下一个消息,所以消费者2收到的消息比消费者1更多】
- 【是一种根据消息处理能力进行分发的方式】

4.5 各种参数
4.5.1 自动应答
- 如果这个参数是true的话,一旦RabbitMQ将消息分发给消费者,就会从内存中删除。
- 如果此时杀死正在执行的消费者,就会丢失正在处理的消息
- 如果是false,就是手动确认模式,如果有一个消费者挂掉,MQ就会交付给其他消费者;RabbitMQ支持消息应答,消费者发送一个消息应答,告诉RabbitMQ这个消息我已经处理完成,你可以删了,然后RabbitMQ就删除内存中的消息。

4.5.2 消息的持久化
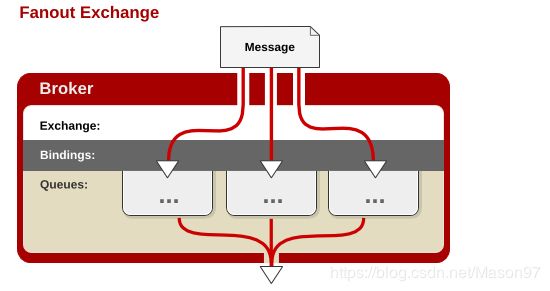
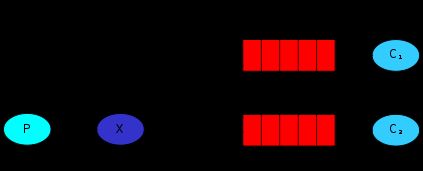
5. RabbitMQ 之 发布订阅模式
5.1 模型图 及 解读
5.2 代码
- 生产者:
- 多了声明交换机的代码
- channel.exchangeDeclare(EXCHANGE_NAME, “fanout”);
public class Send {
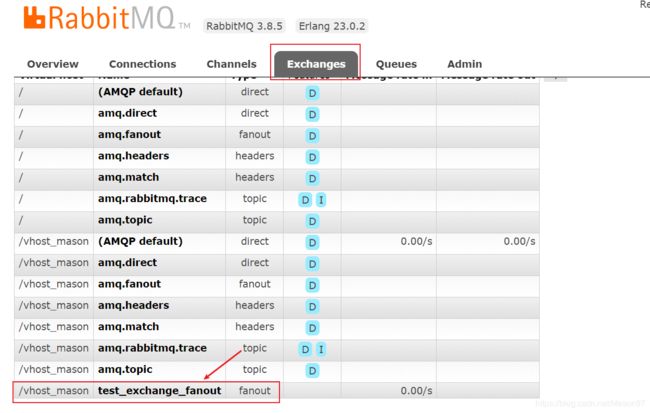
    private static final String EXCHANGE_NAME = "test_exchange_fanout";

    public static void main(String[] args) throws IOException, TimeoutException {
        Connection connection = ConnectionUtils.getConnection();
        Channel channel = connection.createChannel();
        channel.exchangeDeclare(EXCHANGE_NAME, "fanout");
        String msg = "hello ps";
        channel.basicPublish(EXCHANGE_NAME, "", null, msg.getBytes());
        System.out.println("Send :" + msg);
        channel.close();
        connection.close();

    }
}
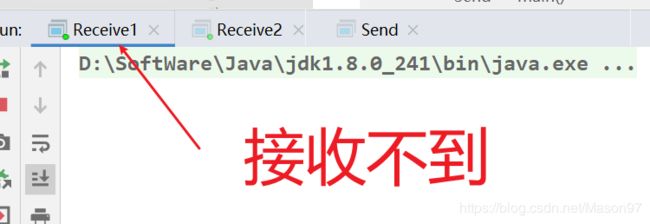
- 这样运行后,消息消失了。因为交换机没有存储的功能,需要绑定队列。消息才能被存储。

- 消费者1:
- 多了队列绑定交换机的代码
- channel.queueBind(QUEUE_NAME,EXCHANGE_NAME,"");
public class Receive1 {
    private static final String QUEUE_NAME = "test_queue_fanout_email";
    private static final String EXCHANGE_NAME = "test_exchange_fanout";

    public static void main(String[] args) throws IOException, TimeoutException {
        Connection connection = ConnectionUtils.getConnection(); // 获取连接
        Channel channel = connection.createChannel();
        // 队列声明
        channel.queueDeclare(QUEUE_NAME, false, false, false, null);
        channel.queueBind(QUEUE_NAME,EXCHANGE_NAME,"");
        channel.basicQos(1);
        // 定义消费者
        DefaultConsumer consumer = new DefaultConsumer(channel) {
            // 获取到达的消息
            @Override
            public void handleDelivery(String consumerTag, Envelope envelope, AMQP.BasicProperties properties,
                                       byte[] body) throws IOException {
                String msgString = new String(body, "utf-8");
                System.out.println("[1] Recv:" + msgString);
                try {
                    Thread.sleep(2000);
                } catch (InterruptedException e) {
                    e.printStackTrace();
                } finally {
                    System.out.println("[1] done ");
                    // 手动回执一个消息
                    channel.basicAck(envelope.getDeliveryTag(), false);
                }
            }
        };
        // 监听队列。
        boolean autoAck = false; // 自动应答改为false
        channel.basicConsume(QUEUE_NAME, autoAck, consumer);
    }
}
- 消费者2:
public class Receive2 {
    private static final String QUEUE_NAME = "test_queue_fanout_sms";
    private static final String EXCHANGE_NAME = "test_exchange_fanout";

    public static void main(String[] args) throws IOException, TimeoutException {
        Connection connection = ConnectionUtils.getConnection(); // 获取连接
        Channel channel = connection.createChannel();
        // 队列声明
        channel.queueDeclare(QUEUE_NAME, false, false, false, null);
        channel.queueBind(QUEUE_NAME, EXCHANGE_NAME, "");
        channel.basicQos(1);
        // 定义消费者
        DefaultConsumer consumer = new DefaultConsumer(channel) {
            // 获取到达的消息
            @Override
            public void handleDelivery(String consumerTag, Envelope envelope, AMQP.BasicProperties properties,
                                       byte[] body) throws IOException {
                String msgString = new String(body, "utf-8");
                System.out.println("[2] Recv:" + msgString);
                try {
                    Thread.sleep(2000);
                } catch (InterruptedException e) {
                    e.printStackTrace();
                } finally {
                    System.out.println("[2] done ");
                    // 手动回执一个消息
                    channel.basicAck(envelope.getDeliveryTag(), false);
                }
            }
        };
        // 监听队列。
        boolean autoAck = false; // 自动应答改为false
        channel.basicConsume(QUEUE_NAME, autoAck, consumer);
    }
}
6. Exchange (交换机 转发器)
- 一方面接收生产者的消息,另一方面向队列推送消息。
6.1 fanout(不处理路由键)
6.2 direct(处理路由键)
6.3 topic
7. RabbitMQ 之 路由模式
7.1 模式图
7.2 代码实现
7.2.1 生产者
public class Send {
    private static final String EXCHANGE_NAME = "test_exchange_direct";

    public static void main(String[] args) throws IOException, TimeoutException {
        Connection connection = ConnectionUtils.getConnection();
        Channel channel = connection.createChannel();
        channel.exchangeDeclare(EXCHANGE_NAME, "direct");// 类型是direct
        String msg = "hello ps";
        String routingKey = "error";// 路由键的名字
        channel.basicPublish(EXCHANGE_NAME, routingKey, null, msg.getBytes());
        System.out.println("Send :" + msg);
        channel.close();
        connection.close();

    }
}
7.2.2 消费者1
public class Receive1 {
    private static final String QUEUE_NAME = "test_queue_direct_1";
    private static final String EXCHANGE_NAME = "test_exchange_direct";

    public static void main(String[] args) throws IOException, TimeoutException {
        Connection connection = ConnectionUtils.getConnection(); // 获取连接
        Channel channel = connection.createChannel();
        // 队列声明
        channel.queueDeclare(QUEUE_NAME, false, false, false, null);
        // 绑定队列
        channel.queueBind(QUEUE_NAME, EXCHANGE_NAME, "error");
        channel.basicQos(1);
        // 定义消费者
        DefaultConsumer consumer = new DefaultConsumer(channel) {
            // 获取到达的消息
            @Override
            public void handleDelivery(String consumerTag, Envelope envelope, AMQP.BasicProperties properties,
                                       byte[] body) throws IOException {
                String msgString = new String(body, "utf-8");
                System.out.println("[1] Recv:" + msgString);
                try {
                    Thread.sleep(2000);
                } catch (InterruptedException e) {
                    e.printStackTrace();
                } finally {
                    System.out.println("[1] done ");
                    // 手动回执一个消息
                    channel.basicAck(envelope.getDeliveryTag(), false);
                }
            }
        };
        // 监听队列。
        boolean autoAck = false; // 自动应答改为false
        channel.basicConsume(QUEUE_NAME, autoAck, consumer);
    }
}
7.2.2 消费者2
public class Receive2 {
    private static final String QUEUE_NAME = "test_queue_direct_2";
    private static final String EXCHANGE_NAME = "test_exchange_direct";

    public static void main(String[] args) throws IOException, TimeoutException {
        Connection connection = ConnectionUtils.getConnection(); // 获取连接
        Channel channel = connection.createChannel();
        // 队列声明
        channel.queueDeclare(QUEUE_NAME, false, false, false, null);
        // 绑定队列
        channel.queueBind(QUEUE_NAME, EXCHANGE_NAME, "error");
        channel.queueBind(QUEUE_NAME, EXCHANGE_NAME, "info");
        channel.queueBind(QUEUE_NAME, EXCHANGE_NAME, "warning");
        channel.basicQos(1);
        // 定义消费者
        DefaultConsumer consumer = new DefaultConsumer(channel) {
            // 获取到达的消息
            @Override
            public void handleDelivery(String consumerTag, Envelope envelope, AMQP.BasicProperties properties,
                                       byte[] body) throws IOException {
                String msgString = new String(body, "utf-8");
                System.out.println("[2] Recv:" + msgString);
                try {
                    Thread.sleep(2000);
                } catch (InterruptedException e) {
                    e.printStackTrace();
                } finally {
                    System.out.println("[2] done ");
                    // 手动回执一个消息
                    channel.basicAck(envelope.getDeliveryTag(), false);
                }
            }
        };
        // 监听队列。
        boolean autoAck = false; // 自动应答改为false
        channel.basicConsume(QUEUE_NAME, autoAck, consumer);
    }
}
7.3 现象分析
8. RabbitMQ 之 topic模式(和路由模式差别不大)
8.1 模式图
8.2 代码实现
8.2.1 生产者
public class Send {
    private static final String EXCHANGE_NAME = "test_exchange_topic";

    public static void main(String[] args) throws IOException, TimeoutException {
        Connection connection = ConnectionUtils.getConnection();
        Channel channel = connection.createChannel();
        channel.exchangeDeclare(EXCHANGE_NAME, "topic");// 类型是topic
        String msg = "商品.......";
        String routingKey = "good.add";// 路由键的名字
        channel.basicPublish(EXCHANGE_NAME, routingKey, null, msg.getBytes());
        System.out.println("Send :" + msg);
        channel.close();
        connection.close();

    }
}
8.2.2 消费者1
public class Receive1 {
    private static final String QUEUE_NAME = "test_queue_topic_1";
    private static final String EXCHANGE_NAME = "test_exchange_topic";

    public static void main(String[] args) throws IOException, TimeoutException {
        Connection connection = ConnectionUtils.getConnection(); // 获取连接
        Channel channel = connection.createChannel();
        // 队列声明
        channel.queueDeclare(QUEUE_NAME, false, false, false, null);
        // 绑定队列
        channel.queueBind(QUEUE_NAME, EXCHANGE_NAME, "good.add");
        channel.basicQos(1);
        // 定义消费者
        DefaultConsumer consumer = new DefaultConsumer(channel) {
            // 获取到达的消息
            @Override
            public void handleDelivery(String consumerTag, Envelope envelope, AMQP.BasicProperties properties,
                                       byte[] body) throws IOException {
                String msgString = new String(body, "utf-8");
                System.out.println("[1] Recv:" + msgString);
                try {
                    Thread.sleep(2000);
                } catch (InterruptedException e) {
                    e.printStackTrace();
                } finally {
                    System.out.println("[1] done ");
                    // 手动回执一个消息
                    channel.basicAck(envelope.getDeliveryTag(), false);
                }
            }
        };
        // 监听队列。
        boolean autoAck = false; // 自动应答改为false
        channel.basicConsume(QUEUE_NAME, autoAck, consumer);
    }
}
8.2.3 消费者2
public class Receive2 {
    private static final String QUEUE_NAME = "test_queue_topic_2";
    private static final String EXCHANGE_NAME = "test_exchange_topic";

    public static void main(String[] args) throws IOException, TimeoutException {
        Connection connection = ConnectionUtils.getConnection(); // 获取连接
        Channel channel = connection.createChannel();
        // 队列声明
        channel.queueDeclare(QUEUE_NAME, false, false, false, null);
        // 绑定队列
        channel.queueBind(QUEUE_NAME, EXCHANGE_NAME, "good.#");
        channel.basicQos(1);
        // 定义消费者
        DefaultConsumer consumer = new DefaultConsumer(channel) {
            // 获取到达的消息
            @Override
            public void handleDelivery(String consumerTag, Envelope envelope, AMQP.BasicProperties properties,
                                       byte[] body) throws IOException {
                String msgString = new String(body, "utf-8");
                System.out.println("[2] Recv:" + msgString);
                try {
                    Thread.sleep(2000);
                } catch (InterruptedException e) {
                    e.printStackTrace();
                } finally {
                    System.out.println("[2] done ");
                    // 手动回执一个消息
                    channel.basicAck(envelope.getDeliveryTag(), false);
                }
            }
        };
        // 监听队列。
        boolean autoAck = false; // 自动应答改为false
        channel.basicConsume(QUEUE_NAME, autoAck, consumer);
    }
}
8.3 现象分析
9. RabbitMQ的消息确认机制
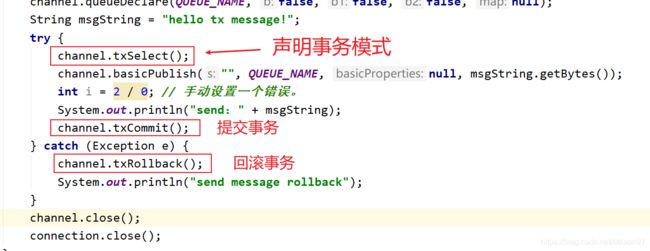
9.1 事务机制
- 生产者代码:
public class TxSend {
    private static final String QUEUE_NAME = "test_queue_tx";

    public static void main(String[] args) throws IOException, TimeoutException {
        Connection connection = ConnectionUtils.getConnection();
        Channel channel = connection.createChannel();
        channel.queueDeclare(QUEUE_NAME, false, false, false, null);
        String msgString = "hello tx message!";
        try {
            channel.txSelect();
            channel.basicPublish("", QUEUE_NAME, null, msgString.getBytes());
            int i = 2 / 0; // 手动设置一个错误。
            System.out.println("send:" + msgString);
            channel.txCommit();
        } catch (Exception e) {
            channel.txRollback();
            System.out.println("send message rollback");
        }
        channel.close();
        connection.close();
    }
}
- 消费者代码:
public class TxRec {
    private static final String QUEUE_NAME = "test_queue_tx";

    public static void main(String[] args) throws IOException, TimeoutException {
        Connection connection = ConnectionUtils.getConnection(); // 获取连接
        Channel channel = connection.createChannel();
        // 队列声明
        channel.queueDeclare(QUEUE_NAME, false, false, false, null);
        // 定义消费者
        DefaultConsumer consumer = new DefaultConsumer(channel) {
            // 获取到达的消息
            @Override
            public void handleDelivery(String consumerTag, Envelope envelope, AMQP.BasicProperties properties,
                                       byte[] body) throws IOException {
                String msgString = new String(body, "utf-8");
                System.out.println("recv[tx]:" + msgString);
            }
        };
        // 监听队列。
        channel.basicConsume(QUEUE_NAME, true, consumer);
    }
}
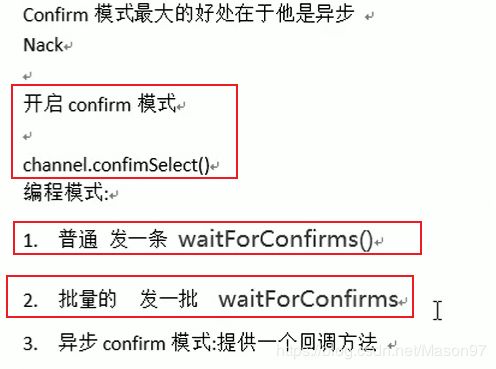
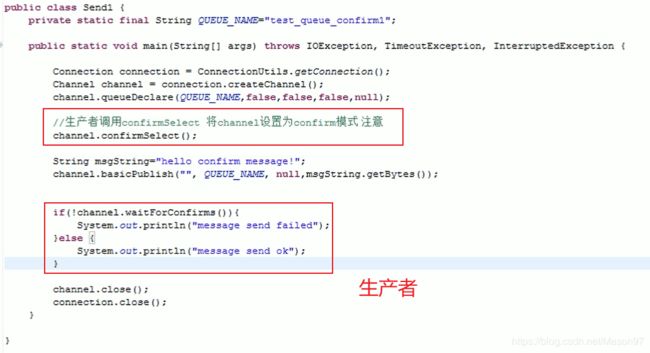
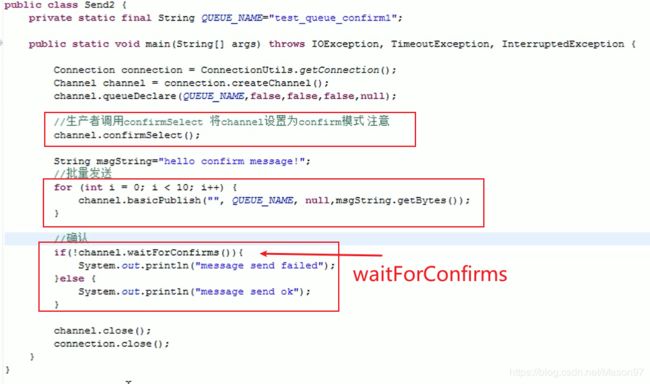
9.2 confirm模式
10. 结合SpringBoot
10.1 绑定键名(一个队列)(两个队列)【轮询方式】
- 创建一个rabbitmq-provider的项目:

- pom依赖:

- 对于application.yml来说:

- DirectRabbitConfig:作用是将几个对象放到Spring容器中

- controller
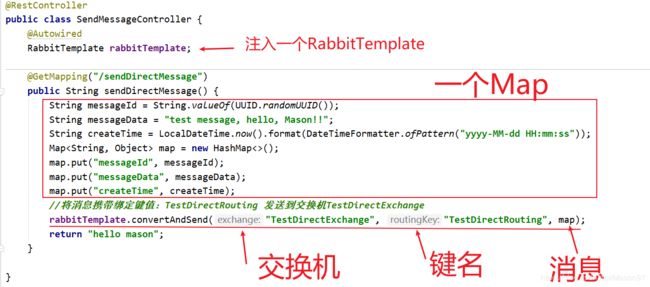
- 启动项目,发送请求,看到url能访问到这个controller

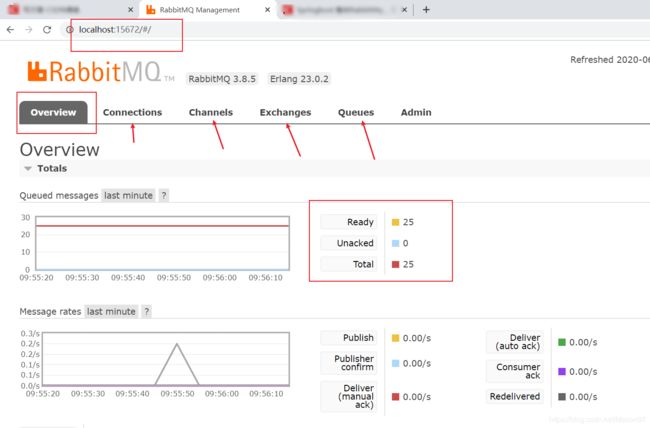
- 登录管理界面,可以看到消息信息。
- 创建新的项目:rabbitmq-consumer

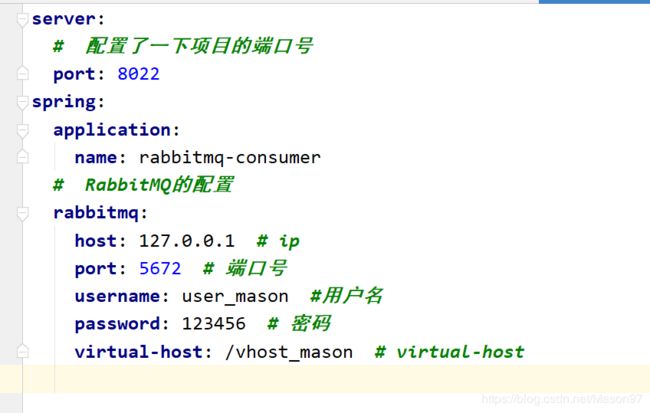

- 用postman发送url请求,使得生产者发送消息。启动消费者的项目。你会发现消费者收到了消息。

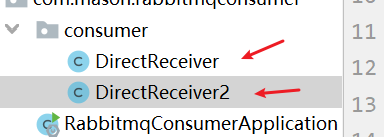
- 配置多台监听绑定到同一个直连交互的同一个队列
- 发现效果是轮询效果,不会重复消费。

10.2 topic模式
- 重点在下面这个图中:routingKey
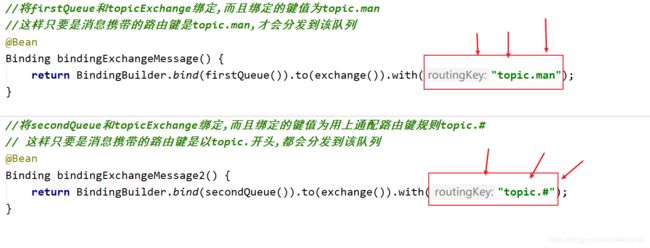
- 生产者项目配置:配置的作用是,设定路由器的名字,队列的名字,将路由器和队列绑定,同时设定这个绑定的键名。从而使得之后向路由器发送消息(附带rountingKey),路由器能够找到对应的队列。消费者监听某个队列,就能够从队列中获取消息。
/**
 * @Auther: Mason
 * @Date: 2020/06/21/10:41
 * @Description:
 */
@Configuration
public class TopicRabbitConfig {

    // 第一个队列
    @Bean
    public Queue firstQueue() {
        return new Queue("firstQueue");
    }

    // 第二个队列
    @Bean
    public Queue secondQueue() {
        return new Queue("secondQueue");
    }

    // 路由
    @Bean
    TopicExchange exchange() {
        return new TopicExchange("topicExchange");
    }


    //将firstQueue和topicExchange绑定,而且绑定的键值为topic.man
    //这样只要是消息携带的路由键是topic.man,才会分发到该队列
    @Bean
    Binding bindingExchangeMessage() {
        return BindingBuilder.bind(firstQueue()).to(exchange()).with("topic.man");
    }

    //将secondQueue和topicExchange绑定,而且绑定的键值为用上通配路由键规则topic.#
    // 这样只要是消息携带的路由键是以topic.开头,都会分发到该队列
    @Bean
    Binding bindingExchangeMessage2() {
        return BindingBuilder.bind(secondQueue()).to(exchange()).with("topic.#");
    }

}
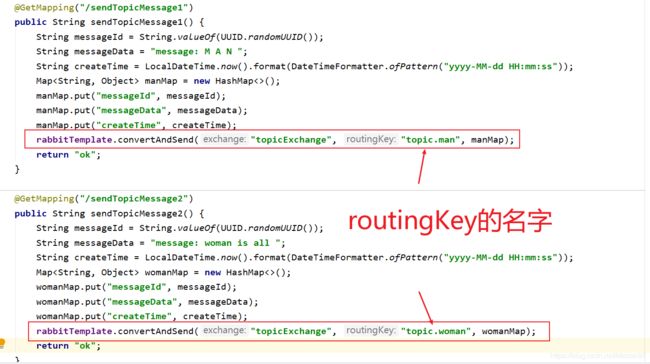
- controller的编写。
- 消费者监听队列:


- url请求:http://localhost:8021/sendTopicMessage1
- 会向topicExchange这个交换机发送消息(附带routingKey)


- topicExchange交换机根据routingKey,将消息发送给firstQueue和secondQueue,这两个队列都有类在进行监听。就会获取到消息,进行了处理。

10.3 Fanout 扇型交换机
- 消费者项目进行配置:
@Configuration
public class FanoutRabbitConfig {

    /**
     * 创建三个队列 :fanout.A   fanout.B  fanout.C
     * 将三个队列都绑定在交换机 fanoutExchange 上
     * 因为是扇型交换机, 路由键无需配置,配置也不起作用
     */

    @Bean
    public Queue queueA() {
        return new Queue("fanout.A");
    }

    @Bean
    public Queue queueB() {
        return new Queue("fanout.B");
    }

    @Bean
    public Queue queueC() {
        return new Queue("fanout.C");
    }

    @Bean
    FanoutExchange fanoutExchange() {
        return new FanoutExchange("fanoutExchange");
    }

    @Bean
    Binding bindingExchangeA() {
        return BindingBuilder.bind(queueA()).to(fanoutExchange());
    }

    @Bean
    Binding bindingExchangeB() {
        return BindingBuilder.bind(queueB()).to(fanoutExchange());
    }

    @Bean
    Binding bindingExchangeC() {
        return BindingBuilder.bind(queueC()).to(fanoutExchange());
    }
}
- 消费者项目写访问接口:
    @GetMapping("/sendFanoutMessage")
    public String sendFanoutMessage() {
        String messageId = String.valueOf(UUID.randomUUID());
        String messageData = "message: testFanoutMessage ";
        String createTime = LocalDateTime.now().format(DateTimeFormatter.ofPattern("yyyy-MM-dd HH:mm:ss"));
        Map<String, Object> map = new HashMap<>();
        map.put("messageId", messageId);
        map.put("messageData", messageData);
        map.put("createTime", createTime);
        rabbitTemplate.convertAndSend("fanoutExchange", null, map);
        return "ok";
    }
