腾讯云CentOS7.5安装Mysql8.0.13
一、清除以前安装的MySQL或者系统自带的MySQL
1.查看是否已安装MySQL
rpm -qa|grep mysql
2.若存在则卸载掉
rpm -e --nodeps mysql-libs
二、安装Mysql
1.使用wget命令下载到本地
sudo wget https://repo.mysql.com//mysql80-community-release-el7-1.noarch.rpm

2.安装
sudo rpm -ivh mysql80-community-release-el7-1.noarch.rpm

sudo yum install mysql-server


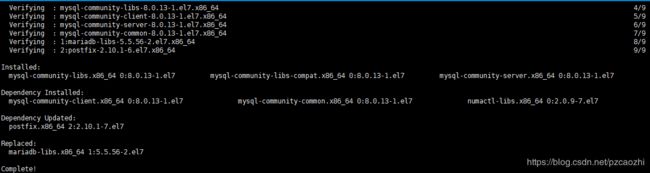
3.检查是否安装成功
mysqladmin -V

4.开启Mysql
sudo service mysqld start

5.查看状态
sudo service mysqld status

6.登录
1)MySQL的初始值不再是空了, 首次登录需要去获取MySQL给的初始值
sudo cat /var/log/mysqld.log

2)获取密码后就可以登录
sudo mysql -uroot -p

3)修改密码
MySQL8修改密码没有以前那么简单了
alter user user() identified by 'xxxxxxxx'
'xxxxxxxx’代表包含字母大小写, 特殊字符, 还要最少8位
也可以设置一个简单的密码,比如“111111”
set global validate_password.policy=0;
set global validate_password.length=1;
alter user user() identified by '111111';
7.远程登录
1)使用Ctrl+Z退出MySQL
Ctrl+Z
2)修改配置i文件my.cnf
sudo vi /etc/my.cnf

去掉default-authentication-plugin=mysql_native_password前面的注释
添加一行port=3306 (不确定mysqld.log看到的33060端口是什么)
3)修改mysql数据库下的user表中host的值
mysql -u root -p
use mysql;
alter user 'root'@'localhost' identified with mysql_native_password by 'xxxxxx';
flush privileges;
update user set host='%' where user='root';
flush privileges;
4)关闭防火墙
CentOS7默认使用的是firewall作为防火墙
步骤一:关闭firewall防火墙
sudo systemctl stop firewalld.service
sudo systemctl disable firewalld.service
sudo systemctl mask firewalld.service
步骤二:安装iptables防火墙
sudo yum install iptables-services -y
sudo systemctl enable iptables
sudo systemctl start iptables
sudo vim /etc/sysconfig/iptables
加入一行
-A INPUT -p tcp -m state --state NEW -m tcp --dport 3306 -j ACCEPT
重启防火墙
sudo systemctl enable iptables.service
sudo systemctl start iptables.service
备注:按道理步骤二的操作是可以的,但实际使用情况看,没有效果,telnet {IP} 3306不能通过
后来又把iptables防火墙也关闭来
步骤三:将mysql 服务加入开机启动项,并启动mysql进程
sudo systemctl enable mysqld.service
sudo systemctl start mysqld.service
步骤四:使用Navicat远程连接MySQL
重启mysql服务
sudo systemctl restart mysqld.service
查看端口
sudo netstat -apn|grep 3306

Navicat工具连接
