树莓派4B-简单的人脸检测
整了一天,终于把树莓派的网络,软件这些整好了,不容易,现在来写写代码试试。
1.获取摄像头数据
我的摄像头是和买树莓派时一起买的,官方原装摄像头。相关驱动应该在厂家提供的版本中就是直接装好了,没费啥力,摄像头就能直接使用。直接使用opencv获取图像数据。代码如下:
opencamera.py
import cv2
def main():
#print("OpenCV Version:{}".format(cv2.__version__))
# 0: use CSI camera,1:use USB camera
cap = cv2.VideoCapture(0)
if(not cap.isOpened()):
print("can't open this camera")
while(True):
ret, FrameImage = cap.read()
if ret == True:
cv2.imshow('Camera Capture',FrameImage)
#Press Q to quit
if (cv2.waitKey(1)) == ord('q'):
cap.release()
break
else:
break
main();
以上代码主要测试摄像头是否能够正常工作
2.摄像头正常工作了之后,拷贝个检测人脸的代码试试,学习阶段,原理还没搞清楚
上代码:
faceDetect.py
import cv2
import os
import time
def main():
print("OpenCV Version:{}".format(cv2.__version__))
# 0: use CSI camera,1:use USB camera
cap = cv2.VideoCapture(0)
if(not cap.isOpened()):
print("can't open this camera")
# Center coordinates
cx = 160
cy = 120
os.system( "echo 0=150 > /dev/servoblaster" )
os.system( "echo 1=150 > /dev/servoblaster" )
xdeg = 150
ydeg = 150
face_cascade = cv2.CascadeClassifier( '/home/pi//Documents/python_PRJ/Hello_Pi/lbpcascade_frontalface_improved.xml' )
fps = 0
t_start = time.time()
while(True):
ret, image = cap.read()
if ret == True:
# change to gray image
GrayImage = cv2.cvtColor(image, cv2.COLOR_BGR2GRAY)
faces = face_cascade.detectMultiScale( GrayImage )
#print "Found " + str( len( faces ) )+" face(s)"
# Draw a rectangle around every face and move the motor towards the face
for ( x, y, w, h ) in faces:
cv2.rectangle( image, ( x, y ), ( x + w, y + h ), ( 100, 255, 100 ), 2)
cv2.putText( image, "Face No." + str( len( faces ) ), ( x, y ), cv2.FONT_HERSHEY_SIMPLEX, 0.5, ( 0, 0, 255 ), 2 )
tx = x + w/2
ty = y + h/2
if ( cx - tx > 10 and xdeg <= 190 ):
xdeg += 3
os.system( "echo 0=" + str( xdeg ) + " > /dev/servoblaster" )
elif ( cx - tx < -10 and xdeg >= 110 ):
xdeg -= 3
os.system( "echo 0=" + str( xdeg ) + " > /dev/servoblaster" )
if ( cy - ty > 10 and ydeg >= 110 ):
ydeg -= 3
os.system( "echo 1=" + str( ydeg ) + " > /dev/servoblaster" )
elif ( cy - ty < -10 and ydeg <= 190 ):
ydeg += 3
os.system( "echo 1=" + str( ydeg ) + " > /dev/servoblaster" )
# Calculate and show the FPS
fps = fps + 1
sfps = fps / ( time.time() - t_start )
cv2.putText( image, "FPS : " + str( int( sfps ) ), ( 10, 10 ), cv2.FONT_HERSHEY_SIMPLEX, 0.5, ( 0, 0, 255 ), 2 )
# Show the frame
cv2.imshow( "Frame", image )
cv2.waitKey( 1 )
if (cv2.waitKey(1)) == ord('q'):
cap.release()
break
else:
break
main();
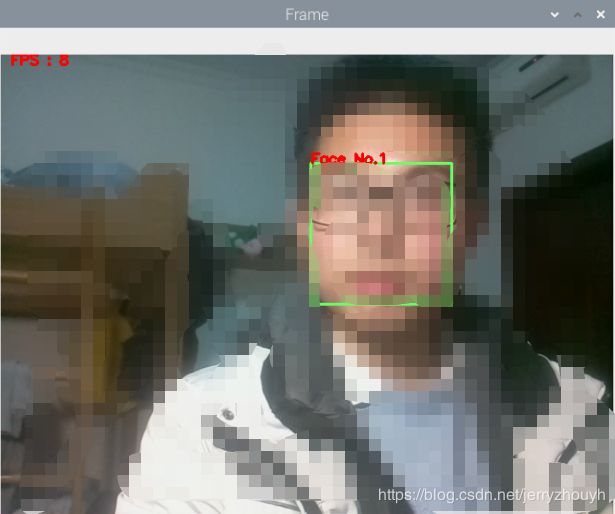
以上代码也是在网上搜索后稍微修改得到,就是用opencv获取图像后进行人脸的检测。lbpcascade_frontalface_improved.xml文件可能测试的时候会用到,https://download.csdn.net/download/qq_41185868/10327829 这个链接下载的。
上张图看下,比较害羞,还是马赛克一下。
