linux安装及Parallels_Desktop_15安装
https://www.runaccepted.com/2020/03/30/linux安装
文章目录
- Parallels Desktop 15 安装
- 安装win10
- CentOS 7下载及配置
- 查看ip-固定ip
- ip相关配置文件
- Mac 连接linux
- 防火墙
- yum源中加入阿里云源
- 安装docker
- 重启后docker无法启动
- 克隆linux
- Mac 连接linux2
- 再重启ssh拒绝 Connection refused
Parallels Desktop 15 安装
官网 https://www.parallels.cn/products/desktop/buy/
链接: https://pan.baidu.com/s/1A4F2RhT4bT-SLK70jLXAoQ 密码: 08f0
安装不要联网!不要联网!
双击安装
出现 无法打开“Parallels Desktop.app”,因为Apple无法检查其是否包含恶意软件
终端输入 sudo spctl --master-disable 允许任何来源的安装
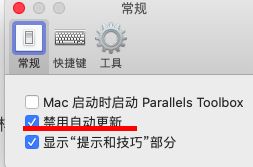
而后不检查更新,这就是不联网的原因,安装当前版
最终

关闭检查

同样不联网,安装Parallels Tools

禁用
安装win10
ed2k://|file|cn_windows_10_multi-edition_vl_version_1709_updated_sept_2017_x64_dvd_100090774.iso|4630972416|8867C5E54405FF9452225B66EFEE690A|/
CentOS 7下载及配置
http://mirrors.aliyun.com/centos/7.7.1908/isos/x86_64/
CentOS-7-x86_64-DVD-1908.iso                       没有桌面(选择☑️)
CentOS-7-x86_64-DVD-1908.torrent
CentOS-7-x86_64-Everything-1908.iso                完整版,集成所有软件
CentOS-7-x86_64-Everything-1908.torrent
CentOS-7-x86_64-LiveGNOME-1908.iso                 有桌面版
CentOS-7-x86_64-LiveGNOME-1908.torrent
CentOS-7-x86_64-LiveKDE-1908.iso                   有桌面版
CentOS-7-x86_64-LiveKDE-1908.torrent
CentOS-7-x86_64-Minimal-1908.iso                   精简版,自带的软件最少
CentOS-7-x86_64-Minimal-1908.torrent
CentOS-7-x86_64-NetInstall-1908.iso                网络安装版
CentOS-7-x86_64-NetInstall-1908.torrent
查看ip-固定ip
# ip address
ip相关配置文件
/etc/sysconfig/network-scripts/ifcfg-eth0
[linux@localhost network-scripts]$ cd /etc/sysconfig/network-scripts
[linux@localhost network-scripts]$ ls
ifcfg-eth0  ifdown-bnep  ifdown-ipv6  ifdown-ppp     ifdown-Team      ifup          ifup-eth   ifup-isdn   ifup-post    ifup-sit       ifup-tunnel       network-functions
ifcfg-lo    ifdown-eth   ifdown-isdn  ifdown-routes  ifdown-TeamPort  ifup-aliases  ifup-ippp  ifup-plip   ifup-ppp     ifup-Team      ifup-wireless     network-functions-ipv6
ifdown      ifdown-ippp  ifdown-post  ifdown-sit     ifdown-tunnel    ifup-bnep     ifup-ipv6  ifup-plusb  ifup-routes  ifup-TeamPort  init.ipv6-global
[linux@192 network-scripts]$ vi ifcfg-eth0

#默认配置
TYPE="Ethernet"
PROXY_METHOD="none"
BROWSER_ONLY="no"
BOOTPROTO="static"
DEFROUTE="yes"
IPV4_FAILURE_FATAL="no"
IPV6INIT="yes"
IPV6_AUTOCONF="yes"
IPV6_DEFROUTE="yes"
IPV6_FAILURE_FATAL="no"
IPV6_ADDR_GEN_MODE="stable-privacy"
NAME="eth0"
UUID="0ae56f0b-16f1-42cd-adc0-b3bc4daa57c2"
DEVICE="eth0"
#

#修改配置
TYPE="Ethernet" #网关类型:以太网
BOOTPROTO="static" #ip设置:静态ip
DEVICE="eth0" #网卡名
ONBOOT="yes" #随系统启动
IPADDR="192.168.0.101" #ip地址
GATEWAY="192.168.0.1" #网关
NETMASK="255.255.255.0" #子网掩码
DNS1="8.8.8.8" #谷歌免费dns
#

[linux@localhost network-scripts]$ reboot
Mac 连接linux
ssh 用户名@ip
LearningtekiMacBook-Air:myblog Learning$ ssh [email protected]
[linux@192 ~]$
[linux@192 ~]$ ip addr
2: eth0: inet 192.168.0.101/24
[linux@192 ~]$
[linux@192 ~]$
防火墙
查看防火墙状态: service firewalld status
启动防火墙: systemctl start firewalld
停止防火墙: systemctl stop firewalld
禁用防火墙: systemctl disable firewalld
查看版本: firewall-cmd --version
查看帮助: firewall-cmd --help
显示状态: firewall-cmd --state
开启端口:firewall-cmd --zone=public(作用域) --add-port=80/tcp(端口和访问类型) --permanent(永久生效)
更新防火墙:firewall-cmd --reload
查看该端口是否开启:firewall-cmd --zone= public --query-port=80/tcp
关闭端口:firewall-cmd --zone= public --remove-port=80/tcp --permanent
yum源中加入阿里云源
-
打开centos的yum文件夹
cd /etc/yum.repos.d/
-
用wget下载repo文件
wget http://mirrors.aliyun.com/repo/Centos-7.repo
如果wget命令不生效
yum -y install wget
-
备份系统原来的repo文件
mv CentOS-Base.repo CentOs-Base.repo.bak
-
替换系统原理的repo文件
mv Centos-7.repo CentOS-Base.repo
-
执行yum源更新命令
yum clean all
yum makecache
yum update
[linux@localhost ~]$ su
Password:
[root@localhost linux]# cd /etc/yum.repos.d/
[root@localhost yum.repos.d]# ls
CentOS-Base.repo      CentOS-CR.repo         CentOS-fasttrack.repo  CentOS-Sources.repo
CentOS-Debuginfo.repo  CentOS-Media.repo      CentOS-Vault.repo
[root@localhost yum.repos.d]# yum -y install wget
[root@localhost yum.repos.d]# wget  http://mirrors.aliyun.com/repo/Centos-7.repo
[root@localhost yum.repos.d]# mv CentOS-Base.repo CentOs-Base.repo.bak
[root@localhost yum.repos.d]# mv Centos-7.repo CentOs-Base.repo
[root@localhost yum.repos.d]# yum clean all
[root@localhost yum.repos.d]# yum makecache
[root@localhost yum.repos.d]# yum update
安装docker
https://www.runaccepted.com/2019/10/21/Docker/
重启后docker无法启动
Cannot connect to the Docker daemon at unix:///var/run/docker.sock. Is the docker daemon running?
解决:
systemctl daemon-reload
service docker restart
[linux@localhost ~]$ docker ps
Cannot connect to the Docker daemon at unix:///var/run/docker.sock. Is the docker daemon running?
[linux@localhost ~]$
[linux@localhost ~]$
[linux@localhost ~]$
[linux@localhost ~]$
[linux@localhost ~]$ systemctl daemon-reload
==== AUTHENTICATING FOR org.freedesktop.systemd1.reload-daemon ===
Authentication is required to reload the systemd state.
Authenticating as: root
Password:
==== AUTHENTICATION COMPLETE ===
[linux@localhost ~]$
[linux@localhost ~]$ service docker restart
Redirecting to /bin/systemctl restart docker.service
==== AUTHENTICATING FOR org.freedesktop.systemd1.manage-units ===
Authentication is required to manage system services or units.
Authenticating as: root
Password:
==== AUTHENTICATION COMPLETE ===
[linux@localhost ~]$
[linux@localhost ~]$
[linux@localhost ~]$ docker ps
Got permission denied while trying to connect to the Docker daemon socket at unix:///var/run/docker.sock: Get http://%2Fvar%2Frun%2Fdocker.sock/v1.40/containers/json: dial unix /var/run/docker.sock: connect: permission denied
[linux@localhost ~]$
[linux@localhost ~]$
[linux@localhost ~]$ su
密码:
[root@localhost linux]# docker ps
CONTAINER ID        IMAGE               COMMAND             CREATED             STATUS              PORTS               NAMES
[root@localhost linux]# docker ps -a
CONTAINER ID        IMAGE                  COMMAND                  CREATED             STATUS                       PORTS               NAMES
19d9ac40ba76        elasticsearch:5.6.11   "/docker-entrypoint.…"   8 hours ago         Exited (143) 6 minutes ago                       elasticsearch
c7473e2145bc        logstash:5.6.11        "/docker-entrypoint.…"   9 hours ago         Exited (137) 8 hours ago                         logstash
7122d84209e4        kibana:5.6.11          "/docker-entrypoint.…"   10 hours ago        Exited (143) 8 hours ago                         kibana
[root@localhost linux]#
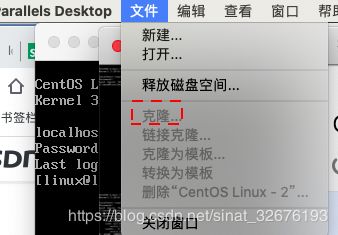
克隆linux
在关机情况下操作
修改IP地址 为192.168.0.102
[linux@localhost ~]$ cd /etc/sysconfig/network-scripts
[linux@localhost network-scripts]$ nano ifcfg-eth0

TYPE="Ethernet"
BOOTPROTO="static"
DEVICE="eth0"
ONBOOT="yes"
IPADDR="192.168.0.102"
GATEWAY="192.168.0.1"
NETMASK="255.255.255.0"
DNS1="8.8.8.8"

[linux@localhost network-scripts]$
删除Linux物理地址绑定的文件(该文件会在操作系统重启并生成物理地址以后将物理地址绑定到IP上
[linux@localhost network-scripts]$ rm -rf /etc/udev/rules.d/70-persistent-net.rules
[linux@localhost network-scripts]$ reboot
Mac 连接linux2
LearningtekiMacBook-Air:myblog Learning$ ssh [email protected]
[linux@localhost ~]$
[linux@localhost ~]$ ip addr
2: eth0: inet 192.168.0.102/24
[linux@localhost ~]$
启动elasticsearch
[root@localhost network-scripts]# docker ps -a
CONTAINER ID        IMAGE                  COMMAND                  CREATED             STATUS                        PORTS               NAMES
19d9ac40ba76        elasticsearch:5.6.11   "/docker-entrypoint.…"   9 hours ago         Exited (143) 40 minutes ago                       elasticsearch
[root@localhost network-scripts]# docker start 19d9ac40ba76
19d9ac40ba76
[root@localhost network-scripts]#
http://192.168.0.102:9200/
// http://192.168.0.102:9200/

{
  "name": "efBli3S",
  "cluster_name": "elasticsearch",
  "cluster_uuid": "RmnRPDI-T4G8hOH92bX5wQ",
  "version": {
    "number": "5.6.11",
    "build_hash": "bc3eef4",
    "build_date": "2018-08-16T15:25:17.293Z",
    "build_snapshot": false,
    "lucene_version": "6.6.1"
  },
  "tagline": "You Know, for Search"
}
再重启ssh拒绝 Connection refused
LearningtekiMacBook-Air:~ Learning$ ssh [email protected]
ssh: connect to host 192.168.0.102 port 22: Connection refused
LearningtekiMacBook-Air:~ Learning$
查看ssh是否启动
[linux@localhost ~]$ ps -e | grep ssh
  981 ?        00:00:00 sshd
[linux@localhost ~]$
查看22端口
[linux@localhost ~]$ ss -lnt
State      Recv-Q Send-Q                          Local Address:Port                                         Peer Address:Port
LISTEN     0      128                                         *:22                                                      *:*
LISTEN     0      100                                 127.0.0.1:25                                                      *:*
LISTEN     0      128                                      [::]:22                                                   [::]:*
LISTEN     0      100                                     [::1]:25                                                   [::]:*
[linux@localhost ~]$
查看hosts名单
127.0.0.1   localhost localhost.localdomain localhost4 localhost4.localdomain4
::1         localhost localhost.localdomain localhost6 localhost6.localdomain6
ping 192.168.0.100
[linux@localhost ~]$ ping 192.168.0.100
PING 192.168.0.100 (192.168.0.100) 56(84) bytes of data.
64 bytes from 192.168.0.100: icmp_seq=1 ttl=64 time=0.165 ms
64 bytes from 192.168.0.100: icmp_seq=2 ttl=64 time=0.274 ms
64 bytes from 192.168.0.100: icmp_seq=3 ttl=64 time=0.374 ms
^C
--- 192.168.0.100 ping statistics ---
3 packets transmitted, 3 received, 0% packet loss, time 2002ms
rtt min/avg/max/mdev = 0.165/0.271/0.374/0.085 ms
[linux@localhost ~]$
添加
192.168.0.100 192.168.0.100
ssh hostname
[linux@localhost ~]$ ssh 192.168.0.100
Warning: Permanently added '192.168.0.100' (ECDSA) to the list of known hosts.
再次ssh linux2
LearningtekiMacBook-Air:~ Learning$ ssh [email protected]
[email protected]'s password:
[linux@localhost ~]$