引子
很久以前就想玩一玩linux,树莓派最初的设想是当做一个班级公用服务器保持常开。后来发现树莓派的功能真心强大,玩的范围便广了起来。期间也不乏许多弯路和折腾。于是再此记录下来,以便以后回顾,能少一些弯路。
为了更好的演示整个过程,还是决定将系统重新安装,以尽可能的模仿当初的环境。
使用到的东西
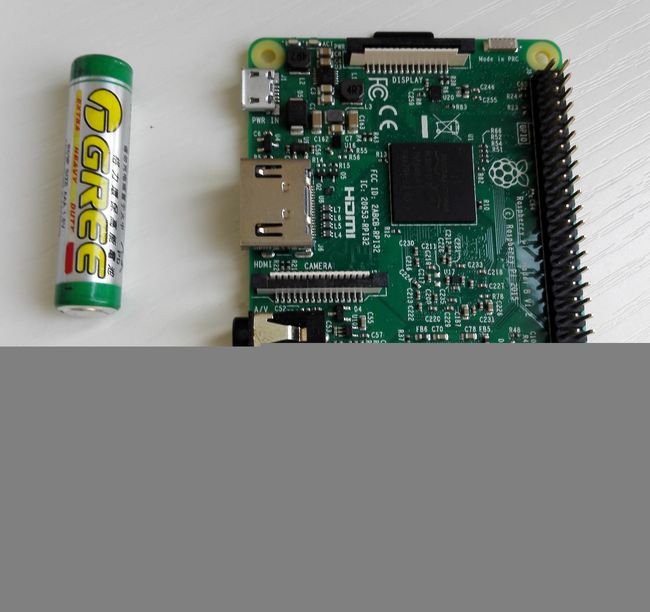
你的树莓派&&电源
一个8G的SD卡&&读卡器
Win32DiskImager
百度即可,或者其他任意类似软件均可
XShell5(个人免费版)
http://sw.bos.baidu.com/sw-search-sp/software/a4bcc35e27be1/xshell5_5.0.1332.exe
树莓派官网
https://www.raspberrypi.org
树莓派官方系统Raspbian JESSIE LITE 4.4(2017-09-07)
https://downloads.raspberrypi.org/raspbian_lite_latest
系统
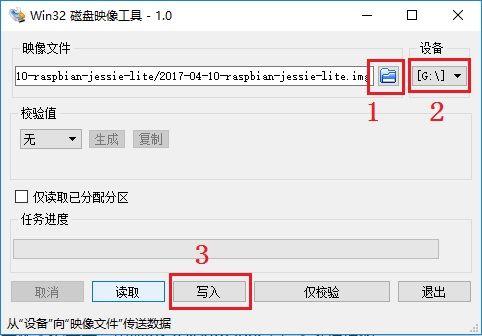
解压系统压缩包,将卡插入读卡器,用Win32DiskImager来写入系统镜像
耐心等待三分钟……
完成后系统只显示一个约40MB的boot分区。其实是U盘协议的问题,windows下的U盘驱动在有两个分区时只加载第一个。
默认Raspbian不启动ssh,记得在boot分区根目录下新建一个叫做ssh(是的,没有后缀)的空文件。
将卡插入树莓派。有网线的话可以跳过下面的部分。
无线网络连接
既然没有网络来用ssh连接,只好准备一个HDMI线和一个显示屏。如果家里面有电视猫的话就很舒服了,把电视猫的HDMI线拔下来插在树莓派上,打开电视就是一个超大显示屏了!
回到正题,网上的大部分教程都是更改/etc/network/interfaces为
wpa-ssid netgear #你要连接的wifi ssid
wpa-psk 1234567890 #你的wpa连接密码
然而这样的话不仅只能保存一个密码,每次连接由某种原因断开后还要重启,很繁琐。
看一看你的/etc/network/interfaces文件,里面有一段应该是这样的
allow-hotplug wlan0
iface wlan1 inet manual
    wpa-conf /etc/wpa_supplicant/wpa_supplicant.conf
把它改成dhcp方式
allow-hotplug wlan0
iface wlan1 inet dhcp
    wpa-conf /etc/wpa_supplicant/wpa_supplicant.conf
或者手动配置IP
iface wlan0 inet static
    address 192.168.2.233
    netmask 255.255.255.0
    network 192.168.2.0
    broadcast 192.168.2.255
    gateway 192.168.2.1
    wpa-conf /etc/wpa_supplicant/wpa_supplicant.conf
我们看到了什么?一个conf文件?这肯定大有文章!
注:(17-10-03修改)
此时连接网络不需要以上步骤,直接进行下面的步骤即可!
事实上wpa-conf有另外一个命令叫wpa-roam,区别是什么?
wpa-roamingis a method with which you can browse and connect to wireless networks.The result of the following setup is that if an ethernet cable is not attached, wlan0 takes precedence and connects you to your desired wireless network or to an available open wireless network or a predetermined wireless network. If you connect an ethernet cable, the cabled network connection immediately shuts down WiFi access and eth0 then connects you to the cabled network. By unplugging the network cable the wireless connection will instantly be available again.
Source : http://manual.aptosid.com/en/inet-setup-en.htm
I assume that,
wpa-confis the static configuration which not needed for roaming through network interfaces. I couldn't find any relevant and detailed document for this.By the way I have same issue with my WiFi configuration. My WiFi does not work when wired ethernet unplugged. So i changed wpa-roam to wpa-conf as like you, it worked.
翻译过来就是wpa-roam和wpa-conf功能上是一样的,但是如果使用wpa-roam则会在“有线连接”已连接上时断开无线连接,而使用wpa-conf则不会
编辑你的/etc/wpa_supplicant/wpa_supplicant.conf
country=GB
ctrl_interface=DIR=/var/run/wpa_supplicant GROUP=netdev
update_config=1

network={
	ssid="WIFI1"
	psk="PASSWD1"
	priority=5
}

network={
	ssid="WIFI2"
	scan_ssid=1
	psk="PASSWD2"
	priority=4
}
ssid填写WiFi的SSID名称,psk则是WPA-2的密码,priority是优先级,scan_ssid是连接“不广播SSID的WIFI”
错误:
过了一会儿无法连接,确认WiFi正常,有线连接正常,iwconfig显示
IEEE 802.11bgn  ESSID:off/any
Mode:Managed  Access Point: Not-Associated
Retry short limit:7
RTS thr:off
Fragment thr:off
Power Management:on
暂不知道原因,我重启一下就好了=_=。
连接&设置
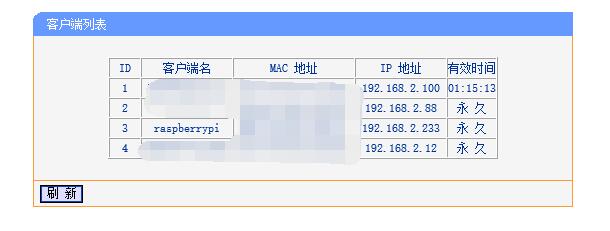
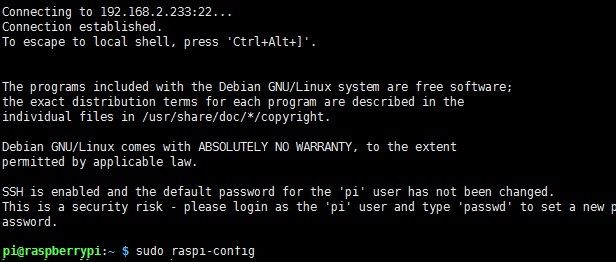
从路由表里可以找到树莓派的IP地址,用XShell连接,默认用户名为pi,密码为raspberry。
树莓派做的很贴心的就是raspi-config,他提供了一个很友好的界面来设置你的树莓派。
记得“1 重设密码”和“7 高级-->A1 扩展文件系统以使用全部的SD卡空间”
使用源
Raspbain默认使用的官方源毕竟在国外,网速相对较慢,这里使用中科大的镜像源。
https://lug.ustc.edu.cn/wiki/mirrors/help/raspbian
编辑
/etc/apt/sources.list文件。删除原文件所有内容,用以下内容取代:deb http://mirrors.ustc.edu.cn/raspbian/raspbian/ jessie main non-free contrib deb-src http://mirrors.ustc.edu.cn/raspbian/raspbian/ jessie main non-free contrib编辑此文件后,请使用
sudo apt-get update命令,更新软件列表。
别忘了要有权限
sudo vi /etc/apt/sources.list
----------------sources.list------------------
deb http://mirrors.ustc.edu.cn/raspbian/raspbian/ jessie main non-free contrib
deb-src http://mirrors.ustc.edu.cn/raspbian/raspbian/ jessie main non-free contrib
#deb http://mirrordirector.raspbian.org/raspbian/ jessie main contrib non-free rpi
# Uncomment line below then 'apt-get update' to enable 'apt-get source'
#deb-src http://archive.raspbian.org/raspbian/ jessie main contrib non-free rpi
----------------sources.list------------------
sudo apt-get update


