CIT通用功能分析
CIT通用功能分析
OntimCit介绍
Customer Interface Test,也就是手机的硬件检测模式,里面可以检测手机的各个硬件的功能是否正常,比如麦克风,距离感应器,光传感器,听筒,相机等
一、软件版本测试
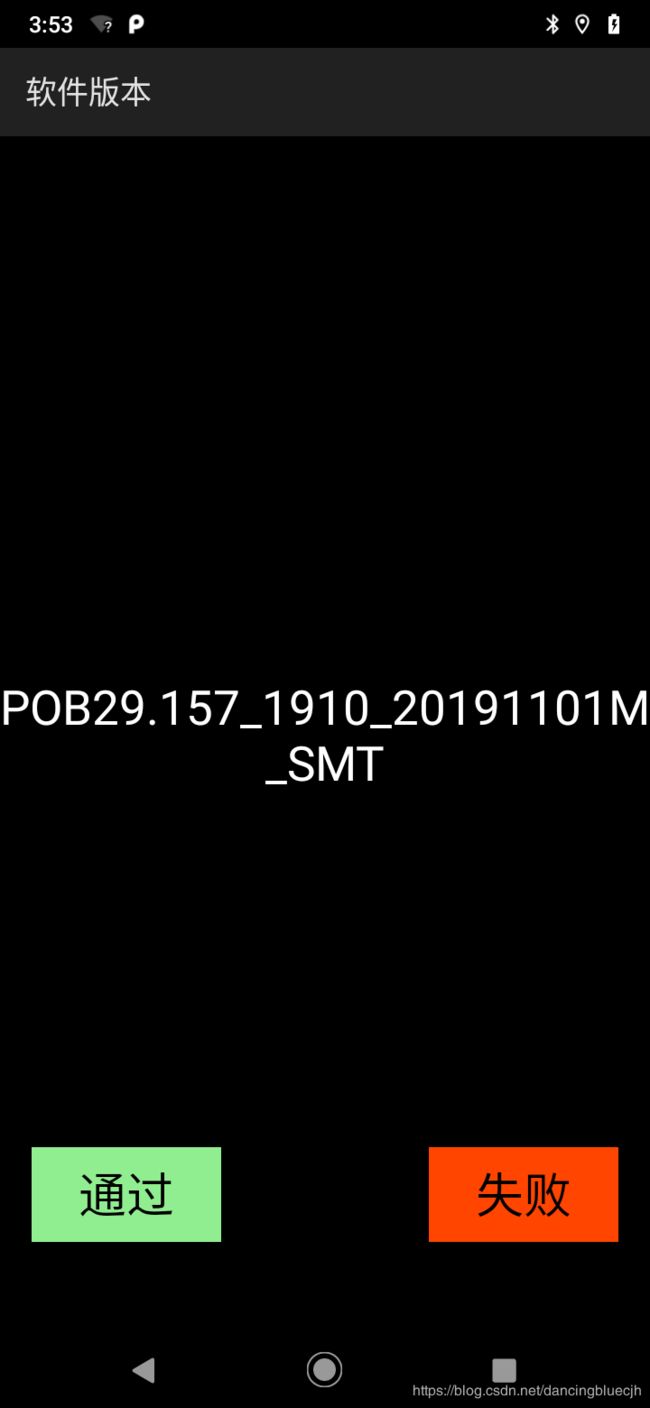
CitVersion.java
在onCreate 中准备数据,在onResume显示pass和fail按钮
使用CitUtils 工具类根据系统属性(SystemProperties)来获取版本信息。
判断一下是不是巴黎版本,如果是就将ontim version 也加上
protected void onCreate(Bundle paramBundle) {
        Intent vIntent = getIntent();
        initSelf(vIntent);
        setContentView(R.layout.sw_version);
        mViewVersion = (TextView)findViewById(R.id.sw_ver_text);
        //使用工具类获取版本信息
        mVersion = CitUtils.getSwVersion();
        //mVersion 长度小于等于0时,设置为空
        mVersion = mVersion.length() <= 0 ? getResources().getString(R.string.empty) : mVersion;
        super.onCreate(paramBundle);
        mBtnPass.setVisibility(View.VISIBLE);
        mBtnFail.setVisibility(View.VISIBLE);
    }
工具类getSwVersion方法如下:
  public static String getSwVersion() {
        String retStr = "";
        if (isSMTVersion()) {
            retStr = SystemProperties.get("ro.versions.internal_sw_ver", "");
        } else {
            retStr = SystemProperties.get("ro.product.sw.internal.version", "");
        }
        return retStr;
    }
二、EMMC存储器
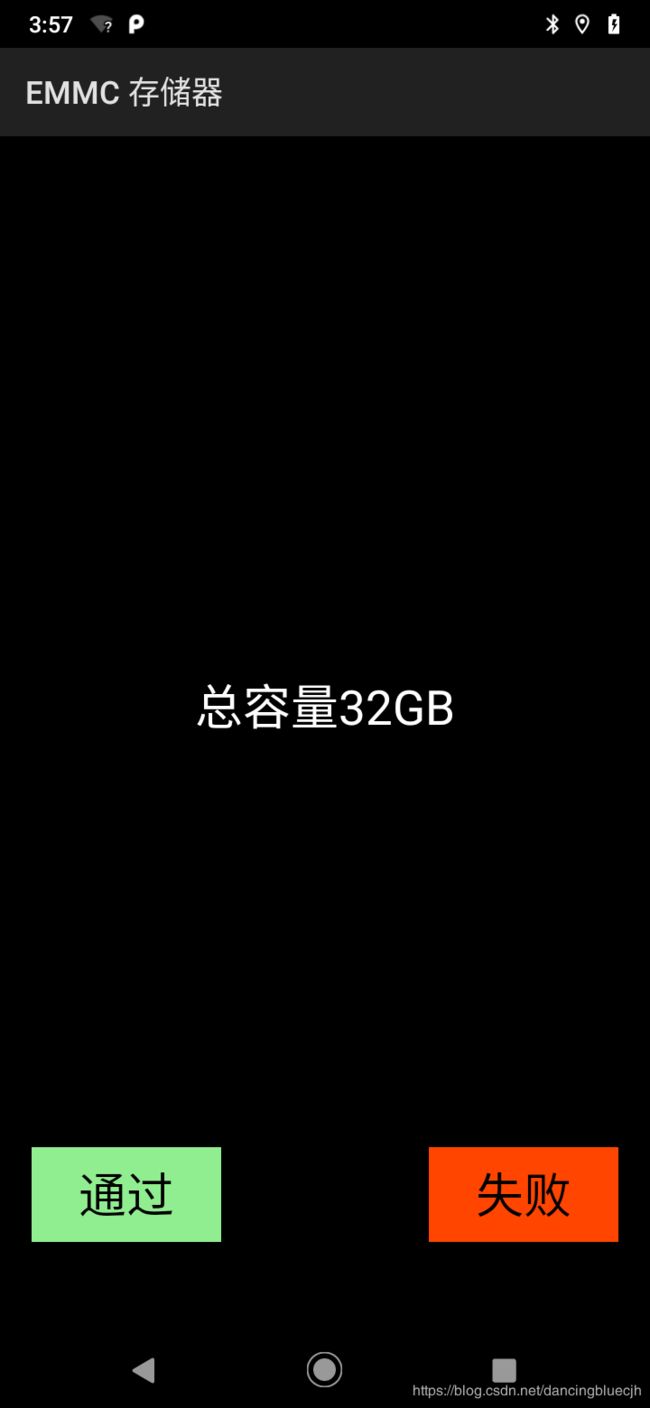
CitEMMC.java
检查外部存储是否挂载了;
挂载了,就用 CitFacService服务根据request实例获取存储大小,显示存储大小,测试项pass。
没有挂载,就显示EMMC 存储器没有发现,测试项fail。
 private void measureEmmcCapacity() {//测量内存容量
        if (Environment.getExternalStorageState().equals("mounted")) {{//外部存储挂载了
            String capacity = getEmmcCapacity();//获取大小
            if (null != capacity) {//显示内存大小
                mEmmcString = mRes.getString(R.string.total_capacity) + capacity + "\n";
            } else {
                mEmmcString= mRes.getString(R.string.total_capacity) + "\n";
            }
            mEmmc.setText(mEmmcString);
        }else{//没有挂载的时候显示 EMMC 存储器没有发现
            mEmmc.setText(mRes.getString(R.string.test_item_emmc) + mRes.getString(R.string.not_found));
        }
    }
private String getEmmcCapacity(){
        Request request = new Request();
        request.setId(Constants.REQ_GET_EMMC_INFO);
        request.setSubId(Constants.SUB_GET_EMMC_CAPACITY);
        Response response;
        if (CitUtils.isSMTVersion()) {//根据Request实例,返回的封装数据结果
            response = CitFacService.requestFac(request);
        } else {
            response = CitFacServiceNormal.requestFac(request);
        }
        String capcity = response.getDataString();
        return capcity;

    }
三、SIM卡测试
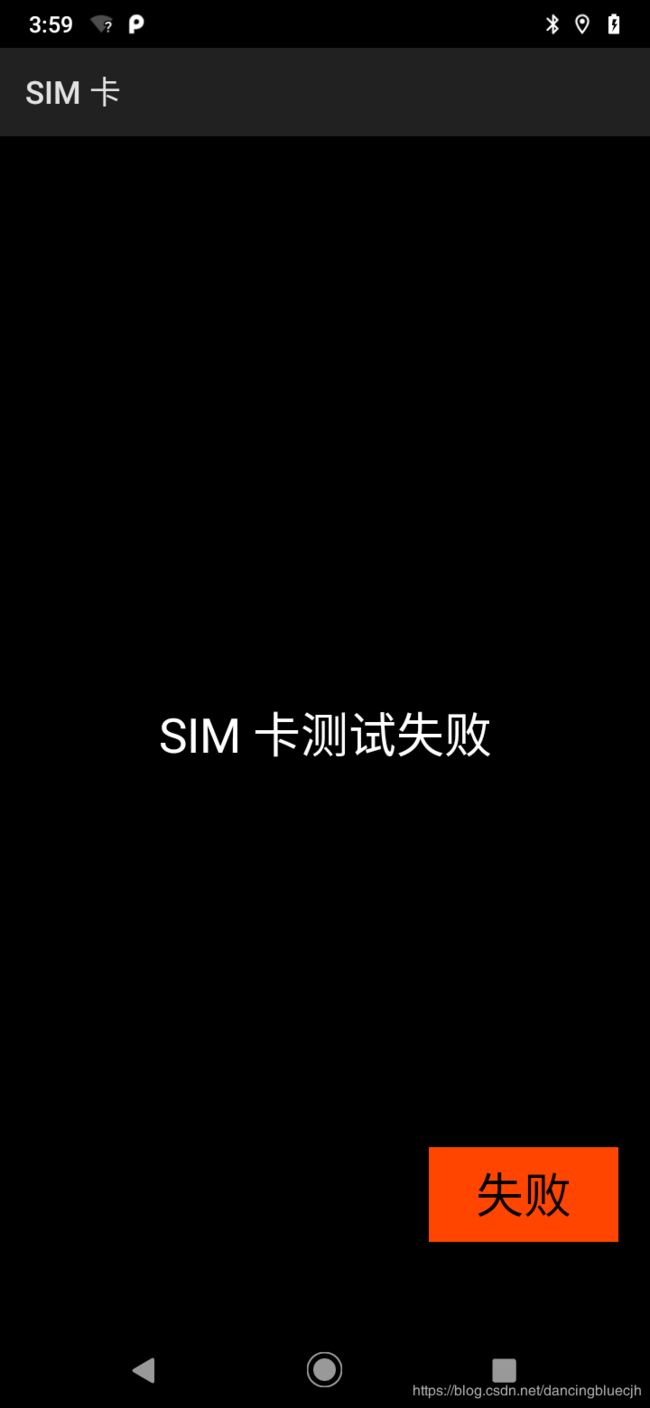
使用TelephonyManager获取sim卡的数量,根据卡的数量使用subscriptionManager获取描述信息mAvailableSubInfos。如果时单卡,然后在判断一下icccard是否存在,存在的话就设置sim1exit为true,测试通过,如果为双卡,要测试hasIccCard(0)和hasIccCard(1)都存在的话就测试通过
CitSIM.java
protected void onCreate(Bundle paramBundle){
        super.onCreate(paramBundle);
        mTelephonyManager = (TelephonyManager)getSystemService(Context.TELEPHONY_SERVICE);
        mSubscriptionManager = (SubscriptionManager)getSystemService(Context.TELEPHONY_SUBSCRIPTION_SERVICE);
        //开始测试
        startTestSIM();
    }
startTestSIM
private void startTestSIM(){
        mPhoneCount = TelephonyManager.from(CitSIM.this).getPhoneCount();
        mSubscriptionInfos = new ArrayList<SubscriptionInfo>(mPhoneCount);
        for (int i = 0; i < mPhoneCount; i++) {
            final SubscriptionInfo sir = findRecordByPhoneId(i);
            mSubscriptionInfos.add(sir);
        }
        if (mPhoneCount == 1) {
            if ( mTelephonyManager.hasIccCard(0)) {
                mSim1Exist = true;
            }
            //只有一张电话卡的时候
            testSIMForOne();
        } else {
            if (mTelephonyManager.hasIccCard(0)) {
                mSim1Exist = true;
            }
            if (mTelephonyManager.hasIccCard(1)) {
                mSim2Exist = true;
            }
            testSIMForAll();
        }
    }
四、外置SD卡
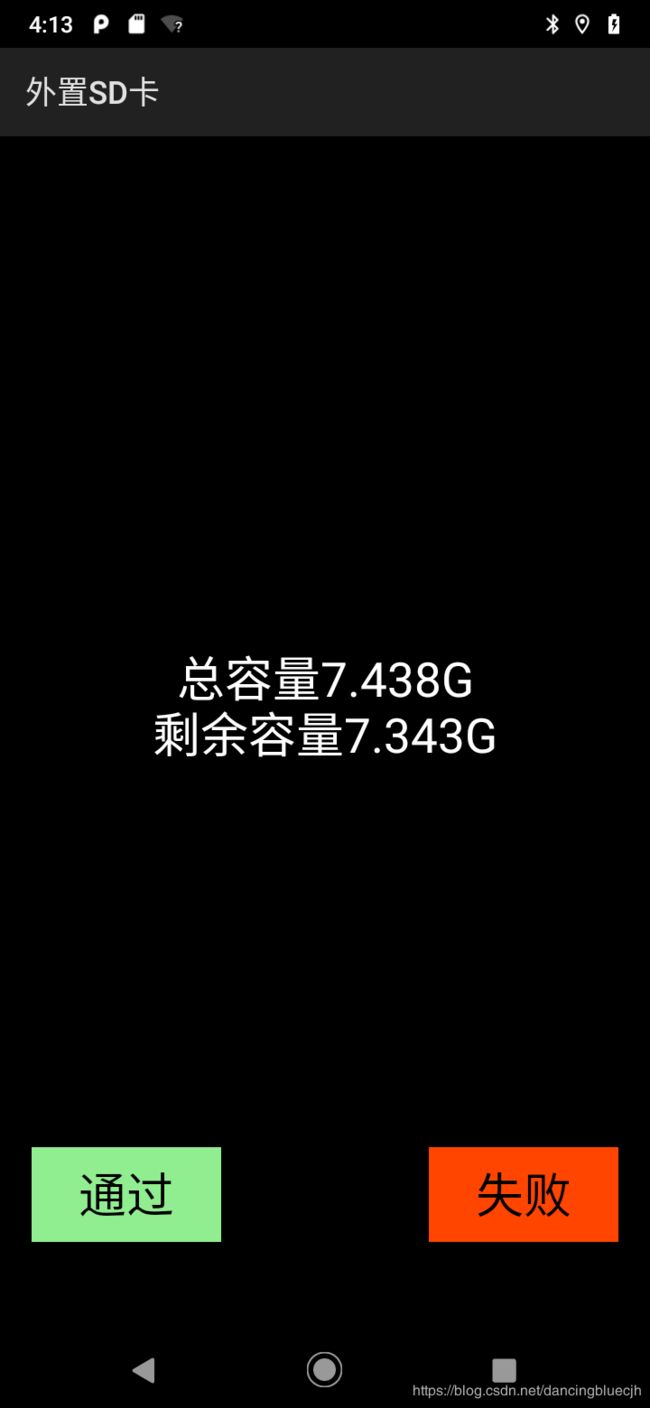
CitSDcard.java
Environment.getExternalStorageState 先判断sd卡是否存在,存在 的话就使用getEmmcCapacity方法开启服务去获取内部存储的值,返回值换算成合适单位,显示大小
protected void onCreate(Bundle paramBundle){
		mStorageManager = StorageManager.from(this);
        if (isSDCardExist()) {
            SDCardSizeTest();
        } else {
            mFilter = new IntentFilter();
            mFilter.addAction(Intent.ACTION_MEDIA_MOUNTED);
            mFilter.addAction(Intent.ACTION_MEDIA_UNMOUNTED);
            mFilter.addDataScheme("file");
            if (!mReg) {
                registerReceiver(mReceiver, mFilter);
                mReg = true;
            }
        }
        SDCardSizeTest();
    }
检查SD卡是否存在isSDCardExist()
private boolean isSDCardExist() {
        StorageVolume[] mVolumesExist = mStorageManager.getVolumeList();
        //打印路径和挂载状态 /storage/emulated/0, state = mounted
        for (int m = 0; m < mVolumesExist.length; m++) {
            Log.i(TAG, "mVolumesExist[" + m + "] = " + mVolumesExist[m].getPath() + ", state = " + mStorageManager.getVolumeState(mVolumesExist[m].getPath()));
        }
        //长度大于等于2并且已经挂载,表示SD存在
        if (mVolumesExist.length >= 2 && mStorageManager.getVolumeState(mVolumesExist[1].getPath()).equals("mounted")) {
            return true;
        } else {
            return false;
        }
    }
获取SD卡内存大小
 private void SDCardSizeTest() {
        //获取安卓设备的所有存储设备,mVolumes封装了挂载路径,挂载状态,以及是否可以移除等信息
        StorageVolume[] mVolumes = mStorageManager.getVolumeList();
        for (int m = 0; m < mVolumes.length; m++) {
            Log.i(TAG, "mVolumes[" + m + "] = " + mVolumes[m].getPath() + ", state = " + mStorageManager.getVolumeState(mVolumes[m].getPath()));
        }

        if (mVolumes.length >= 2 && mStorageManager.getVolumeState(mVolumes[1].getPath()).equals("mounted")) {
            StatFs mStatfs = new StatFs(mVolumes[1].getPath());
            long mStatfsBlockCount = mStatfs.getBlockCount();
            long mStatfsBlockSize = mStatfs.getBlockSize();
            long mStatfsAvailableBlocks = mStatfs.getAvailableBlocks();
            //总容量和可用容量换算成GB
            long mStatfsTotal = (mStatfsBlockCount * mStatfsBlockSize) / 1024L / 1024L;
            long mStatfsFree = (mStatfsAvailableBlocks * mStatfsBlockSize) / 1024L / 1024L;
            mSdcardString = (new StringBuilder()).append(getString(R.string.total_capacity)).append(tenthsToFixedString((float)mStatfsTotal / 1024F, 3)).append("G\n").toString();
            if (mStatfsFree < 1024L) {
                mSdcardString = (new StringBuilder()).append(mSdcardString).append(getString(R.string.available_capacity)).append(mStatfsFree).append("M\n").toString();
            } else {
                mSdcardString = (new StringBuilder()).append(mSdcardString).append(getString(R.string.available_capacity)).append(tenthsToFixedString((float) mStatfsFree / 1024F, 3)).append("G\n").toString();
            }
            //显示SD卡信息
            mSdcard.setText(mSdcardString);
            if (mReg) {
                unregisterReceiver(mReceiver);
                mReg = false;
            }
            mBtnPass.setVisibility(View.VISIBLE);
            if (mTestType == Constants.TEST_TYPE_AUTO) {
                mBtnPass.performClick();
            }
        } else {
            //存储设备小于2,或者挂载状体为未挂载的时候测试失败
            mSdcard.setText(getResources().getString(R.string.sdcard_unmount));
            //test fail
        }
    }
五、屏幕测试
新建一个测试布局,设置窗口为全屏模式,宽高设置为实际显示的宽高,颜色有一个数组,预先配置了三彩条、黑、白、灰、红、绿、蓝七种颜色,点击颜色布局,在颜色为黑白灰的时候都会延迟两秒发送消息,然后显示下一个颜色。当七种颜色全部测过之后,会将颜色布局隐藏,显示出pass按钮,如果测试中发现屏幕没有坏点,测试通过。
private void testLCD(){
        getWindow().setFlags(WindowManager.LayoutParams.FLAG_FULLSCREEN ,WindowManager.LayoutParams.FLAG_FULLSCREEN);
        mDisplayMetrics = new DisplayMetrics();
        getWindowManager().getDefaultDisplay().getRealMetrics(mDisplayMetrics);
        //设置屏幕宽高
        mScreenWidth = mDisplayMetrics.widthPixels;
        mScreenHeight = mDisplayMetrics.heightPixels;
        mColorView = new ColorView(this, mScreenColor,mScreenWidth,mScreenHeight);
        ViewGroup.LayoutParams layout = new ViewGroup.LayoutParams(ViewGroup.LayoutParams.FILL_PARENT,ViewGroup.LayoutParams.FILL_PARENT);
        mColorView.setLayoutParams(layout);
        //点击屏幕切换颜色
        mColorView.setOnClickListener(new View.OnClickListener() {
            public void onClick(View v) {
                if(!mSingleClick){
                    //通过handler控制mSingleClick的值来控制点击动作是否改变颜色
                    mSingleClick =true;
                    mHandler.sendEmptyMessage(1);
                }
            }
        });
        mLcdShow.addView(mColorView, 0);
        //提示测试者点击屏幕切换颜色
        Toast.makeText(this,R.string.ontouchscreen, Toast.LENGTH_SHORT).show();
    }
切换颜色方法
 private void changeColor() {
        mColorChangeCount ++;
        Log.d(TAG, "CitLCD changeColor,mColorChangeCount = " + mColorChangeCount);
        if(mColorChangeCount > 7){
            mHandler.removeMessages(1);
            mTestLayout.setVisibility(View.VISIBLE);
            mLcdShow.setVisibility(View.INVISIBLE);
            mLcdResult.setText(R.string.test_item_lcd_end);
        }else{
            mColorView.setColor(findNextColor(mColorView.getColor()));
            mColorView.invalidate();
            //黑白灰颜色延迟两秒发送消息
            if(mColorView.getColor() == Color.BLACK|| mColorView.getColor() == Color.WHITE|| mColorView.getColor() == mColorGray){
                //延迟两秒切换颜色并将singleclick设置为false
                mHandler.sendEmptyMessageDelayed(2,2000);
            }else{
                try {
                    Thread.currentThread().sleep(200);
                } catch (InterruptedException e) {
                    e.printStackTrace();
                }
                mSingleClick =false;
            }
        }
    }
六、后摄闪光灯测试
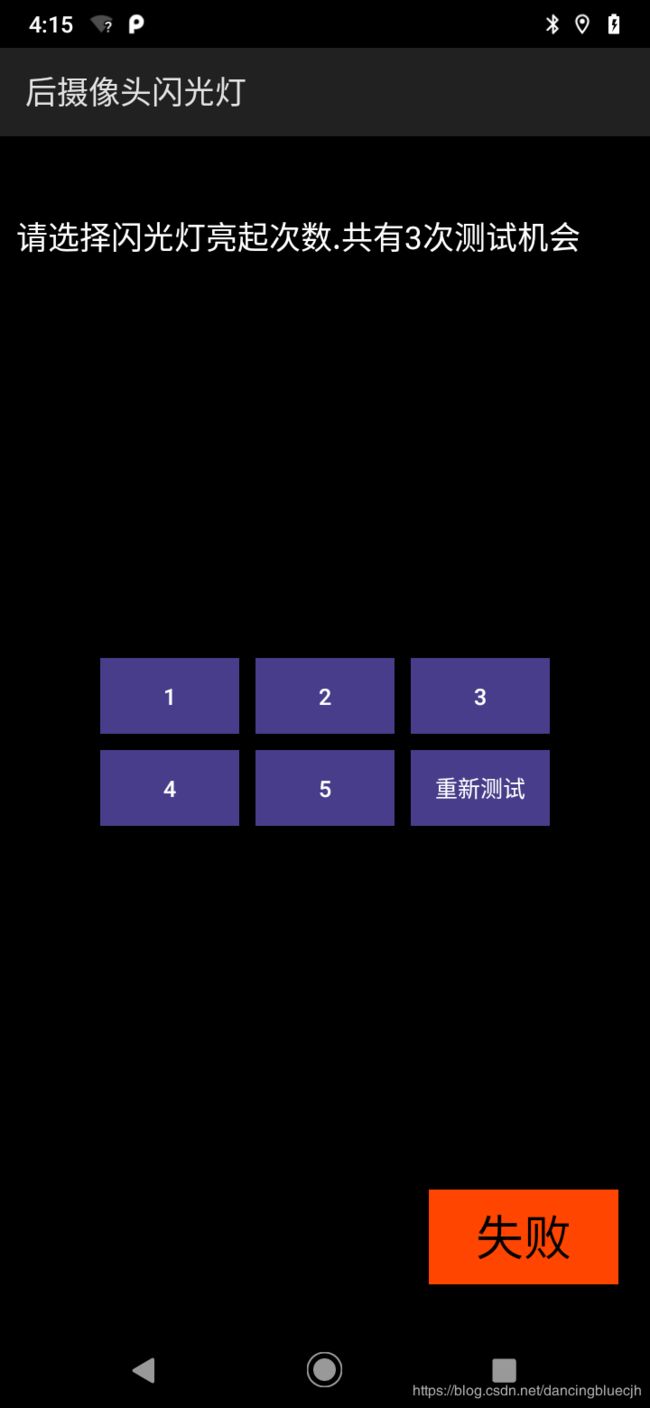
获取mCameraManager然后获取一个小于7的随机数mRandomNumber,发送使闪关灯亮的消息,当获取到灯亮的消息时,mCameraManager设置闪光灯为开,500毫秒后设置为关,此时mCurrentTimes小于随机数mRandomNumber ,闪光灯亮一次, mCurrentTimes会自动加一;直到mCurrentTimes不再小于随机数时,闪光灯将不再打开。测试完成之后选择闪光灯对应的亮灭次数。选择正确则pass,选择错误时mFailTimes加一,有三次重新测试的机会,mFailTimes等于三时测试项失败。
protected void onCreate(Bundle savedInstanceState) {
        super.onCreate(savedInstanceState);
        mCameraManager = (CameraManager) getSystemService(Context.CAMERA_SERVICE);
        mHandler = new UpdateHandler(this);
        mRandomNumber = new Random().nextInt(RANDOM_MAX) + 1;
        mCurrentTimes = 0;
        mHandler.sendEmptyMessageDelayed(MSG_TORCH_ON, 1000);
    }
handler处理消息
public void handleMessage(Message msg) {
            CitBackTorch activity = activityReference.get();
            switch (msg.what) {

                case MSG_TORCH_ON:
                    if (activity != null) {
                        if (activity.mCurrentTimes < activity.mRandomNumber) {
                            try {//打开闪光灯
                                mCameraManager.setTorchMode("0", true);
                            } catch (CameraAccessException e) {
                                Log.e(TAG, "Couldn't set torch mode" + e);
                            }
                            //500毫秒后闪光灯设置为关
                            activity.mHandler.sendEmptyMessageDelayed(MSG_TORCH_OFF, 500);
                            //亮一次mCurrentTimes自动加一
                            activity.mCurrentTimes += 1;
                        } else {//超过随机数后移除消息
                            activity.mHandler.removeMessages(MSG_TORCH_ON);
                        }
                    } else {
                        Log.d(TAG, "handleMessage: MSG_TORCH_ON, the activity is null!");
                    }
                    break;
                case MSG_TORCH_OFF:
                    if (activity != null) {
                        try {
                            mCameraManager.setTorchMode("0", false);
                        } catch (CameraAccessException e) {
                            Log.e(TAG, "Couldn't set torch mode" + e);
                        }
                        activity.mHandler.sendEmptyMessageDelayed(MSG_TORCH_ON, 500);
                    } else {
                        Log.d(TAG, "handleMessage: MSG_TORCH_OFF, the activity is null!");
                    }
                    break;
            }
        }
七、震动马达测试
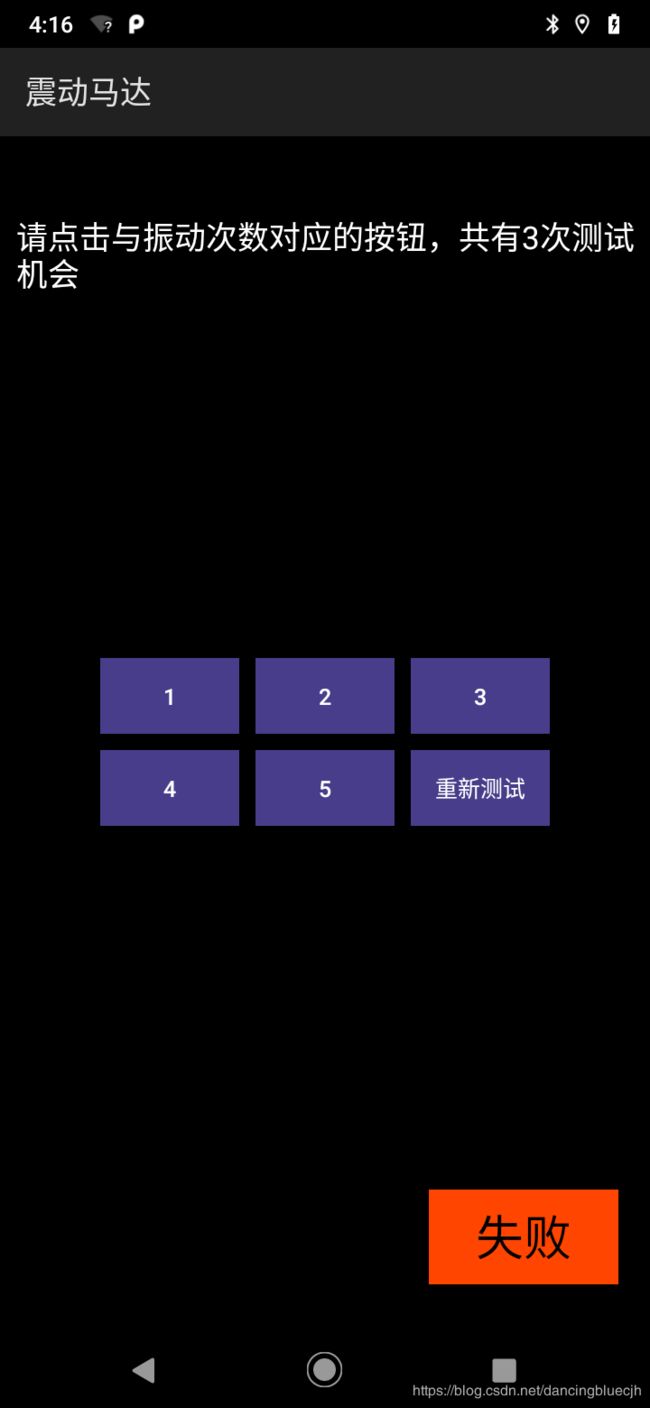
CitVibrarion.java
初始化时获取一个 mVibrator和随机数 mRandomNumber,开启一个线程,然后for循环当i小于随机数时就震动500毫秒,休眠1秒。当跳出循环时handler发送消息显示选项按钮。选择正确后测试项pass。
private void startVibrate(){
        new Thread(){
            public void run(){
                for (int i = 0; i < mRandomNumber; i++){
                    mVibrator.vibrate(500);
                    try{
                        Thread.sleep(1000L);
                    }catch (InterruptedException ignore){
                    }
                }
                mHandler.sendEmptyMessage(1);
            }
        }.start();
    }
八、听筒测试
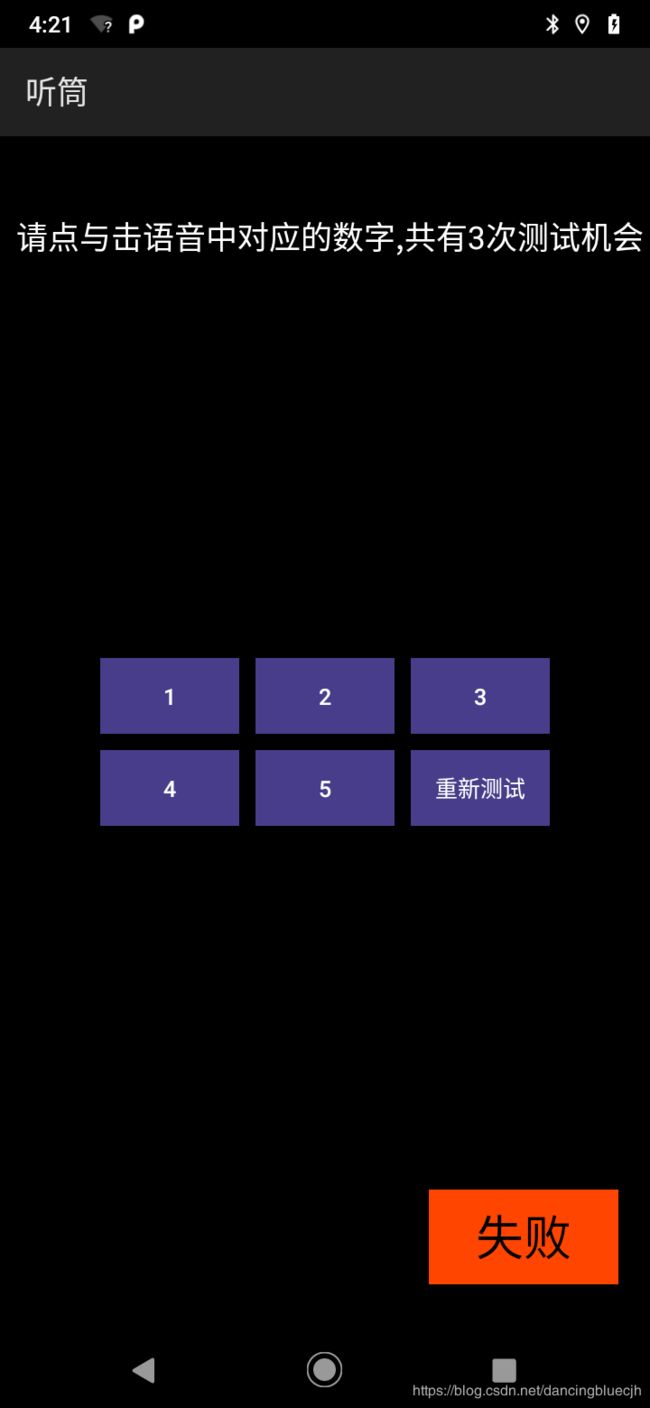
CitRreceiver.java
初始化时注册一个广播接受者SpeakerReceiver,当收到耳机插入的广播时,MideaPlayer停止播放,收到拔出的广播时,重新开始测试。在activity获取焦点时开始测试, 生成随机数,代表要使用对应的哪个音乐资源,然后设置为最大音量,使用MideaPlayer开始播放,在监听到播放完成时重新播放。然后选择对应的按钮,选择正确时测试项pass。
private void testReceiver() {
        mPlayer = new MediaPlayer();
        Random random = new Random();
        mRandomNumber = random.nextInt(5);
        mRandomNumber = mRandomNumber == 0 ? 1 : mRandomNumber;
        if(mTestType == Constants.TEST_TYPE_MACHINE){
            mAssetFileDescriptor = getResources().openRawResourceFd(R.raw.speaker);
        }else {
            switch (mRandomNumber) {
                case 1:
                    if (isZhContext) {
                        mAssetFileDescriptor = getResources().openRawResourceFd(R.raw.zh1);
                    } else {
                        mAssetFileDescriptor = getResources().openRawResourceFd(R.raw.en1);
                    }
                   //根据随机数设置播放资源文件
                default:
                    break;
            }
        }
        try {
            mPlayer.setOnCompletionListener(new android.media.MediaPlayer.OnCompletionListener() {
                public void onCompletion(MediaPlayer mediaplayer) {
                    //播放完成之后如果不是机器测试直接再次开始播放
                    if(mTestType == Constants.TEST_TYPE_MACHINE) {
                        if (mTestCount++ < 3) {
                            mManualReset.setVisibility(View.VISIBLE);
                        }
                    }else {
                        startPlay();
                    }
                }
            });
            if (mAssetFileDescriptor != null) {
                mPlayer.setDataSource(mAssetFileDescriptor.getFileDescriptor(), mAssetFileDescriptor.getStartOffset(), mAssetFileDescriptor.getLength());
                mPlayer.setAudioStreamType(AudioManager.STREAM_VOICE_CALL);
                mPlayer.prepare();
            } else {
                Log.d(TAG, "create mAssetFileDescriptor == null ");
            }
        }
        //设置最大音量,并开始播放
        setMaxVolume();
        startPlay();
    }
处理耳机的拔插
private class MyHandler extends Handler {
        private MyHandler() {
        }

        @Override
        public void handleMessage(Message msg) {
            super.handleMessage(msg);
            if (msg.what == MSG_1){
                //耳机插入。停止播放
                stopPlay();
                if(mTestType == Constants.TEST_TYPE_MACHINE) {
                    mManualReset.setVisibility(View.INVISIBLE);
                }else {
                    testEnd();
                    mRetest.setVisibility(View.INVISIBLE);
                }
            }else if (msg.what == MSG_2) {//耳机拔出,重新测试
                stopPlay();
                if(mTestType == Constants.TEST_TYPE_MACHINE){
                    machineType();
                    mShowText.setText(R.string.speaker_manual_tip);
                }else {
                    mShowText.setText(R.string.test_item_receiver_tips);
                    testEnd();
                    retest();
                }
                testReceiver();
            }
        }
    }

    private class SpeakerReceiver extends BroadcastReceiver {
        public void onReceive(Context context, Intent intent) {
            if (Intent.ACTION_HEADSET_PLUG.equals(intent.getAction())) {
                if (intent.hasExtra("state")) {
                    int state = intent.getIntExtra("state", 0);
                    if (state == 1) {
                        //耳机插入
                        mIsHeadsetPluged = true;
                        mHandler.removeMessages(MSG_2);
                        mHandler.sendEmptyMessage(MSG_1);
                    } else if(state == 0){
                        /耳机拔出
                        mIsHeadsetPluged = false;
                        mHandler.removeMessages(MSG_1);
                        //发送消息
                        mHandler.sendEmptyMessage(MSG_2);
                    }
                }
            }
        }
    }
九、喇叭测试
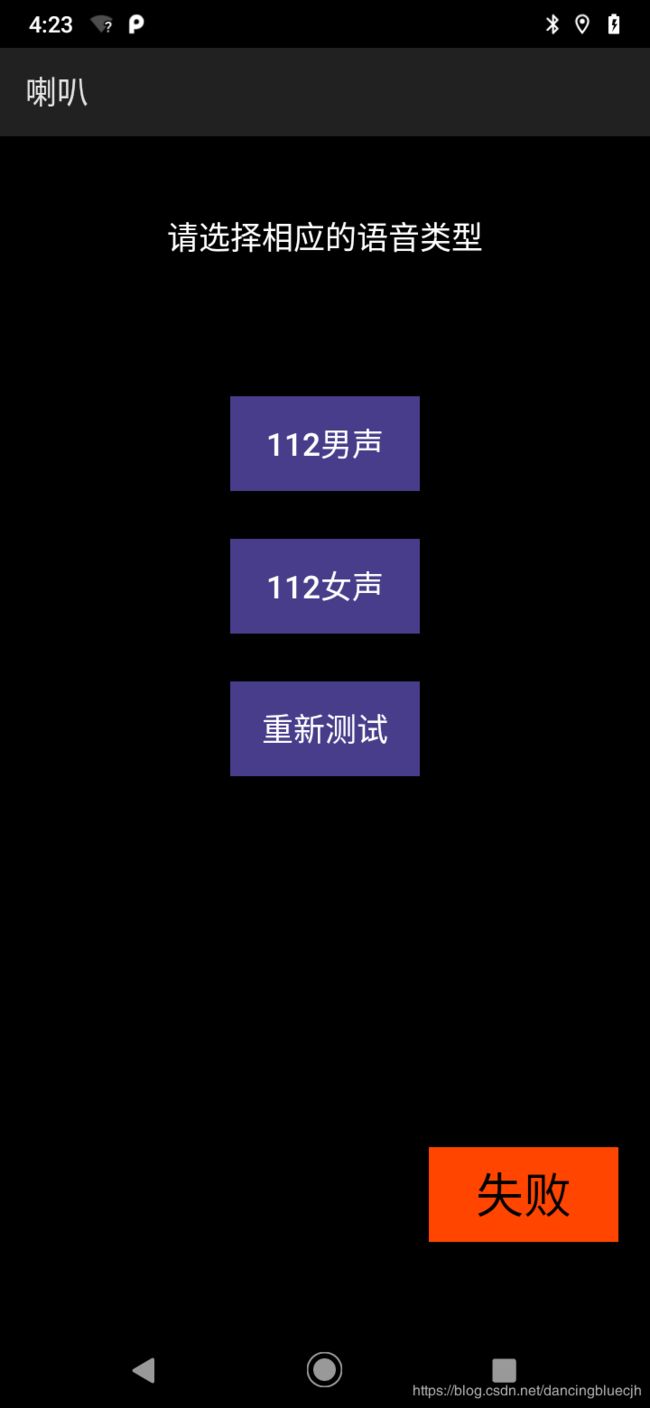
根据测试类型进行相应的测试,以下代码为人工测试。使用MediaPlayer根据随机数设置男声或者女声资源开始播放,播放完成之后显示选项按钮,选择对应的男声还是女声,测试项pass
private void persionTestSpeaker() {
        //Random rng1 = new Random();
        mPlayerId = new Random().nextInt(2);
        Log.d(TAG, "mPlayerId  = " + mPlayerId);
        if (mPlayerId == 0) {
            mPlayer = MediaPlayer.create(this, R.raw.male112);
        } else if (mPlayerId == 1) {
            mPlayer = MediaPlayer.create(this, R.raw.female112);
        }
        //播放完成后显示对应选项按钮
        mPlayer.setOnCompletionListener(new android.media.MediaPlayer.OnCompletionListener() {
            public void onCompletion(MediaPlayer mediaplayer) {
                Log.d(TAG, "playMusic  0 onCompletion ");
                mBtnMan.setVisibility(View.VISIBLE);
                mBtnWoman.setVisibility(View.VISIBLE);
                mBtnRetest.setVisibility(View.VISIBLE);
                mBtnFail.setVisibility(View.VISIBLE);
            }
        });

        if (mHeadsetExist) {
            mTxtTip.setText(mRes.getString(R.string.headset_title) + " " + mRes.getString(R.string.remove_headset));
        } else {//没有插入耳机,开始播放
            startSpeaker();
        }
    }
十、 麦克风振幅
开启线程,给 mMediaPlayer设置资源,然后开始播放,播放的同时也开启线程去录音,然后把录音的最大振幅保存在一个列表中,最后求出一个平均最大值,如果大于2000就测试通过。
private int audoLoop(final Context context ){
//Start play stream audio
mMediaPlayer = new MediaPlayer();
mIsPlaying = true;
Log.d(TAG,“Start play stream audio”);
(new Thread(){
public void run(){
try{
AssetFileDescriptor mAssetFileDescriptor = context.getResources().openRawResourceFd(R.raw.micamplitude);
mMediaPlayer.setDataSource(mAssetFileDescriptor.getFileDescriptor(), mAssetFileDescriptor.getStartOffset(),
mAssetFileDescriptor.getLength());
mAssetFileDescriptor.close();
mMediaPlayer.setOnCompletionListener(new android.media.MediaPlayer.OnCompletionListener() {
public void onCompletion(MediaPlayer mediaplayer){
Log.d(TAG,“Play stream audio completely”);
mIsPlaying = false;
}
});
mMediaPlayer.setAudioStreamType(AudioManager.STREAM_MUSIC);
mMediaPlayer.prepare();
mMediaPlayer.start()//播放
mMediaRecorder = new MediaRecorder();
    (new Thread(){
        public void run(){
            File file = new File(mAmpFile);
            if (file.exists())
                file.delete();
            try{
                mMediaRecorder.setAudioSource(1);
                mMediaRecorder.setOutputFormat(1);
                mMediaRecorder.setAudioEncoder(1);
                mMediaRecorder.setOutputFile(mAmpFile);
                mMediaRecorder.prepare();
                mMediaRecorder.start();//录音
                Log.d(TAG,"Start record stream audio");
            }catch (Exception e) {
                Log.e(TAG,"Record error ",e);
            }
        }
    }).start();
while (mIsPlaying){
            amplitudeList[amplitudeIdex]=mMediaRecorder.getMaxAmplitude();
            Log.d(TAG,"amplitudeList["+amplitudeIdex+"] = " + amplitudeList[amplitudeIdex]);
            amplitudeIdex++;
            if(amplitudeIdex >= MAX_SIZE) {
                break;
            }
            sleep(MAX_INTERVAL);
        }
十一、 主麦克风测试
CitPreMic.java
点击开始录音按钮,录制三秒,然后handler处理消息,播放刚才录制的声音,如果发出声音测试项pass
  mBtnRecord.setOnClickListener(new View.OnClickListener(){
            public void onClick(View paramView) {
                    mIsHeadsetPluged = true;
                    mTimer = MAX_TIME;
                    mStatus = 0;
                    mRecorder.startPreRecording();
                    mHandler.sendEmptyMessage(MSG_1);
                    mBtnPass.setVisibility(View.INVISIBLE);
                    mBtnRecord.setVisibility(View.INVISIBLE);
        });

			if (msg.what == MSG_2) {
                if (mStatus == 1) {
                    mStatus = 2;
                    Log.d(TAG, "Start playing");
                    mRecorder.stop();
                    mRecorder.startPlayback();
                }
十二、 LED灯测试

CitRgbLed.java
oncreate方法中根据参数配置,判断是双色灯测试还是三色灯,获取一个小于6的随机数,在onstart时开始测试,根据随机数和配置参数handler发送message。然后处理消息,根据message的参数, on_off开关、 led红灯绿灯,来设置PrivProperty。然后对应的红灯或者绿灯就会变亮,led灯亮灭测试之后显示出6个选项,选择对应的led灯亮灭顺序,点击顺序图片后会判断刚才的随机数是否对应,对应的话就测试通过
根据参数判断时三色灯还是双色灯
protected void onCreate(Bundle paramBundle) {
        **
        if (mParam == 1) {  //1是3色灯; 2是双色灯
            mLedCount = 3;
            setTitle(getResources().getString(R.string.test_item_rgb_light));
        } else if (mParam == 2) {
            android.util.Log.d(TAG, "onCreate: mParam == 2");
            setTitle(getResources().getString(R.string.test_item_rg_light));
        }
        init();
}
处理消息,点亮对应颜色的led灯
private Handler mHandler = new Handler() {
        @Override
        public void handleMessage(Message msg) {
            Log.d(TAG, "  handleMessage,msg = " + msg);
            switch (msg.what) {
                case RLIGHT_ON:
                    if (mPause == true)
                        return;
                    Log.d(TAG, " RLIGHT_ON");
                    SetLed("on", "r");
                    mHandler.sendEmptyMessageDelayed(RGBLIGHT_OFF, 1000);
                    break;
              	...
}
具体设置led灯亮代码
  private void SetLed(String on_off, String led) {
        if (on_off.equals("on")) {
            if (led.equals("r")) {
                if (CitCustomize.isBali()) {
                    //SystemProperties.set("sys.led.red", "on");
                    mActivityManager.setPrivProperty("sys.led.red", "on");
                    //ledCtrl("on", "r");
                } else {
                    rgbCtrl(RED_LED, 255);
                }
            }
        }
此处要注意 device/ontim/Fiji / init.project.rc 这个文件中要有
相应的条件和动作。当property sys.led.red 值为on 时,写节点信息 ,255亮,0灭
on property:sys.led.red=on
write /sys/class/leds/red/brightness 255
on property:sys.led.red=off
write /sys/class/leds/red/brightness 0
要注意咱们有没有写这个节点的权限,没有权限要让相应人员添加上。
十三、按键测试
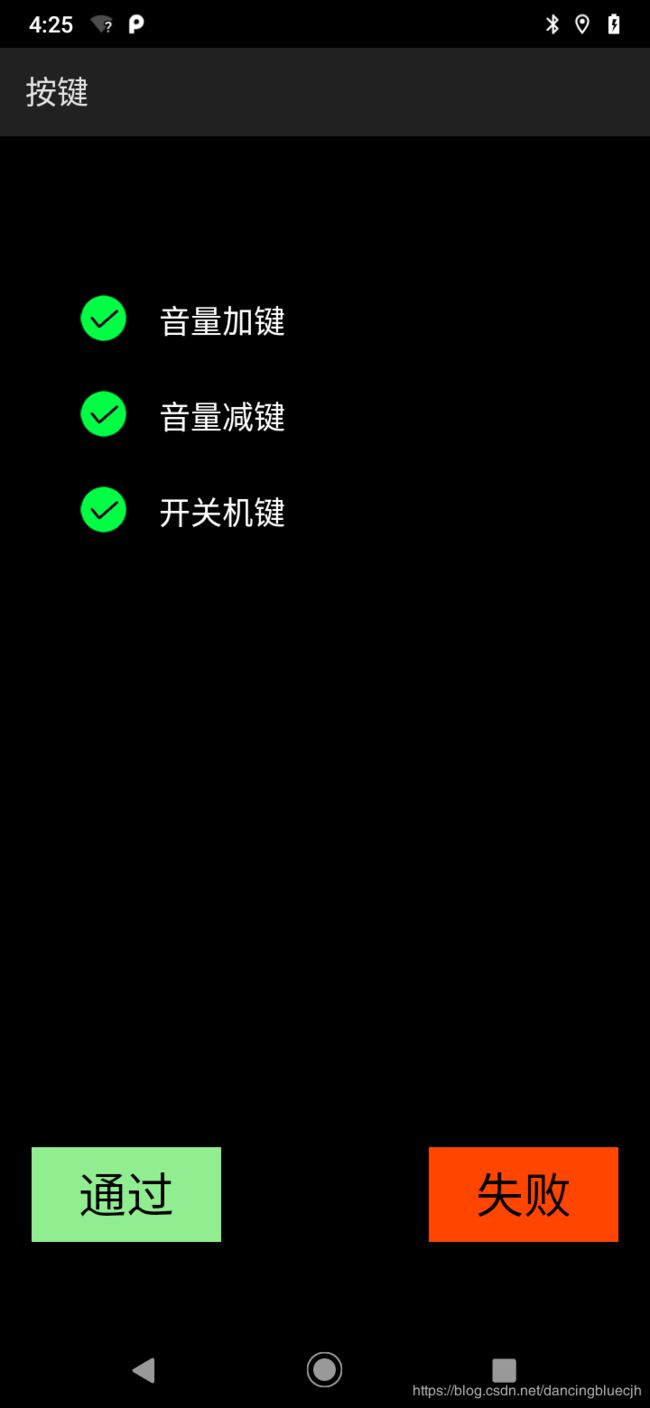
CitKey.java
拦截三个按键的onKeyDown事件,点击时键对应按键的字体改为白色小图标设置为可见,全部点击过后测试项通过。
public boolean onKeyDown(int paramInt, KeyEvent paramKeyEvent) {
        Log.v(TAG, "onKeyDown keyCode=" + paramInt);
        if (paramKeyEvent.getKeyCode() == KeyEvent.KEYCODE_VOLUME_UP) {
            mVolumeUpImage.setVisibility(View.VISIBLE);
            mVolumeUpText.setTextColor(Color.WHITE);
            mUp = true;
        } else if (paramKeyEvent.getKeyCode() == KeyEvent.KEYCODE_VOLUME_DOWN) {
            mVolumeDownImage.setVisibility(View.VISIBLE);
            mVolumeDownText.setTextColor(Color.WHITE);
            mDown = true;
        } else if (paramKeyEvent.getKeyCode() == KeyEvent.KEYCODE_POWER) {
            if (mParam == 1) {
                mPowerImage.setVisibility(View.VISIBLE);
                mPowerText.setTextColor(Color.WHITE);
                mPower = true;
            }
        }
		//三个按键事件全部收到后测试通过
        if (mUp == true && mDown == true && mPower == true) {
            mBtnPass.setVisibility(View.VISIBLE);
            if (mTestType == Constants.TEST_TYPE_AUTO) {
                mBtnPass.performClick();
            }
        }

        return true;
    }
十四、电池与充电
CitBattery.java
初始化时注册监听电池电量变化的广播,收到电池电量变化时设置电池电量和电池电压,然后发送GET_PLUG_DEVICE消息处理是否插入了充电线,查看充电状态,1秒后继续发送GET_PLUG_DEVICE消息,拔出充电线后显示pass按钮
收到电池电量变化时设置电池电量和电池电压
private BroadcastReceiver mSmtIntentReceiver = new BroadcastReceiver() {
        public void onReceive(Context paramContext, Intent paramIntent) {
            if (paramIntent.getAction().equals("android.intent.action.BATTERY_CHANGED")) {
                mBatteryLevel.setText(paramIntent.getIntExtra("level", 0) + "%");
                mBatteryVoltage.setText(paramIntent.getIntExtra("voltage", 0) + "mV");
            }
        }
    };
消息处理,充电线的插入和拔出状态
public void handleMessage(Message msg) {
            Log.d(TAG, "  handleMessage,msg = " + msg);
            int plugType = CitUtils.getPluginDevice();
            switch (msg.what) {
                case GET_PLUG_DEVICE:
                    if (plugType == 1 || plugType == 2) {//插入状态时显示充电类型和插入状态
                        if (plugType == 1) {//设置usb链接类型
                            mBatteryPlugged.setText(mContext.getString(R.string.battery_plugged_yes) + " & AC");
                        } else {
                            mBatteryPlugged.setText(mContext.getString(R.string.battery_plugged_yes) + " & USB");
                        }

                        mBatteryTestTips.setText(mContext.getString(R.string.battery_please_plugg_out));
                        mBatteryTypeCStatus.setText(mContext.getString(R.string.battery_plugged_yes));
                        if (0 == mParam) { // Need check front plug
                            if (CitUtils.getPluginStatus() == 1) {
                                mBatteryTypeCStatus.setText(mContext.getString(R.string.plug_status_front));
                                mHasPlugFront = true;
                            } else if (CitUtils.getPluginStatus() == 2) {
                                mBatteryTypeCStatus.setText(mContext.getString(R.string.plug_status_back));
                                mHasPlugBack = true;
                            }

                            if (mHasPlugBack && mHasPlugFront) {
                                mBatteryTestTips.setText(mContext.getString(R.string.battery_please_plugg_out));
                            } else {
                                mBatteryTestTips.setText(mContext.getString(R.string.battery_please_change_plug));
                            }
                        } else if (1 == mParam) {
                            mHasPlugFront = true;
                            mHasPlugBack = true;
                        }
                    } else {//拔出充电线显示pass按钮
                        mBatteryPlugged.setText(mContext.getString(R.string.battery_plugged_no));
                        mBatteryTypeCStatus.setText(mContext.getString(R.string.plug_status_none));
                        Log.d(TAG, "mBtnPass IS mHasPlugBack = " + mHasPlugBack);
                        if (!mHasPlugBack && !mHasPlugFront) {
                            mBatteryTestTips.setText(mContext.getString(R.string.battery_please_plugg_in));
                        } else if (mHasPlugFront && mHasPlugBack) {
                            mBtnPass.setVisibility(View.VISIBLE);
                            if (mTestType == Constants.TEST_TYPE_AUTO) {
                                mBtnPass.performClick();
                            }
                        } else {
                            mBatteryTestTips.setText("");
                        }
                    }
                    mHandler.sendEmptyMessageDelayed(GET_PLUG_DEVICE, 1000);
                    break;
            }
        }
    };
十五、屏幕背光
CitBackLight.java
通过handler发送消息和setBrightness这个方法改变屏幕的背光亮度,如果屏幕亮度有变化,测试项通过
 private Handler mHandler = new Handler() {
        @Override
        public void handleMessage(Message msg) {
            Log.d(TAG, "  handleMessage,msg = " + msg);
            switch(msg.what) {
                case mBrightnessDelay:
                    if(mPause == true) {
                        return;
                    }
                    //每隔300毫秒改变一次屏幕亮度
                    brightnessLoop();
                    mHandler.sendEmptyMessageDelayed(mBrightnessDelay,300);
                    break;
            }
        }
    };
 private void brightnessLoop(){
        Log.d(TAG, "  brightnessLoop");
        //每次剑侠0.23,当小于0时亮度直接设置为1
        mLight -= 0.23f;
        if(mLight < 0.0001f){
            mLight = 1.0f;
        }
        setBrightness(mLight);
    }
通过LayoutParams设置屏幕亮度
private void setBrightness(float light){
        WindowManager.LayoutParams mLParams = getWindow().getAttributes();
        mLParams.screenBrightness = light;
        getWindow().setAttributes(mLParams);
        Log.d(TAG, "  setBrightness, light = " + light + ", mLParams = " + mLParams);
    }
十六、环境光传感器
CitLightSensor.java
初始化 时,判断一下参数值,如果为1或者2要直接显示校准按钮,当参数值为3时,快速点击光照度的值,在10秒内超过10次的话,就会显示校准按钮。点击校准按钮时根据不同的平台打开对应的光传感器校准的界面,校准成功后,根据sensor的event事件,来检测光传感器的值的变化 。 当值的变化幅度达到要求时测试项通过( 比如在mparm为1时,只需要sensor的值有三次变化超过25,测试项通过)。
protected void onCreate(Bundle paramBundle) {
        super.onCreate(paramBundle);
        if (1 == mParam || 2 == mParam) {//配置参数为1或2时显示校准按钮,要先校准再去测试
            calibrationButton.setVisibility(View.VISIBLE);
        } else {//参数为3
            if (mTestType == Constants.TEST_TYPE_MANUAL) {
                mTxtSensorValues.setOnClickListener(new android.view.View.OnClickListener() {
                    public void onClick(View view) {
                        mTextClickTimes++;
                        if (1 == mTextClickTimes) {
                            mHandler.sendEmptyMessageDelayed(COUNT_DOWN, COUNT_DOWN_TIME);
                        }
                        if (10 == mTextClickTimes) {//10秒内点击十次显示校准按钮
                            calibrationButton.setVisibility(View.VISIBLE);
                            mBtnPass.setVisibility(View.INVISIBLE);
                            mBtnFail.setVisibility(View.VISIBLE);
                            mNeedCalibrate = true;
                            mCalibrateSucess = false;
                            mTextClickTimes = 0;
                            mCount = 0;
                        }
                    }
                });
            }
        }
        //startActivityForResult 方式根据平台显示校准界面
        calibrationButton.setOnClickListener(new android.view.View.OnClickListener() {
            public void onClick(View view) {
                String platformType = CitCustomize.getSensorPlatformType();
                Log.i(TAG,"onClick platformType = "+platformType);
                if (TextUtils.equals(platformType,Constants.PLATFORM_710)){
                    Intent intent = new Intent(getApplicationContext(), CitSensorCalibration.class);
                    intent.putExtra("sensor_type", 5);//1:TYPE_ACCELEROMETER 4:TYPE_GYROSCOPE 8:TYPE_PROXIMITY 5:TYPE_LIGHT
                    intent.putExtra("cali_type", 1);
                    startActivityForResult(intent, 44);
                }else if (TextUtils.equals(platformType,Constants.PLATFORM_632)){
                    mBtnPass.setVisibility(View.INVISIBLE);
                    mBtnFail.setVisibility(View.VISIBLE);
                    mCalibrateSucess = false;
                    mCount = 0;
                    Intent intent = new Intent();
                    intent.setClassName("com.qualcomm.qti.sensors.qsensortest", "com.qualcomm.qti.sensors.ui.qsensortest.LCitSensorCalibrate");
                    intent.putExtra("sensor_type", 5);//1:TYPE_ACCELEROMETER 4:TYPE_GYROSCOPE 8:TYPE_PROXIMITY 5:TYPE_LIGHT
                    intent.putExtra("cali_type", 5);
                    startActivityForResult(intent, 44);
                }

            }
        });
    }
//需要注意的是在校准的时候会用到jni 库,我们要注意在fiji.mk文件中添加使这些库参加编译。
private SensorEventListener sensorEventListener = new SensorEventListener() {
        public void onSensorChanged(SensorEvent event) {
            StringBuilder stringBuilder = new StringBuilder();
            switch (event.sensor.getType()) {
                case Sensor.TYPE_LIGHT: //lightsensor
                    Log.d(TAG, "  TYPE_LIGHT,event.values[0] = " + event.values[0]);
                    stringBuilder.append(mRes.getString(R.string.light_lux) + ":" + (int) event.values[0]);
                    if (1 == mParam && mCalibrateSucess) {
                        //如果mparam=1 且校准通过 值变化超过三次测试通过
                        compareLightValues(event.values[0]);
                        if (3 == mCount) {
                            mBtnPass.setVisibility(View.VISIBLE);
                            mBtnFail.setVisibility(View.INVISIBLE);
                            if (mTestType == Constants.TEST_TYPE_AUTO) {
                                mBtnPass.performClick();
                            }
                        }
                    }
                default:
                    stringBuilder.append(getResources().getString(R.string.unknow_sensor));
                    break;
            }
            mTxtSensorValues.setText(stringBuilder.toString());
        }
    };
十七、接近传感器
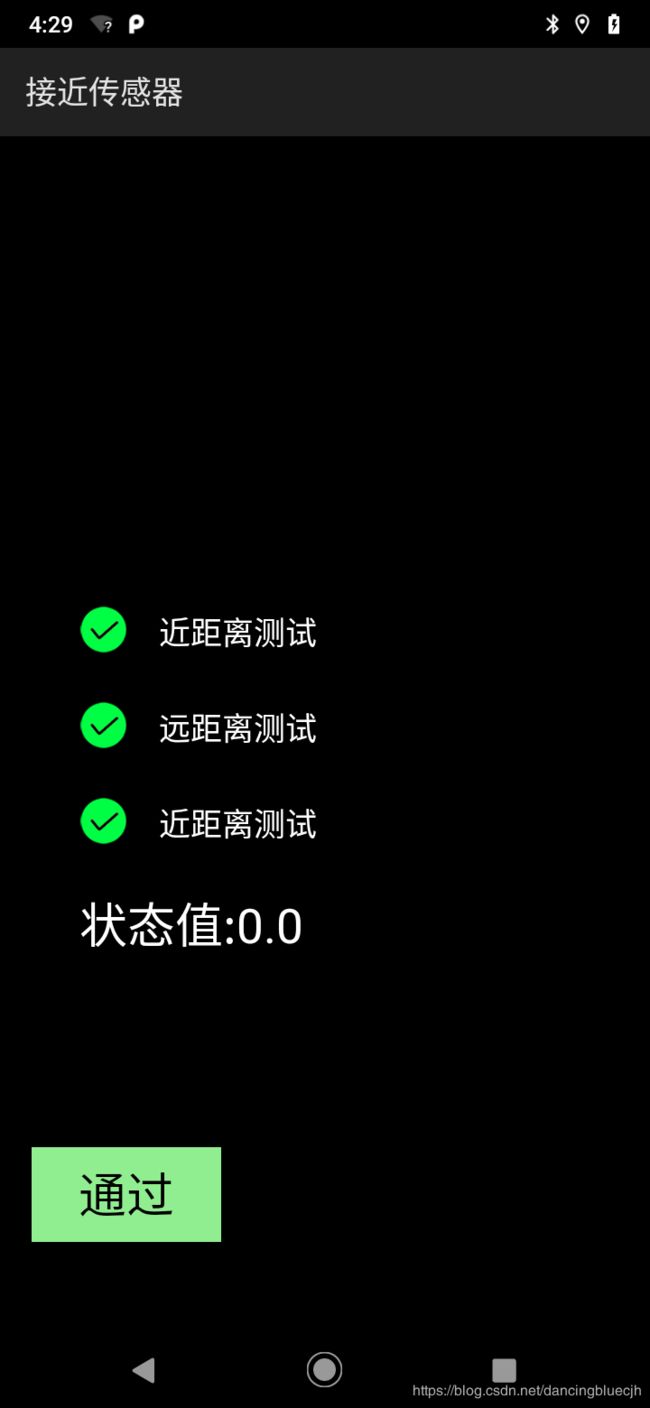
CitProximitySensor.java
状态值1表示远距离0表示近距离,在单项测试时,点击状态值,如果十秒内点击超过10次就会显示校准按钮,点击校准按钮,根据不同平台打开对应的类进行校准,校准通过后返回值,然后近距离测试 mFirstNear初始值为false,event.values[0]的值等于0时通过
远距离测试event.values[0]的值大于0时通过
近距离测试event.values[0]的值等于0时通过,都通过后此测试项pass
private SensorEventListener sensorEventListener = new SensorEventListener() {
        public void onSensorChanged(SensorEvent event) {
            StringBuilder stringBuilder = new StringBuilder();
            switch (event.sensor.getType()) {
                case Sensor.TYPE_PROXIMITY: //接近传感器的值发生变化;
                    stringBuilder.append(mRes.getString(R.string.proximity_state) + ":" + event.values[0]);
                    if (1 == mParam && mCalibrateSucess) { // 校准模式
                        Log.d(TAG, "  Tcalibration mode  event.values[0]=" + event.values[0]);
                        if (!mFirstNear && NEAR == event.values[0]) {
                            //第一次近距离
                            mFirsttNearImage.setVisibility(View.VISIBLE);
                            mFirstNear = true;
                        }
                        if (mFirstNear && NEAR < event.values[0]) {
                            //第二次远距离
                            mSecondFarImage.setVisibility(View.VISIBLE);
                            mSecondFar = true;
                        }
                        if (mSecondFar && NEAR == event.values[0]) {
                            //第三次近距离
                            mThirdNearImage.setVisibility(View.VISIBLE);
                            mThirdNear = true;
                            mBtnPass.setVisibility(View.VISIBLE);
                            mBtnFail.setVisibility(View.INVISIBLE);
                            if (mTestType == Constants.TEST_TYPE_AUTO) {
                                mBtnPass.performClick();
                            }
                        }
                    } else if (2 == mParam) { // 测试模式
                        Log.d(TAG, "  Test mode  event.values[0]=" + event.values[0]);
                        if (NEAR == event.values[0]) {
                            Log.d(TAG, "state  first near");
                            mFirsttNearImage.setVisibility(View.VISIBLE);
                            mFirstNear = true;
                        }
                        if (mFirstNear && NEAR < event.values[0]) {
                            Log.d(TAG, "state  second far");
                            mSecondFarImage.setVisibility(View.VISIBLE);
                            mSecondFar = true;
                        }
                        if (mSecondFar && NEAR == event.values[0]) {
                            Log.d(TAG, "state  third near");
                            mThirdNearImage.setVisibility(View.VISIBLE);
                            mThirdNear = true;
                            mBtnPass.setVisibility(View.VISIBLE);
                            mBtnFail.setVisibility(View.INVISIBLE);
                            if (mTestType == Constants.TEST_TYPE_AUTO) {
                                mBtnPass.performClick();
                            }
                        }
                    } else if (3 == mParam) { //主板测试,只获取Sensor的值
                        Log.d(TAG, "  Main board mode  event.values[0]=" + event.values[0]);
                        if (3 == sensorChangeCount++) {
                            Log.d(TAG, "state  change times=" + sensorChangeCount);
                            mBtnPass.setVisibility(View.VISIBLE);
                            mBtnFail.setVisibility(View.INVISIBLE);
                            if (mTestType == Constants.TEST_TYPE_AUTO) {
                                mBtnPass.performClick();
                            }
                        }
                    }
                    break;
                default:
                    stringBuilder.append(getResources().getString(R.string.unknow_sensor));
                    break;
            }
            mTxtSensorValues.setText(stringBuilder.toString());
        }

        public void onAccuracyChanged(Sensor sensor, int accuracy) {

        }
    };
十八、水平加速度传感器
CitAccelSensorHoriz.java
mTxtSensorValues这个值在十秒内点击超过十次并且参数不为1,此时校准按钮显示,并根据平台显示对应的校准界面,手机放平,校准通过后看xyz三个值的变化,
X_MIN_VALUE = -0.2;
X_MAX_VALUE = 0.2;
Y_MIN_VALUE = -0.2;
Y_MAX_VALUE = 0.2;
Z_MIN_VALUE = 9.31;
Z_MAX_VALUE = 10.29;
如果不是bali项目在这个范围内变化十次测试通过,bali项目把变化范围改大了。
private SensorEventListener mSensorEventListener = new SensorEventListener() {
        public void onSensorChanged(SensorEvent event) {
            Log.d("CIT", "CitAccelSensorHoriz onSensorChanged");
            StringBuilder stringBuilder = new StringBuilder();
            switch (event.sensor.getType()) {
                case Sensor.TYPE_ACCELEROMETER: //水平加速度传感器
                    //显示x、y、z的值
                    float[] values = event.values;
                    stringBuilder.append("X: " + values[0] + "\n");
                    stringBuilder.append("Y: " + values[1] + "\n");
                    stringBuilder.append("Z: " + values[2] + "\n");
                    if ((1 == mParam  || 2 == mParam) && mCalibrateSucess) {
                    //校准模式并且校准已经通过
                        if ((values[0] < X_MIN_VALUE) || (values[0] > X_MAX_VALUE)) {
                            mCount = 0;
                            break;
                        }
                        if ((values[1] < Y_MIN_VALUE) || (values[1] > Y_MAX_VALUE)) {
                            mCount = 0;
                            break;
                        }
                        if ((values[2] < Z_MIN_VALUE) || (values[2] > Z_MAX_VALUE)) {
                            mCount = 0;
                            break;
                        }
                        testPass();

                    } else if (3 == mParam) { //3. 主板测试直接十次变化通过
                        testPass();
                    }
                    break;
                default:
                    stringBuilder.append(getResources().getString(R.string.unknow_sensor));
                    break;
            }
            mTxtSensorValues.setText(stringBuilder.toString());
        }
    };
超过十次测试项通过
 private void testPass() {
        if (10 == mCount++) {
            mBtnPass.setVisibility(View.VISIBLE);
            mBtnFail.setVisibility(View.INVISIBLE);
            if (mTestType == Constants.TEST_TYPE_AUTO) {
                mBtnPass.performClick();
            }
        }
    }
十九、 加速度传感器
CitAccelSensor.java 跟水平加速度类似测试的是同一个器件,Gsensor.
只是要在45度夹具上测试,值在以下范围内变化
X_MIN_VALUE = -5.88;
X_MAX_VALUE = -3.92;
Y_MIN_VALUE = 3.92;
Y_MAX_VALUE = 5.88;
e Z_MIN_VALUE = 5.201;
Z_MAX_VALUE = 8.667;
超过10次测试项通过。
private SensorEventListener mSensorEventListener = new SensorEventListener() {
        public void onSensorChanged(SensorEvent event) {
            StringBuilder stringBuilder = new StringBuilder();
            switch (event.sensor.getType()) {
                case Sensor.TYPE_ACCELEROMETER:
                    stringBuilder.append("X: " + event.values[0] + "\n");
                    stringBuilder.append("Y: " + event.values[1] + "\n");
                    stringBuilder.append("Z: " + event.values[2] + "\n");
                    if ((event.values[0] < X_MIN_VALUE) || (event.values[0] > X_MAX_VALUE)) {
                        mCount = 0;
                        break;
                    }
                    if ((event.values[1] < Y_MIN_VALUE) || (event.values[1] > Y_MAX_VALUE)) {
                        mCount = 0;
                        break;
                    }
                    if ((event.values[2] < Z_MIN_VALUE) || (event.values[2] > Z_MAX_VALUE)) {
                        mCount = 0;
                        break;
                    }
                    if (mCount++ > 10) {
                        mBtnPass.setVisibility(View.VISIBLE);
                        mBtnFail.setVisibility(View.INVISIBLE);
                        if (mTestType == Constants.TEST_TYPE_AUTO) {
                            mBtnPass.performClick();
                        }
                    }
                    break;
                default:
                    stringBuilder.append(getResources().getString(R.string.unknow_sensor));
                    break;
            }
            mTxtSensorValues.setText(stringBuilder.toString());//显示xyz的值
        }
    };
二十、指纹测试
CitFingerPrint.java
先根据节点获取指纹信息,然后如果是smt版本并且是bali项目,就sendFPTestRequest发送一个广播,供应商的应用收到广播后开始测试指纹,通过后发送回一个广播,代码中注册了一个mReceiver,来接受广播,当收到指纹通过的广播时测试项通过;如果是其他项目就打开对应的供应商的类去测试指纹,根据返回值显示pass按钮。
protected void onCreate(Bundle paramBundle) {
        Intent vIntent = getIntent();
        initSelf(vIntent);
        setContentView(R.layout.finger_print);
        super.onCreate(paramBundle);
        if (CitUtils.isSMTVersion()) {
            fingerinfo = CitFacService.runCmdByFac("cat /sys/hwinfo/FP_MFR").toLowerCase();
        } else {
            fingerinfo = CitFacServiceNormal.runCmdByFac("cat /sys/hwinfo/FP_MFR").toLowerCase();
        }
        Log.d(TAG, "  onCreate fingerinfo= " + fingerinfo);
        mBtnPass.setVisibility(View.INVISIBLE);
        mBtnFail.setVisibility(View.VISIBLE);
        mReTestButton = (Button) findViewById(R.id.btn_retest);
        if (CitUtils.isSMTVersion()) {
            Intent testIntent = new Intent();

            if (CitCustomize.isMtkPlatform()) {
                mFilter = new IntentFilter();
                mFilter.addAction("com.mmi.helper.response");
                registerReceiver(mReceiver, mFilter);
                sendFPTestRequest();//mtk平台发送广播打开指纹测试
            } else {
                if (fingerinfo.contains("icnf7332")) {//根据指纹信息打开对应的指纹测试类
                    testIntent.putExtra("config_autoexit", true);
                    testIntent.putExtra("config_autotest", true);
                    testIntent.putExtra("config_autoexit_delay_time", 500);
                    testIntent.putExtra("config_supportTouchTest", true);
                    testIntent.putExtra("config_showcapturedImg", true);
                    testIntent.putExtra("config_savecapturedImg", false);
                    packgeName = "com.fpsensor.fpSensorExtensionSvc2";
                    className = "com.fpsensor.sensortesttool.sensorTestActivity";
                    mCanTest = true;
                    Log.d(TAG, " startActivity fpsensor");
                } else {
                    Toast.makeText(CitFingerPrint.this, getResources().getString(R.string.test_item_fingerprint_info), Toast.LENGTH_LONG).show();
                    mCanTest = false;
                }
                if (mCanTest) {
                    testIntent.setClassName(packgeName, className);
                    startActivityForResult(testIntent, FP_TEST_REQUEST_CODE);
                }
            }
    }
mtk平台发送广播打开指纹测试界面
private void sendFPTestRequest() {
        Intent intent = new Intent("com.mmi.helper.request");
        intent.setPackage("com.ontim.cit");
        intent.putExtra("type", "fp_test");
        sendBroadcast(intent);
    }
指纹测试的apk存放路径:vendor/ontim/fpcit/
二十一、USB OTG测试
获取一个输入设备的数组,然后遍历数据,如果设备名称中包含mouse就说明插入了鼠标。
初始化时发送 GET_OTG_OK_MSG获取OTG状态ok的消息,处理这个消息时,检查一下是否插入了鼠标,插入鼠标后,如果参数为0就要检查一下OTG正反插的问题,如果参数为1,将mHasPlugBack和mHasPlugFront的值设置为ture,然后拔出鼠标,Handler处理消息,此时没有鼠标插入,根据mHasPlugBack和mHasPlugFront的值来判断是否显示pass按钮。测试完成。
检查鼠标设备
private boolean checkMouseDevice() {
        final int[] devices = InputDevice.getDeviceIds();
        for (int i = 0; i < devices.length; i++) {
            InputDevice device = InputDevice.getDevice(devices[i]);
            if (null != device) {
                Log.d(TAG, "Device: name=" + device.getName() + " ID=" + device.getId() + " Descriptor=" + device.getDescriptor() +
                        " isVirtual=" + device.isVirtual() + " isExternal=" + device.isExternal());
                if (!device.isVirtual() && device.isExternal()) {
                    if (device.getName().toLowerCase().contains("mouse")) {
                        return true;
                    }
                }
            }
        }
        Log.d(TAG, "No any input devices");
        return false;
    }
处理OTG存在的消息
public void handleMessage(Message msg) {
            switch (msg.what) {
                case GET_OTG_OK_MSG:
                    if (checkMouseDevice()) {
                        if (0 == mParam) { // 需要检查usb线的正反插
                            ...
                        } else if (1 == mParam) {
                            mOtgStatus.setText(CitUsbOtg.this.getResources().getString(R.string.battery_plugged_yes));
                            mOtgTestTips.setText(CitUsbOtg.this.getResources().getString(R.string.otg_test_end_tips));
                            mHasPlugFront = true;
                            mHasPlugBack = true;
                        }
                    } else {
                        mOtgStatus.setText(CitUsbOtg.this.getResources().getString(R.string.plug_status_none));

                        if (!mHasPlugFront && !mHasPlugBack) {
                            mOtgTestTips.setText(CitUsbOtg.this.getResources().getString(R.string.otg_plug_off_tips));
                        } else if (mHasPlugBack && mHasPlugFront) {
                            mBtnPass.setVisibility(View.VISIBLE);
                            if (mTestType == Constants.TEST_TYPE_AUTO) {
                                mBtnPass.performClick();
                            }
                        } else {
                            mOtgTestTips.setText("");
                        }
                    }
                    sendEmptyMessageDelayed(GET_OTG_OK_MSG, 500);
            }
        }
二十二、 蓝牙测试
注册广播接受者。
收到找到蓝牙设备或者名称变化的时候,遍历设备名称的集合如果不存在这个名称就加入集合,收到蓝牙状态改变的时候重新开始扫描。handler处理消息,如果设备名的数组中含有ontim测试项通过,超过30秒没有找到包含ontime的蓝牙设备,测试项失败。
ACTION_1 = “android.bluetooth.device.action.FOUND”;
ACTION_2 = “android.bluetooth.device.action.NAME_CHANGED”;
ACTION_STATE_CHANGED = “android.bluetooth.adapter.action.STATE_CHANGED”;
private class BluetoothReceiver extends BroadcastReceiver {
        public void onReceive(Context context, Intent intent) {
            if (ACTION_1.equals(intent.getAction()) || ACTION_2.equals(intent.getAction())) {
                BluetoothDevice btDev = (BluetoothDevice) intent.getParcelableExtra("android.bluetooth.device.extra.DEVICE");
                String str = btDev.getName();
               //检查设备名称,不存在就加入集合
                if (null != str) {
                    boolean flag = true;
                    for (int i = 0; i < mDevList.size(); i++) {
                        if (mDevList.get(i).equals(str)) {
                            flag = false;
                            break;
                        }
                    }
                    if (true == flag) {
                        mDevList.add(str);
                    }
                    mHandler.sendEmptyMessage(2);
                }
            } else if (ACTION_STATE_CHANGED.equals(intent.getAction())) {
                int state = intent.getIntExtra(BluetoothAdapter.EXTRA_STATE, BluetoothAdapter.ERROR);
                Log.d(TAG, "onReceive: " + state);
                if (state == BluetoothAdapter.STATE_ON) {
                    startScan();
                }
            }
        }
    }
处理消息改变设备名称集合UI
private class MyHandler extends Handler {
        private MyHandler() { }
        @Override
        public void handleMessage(Message msg) {
            super.handleMessage(msg);
            if (msg.what == 1) {
                mTimer = mTimer + 1;
                if (mTimer > TIMEOUT) {
                    Log.d(TAG, "Bluetooth scan failed");
                    mBtnFail.setVisibility(View.VISIBLE);
                }
                Resources res = getResources();
                mHandler.sendEmptyMessageDelayed(1, 1000L);
            } else if (msg.what == 2) {
                mListAdapter.notifyDataSetChanged();
                for (int i = 0; i < mDevList.size(); i++) {
                //遍历集合,,名称包含“ontim”,测试项通过
                    if (mDevList.get(i).toLowerCase().contains(PASS_FLAG)) {
                        mBtnPass.setVisibility(View.VISIBLE);
                        if (mTestType == Constants.TEST_TYPE_AUTO) {
                            mHandler.removeMessages(1);
                            mHandler.removeMessages(2);
                            mAdapter.cancelDiscovery();
                            mBtnPass.performClick();
                        }
                    }
                }
            }
        }
    }
二十三、 WiFi测试
CitWiFi.java
获取焦点时开始扫描,然后wifimanager开始扫描,然后处理handler消息,遍历扫描的的结果,如果信息中包含有ontim而且mrssi值大于-50则测试项通过,30秒没有符合条件就显示fail.
mWifiManager开启扫描
private void startScan() {
        if (Build.VERSION.SDK_INT >= 23) {
            if (PermissionUtils.checkPermissions(this, PermissionUtils.PermissionType.WIFI, 100)) {
                mWifiManager.startScan();
            }
        }
    }
public void handleMessage(Message msg) {
        super.handleMessage(msg);
        if (msg.what == 1) {
            mTimer = mTimer + 1;
            if (mTimer > TIMEOUT) {
                Log.d(TAG, "WiFi scan failed");
                mBtnFail.setVisibility(View.VISIBLE);
            }
            Resources res = getResources();
            if (mTimer % SCAN_INTERVAL == 0) {
                startScan();
                Log.d(TAG, "Set WiFi scan timer :" + mTimer);
            }
            mHandler.sendEmptyMessageDelayed(1, 1000L);
        } else if (msg.what == 2) {
            getScanResult();
            mHandler.sendEmptyMessageDelayed(2, 1000L);
        }
 for (int i = 0; i < accessPoints.size(); i++) {
                SSIDInfo info = accessPoints.get(i);
                String str = info.mSsid + " [ " + info.mRssi + " ]";
                Log.d(TAG, "info =" + str);
                mDevList.add(str);
                //热点信息包含ontim而且Rssi大于-50测试通过
                if (info.mSsid.toLowerCase().contains(PASS_FLAG) && info.mRssi >= mCriteria) {
                    Log.d(TAG, "Find PASS_FLAG device" + info.mSsid);
                    mTestFinish = true;
                    mTxtSsid.setText(str);
                    mHandler.removeMessages(1);
                    mBtnPass.setVisibility(View.VISIBLE);
                    if (mTestType == Constants.TEST_TYPE_AUTO) {
                        mHandler.removeMessages(1);
                        mHandler.removeMessages(2);
                        mBtnPass.performClick();
                    }
                }
            }
二十四、GPS测试
初始化时绑定服务,根据服务的回调LbsLocChanged事件,来发送定位成功的消息,handler处理消息,显示pass按钮和经纬度的值。
class LbsServiceConn implements ServiceConnection {
        @Override
        public void onServiceConnected(ComponentName name, IBinder service) {
            mBinder = (CitGpsService.LbsBinder)service;
            mBinder.getService().addLbsLocListener(new CitGpsService.LbsLocListener() {
                @Override
                public void onLbsLocChanged(String location) {
                    Message msg = new Message();
                    msg.what = MSG_LOCATION;
                    Bundle bundle = new Bundle();
                    bundle.putString("loc", location);
                    msg.setData(bundle);
                    mHandler.sendMessage(msg);
                }
            });
 if (msg.what == MSG_LOCATION) {
                if (mIsFixed == false) {
                    mIsFixed = true;
                    mBtnPass.setVisibility(View.VISIBLE);
                    if (mTestType == Constants.TEST_TYPE_AUTO) {
                        mBtnPass.performClick();
                    }
                }
                String strLoc = msg.getData().getString("loc", "");
                mTxtLocation.setText(strLoc);
            }
二十五、触摸屏手动测试
CitTouchManual.java CitTouchTestMainActivity.java
主要看 CitTouchTestMainActivity这个类.
根据TP的型号确定 tpType的类型, 然后根据屏幕的宽高和遮盖尺寸确定了遮盖层view的参数,
然后生成自定义的遮盖层视图mBlockMatrixView ,添加到根布局,然后当触摸屏幕时利用view的onTouch回调方法来改变遮盖层的颜色,然后用手按顺序滑动,测试项通过
根据TP的型号确定 tpType的类型
if (tp_info != null && (tp_info.contains("FT6436"))) {
            tpType = ColorBlockMatrix.TP_TYPE_FT6436;
        } else if (tp_info != null && (tp_info.equalsIgnoreCase("Ofilm-MSG2138A"))) {
            tpType = ColorBlockMatrix.TP_TYPE_MSG2138A;
        } else if (tp_info != null && (tp_info.contains("GT615_vendor"))) {
            tpType = ColorBlockMatrix.TP_TYPE_FT5436;
        } else {
            tpType = ColorBlockMatrix.TP_TYPE_FT5436;
        }
添加遮盖层视图
    mColorBlockMatrix = new ColorBlockMatrix(mContext, screenWidth, screenHeight, blocksize, tpType);
    mColorBlockMatrix.setDrawType(0);
    mColorBlockMatrix.initBlocks();
    mBlockMatrixView = new BlockMatrixView(this, mColorBlockMatrix);
    LinearLayout layoutRoot = (LinearLayout) findViewById(R.id.root_panel);
    Log.d(TAG, "uiFlags =" + uiFlags + "=" + Integer.toBinaryString(uiFlags));
    getWindow().getDecorView().setSystemUiVisibility(uiFlags);
    layoutRoot.addView(mBlockMatrixView, 0);
    mBlockMatrixView.setOnTouchListener(this);
    mColorBlockMatrix.setTouchStateChangeListener(this);
==================================================================================
注意事项:
下面这个文件设置各测试项是否测试和测试参数,提交之前先git branch -a 查看一下在那个分支,要提到代码所在分支
/vendor/cnce/proprietary/server/android/2.0/CitConfigurationFiji.cpp
第二个月添加
二十六 SarSensor 测试
首先获取SensorManger,根据sar sensor 的id获取一个Sensor列表,如果列表不为空就设置sar的event事件监听,列表为空的时候,说明sar sensor不存在,测试项失败。
 protected void onResume() {
        android.util.Log.d(TAG, "onResume: ===============");
        if (1 == mParam) {
            calibrationButton.setVisibility(View.VISIBLE);
        }
        mSensorManager = (SensorManager) getSystemService(Context.SENSOR_SERVICE);
        List<Sensor> sensorList = mSensorManager.getSensorList(SAR_SENSOR_ID);
        for (Sensor sensor : sensorList) {
            Log.d(TAG, "sensor.getType() = " + sensor.getType() + "GET NAME=" + sensor.getName());
        }
        if (!sensorList.isEmpty()) {
            mSensorManager.registerListener(sensorEventListener,
                    sensorList.get(0),
                    SensorManager.SENSOR_DELAY_NORMAL);
        } else {
            android.util.Log.d(TAG, "onResume: ============unknow_sensor===");
            mTxtSensorValues.setText(getResources().getString(R.string.unknow_sensor));
        }
        super.onResume();
    }
sar sensor校准根据参数显示校准按钮,点击校准根据平台进入相应的校准界面。
下面是mtk平台的校准。CitSarSensorCalibration.java
点击校准按钮后将按钮设置为不可点击,并发送校准广播
 //发送校准广播
    private void sendCaliRequest(String action) {
        Intent intent = new Intent("com.mmi.helper.request");
        intent.setPackage("com.ontim.cit");
        intent.putExtra("type", "sarsensor_calibration");
        intent.putExtra("action", action);
        sendBroadcast(intent);
    }
CitHelperReceiver收到sarsensor校准的广播后,根据EmSensor.sarStartCalibration()的返回值发送校准成功或者失败的广播。
 case MSG_SAR_SENSOR_CALI:
         int result = EmSensor.sarStartCalibration();
         if (result == EmSensor.RET_STATIC_CALI_SUCCESS) {//成功
             sendRspBroadcast("sarsensor_calibration", "calibrate", 1);
         } else {//失败
            sendRspBroadcast("sarsensor_calibration", "calibrate", 0);
         }
          break;
校准功能的主要方法就是EmSensor.sarStartCalibration(),这个方法是我们自己在EmSensor.java中添加的native方法
public static native int sarStartCalibration();

public static native int getSarStaticCalibration(float[] result);
通过jni最终会调用到驱动给的接口com_mediatek_engineermode_sensor.cpp
	{ "sarStartCalibration", "()I",(void *) startLightCalibration },
	{ "getSarStaticCalibration", "([F)I",(void *) getLightStaticCalibration }
校准界面收到CitHelperReceiver发送回来的广播,关闭此界面,setResult将成功或者失败的结果带回SarSensor测试界面。
校准成功后我们测试sar功能,收到sar的event事件,sarsensor的 event.values值有四次不同,则测试通过.
switch (event.sensor.getType()) {
                case SAR_SENSOR_ID: //A constant describing an light sensor type.
                    Log.d(TAG, "  SAR ,event.values[0] = " + event.values[0]);
                    stringBuilder.append("level: " + event.values[0] + "\n");
                    Log.d(TAG, "  SAR ,event.values[1] = " + event.values[1]);
                    Log.d(TAG, "  SAR ,event.values[2] = " + event.values[2]);
                    mTxtSensorRaw.setText("rawdata: " + event.values[1]);
                    if (mSarSensorLastValue != event.values[0]) {
                        if ((1 == mParam && mCalibrateSucess) || (2 == mParam)) { //1.calibrate mode 2.had calibrated mode
                            if(2 == mParam){
                                if (mNeedCalibrate) {
                                    if (mCalibrateSucess) testPass();
                                } else {
                                    testPass();
                                }
                            }else {
                                testPass();
                            }
                        }else if(3 == mParam){ //3. mainboard mode
                            Log.d(TAG, "  Main board mode  mCount=" + mCount);
                            testPass();
                        }
                        mSarSensorLastValue = event.values[0];
                    }
                    break;
private void testPass(){
        if (4 == mCount++) {
            mBtnPass.setVisibility(View.VISIBLE);
            mBtnFail.setVisibility(View.INVISIBLE);
            if (mTestType == Constants.TEST_TYPE_AUTO) {
                mBtnPass.performClick();
            }
        }
    }
二十七 后主摄像头测试

相机操作的四个重要步骤:
CameraManager-->openCamera ---> 打开相机
CameraDeviceImpl-->createCaptureSession ---> 创建捕获会话
CameraCaptureSession-->setRepeatingRequest ---> 设置预览界面
CameraDeviceImpl-->capture ---> 开始捕获图片
在oncreate时将参数设置给fragment,然后显示Camera2Fragment
 @Override
    protected void onCreate(Bundle savedInstanceState) {
        Intent vIntent = getIntent();
        initSelf(vIntent);
		Bundle bundle = new Bundle();
        bundle.putString("id", CitUtils.getCameraIdByNode(Constants.BACK_MAIN_CAMERA_NODE));
		// /sys/hwinfo/BACK_CAM_MFR 通过camera节点获取id值.
        bundle.putBoolean("auto_focus", hasAutoFocus);//自动聚焦
        bundle.putBoolean("take_pic", canTakePic);//能否拍照
        bundle.putBoolean("touch_focus", hasTouchFocus);//手动聚焦
        bundle.putBoolean("view_pic", canViewPic);//能否预览
        bundle.putBoolean("auto_flash", true);//自动闪光
        bundle.putInt("focus_num", needFocusNum);//聚焦次数
        bundle.putInt("pic_num", needTakePicNum);//照片数量
        bundle.putString("pic_name", "rear1");//照片名称
        bundle.putBoolean("pic_ok", pic_ok);//拍照是否完成
        mCameraFragment.setArguments(bundle);
        if (null == savedInstanceState) {
            startTest();//显示fragment
        }

}
接下来的测试全部在Camera2Fragment中进行
首先根据mCameraId打开对应的摄像头
private void openCamera(int width, int height) {
        setUpCameraOutputs(width, height);//设置和camera相关的成员变量,预览图像的长宽,判断是否旋转了,如果旋转了手机要修改图像长宽
        configureTransform(width, height);//给TextureView配置必要的参数,设置camere的显示范围
        Activity activity = getActivity();
        CameraManager manager = (CameraManager) activity.getSystemService(Context.CAMERA_SERVICE);
        try {
            if (!mCameraOpenCloseLock.tryAcquire(2500, TimeUnit.MILLISECONDS)) {//避免在camera关闭之前退出app
                throw new RuntimeException("Time out waiting to lock camera opening.");
            }
			//根据mCameraId打开对应的摄像头
            manager.openCamera(mCameraId, mStateCallback, mBackgroundHandler);
        } catch (CameraAccessException e) {
            e.printStackTrace();
        } catch (InterruptedException e) {
            throw new RuntimeException("Interrupted while trying to lock camera opening.", e);
        }
    }
打开摄像头之后,会回调onOpened方法去设置预览
 private final CameraDevice.StateCallback mStateCallback = new CameraDevice.StateCallback() {

        @Override
        public void onOpened(CameraDevice cameraDevice) {
            // This method is called when the camera is opened.  We start camera preview here.
            mCameraOpenCloseLock.release();
            mCameraDevice = cameraDevice;
            createCameraPreviewSession();//发起预览
        }
 };
预览方法
//创建相机预览节点
    private void createCameraPreviewSession() {
        try {
            SurfaceTexture texture = mTextureView.getSurfaceTexture();
            assert texture != null;
            // 我们将默认缓冲区的大小配置为所需的摄像机预览的大小。
            texture.setDefaultBufferSize(mPreviewSize.getWidth(), mPreviewSize.getHeight());
            // 这是我们开始预览所需的输出Surface。
            Surface surface = new Surface(texture);
            //给Surface设置一个
            mPreviewRequestBuilder
                    = mCameraDevice.createCaptureRequest(CameraDevice.TEMPLATE_PREVIEW);
            mPreviewRequestBuilder.addTarget(surface);
            //创建了CameraCaptureSession来进行摄像机预览。
            mCameraDevice.createCaptureSession(Arrays.asList(surface, mImageReader.getSurface()),
                    new CameraCaptureSession.StateCallback() {

                        @Override
                        public void onConfigured(CameraCaptureSession cameraCaptureSession) {
                            // The camera is already closed
                            if (null == mCameraDevice) {
                                return;
                            }

                            // When the session is ready, we start displaying the preview.
                            mCaptureSession = cameraCaptureSession;
                            try {
                                if (isAutoFocus) {
                                    // Auto focus should be continuous for camera preview.
                                    mPreviewRequestBuilder.set(CaptureRequest.CONTROL_AF_MODE,
                                            CaptureRequest.CONTROL_AF_MODE_CONTINUOUS_PICTURE);
                                } else {
                                    // Auto focus should be continuous for camera preview.
                                    mPreviewRequestBuilder.set(CaptureRequest.CONTROL_AF_MODE,
                                            CaptureRequest.CONTROL_AE_MODE_OFF);
                                }
                                // Flash is automatically enabled when necessary.
                                //会自动打开闪光灯如果有必要的话
                                android.util.Log.d(TAG, "onConfigured: isInfrared="+isInfrared);
                                if (isInfrared) {
                                    mPreviewRequestBuilder.set(CaptureRequest.FLASH_MODE, CaptureRequest.FLASH_MODE_TORCH);
                                } else {
                                    setAutoFlash(mPreviewRequestBuilder);
                                }
                                // Finally, we start displaying the camera preview.
                                mPreviewRequest = mPreviewRequestBuilder.build();
                                mCaptureSession.setRepeatingRequest(mPreviewRequest,
                                        mCaptureCallback, mBackgroundHandler);
                            } catch (CameraAccessException e) {
                                e.printStackTrace();
                            }
                        }

                        @Override
                        public void onConfigureFailed(
                                CameraCaptureSession cameraCaptureSession) {
//                            showToast("Failed");
                        }
                    }, null
            );
        } catch (CameraAccessException e) {
            e.printStackTrace();
        }
    }
预览之后,用户点击AutoFitTextureView显示的区域开始对焦,
AutoFitTextureView,重写了onTouchEvent,根据手指点击和抬起时的两次坐标和时间间隔,确定需要对焦。
    @Override
    public boolean onTouchEvent(MotionEvent event) {
        switch (event.getAction()) {
            case MotionEvent.ACTION_DOWN:
                mDownTime = System.currentTimeMillis();
                mDownX = event.getX();
                mDownY = event.getY();
                break;
            case MotionEvent.ACTION_UP:
                mTouchTime = System.currentTimeMillis() - mDownTime;
                detectGesture(mDownX, event.getX(), mDownY, event.getY());
                break;
        }
        return true;
    }

    private void detectGesture(float downX, float upX, float downY, float upY) {
        float distanceX = upX - downX;
        float distanceY = upY - downY;
        //手指x/y移动小于mClickDistance,并且时间小于200毫秒
        //mClickDistance = 屏幕宽度/20
        if (Math.abs(distanceX) < mClickDistance
                && Math.abs(distanceY) < mClickDistance
                && mTouchTime < DELAY_TIME) {
            mListener.onTouchFocus(upX, upY);
        }
    }
触发对焦
    public void onTouchFocus(float x, float y) {
        if (!isTouchFocus) {
            return;
        }
        mTouchFocus += 1;
        Log.d(TAG, "onTouchFocus: " + x + ", " + y);
        mFocusManager.startFocus(x, y);//将对焦图案显示在对应的坐标上
        MeteringRectangle focusRect = mFocusManager.getFocusArea(x, y, true);
        MeteringRectangle meterRect = mFocusManager.getFocusArea(x, y, false);
        //设置为自动对焦
        mPreviewRequestBuilder.set(CaptureRequest.CONTROL_AF_MODE, CaptureRequest.CONTROL_AF_MODE_AUTO);
        //设置整个3A控制程序模式 自动聚焦(AF),自动曝光(AE)和自动白平衡(AEB)
        mPreviewRequestBuilder.set(CaptureRequest.CONTROL_MODE, CaptureRequest.CONTROL_MODE_AUTO);
        if (mFocusArea == null) {
            mFocusArea = new MeteringRectangle[]{focusRect};
        } else {
            mFocusArea[0] = focusRect;
        }
        if (mMeteringArea == null) {
            mMeteringArea = new MeteringRectangle[]{meterRect};
        } else {
            mMeteringArea[0] = meterRect;
        }

        if (isMeteringSupport(true)) {//自动聚焦可使用的最大测量区域数
            mPreviewRequestBuilder.set(CaptureRequest.CONTROL_AF_REGIONS, mFocusArea);
        }
        if (isMeteringSupport(false)) {//自动曝光可使用的最大测量区域数
            mPreviewRequestBuilder.set(CaptureRequest.CONTROL_AE_REGIONS, mMeteringArea);
        }
        // 要触发3A行为,需要为下一个请求简单地设置相关触发器实体,以引导触发器的启动。
        // 例如,启动自动聚焦的触发器需要在一个请求中将ANDROID_CONTROL_AF_TRIGGER设置为ANDROID_CONTROL_AF_TRIGGER_START。
        // 停止自动聚焦需要将ANDROID_CONTROL_AF_TRIGGER设置为ANDROID_CONTRL_AF_TRIGGER_CANCEL。
        // 否则,实体不存在或者被设置为ANDROID_CONTROL_AF_TRIGGER_IDLE。
        mPreviewRequestBuilder.set(CaptureRequest.CONTROL_AF_TRIGGER, CaptureRequest.CONTROL_AF_TRIGGER_IDLE);

        CaptureRequest request = mPreviewRequestBuilder.build();
        try {

            if (mCaptureSession == null){
                return;
            }
			//设置预览界面
            mCaptureSession.setRepeatingRequest(request, mCaptureCallback, mBackgroundHandler);
            //触发自动对焦
            mPreviewRequestBuilder.set(CaptureRequest.CONTROL_AF_TRIGGER, CaptureRequest.CONTROL_AF_TRIGGER_START);
            //开始捕获图片
            mCaptureSession.capture(mPreviewRequestBuilder.build(), mCaptureCallback, mBackgroundHandler);

            mMainHandler.sendEmptyMessage(MSG_UI_TOUCH_FOCUS_RUNNING);//提示语:对焦中

        } catch (CameraAccessException e) {
            e.printStackTrace();
        }
    }
触发对焦后会回调mCaptureCallback的方法处理数据
对焦失败时更新对焦状态,overlayManager.focusFailed()会跟新ui
 //图片捕获中
        @Override
        public void onCaptureProgressed(CameraCaptureSession session,
                                        CaptureRequest request,
                                        CaptureResult partialResult) {
            updateAfState(partialResult);
            process(partialResult);
        }

        //图片捕获完成
        @Override
        public void onCaptureCompleted(CameraCaptureSession session,
                                       CaptureRequest request,
                                       TotalCaptureResult result) {
            updateAfState(result);
            process(result);
点击两次屏幕对焦两次之后点击关闭按钮,对焦对焦次数大于需要次数并且拍照张数大于需要次数,测试项通过
@Override
    public void onClick(View view) {
        switch (view.getId()) {
            case R.id.back:
                Log.d(TAG," mNeedFocusNum = "+mNeedFocusNum+" mTouchFocus = "+ mTouchFocus);
                if (mTouchFocus >= mNeedFocusNum && mTakePicNum >= mNeedPicNum) {
                    if (getActivity() instanceof CommunicateEvent){
                        mTouchFocus = 0;
                        mFocusTimes = 0;
                        ((CommunicateEvent) getActivity()).setResult(picOk);
                        ((CommunicateEvent) getActivity()).endTest();
                        if (isTouchFocus) {//重置为初始化条件
                           mFirstNum = 0;
                           mSecondNum = 0;
                           mFocusTips.setText(getResources().getString(R.string.far_focus_tips));
                        }
                        getFragmentManager().beginTransaction()
                                .hide(this);
                    }
                } else {
                    Toast.makeText(getActivity(), getResources().getString(R.string.tip_test_use_rules), Toast.LENGTH_LONG).show();
                }
                break;
        }
    }
二十八 触摸屏自动
先根据硬件信息节点分辨出是哪一个供应商的屏幕,然后根据不同供应商的路径去读取屏幕测试结果。根据读取的结果判断成功还是失败。
    // 不同供应商读取屏幕测试结果的路径
    private static final String FOCALTECH = "/sys/bus/i2c/devices/0-0038/fts_test";
    private static final String ILITEK = "/proc/ilitek/mp_lcm_on_test";
    //硬件信息路径
    private static final String TP_PATH = "/sys/hwinfo/TP_MFR";

@Override
    protected void onCreate(Bundle paramBundle) {
        Intent vIntent = getIntent();
        initSelf(vIntent);
        setContentView(R.layout.touch);
        super.onCreate(paramBundle);
        mRetestButton = (Button) findViewById(R.id.btn_retest);
        mTvSuccess = (TextView)findViewById(R.id.tv_is_success);
        mRetestButton.setVisibility(View.INVISIBLE);
        //根据路径读取指纹信息
        tpInfo = readTpInfo(TP_PATH).toLowerCase();
        Log.d(TAG, "tpInfo = " + tpInfo);
        if (tpInfo != null) {
        // 判断是哪家供应商的屏幕,根据路径读出的数值判断成功或者失败
        // 前两种屏幕在开机亮屏的时候驱动已经将tP的测试结果写入倒了对应的文件中
            if (tpInfo.contains("truly_focaltech") || tpInfo.contains("holitek-ft8006p")) {
                setTpResult(readTpInfo(FOCALTECH));
            } else if (tpInfo.contains("skyworth")) {
                setTpResult(readTpInfo(ILITEK));
            } else if(tpInfo.contains("truly-icnl9911s")) {
                tpTestChipone();
            } else {
                Toast.makeText(this, getResources().getString(R.string.test_item_touch_info), Toast.LENGTH_LONG).show();
                //sendRspBroadcast("tp_test", 0);
                //this.finish();
                mHandler.sendEmptyMessage(FAIL);
            }
        }
下面这个方法是驱动提供的,咱们写入1驱动会处理,咱们再去读取那个文件,得到的结果就是屏幕测试的结果。
private void tpTestChipone() {
        final String file = "/sys/chipone-tddi/test/self_test";
        final String formatEchoCmd = "echo %d > " + file;
        final String catCmd = "cat " + file;
        //CitFacService.runCmdByFac(String.format(formatEchoCmd, 1));
        writeInfoToFile(file,"1");
        String tpInfo_icnl = readTpInfo1(file).toLowerCase();
        writeInfoToFile(file,"0");
        //CitFacService.runCmdByFac(String.format(formatEchoCmd, 0));
        setTpResult(tpInfo_icnl);
    }
二十九 耳机测试
点击录音按钮,使用自定义的Recorder去录音,然后播放,播放完成后收到耳机的按键事件测试项通过。
    protected void onCreate(Bundle paramBundle) {
        Intent vIntent = getIntent();
        initSelf(vIntent);
        setContentView(R.layout.headset);
        super.onCreate(paramBundle);
        //创建自定义的recorder
        mRecorder = new Recorder();
        mRes = this.getResources();
        mHandler = new MyHandler();
        mBtnFail.setVisibility(View.VISIBLE);
        mFilter = new IntentFilter();
        mFilter.addAction(Intent.ACTION_HEADSET_PLUG);
        mReceiver = new SpeakerReceiver();

        mBtnRecord.setOnClickListener(new View.OnClickListener(){
            public void onClick(View paramView) {
                if (!isHeadsedPresent()) {//检查耳机是否已经插入,提醒插入耳机
                    Toast.makeText(CitHeadset.this, mRes.getString(R.string.headset_tip_no_headset), Toast.LENGTH_SHORT).show();
                    mTextView.setText(mRes.getString(R.string.headset_tip_no_headset));
                    return;
                } else {
                    mIsHeadsetPluged = true;
                    mTimer = MAX_TIME;
                    mStatus = 0;
                    mRecorder.startRecording();//开始录音
                    mHandler.sendEmptyMessage(MSG_1);//发送消息,录音三秒
                    mBtnPass.setVisibility(View.INVISIBLE);
                    mBtnRecord.setVisibility(View.INVISIBLE);
                    if (!mReg) {
                        registerReceiver(mReceiver, mFilter);
                        mReg = true;
                    }
                }
            }
        });
    }
Handler处理消息
private class MyHandler extends Handler {
        private MyHandler() {
        }

        @Override
        public void handleMessage(Message msg) {
            super.handleMessage(msg);
            if (msg.what == MSG_1)//录音状态
            {
                if (mStatus == 0) {
                    mStatus = 1;
                }
                if (mTimer <= 0) {
                    Log.d(TAG, "Stop recording");
                    mHandler.removeMessages(MSG_1);
                    //录制完成后发送消息MSG_2
                    mHandler.sendEmptyMessage(MSG_2);
                    mTimer = MAX_TIME;
                } else {
                    mTextView.setText(mRes.getString(R.string.headset_tip_recording) + mTimer);
                    //每隔一秒发送一次MSG_1,mTimer-1,实现录制三秒
                    mTimer -= 1;
                    mHandler.sendEmptyMessageDelayed(MSG_1, 1000L);
                }
            } else if (msg.what == MSG_2) {//播放状态
                if (mStatus == 1) {
                    mStatus = 2;
                    Log.d(TAG, "Start playing");
                    mRecorder.stop();//停止录音
                    mRecorder.startPlayback();//开始播放
                    setMaxVolume();//最大音量
                    //通过audioManager.setStreamVolume(AudioManager.STREAM_MUSIC, maxVolume, 0)设置为最大音量
                }
                if (mTimer <= 0) {
                    Log.d(TAG, "Complete playing");
                    mHandler.removeMessages(MSG_2);
                    mRecorder.stop();//停止播放
                    mTextView.setText(mRes.getString(R.string.headset_tip_press_mic_button));
                } else {
                    mTextView.setText(mRes.getString(R.string.headset_tip_playing) + mTimer);
                    mTimer -= 1;
                    mHandler.sendEmptyMessageDelayed(MSG_2, 1000L);
                }
            } else if (msg.what == MSG_3) {//耳机键已被按下,测试成功
                mStatus = 3;
                if (mIsHeadsetPluged == true) {
                    mTextView.setText(mRes.getString(R.string.headset_tip_key_press));
                    mBtnPass.setVisibility(View.VISIBLE);
                    mBtnRecord.setVisibility(View.VISIBLE);
                    if (mTestType == Constants.TEST_TYPE_AUTO) {
                        mBtnPass.performClick();
                    }
                    if (mReg == true) {
                        unregisterReceiver(mReceiver);
                        mReg = false;
                    }
                }
            } else if (msg.what == MSG_4) {//恢复初始条件
                if (mIsHeadsetPluged == false) {
                    mRecorder.stop();
                    mHandler.removeMessages(MSG_1);
                    mHandler.removeMessages(MSG_2);
                    mHandler.removeMessages(MSG_3);
                    if (mReg == true) {
                        unregisterReceiver(mReceiver);
                        mReg = false;
                    }
                    mBtnRecord.setVisibility(View.VISIBLE);
                    mTextView.setText(mRes.getString(R.string.headset_tip_no_headset));
                }
            }
        }
    }
分析一下自定义的recorder
开始录音
 public void startRecording(){
        int i = 1;
        stop();//通知录音停止播放
        File path = Environment.getExternalStorageDirectory();
        File outFile = new File(path.getPath() + "/recordoutput.amr");
        if(outFile.exists()) {
            outFile.delete();//录音文件存在的话先清空
        }
        if (mSampleLength > 0) {
            mSampleLength = 0;
        }
        mMediaRecorder = new MediaRecorder();
        mMediaRecorder = new MediaRecorder();
        //设定录音来源为主麦克风。
        mMediaRecorder.setAudioSource(MediaRecorder.AudioSource.MIC);
        //输出格式
        mMediaRecorder.setOutputFormat(MediaRecorder.OutputFormat.RAW_AMR);
        //设置编解码器
        mMediaRecorder.setAudioEncoder(MediaRecorder.AudioEncoder.AMR_NB);
        mMediaRecorder.setOutputFile(path.getPath() + "/recordoutput.amr");

        try{
            mMediaRecorder.prepare();
        }catch (IOException ioexception1){
            setError(2);
            mMediaRecorder.reset();
            mMediaRecorder.release();
            mMediaRecorder = null;
            return;
        }

        try {
            mMediaRecorder.start();
        } catch (Exception e) {
            setError(2);
            mMediaRecorder.reset();
            mMediaRecorder.release();
            mMediaRecorder = null;
            return;
        }
        mSampleStart = System.currentTimeMillis();
        setState(i);
    }
播放录音
public void startPlayback( ){
        stop();
        File path = Environment.getExternalStorageDirectory();
        mMediaPlayer = new MediaPlayer();
        try{
        // 设置播放资源为上面的录音文件
            mMediaPlayer.setDataSource(path.getPath() + "/recordoutput.amr");
            mMediaPlayer.setOnCompletionListener(this);
            mMediaPlayer.setOnErrorListener(this);
            mMediaPlayer.prepare();
            mMediaPlayer.start();
        }catch (java.io.IOException e) {
            Log.e(TAG, e.getMessage(), e);
        }
        mSampleStart = System.currentTimeMillis();
        setState(2);
    }
三十 FM测试
先根据CitCustomize获取当前时什么平台,如果是高通平台通过startActivityForResult(intent, 1)方式打开FM,
如果是mtk平台则通过citHelperreceiver 打开FM,进入FM调台,有电台声音的话,点击返回,FM会将成功或者失败的结果返回
protected void onCreate(Bundle paramBundle) {
        Intent vIntent = getIntent();
        initSelf(vIntent);
        setContentView(R.layout.fm);
        super.onCreate(paramBundle);
        mBtnFail.setVisibility(View.VISIBLE);
        mFmResult = (TextView)findViewById(R.id.fm_text);
        setMaxVolume();
        if (Constants.PLATFORM_710.equals(CitCustomize.getSensorPlatformType()) ||
                Constants.PLATFORM_632.equals(CitCustomize.getSensorPlatformType())) {
            mFilter = new IntentFilter();
            mFilter.addAction("com.fm.cit_test");
            registerReceiver(mReceiver, mFilter);
            mReg = true;
            Intent intent = new Intent(Intent.ACTION_MAIN,null);
            intent.putExtra("is_cit", true);
            intent.setClassName("com.caf.fmradio","com.caf.fmradio.FMRadio");
            try {
                startActivityForResult(intent, 1);//高通平台打开FM
            }catch (Exception e){
                e.printStackTrace();
            }
        } else if (Constants.PLATFORM_MT6739.equals(CitCustomize.getSensorPlatformType())) {
            mHelperFilter = new IntentFilter();
            mHelperFilter.addAction("com.mmi.helper.response");
            registerReceiver(mHelperReceiver, mHelperFilter);
            mHelperReg = true;
            sendFPTestRequest();//mtk平台打开FM
        } else {
            return;
        }
    }
发送fm_test广播
 private void sendFPTestRequest() {
        Intent intent = new Intent("com.mmi.helper.request");
        intent.setPackage("com.ontim.cit");
        intent.putExtra("type", "fm_test");
        intent.putExtra("config_autoexit", false);
        sendBroadcast(intent);
    }
CitHelperReceiver收到收到fm_test广播后,根据strType打开FM
 @Override
    public void onReceive(Context context, Intent intent) {
        mContext = context;
        String action = intent.getAction();
        Log.d(TAG, "onReceive, action = " + action);
        if(action.equals("com.mmi.helper.request")) {
            String strType = intent.getStringExtra("type");
            Log.i(TAG, "Request type = " + strType);
              if (strType.equals("fm_test")) {
                boolean autoExit = intent.getBooleanExtra("config_autoexit", true);
                Log.d(TAG, "FM test autoExit = " + autoExit);
                Intent fmIntent = new Intent();
                fmIntent.setClassName("com.ontim.cit", "com.ontim.cit.CitHelperActivity");
                fmIntent.putExtra("test_type", "fm_test");
                fmIntent.putExtra("config_autoexit", autoExit);
                fmIntent.setFlags(Intent.FLAG_ACTIVITY_NEW_TASK);
                mContext.startActivity(fmIntent);
            }
        }
    }
在FM界面点击返回,会发送测试成功或者失败的广播,citFM接受到广播后根据返回值设置显示成功和失败的按钮。
CitBase.java 基类分析
主要功能
就是点击成功和失败按钮时会写标志位,记录下各个测试是否测试成功
	protected void finishTest() {
        saveResult();
        Intent data = new Intent();
        Bundle bundle = new Bundle();
        bundle.putInt("id", mID);
        bundle.putInt("result", mResult);
        data.putExtras(bundle);
        setResult(RESULT_OK, data);//将结果返回给打开它的类
        CitBase.this.finish();
        CitLog.getInstance().writeLog(mName, mResult);//打印log,测试项和测试结果
    }

    private void saveResult() {
        //if (mTestType == Constants.TEST_TYPE_AUTO) {
        ArrayList<Byte> rsp;
        if (CitUtils.isSMTVersion()) {//写标志位
            rsp = CitFacService.rwCitItemTestResult(Constants.SUB_PARTITION_W, mCitType, mID, mResult);
        } else {
            rsp = CitFacServiceNormal.rwCitItemTestResult(Constants.SUB_PARTITION_W, mCitType, mID, mResult);
        }
        //}
    }
CitFacService.rwCitItemTestResult方法
/**
     * Read/Write CIT test item result to file
     *
     * @param operation: read(1) or write(2)
     * @param citType: cit测试类型
     * @param itemId: cit测试项id
     * @param data: 写才需要的数据,在读的时候不使用
     * @return 、返回值 读或者写 成功与否
     */
public static ArrayList<Byte> rwCitItemTestResult(int operation, int citType, int itemId, int data) {
        ArrayList<Byte> req = new ArrayList<Byte>();
        ArrayList<Byte> rsp = new ArrayList<Byte>();
        Byte[] reqData = {
            (byte)(Constants.REQ_RW_CIT_ITEM_RESULT & 0xFF), (byte)((Constants.REQ_RW_CIT_ITEM_RESULT >> 8) & 0xFF), /*main req id*/
            (byte)(operation & 0xFF), (byte)((operation >> 8) & 0xFF), /*sub req id, read or write*/
            3, 0, /*req data length */
            (byte) citType, /*Cit type, reset by parameter citType */
            (byte) itemId, /*Item id, reset by parameter itemId*/
            (byte) data, /*result, reset by parameter data*/
        };

        for (int i = 0; i < reqData.length; i++) {
            req.add(reqData[i]);
        }

        try {
            rsp = instance.fac_cmd_handle(req);
        } catch (RemoteException e) {
            e.printStackTrace();
        }

        int rspLen = (int)(rsp.get(4).byteValue() & 0xFF) + (int)(rsp.get(5).byteValue() & 0xFF) * 256;
        List<Byte> sub = rsp.subList(6, rspLen + 6);
        return new ArrayList<Byte>(sub);
    }
参考文献:
自定义Camera系列之:TextureView + Camera
音视频直播技术–Android视频采集(Camera2)
Android Camera2 之 CaptureRequest 和 CaptureResult