零知开源分享 - 移植 LittleVGL.GUI库demo演示
Little VGL作为一个优秀、源码开源的GUI库,内存占用少但界面炫酷,目前得到越来越多的支持。零知开源平台已移植了该库,下面在零知开发板-增强板上进行实验演示。
特性:
- 16, 32 or 64 bit microcontroller or processor
- 16 MHz clock speed
- 8 kB RAM for static data and >2 KB RAM for dynamic data (graphical objects)
- 64 kB program memory (flash)
- 支持GPU
1、硬件准备
(1)零知开发板-增强板
(2)TFT液晶显示屏
(3)零知开发工具
(4)杜邦线若干
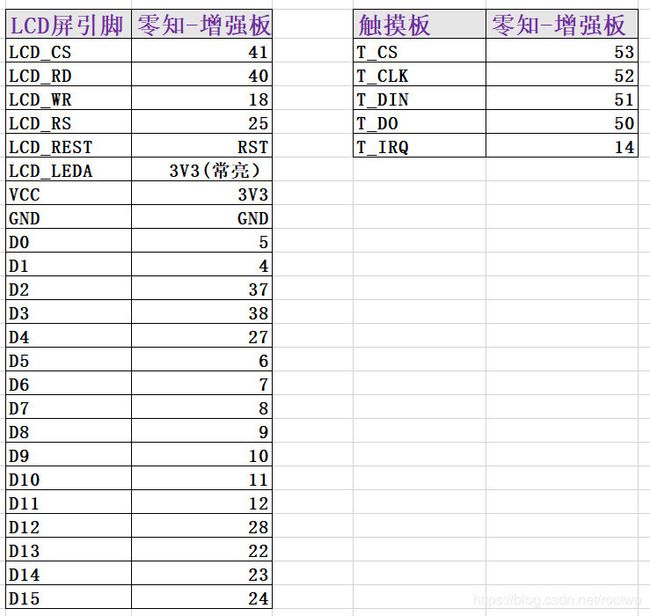
2、硬件连接
使用2.4寸、ILI9341驱动、带触摸屏XPT2046的TFT液晶显示屏作为显示工具,与零知增强板配合使用,硬件连接按下表进行连线:
3、编写代码
因为使用了TFT液晶显示屏作为显示工具,所以需要用到FSMC_TFT库,同时也用到触摸屏功能,也需要XPT2046的软件库,相关的库文件可到零知实验室官网免费获取。
(1)显示设备
初始化:
/**
* Initialize your display here
*/
void tft_init(void)
{
        lv_disp_drv_t disp_drv;
        lv_disp_drv_init(&disp_drv);

        disp_drv.disp_fill = tft_fill;
        disp_drv.disp_map = tft_map;
        disp_drv.disp_flush = tft_flush;

        lv_disp_drv_register(&disp_drv);
}
液晶屏与LittleVGL库相关联,进行显示的操作:
/**
* Flush a color buffer
* @param x1 left coordinate of the rectangle
* @param x2 right coordinate of the rectangle
* @param y1 top coordinate of the rectangle
* @param y2 bottom coordinate of the rectangle
* @param color_p pointer to an array of colors
*/
void tft_flush(int32_t x1, int32_t y1, int32_t x2, int32_t y2, const lv_color_t * color_p)
{
        //        LCD_Color_Fill(x1,y1,x2,y2,color_p);
        u16 height,width;
        u16 i,j;
        width=x2-x1+1;                         //得到填充的宽度
        height=y2-y1+1;                        //高度
        for(i=0;iLCD_RAM=color_p->full;//写入数据
                        color_p++;
                }
        }
        lv_flush_ready();
}


/**
* Put a color map to a rectangular area
* @param x1 left coordinate of the rectangle
* @param x2 right coordinate of the rectangle
* @param y1 top coordinate of the rectangle
* @param y2 bottom coordinate of the rectangle
* @param color_p pointer to an array of colors
*/
void tft_map(int32_t x1, int32_t y1, int32_t x2, int32_t y2, const lv_color_t * color_p)
{
        u16 height,width;
        u16 i,j;
        width=x2-x1+1;                         //得到填充的宽度
        height=y2-y1+1;                        //高度
        for(i=0;iLCD_RAM=color_p->full;//写入数据
                        color_p++;
                }
        }
}

/**
* Fill a rectangular area with a color
* @param x1 left coordinate of the rectangle
* @param x2 right coordinate of the rectangle
* @param y1 top coordinate of the rectangle
* @param y2 bottom coordinate of the rectangle
* @param color fill color
*/
void tft_fill(int32_t x1, int32_t y1, int32_t x2, int32_t y2, lv_color_t color)
{
        LCD_Fill(x1,y1,x2,y2,color.full);
}
(2)输入设备,即用触摸屏作为输入设备
初始化:
/**
* init touchpad here
*/
/*************************
* Input device interface
*************************/
void touchpad_init(void)
{

        lv_indev_drv_t indev_drv;                       /*Descriptor of an input device driver*/
        lv_indev_drv_init(&indev_drv);                  /*Basic initialization*/
        indev_drv.type = LV_INDEV_TYPE_POINTER;         /*The touchpad is pointer type device*/
        indev_drv.read = ex_tp_read;                 /*Library ready your touchpad via this function*/
        lv_indev_drv_register(&indev_drv);              /*Finally register the driver*/
}
触摸位置的读取:
/*
* touch read position
*/
bool ex_tp_read(lv_indev_data_t *data)
{
        bool tp_is_pressed = ts.touched(); /*TODO read here the state of toush pad*/
        int16_t last_x = 0;
        int16_t last_y = 0;

        if(tp_is_pressed) {
                /*Touch pad is being pressed now*/
                TS_Point p = ts.getPoint();

                //convert to lcd position
                last_y = 320-(p.x *320)/4095;       /*TODO save the current X coordinate*/
                last_x = 240-(p.y *240)/4095;       /*TODO save the current Y coordinate*/

                Serial.print("touched:");
                Serial.print(last_x);Serial.print(",");Serial.println(last_y);
        }

        data->point.x = last_x;
        data->point.y = last_y;
        data->state = tp_is_pressed ? LV_INDEV_STATE_PR : LV_INDEV_STATE_REL;

        return false;       /*Return false because no moare to be read*/
}
注:触摸屏最好先进行校准,这样读取位置就比较精确,这里简单的进行了一下转换,对于尺寸较大的控件影响不大,如果是尺寸很小的控件不做校准,读取位置就会有很大的偏差。
(3)LVGL system tick
使用一个1ms定时器中断进行提供:
void timer_handler(stimer_t *timer)
{
        lv_tick_inc(1);
}

void lvgl_timer_init()
{
        static stimer_t m_timer;
        m_timer.timer = TIM3;
        TimerHandleInit(&m_timer, 10-1, 8400-1);//1ms timer
        attachIntHandle(&m_timer, timer_handler);
}
(4)创建lvgl的一个demo
这里直接调用了官方示例的demo进行演示。
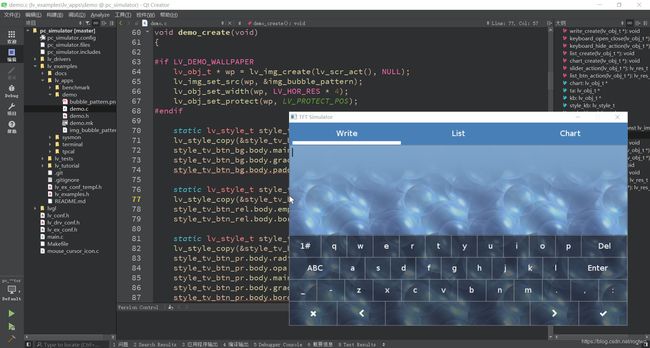
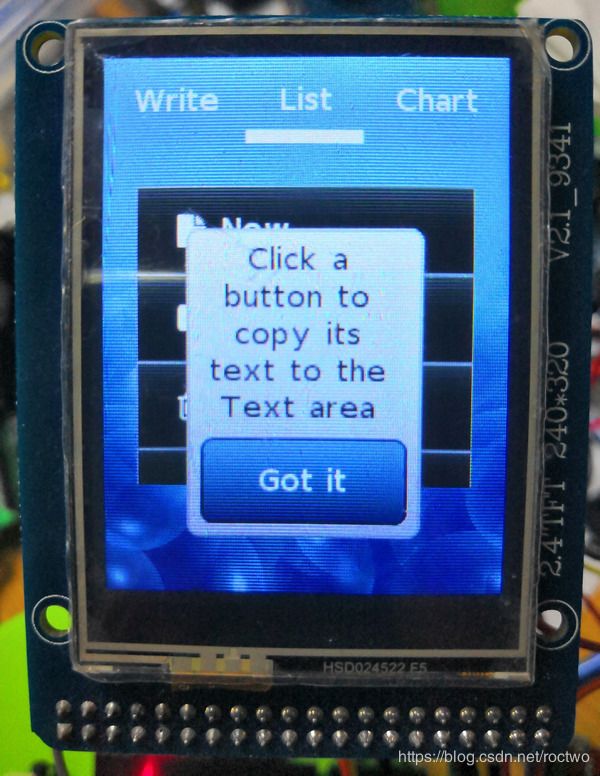
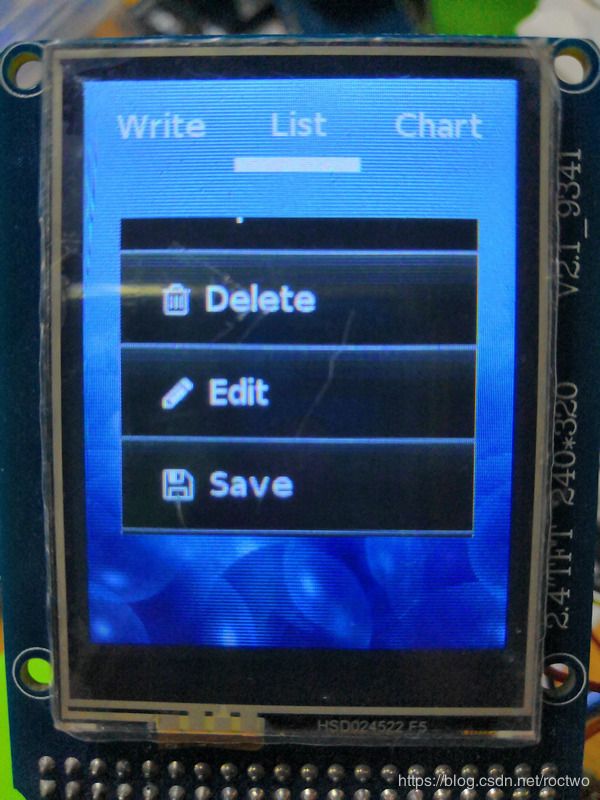
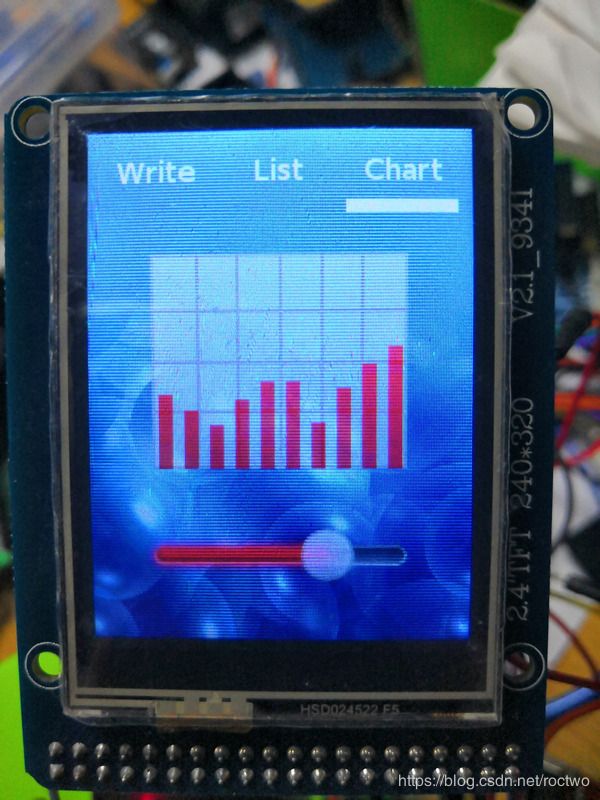
4、运行效果

还可以使用PC端模拟器辅助开发调试UI,以下是windows上Qt运行效果: