前言
在大规模安装服务器时,需要批量自动化方法来安装服务器,来减少日常的工作量。
PXE(Pre-boot Execution Environment)是由Intel设计的协议,它可以使计算机通过网络而不是从本地硬盘、光驱等设备启动。现代的网卡,一般都内嵌支持PXE的ROM芯片。当计算机引导时,BIOS把PXE client调入内存执行,并显示出命令菜单,经用户选择后,PXE client将放置在远端的操作系统通过网络下载到本地运行。
本文主要是搭建PXE的完整命令,具体的说明我都加到了命令后面进行了注释,这里我使用的KVM进行的操作,如果有什么不清楚的地方,可以私信我,或者给我发邮件。
欢迎大家批评指教,在这里谢谢各位了。
具体实现
特别注意
本次操作的虚拟机环境是将防火墙(iptables)和SeLinux关闭的情况下进行的操作,之前并没有意识到这一点,实在是抱歉。
实现目标
这次会计划实现的功能有:
- 分配ip地址和对应主机名
- 装机可选择菜单,可选择安装RHEL6或者CentOS6,缺省为RHEL6
- 安装后执行脚本,添加普通用户,搭建yum,并且安装vsftpd 服务,并做到随机自启
搭建部署
//安装配置DNS服务,来实现动态分配主机名
[root@pxe-server-04 ~]# yum -y install bind bind-chroot  //安装DNS服务包
[root@pxe-server-04 ~]# service named restart           //开启DNS服务
停止 named:                                               [确定]
Generating /etc/rndc.key:                                  [确定]
启动 named:                                               [确定]
[root@pxe-server-04 ~]# chkconfig named on  //开机自启
[root@pxe-server-04 ~]# chkconfig named --list  //验证结果
named           0:off   1:off   2:on    3:on    4:on    5:on    6:off
[root@pxe-server-04 ~]# vim /etc/named.conf
[root@pxe-server-04 ~]# cat /etc/named.conf //配置文件修改如下
//
// named.conf
//
// Provided by Red Hat bind package to configure the ISC BIND named(8) DNS
// server as a caching only nameserver (as a localhost DNS resolver only).
//
// See /usr/share/doc/bind*/sample/ for example named configuration files.
//

options {
    listen-on port 53 { any; }; //监听端口
    directory   "/var/named";   //地址库文件所在目录
    allow-query     { any; };   //允许任何客户机查询
};

zone "4.168.192.in-addr.arpa" IN {  //反向解析配置
    type master;
    file "192.168.4.arpa";
};
[root@pxe-server-04 ~]# cd /var/named/  //进入地址库文件目录
[root@pxe-server-04 named]# ll
total 32
drwxr-x---. 6 root  named 4096 Dec 17 09:18 chroot
drwxrwx---. 2 named named 4096 Dec 17 09:20 data
drwxrwx---. 2 named named 4096 Dec 17 09:20 dynamic
-rw-r-----. 1 root  named 2075 Apr 23  2014 named.ca
-rw-r-----. 1 root  named  152 Dec 15  2009 named.empty
-rw-r-----. 1 root  named  152 Jun 21  2007 named.localhost
-rw-r-----. 1 root  named  168 Dec 15  2009 named.loopback
drwxrwx---. 2 named named 4096 May 11  2015 slaves
[root@pxe-server-04 named]# cp -p named.localhost 192.168.4.arpa  //由于named服务需要给该配置文件添加named所属组属性,所以这里就使用cp -p命令,保留原文将的属性,拷贝一个模板来进行修改
[root@pxe-server-04 named]# hostname
pxe-server-04.wolf.com
[root@pxe-server-04 named]# vim 192.168.4.arpa
[root@pxe-server-04 named]# cat 192.168.4.arpa  //配置文件修改如下
$TTL 1D
@   IN SOA  @ rname.invalid. (
                    0   ; serial
                    1D  ; refresh
                    1H  ; retry
                    1W  ; expire
                    3H )    ; minimum
    NS  pxe-server-04.wolf.com.   //该位置写主机名即前面hostname的结果,但是需要以“.”结尾,请务必注意,负责重启服务会出现报错
$GENERATE 100-200 $ PTR  pc-$.war.cn.   //使用函数,生成从100到200连续的数字
[root@pxe-server-04 named]# service named restart
停止 named:                                               [确定]
启动 named:                                               [确定]
//验证DNS结果
[root@pxe-server-04 named]# nslookup 192.168.4.102 192.168.4.99 //前一个IP是验证的IP地址,后一个IP是当前主机的ip地址,即DNS服务器的地址
Server:     192.168.4.99
Address:    192.168.4.99#53

102.4.168.192.in-addr.arpa  name = pc-102.war.cn.

//安装,配置DHCP服务
[root@pxe-server-04 ~]# yum -y install dhcp
[root@pxe-server-04 ~]# chkconfig dhcpd on
[root@pxe-server-04 ~]# chkconfig dhcpd --list
dhcpd           0:off   1:off   2:on    3:on    4:on    5:on    6:off
[root@pxe-server-04 ~]# vim /etc/dhcp/dhcpd.conf
[root@pxe-server-04 ~]# cat /etc/dhcp/dhcpd.conf //初始dhcpd服务主配置文件,没有缺省配置,需要我们自己添加
#
# DHCP Server Configuration file.
#   see /usr/share/doc/dhcp*/dhcpd.conf.sample  //模板文件,可使用r写入
#   see 'man 5 dhcpd.conf'  //使用man帮助查看该文件
#
//经过修改后文件如下
[root@pxe-server-04 ~]# cat /etc/dhcp/dhcpd.conf
# dhcpd.conf
#
# Sample configuration file for ISC dhcpd
#

# option definitions common to all supported networks...

subnet 192.168.4.0 netmask 255.255.255.0 {
  range 192.168.4.100 192.168.4.200;
  option domain-name-servers 192.168.4.99;
  option routers 192.168.4.1;
  default-lease-time 600;
  max-lease-time 7200;
  next-server 192.168.4.99;   //制定下一个服务器,由于下一个服务,依然在本机搭建,所以ip仍然
  filename "pxelinux.0";   // 网卡引导文件(二进制文件),用来下载内核,驱动文件
}
[root@pxe-server-04 ~]# service dhcpd restart
关闭 dhcpd:                                               [确定]
正在启动 dhcpd:                                           [确定]

//安装,配置tftp服务
//这里使用tftp的原因在于,在装机到此时,客户端计算机并没有系统,所以就连用户都没有,所以需要使用这个简单文件传输系统
[root@pxe-server-04 ~]# yum -y install tftp-server
[root@pxe-server-04 ~]# service xinetd restart
停止 xinetd:                                              [失败]
正在启动 xinetd:                                          [确定]
[root@pxe-server-04 ~]# chkconfig xinetd on  //临时服务管理器
[root@pxe-server-04 ~]# chkconfig xinetd --list
xinetd          0:off   1:off   2:on    3:on    4:on    5:on    6:off
[root@pxe-server-04 ~]# chkconfig tftp on    //开启临时服务
[root@pxe-server-04 ~]# chkconfig tftp --list
tftp            on
[root@pxe-server-04 ~]# cd /var/lib/tftpboot/  //进入tftp共享目录
[root@pxe-server-04 tftpboot]# ls
[root@pxe-server-04 tftpboot]# yum provides */pxelinux.0  //查询该文件是由哪个rpm生成的
Failed to set locale, defaulting to C
Loaded plugins: product-id, security, subscription-manager
This system is not registered to Red Hat Subscription Management. You can use subscription-manager to register.
syslinux-nonlinux-4.04-3.el6.noarch : SYSLINUX modules which aren't run from linux.    //pxelinux.0 即是由该rpm包产生的,接下来只需要安装该包即可
Repo        : 192.168.4.254_rhel6
Matched from:
Filename    : /usr/share/syslinux/pxelinux.0

[root@pxe-server-04 tftpboot]# yum -y install syslinux-nonlinux
[root@pxe-server-04 tftpboot]# rpm -ql syslinux-nonlinux | grep pxelinux.0  //查找该文件所在路径
/usr/share/syslinux/gpxelinux.0
/usr/share/syslinux/pxelinux.0
[root@pxe-server-04 tftpboot]# cp /usr/share/syslinux/pxelinux.0 /var/lib/tftpboot/     //拷贝到tftp目录中
[root@pxe-server-04 tftpboot]# ls
pxelinux.0

//接下来需要准备装机时的软件包,内核,驱动等相关文件
//这些文件都在系统的ISO镜像文件中,当然以可以使用光驱挂载系统光盘,但是由于服务器一般不会带光驱,所以使用文件的情况会更多一些,这里我们使用ISO镜像文件
[root@pxe-server-04 ~]# ls rhel-server-6.7-x86_64-dvd.iso
rhel-server-6.7-x86_64-dvd.iso
[root@pxe-server-04 ~]# ls CentOS-6.7-x86_64-bin-DVD1.iso
CentOS-6.7-x86_64-bin-DVD1.iso
// 一般上述ISO镜像文件会挂载在ftp服务器上或web服务器上,所以这里我们先搭建web,即httpd服务
[root@pxe-server-04 ~]# yum -y install httpd
[root@pxe-server-04 ~]# service httpd restart
停止 httpd:                                               [失败]
正在启动 httpd:httpd: apr_sockaddr_info_get() failed for pxe-server-04.wolf.com
httpd: Could not reliably determine the server's fully qualified domain name, using 127.0.0.1 for ServerName
                                                           [确定]
[root@pxe-server-04 ~]# chkconfig httpd on
[root@pxe-server-04 ~]# chkconfig httpd --list
httpd           0:off   1:off   2:on    3:on    4:on    5:on    6:off
[root@pxe-server-04 ~]# vim /etc/httpd/conf/httpd.conf  //httpd服务主配置文件,这里使用缺省配置即可,所以不需要修改,就是单纯的亮出来
[root@pxe-server-04 ~]# cd /var/www/html/   //httpd服务缺省文件路径,我们需要将ISO镜像文件挂载到这里
//这里我们使用自动挂载,当然也可以使用手动挂载或者触发挂载
[root@pxe-server-04 html]# mkdir redhat-6.7
[root@pxe-server-04 html]# mkdir centos-6.7  //创建挂载点
[root@pxe-server-04 html]# vim /etc/fstab
[root@pxe-server-04 html]# cat /etc/fstab

#
# /etc/fstab
# Created by anaconda on Tue Mar 29 20:53:13 2016
#
# Accessible filesystems, by reference, are maintained under '/dev/disk'
# See man pages fstab(5), findfs(8), mount(8) and/or blkid(8) for more info
#
/dev/mapper/VolGroup-lv_root /                       ext4    defaults        1 1
UUID=146c8194-872b-43cf-9046-58a8d2ee2117 /boot                   ext4    defaults        1 2
/dev/mapper/VolGroup-lv_swap swap                    swap    defaults        0 0
tmpfs                   /dev/shm                tmpfs   defaults        0 0
devpts                  /dev/pts                devpts  gid=5,mode=620  0 0
sysfs                   /sys                    sysfs   defaults        0 0
proc                    /proc                   proc    defaults        0 0
/root/rhel-server-6.7-x86_64-dvd.iso    /var/www/html/redhat-6.7  iso9660  defaults,loop 0 0  //添加配置信息
/root/CentOS-6.7-x86_64-bin-DVD1.iso    /var/www/html/centos-6.7  iso9660  defaults,loop 0 0  //添加配置信息
[root@pxe-server-04 html]# mount -a
[root@pxe-server-04 html]# ls redhat-6.7/     //验证结果
EFI      EULA_en  EULA_it  EULA_pt  HighAvailability  README                      ResilientStorage    TRANS.TBL  media.repo
EULA     EULA_es  EULA_ja  EULA_zh  LoadBalancer      RPM-GPG-KEY-redhat-beta     ScalableFileSystem  images     release-notes
EULA_de  EULA_fr  EULA_ko  GPL      Packages          RPM-GPG-KEY-redhat-release  Server              isolinux   repodata
[root@pxe-server-04 html]# ls centos-6.7/     //验证结果
CentOS_BuildTag  EULA  Packages                  RPM-GPG-KEY-CentOS-6        RPM-GPG-KEY-CentOS-Security-6  TRANS.TBL  isolinux
EFI              GPL   RELEASE-NOTES-en-US.html  RPM-GPG-KEY-CentOS-Debug-6  RPM-GPG-KEY-CentOS-Testing-6   images     repodata

//现在ISO文件已经挂载好了,那么接下来需要回到tftp目录下,准备相关的文件
[root@pxe-server-04 html]# cd /var/lib/tftpboot/
[root@pxe-server-04 tftpboot]# ls
pxelinux.0
[root@pxe-server-04 tftpboot]# mkdir redhat-6.7
[root@pxe-server-04 tftpboot]# mkdir centos-6.7  //由于这次我们是想将redhat和centos都集成进来,便于日后的扩占和方便,所以需要对redhat和centos进行区分,防止两个系统的内核文件和驱动文件混淆导致错误
//当然也可以只安装一个,如果只安装一个,那么这里就不需要整个文件夹的创建,直接操作即可,不过建议还是建立一个,便于日后的扩展

//查看文件,
[root@pxe-server-04 tftpboot]# ls /var/www/html/redhat-6.7/isolinux/
TRANS.TBL  boot.cat  boot.msg  grub.conf  initrd.img  isolinux.bin  isolinux.cfg  memtest  splash.jpg  vesamenu.c32  vmlinuz
[root@pxe-server-04 tftpboot]# ls /var/www/html/centos-6.7/isolinux/
TRANS.TBL  boot.cat  boot.msg  grub.conf  initrd.img  isolinux.bin  isolinux.cfg  memtest  splash.jpg  vesamenu.c32  vmlinuz

[root@pxe-server-04 tftpboot]# cp /var/www/html/redhat-6.7/isolinux/initrd.img  redhat-6.7/   //拷贝redhat的驱动文件
[root@pxe-server-04 tftpboot]# cp /var/www/html/redhat-6.7/isolinux/vmlinuz  redhat-6.7/   //拷贝redhat的内核文件
[root@pxe-server-04 tftpboot]# cp /var/www/html/centos-6.7/isolinux/initrd.img centos-6.7/
[root@pxe-server-04 tftpboot]# cp /var/www/html/centos-6.7/isolinux/vmlinuz centos-6.7/

//由于菜单文件和图形化文件只需要一份,所以无需区分
//创建菜单文件目录,并将菜单文件拷贝,拷贝的同时改名为default
[root@pxe-server-04 tftpboot]# mkdir pxelinux.cfg  //缺省配置,不能改变
[root@pxe-server-04 tftpboot]# cp /var/www/html/centos-6.7/isolinux/isolinux.cfg pxelinux.cfg/default
//拷贝图形化支持文件
[root@pxe-server-04 tftpboot]# cp /var/www/html/centos-6.7/isolinux/vesamenu.c32 /var/lib/tftpboot/
//验证结果
[root@pxe-server-04 tftpboot]# pwd
/var/lib/tftpboot
[root@pxe-server-04 tftpboot]# ls
centos-6.7  pxelinux.0  pxelinux.cfg  redhat-6.7  vesamenu.c32
[root@pxe-server-04 tftpboot]# ls centos-6.7/
initrd.img  vmlinuz
[root@pxe-server-04 tftpboot]# ls redhat-6.7/
initrd.img  vmlinuz
[root@pxe-server-04 tftpboot]# ls pxelinux.cfg/
default

//准备装机背景图片,由于这次安装时的菜单页面我们是要采用图形化页面,所以需要一张图片作为背景
//Linux装机时的背景图片是需要特殊制作的
[root@pxe-server-04 tftpboot]# rpm -ql syslinux | grep .jpg
/usr/share/doc/syslinux-4.04/sample/m16-640x640-syslinux.jpg
/usr/share/doc/syslinux-4.04/sample/syslinux_splash.jpg
[root@pxe-server-04 tftpboot]# cp /usr/share/doc/syslinux-4.04/sample/syslinux_splash.jpg pxelinux.cfg/
[root@pxe-server-04 tftpboot]# ls pxelinux.cfg/
default  syslinux_splash.jpg

//修改菜单文件
[root@pxe-server-04 tftpboot]# chmod +w pxelinux.cfg/default  //添加可写权限,当然在root用户下,可以强制修改,但是建议还是添加一下
[root@pxe-server-04 tftpboot]# ls -l pxelinux.cfg/default
-rw-r--r--. 1 root root 923 Dec 17 11:09 pxelinux.cfg/default
[root@pxe-server-04 tftpboot]# vim pxelinux.cfg/default
[root@pxe-server-04 tftpboot]# cat pxelinux.cfg/default
default vesamenu.c32  //图形化支撑文件
#prompt 1
timeout 600   //读秒时间,表示十分之一秒

display boot.msg

menu background pxelinux.cfg/syslinux_splash.jpg  //背景图片路径
menu title INTALL LINUX   //菜单文件标题,可随意
menu color border 0 #ffffffff #00000000
menu color sel 7 #ffffffff #ff000000
menu color title 0 #ffffffff #00000000
menu color tabmsg 0 #ffffffff #00000000
menu color unsel 0 #ffffffff #00000000
menu color hotsel 0 #ff000000 #ffffffff
menu color hotkey 7 #ffffffff #ff000000
menu color scrollbar 0 #ffffffff #00000000

label redhat-6.7  //选项标签
  menu label Install ^RedHat6.7 //标签显示内容,"^"表示可以通过按键后面的第一个字母进行快速选择
  menu default   //默认,当读秒结束后,没有进行其他操作的话,会选择该配置所在的标签
  kernel redhat-6.7/vmlinuz   //redhat的内核文件,注意区分,也可以对vmlinuz进行改名操作,以名词区分,这里使用目录进行区分
  append initrd=redhat-6.7/initrd.img
label centos-6.7
  menu label Install ^CentOS6.7
  kernel centos-6.7/vmlinuz
  append initrd=centos-6.7/initrd.img
label rescue
  menu label ^Rescue installed system  //救援模式,任意选择使用哪一个版本的驱动和内核,该标签在装机时,并无作用
  kernel centos-6.7/vmlinuz
  append initrd=centos-6.7/initrd.img rescue
label local  //从本地硬盘启动
  menu label Boot from ^local drive
  localboot 0xffff

//准备应答文件,接下来要将在装机时的选项和配置做成一个配置文件,以实现自动化装机操作
//可以直接手动编写,但是那样难度较大,这里我们选择使用一款图像化的软件
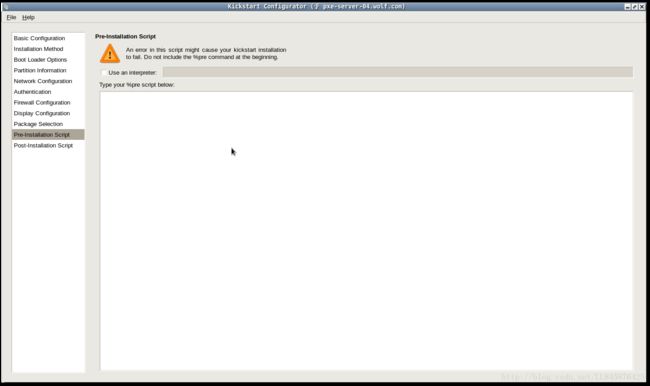
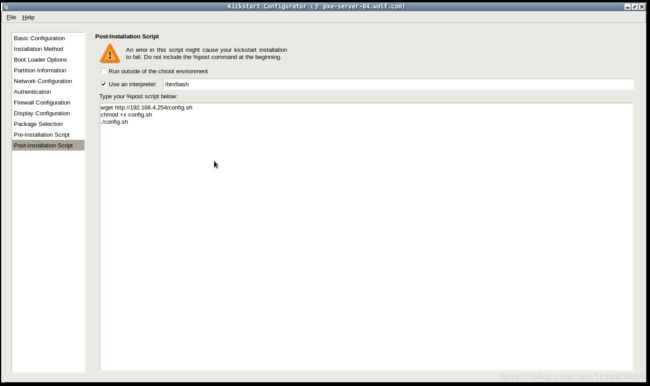
//截图放在了后面,各位可以参考图片进行操作
[root@pxe-server-04 ~]# yum -y install system-config-kickstart
[root@pxe-server-04 ~]# system-config-kickstart  //启动软件
[root@pxe-server-04 ~]# cd /var/www/html/
[root@pxe-server-04 html]# ls
centos-6.7  centos6.7-ks.cfg  config.sh  redhat-6.7
[root@pxe-server-04 html]# cat centos6.7-ks.cfg
#platform=x86, AMD64, or Intel EM64T
#version=DEVEL
# Firewall configuration
firewall --disabled
# Install OS instead of upgrade
install
# Use network installation
url --url="http://192.168.4.99/centos-6.7"
# Root password
rootpw --iscrypted $1$15OTgffs$30Fh3lNZVXIdIu1qfgBwt1
# System authorization information
auth  --useshadow  --passalgo=sha512
# Use text mode install
text
firstboot --disable
# System keyboard
keyboard us
# System language
lang zh_CN
# SELinux configuration
selinux --disabled
# Installation logging level
logging --level=info
# Reboot after installation
reboot
# System timezone
timezone  Asia/Shanghai
# Network information
network  --bootproto=dhcp --device=eth0 --onboot=on
# System bootloader configuration
bootloader --location=mbr
# Clear the Master Boot Record
zerombr
# Partition clearing information
clearpart --all --initlabel
# Disk partitioning information
part /boot --fstype="ext4" --size=200
part swap --fstype="swap" --size=1024
part / --fstype="ext4" --grow --size=1

%post --interpreter=/bin/bash
wget http://192.168.4.254/config.sh
chmod +x config.sh
./config.sh
%end

%packages
@base

%end
//在这里我多加了一个安装后执行脚本
//该功能是在系统装完之后,自动去执行的脚本
[root@pxe-server-04 html]# ls config.sh
config.sh
[root@pxe-server-04 html]# ls redhat-config.sh
redhat-config.sh
[root@pxe-server-04 html]# cat config.sh
rm -rf /etc/yum.repos.d/*
cd /etc/yum.repos.d/
echo '
[centos-yum]
ame=added from: http://192.168.4.254/CentOS-6
baseurl=http://192.168.4.254/CentOS6
enabled=1
gpgcheck=0'  > centos-yum.repo
yum clean all
yum repolist
yum -y install vsftpd
service vsftpd start
chkconfig vsftpd on
useradd test-user-01
echo 123456 | passwd --stdin test-user-01
[root@pxe-server-04 html]#


[root@pxe-server-04 html]# cp centos6.7-ks.cfg redhat6.7-ks.cfg
[root@pxe-server-04 html]# ls redhat6.7-ks.cfg
redhat6.7-ks.cfg
[root@pxe-server-04 html]# vim redhat6.7-ks.cfg //其他保持不变,将路径修改为redhat的包路径即可
//还有两个系统的脚本文件,由于yum的原因,也进行了区分
  //url --url="http://192.168.4.99/redhat-6.7"
  //%post --interpreter=/bin/bash
    wget http://192.168.4.99/redhat-config.sh
    chmod +x config.sh
    ./config.sh
    %end


//将应答文件添加进配置文件
[root@pxe-server-04 tftpboot]# vim pxelinux.cfg/default

label redhat-6.7
  menu label Install ^RedHat6.7
  menu default
  kernel redhat-6.7/vmlinuz
  append initrd=/redhat-6.7/initrd.img ks=http://192.168.4.99/redhat6.7-ks.cfg
label centos-6.7
  menu label Install ^CentOS6.7
  kernel centos-6.7/vmlinuz
  append initrd=centos-6.7/initrd.img ks=http://192.168.4.99/centos6.7-ks.cfg
结果验证
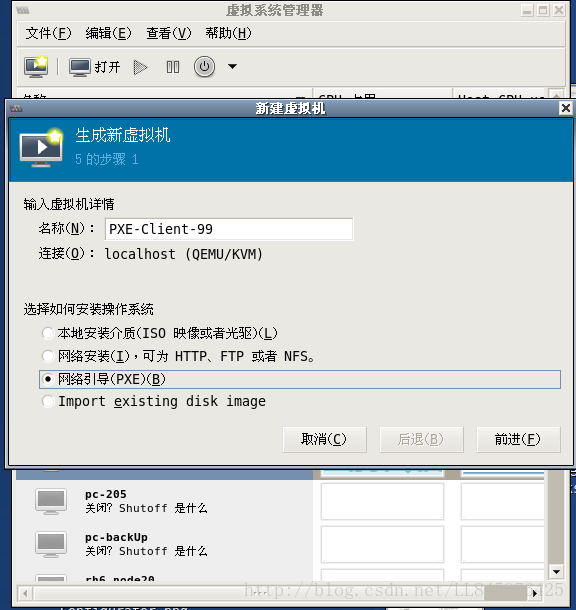
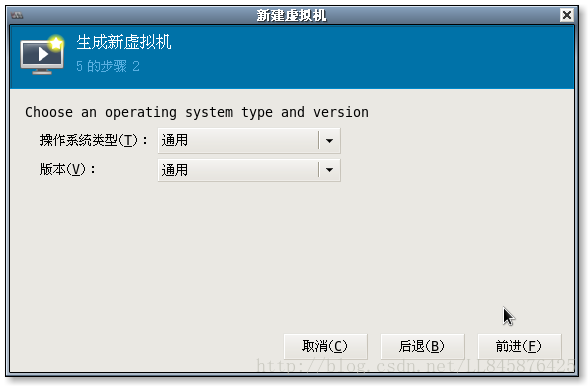
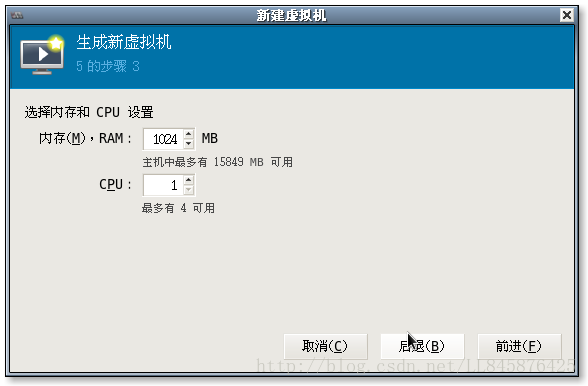
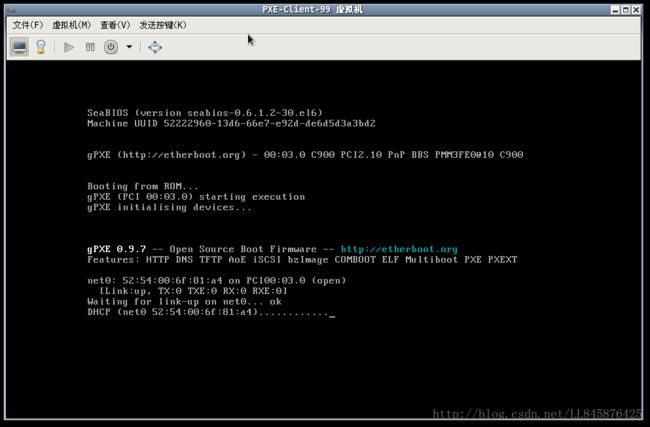
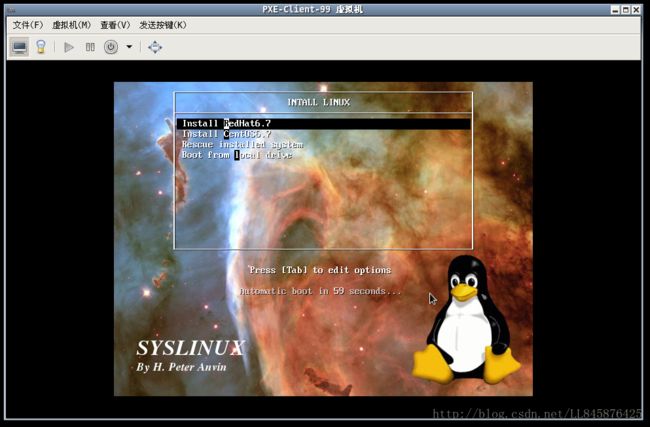
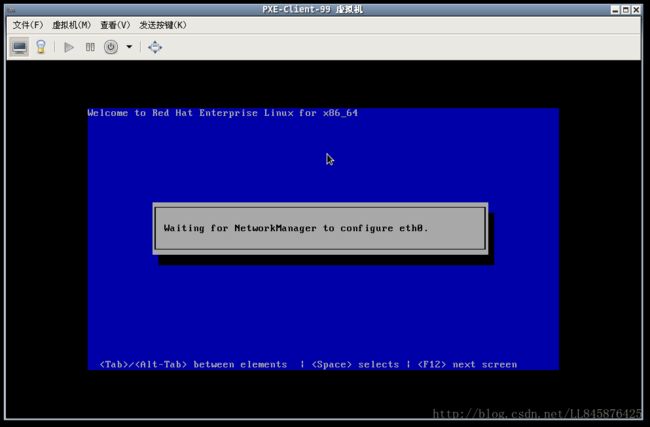
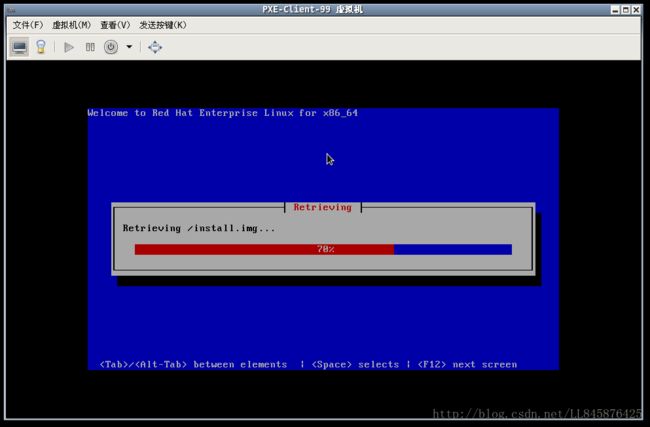
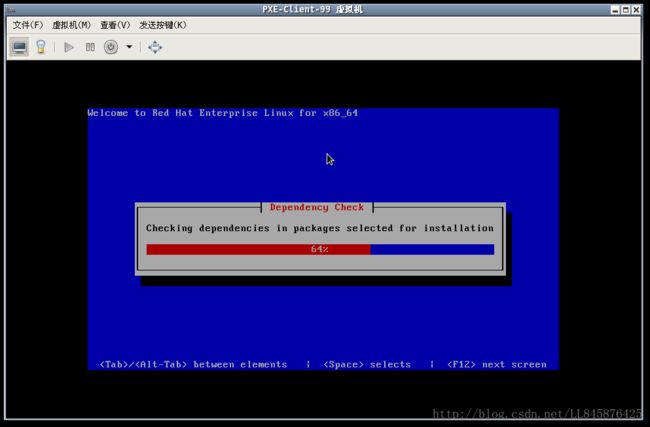
系统安装流程
脚本执行结果验证
[root@pc-113 ~]# ifconfig eth0 | head -2
eth0      Link encap:Ethernet  HWaddr 52:54:00:0D:66:DF
          inet addr:192.168.4.113  Bcast:192.168.4.255  Mask:255.255.255.0
[root@pc-113 ~]# hostname
pc-113.war.cn
[root@pc-113 ~]# service vsftpd status
vsftpd (pid 1469) 正在运行...
[root@pc-113 ~]# grep test-user-01 /etc/passwd
test-user-01:x:500:500::/home/test-user-01:/bin/bash


