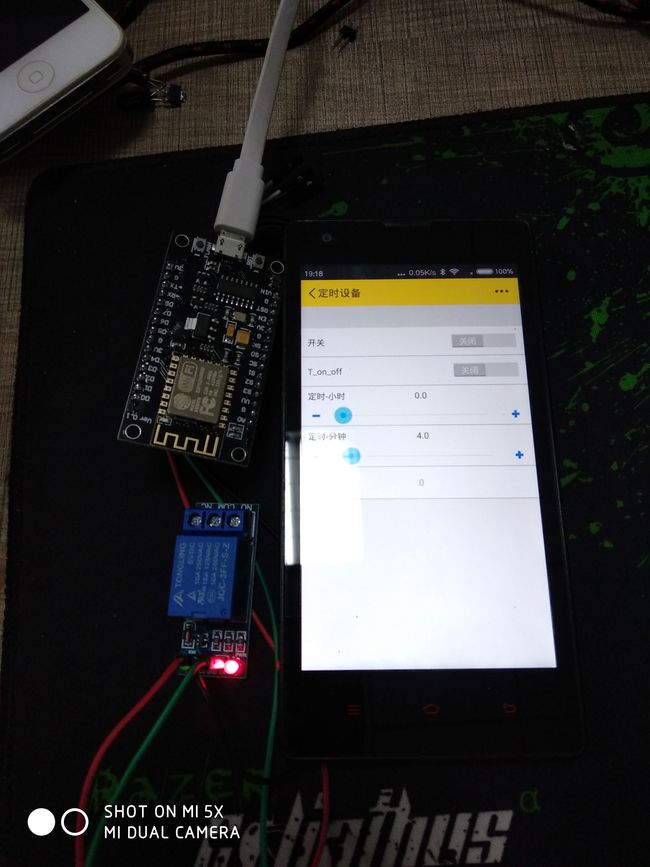
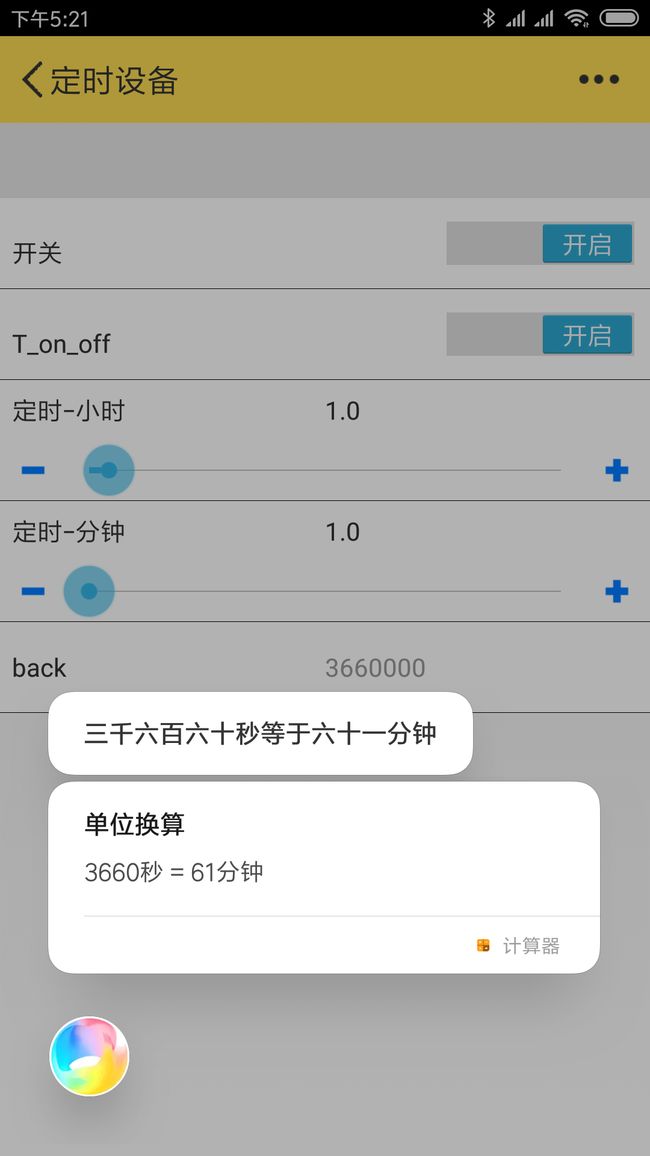
嵌入式制作智能定时设备。
嵌入式制作智能定时设备。
最简单的嵌入式开发即利用机智云的SOC方案,利用安信可的编译器进行bin固件的编写。最后在烧写进esp8266中,实现最简单的智能远程控制设备,这次的另一个重要亮点在于实现的硬件计时,也就是实现了硬件端的定时触发,这次的效果是定时启动设备。
依旧是最经典的Makefile修改为esp编译模式
BOOT?=new
APP?=1
SPI_SPEED?=40
SPI_MODE?=QIO
SPI_SIZE_MAP?=6
user_main.c的文件简单修改即可,加入要控制的按键初始化。
LOCAL void ICACHE_FLASH_ATTR keyInit(void)
{
singleKey[0] = keyInitOne(KEY_0_IO_NUM, KEY_0_IO_MUX, KEY_0_IO_FUNC,
key1LongPress, key1ShortPress);
singleKey[1] = keyInitOne(KEY_1_IO_NUM, KEY_1_IO_MUX, KEY_1_IO_FUNC,
key2LongPress, key2ShortPress);
keys.singleKey = singleKey;
keyParaInit(&keys);
PIN_FUNC_SELECT(PERIPHS_IO_MUX_MTDI_U, FUNC_GPIO12); //GPIO12初始化
GPIO_OUTPUT_SET(GPIO_ID_PIN(12), 1);//GPIO12 低电平输出
}
下面是gizwits_product.c的代码。里面有很详细的代码。
#include
#include
#include "gizwits_product.h"
#include "driver/hal_key.h"

/** User area The current device state structure */
dataPoint_t currentDataPoint;
bool isTimer;
long timer_timers;
long time_mills;//定义总秒数
static os_timer_t os_timer;
/**
 * 定时任务函数
 */
void Led_Task_Run(void){
//开灯
 GPIO_OUTPUT_SET(GPIO_ID_PIN(12), 0);
 //执行完毕,我们要把定时时间设置0 ,定时使能状态为false
 timer_timers=0;         //根据继电器的种类和要定时的任务而定。这是低电平触发继电器的定时开机功能。
 isTimer=false;
}
void Led_Task_Off(void){
//开灯
 GPIO_OUTPUT_SET(GPIO_ID_PIN(12), 1);
 //执行完毕,我们要把定时时间设置0 ,定时使能状态为false
 timer_timers=0;         //根据继电器的种类和要定时的任务而定。这是低电平触发继电器的定时关机功能。
 isTimer=false;
}
int8_t ICACHE_FLASH_ATTR gizwitsEventProcess(eventInfo_t *info, uint8_t *data, uint32_t len)
{
    uint8_t i = 0;
    dataPoint_t * dataPointPtr = (dataPoint_t *)data;
    moduleStatusInfo_t * wifiData = (moduleStatusInfo_t *)data;

    if((NULL == info) || (NULL == data))
    {
        GIZWITS_LOG("!!! gizwitsEventProcess Error \n");
        return -1;
    }

    for(i = 0; i < info->num; i++)
    {
        switch(info->event[i])
        {
        case EVENT_on_off :
            currentDataPoint.valueon_off = dataPointPtr->valueon_off;
            GIZWITS_LOG("Evt: EVENT_on_off %d \n", currentDataPoint.valueon_off);
            if(0x01 == currentDataPoint.valueon_off)
            {
                GPIO_OUTPUT_SET(GPIO_ID_PIN(12), 0); //开灯
            }
            else
            {
                GPIO_OUTPUT_SET(GPIO_ID_PIN(12), 1); //关灯
            }
            break;
        case EVENT_T_on_off :
            currentDataPoint.valueT_on_off = dataPointPtr->valueT_on_off;
            if(0x01 == currentDataPoint.valueT_on_off)
            {
                isTimer=true;//开启定时器
            }
            else
            {
                 /** 关闭该定时器 */
                            os_timer_disarm( &os_timer );
                 /** 定时器使能为false */
                            isTimer=false;
            }
            break;
        case EVENT_time_h:
            currentDataPoint.valuetime_h= dataPointPtr->valuetime_h;
            GIZWITS_LOG("Evt:EVENT_time_h %d\n",currentDataPoint.valuetime_h);
            //user handle
            break;
        case EVENT_time_m:
            currentDataPoint.valuetime_m= dataPointPtr->valuetime_m;
            GIZWITS_LOG("Evt:EVENT_time_m %d\n",currentDataPoint.valuetime_m);
            if(isTimer){
                if (currentDataPoint.valueon_off){  //判断继电器状态,如果原来是关闭状态,就定时开机,如果原来是开启状态,就定时关闭。
                     /** 关闭该定时器 */
                    os_timer_disarm( &os_timer );
                    // 配置该定时器回调函数,指定的执行方法是: Led_Task_Run (),下面会提供代码
                    os_timer_setfn( &os_timer, (ETSTimerFunc *) ( Led_Task_Off ), NULL );
                    time_mills = (currentDataPoint.valuetime_h *60 + currentDataPoint.valuetime_m)*60000;
                    /** 开启该定时器 :下发的是秒数,这里的单位是毫秒,要乘1000* ,后面false表示仅仅执行一次**/
                    //os_timer_arm( &os_timer, currentDataPoint.valuetime_m*1000, false );
                    os_timer_arm( &os_timer, time_mills, false );
                    /**赋值给timer_timers,方便会调用 */
                    timer_timers=currentDataPoint.valuetime_m;
                }
                else
                {
                    /** 关闭该定时器 */
                    os_timer_disarm( &os_timer );
                    // 配置该定时器回调函数,指定的执行方法是: Led_Task_Run (),下面会提供代码
                    os_timer_setfn( &os_timer, (ETSTimerFunc *) ( Led_Task_Run ), NULL );
                    time_mills = (currentDataPoint.valuetime_h *60 + currentDataPoint.valuetime_m)*60000;
                    /** 开启该定时器 :下发的是秒数,这里的单位是毫秒,要乘1000* ,后面false表示仅仅执行一次**/
                    //os_timer_arm( &os_timer, currentDataPoint.valuetime_m*1000, false );
                    os_timer_arm( &os_timer, time_mills, false );
                    /**赋值给timer_timers,方便会调用 */
                    timer_timers=currentDataPoint.valuetime_m;
                }
                }
            break;

        case WIFI_SOFTAP:
            break;
        case WIFI_AIRLINK:
            break;
        case WIFI_STATION:
            break;
        case WIFI_CON_ROUTER:
            GIZWITS_LOG("@@@@ connected router\n");

            break;
        case WIFI_DISCON_ROUTER:
            GIZWITS_LOG("@@@@ disconnected router\n");

            break;
        case WIFI_CON_M2M:
            GIZWITS_LOG("@@@@ connected m2m\n");
            setConnectM2MStatus(0x01);

            break;
        case WIFI_DISCON_M2M:
            GIZWITS_LOG("@@@@ disconnected m2m\n");
            setConnectM2MStatus(0x00);

            break;
        case WIFI_RSSI:
            GIZWITS_LOG("@@@@ RSSI %d\n", wifiData->rssi);
            break;
        case TRANSPARENT_DATA:
            GIZWITS_LOG("TRANSPARENT_DATA \n");
            //user handle , Fetch data from [data] , size is [len]
            break;
        case MODULE_INFO:
            GIZWITS_LOG("MODULE INFO ...\n");
            break;

        default:
            break;
        }
    }
    system_os_post(USER_TASK_PRIO_2, SIG_UPGRADE_DATA, 0);

    return 0;
}


/**
* User data acquisition

* Here users need to achieve in addition to data points other than the collection of data collection, can be self-defined acquisition frequency and design data filtering algorithm

* @param none
* @return none
*/
void ICACHE_FLASH_ATTR userHandle(void)
{

    currentDataPoint.valueback = time_mills ;

    currentDataPoint.valueon_off = !GPIO_INPUT_GET(12) ;
    //是否开启定时器的回调
    currentDataPoint.valueT_on_off =isTimer;
    if(isTimer){
     currentDataPoint.valuetime_m =timer_timers ;
     }
    else
    {
        /*数据清零*/
      currentDataPoint.valuetime_m =0;
      currentDataPoint.valuetime_h =0;
      currentDataPoint.valueback = 0;
     }
    system_os_post(USER_TASK_PRIO_2, SIG_UPGRADE_DATA, 0);
}


/**
* Data point initialization function

* In the function to complete the initial user-related data
* @param none
* @return none
* @note The developer can add a data point state initialization value within this function
*/
void ICACHE_FLASH_ATTR userInit(void)
{
    gizMemset((uint8_t *)¤tDataPoint, 0, sizeof(dataPoint_t));

    /** Warning !!! DataPoint Variables Init , Must Within The Data Range
     * 警告!!!!必须在数据范围内的数据池变量init**/
/*
        currentDataPoint.valueon_off = 0;
        currentDataPoint.valueT_on_off = 0;
        currentDataPoint.valuetime_h = 0;
        currentDataPoint.valuetime_m = 0;
        currentDataPoint.valueback = 0;
*/

}
整体文件下载地址。七牛云链接:http://pbhutn8vv.bkt.clouddn.com/soc_dingshi.zip

