在caffe框架下用训练好的网络模型提取图像特征并可视化
在一些项目任务中,我需要提取一系列图像的CNN-features,再对其进行后续的处理。这里可以使用任意的网络模型,因为本人也是新手,会尽量写的详细,可能不是最有效率的方法,但亲测有效。
这里会对一个数据集中所有的图像进行特征提取,并将从指定层中输出的CNN特征存储到lmdb文件中,再转化为mat文件,也可以用matlab进行可视化。
**
一、准备需要提取特征的图像列表
**
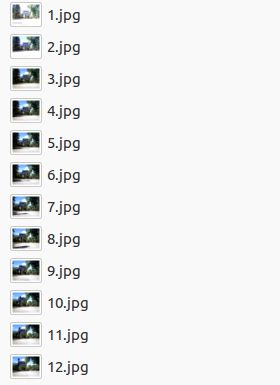
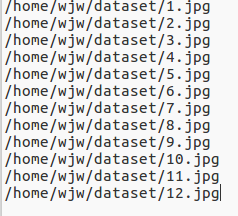
因为我需要对一系列图像进行读取和特征提取,所以这里先生成存有图像绝对路径的txt文件。

通过简单的python代码,获取数据集图像的绝对路径,并按照序号大小进行排序,形成文件temp_list.txt。
import os

img_path='/home/wjw/dataset/' #图片所在文件夹的路径

img_list=os.listdir(img_path)

img_list.sort(key=lambda x:int(x[:-4])) #文件名按数字排序,[:-4]是排除了后缀名
img_nums=len(img_list)

with open("temp_list.txt", "w+") as fp:
    for i in range(img_nums):
        img_name=img_path+img_list[i]
        print(img_name)
        fp.write(img_name+'\n')
fp.close()
二、用于提取特征的网络模型与定义
这里我们以AlexNet-places365网络为例,其训练好的网络模型与网络结构定义可以在这里下载得到。
![]()
这样我们就得到了训练好的模型alexnet_places365.caffemodel和网络结构定义deploy_alexnet_places365.prototxt。但是我们这里还需要对deploy_alexnet_places365.prototxt进行修改,主要是为了增加输入层的内容。
deploy_alexnet_places365.prototxt中第一层卷积层前的代码如下:
name: "CaffeNet-Places365"
input: "data"
input_dim: 10
input_dim: 3
input_dim: 227
input_dim: 227
对其进行改写替换,得到适用于特征提取的文件val_alexnet_places365.prototxt,修改后的代码如下,其中用到的places2CNN365_mean.binaryproto文件也从上述网站中下载得到。
name: "CaffeNet-Places365"
layer {
  name: "data"
  type: "ImageData"
  top: "data"
  top: "label"
  transform_param {
    mirror: false
    crop_size: 227
    mean_file: "/home/wjw/places2CNN365_mean.binaryproto"
  }
  image_data_param {
    source: "/home/wjw/dataset/temp_list.txt"
    batch_size: 645
    new_height: 256
    new_width: 256
  }
}
三、提取特征并存储
caffe提供了一个tool用来提取特征,即./caffe/tools/extract_features.bin,这里有一个官方的使用说明。其运行参数为:extract_features.bin $MODEL $PROTOTXT $LAYER $LMDB_OUTPUT_PATH $BATCHSIZE,具体每个参数的意义如下:
$MODEL :用来提取特征的已经训练好的网络模型,即alexnet_places365.caffemodel的绝对路径
$PROTOTXT :对应模型的网络结构定义文件,即val_alexnet_places365.prototxt的绝对路径
$LAYER :提取特征的层数,如conv5/pool3/fc7,这个根据需求具体定义
$LMDB_OUTPUT_PATH :输出特征的保存路径
$BATCHSIZE :数据的输入最小批量 the number of data mini-batches
为了避免每次提取特征时要进行以上复杂繁琐的参数输入,我们这里直接写一个extract_feature_example.sh文件
#!/usr/bin/env sh
# args for EXTRACT_FEATURE
TOOL=./build/tools
MODEL=/home/wjw/models/alexnet_places365.caffemodel  # 网络模型
PROTOTXT=/home/wjw/models/val_alexnet_places365.prototxt # 网络定义
LAYER=fc7 # 提取层的名字,如conv5、fc7等
LEVELDB=/home/wjw/temp/features_conv3 # 保存的leveldb路径
BATCHSIZE=10
$TOOL/extract_features.bin  $MODEL $PROTOTXT $LAYER $LEVELDB $BATCHSIZE lmdb GPU #没有GPU就换成CPU
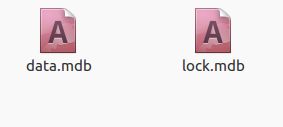
在caffe的根目录下运行bash extract_feature_example.sh,这样就可以得到一个保存lmdb格式特征数据的features_fc7文件夹,文件夹中内容如下:

四、使用特征文件进行可视化
要先将lmdb文件转换为mat文件,再用matlab调用mat进行可视化。这里需要使用两个辅助文件:./feat_helper_pb2.py 和 ./lmdb2mat.py。
feat_helper_pb2.py代码如下(无需修改):
# Generated by the protocol buffer compiler.  DO NOT EDIT!

from google.protobuf import descriptor
from google.protobuf import message
from google.protobuf import reflection
from google.protobuf import descriptor_pb2
# @@protoc_insertion_point(imports)


DESCRIPTOR = descriptor.FileDescriptor(
  name='datum.proto',
  package='feat_extract',
  serialized_pb='\n\x0b\x64\x61tum.proto\x12\x0c\x66\x65\x61t_extract\"i\n\x05\x44\x61tum\x12\x10\n\x08\x63hannels\x18\x01 \x01(\x05\x12\x0e\n\x06height\x18\x02 \x01(\x05\x12\r\n\x05width\x18\x03 \x01(\x05\x12\x0c\n\x04\x64\x61ta\x18\x04 \x01(\x0c\x12\r\n\x05label\x18\x05 \x01(\x05\x12\x12\n\nfloat_data\x18\x06 \x03(\x02')


_DATUM = descriptor.Descriptor(
  name='Datum',
  full_name='feat_extract.Datum',
  filename=None,
  file=DESCRIPTOR,
  containing_type=None,
  fields=[
    descriptor.FieldDescriptor(
      name='channels', full_name='feat_extract.Datum.channels', index=0,
      number=1, type=5, cpp_type=1, label=1,
      has_default_value=False, default_value=0,
      message_type=None, enum_type=None, containing_type=None,
      is_extension=False, extension_scope=None,
      options=None),
    descriptor.FieldDescriptor(
      name='height', full_name='feat_extract.Datum.height', index=1,
      number=2, type=5, cpp_type=1, label=1,
      has_default_value=False, default_value=0,
      message_type=None, enum_type=None, containing_type=None,
      is_extension=False, extension_scope=None,
      options=None),
    descriptor.FieldDescriptor(
      name='width', full_name='feat_extract.Datum.width', index=2,
      number=3, type=5, cpp_type=1, label=1,
      has_default_value=False, default_value=0,
      message_type=None, enum_type=None, containing_type=None,
      is_extension=False, extension_scope=None,
      options=None),
    descriptor.FieldDescriptor(
      name='data', full_name='feat_extract.Datum.data', index=3,
      number=4, type=12, cpp_type=9, label=1,
      has_default_value=False, default_value="",
      message_type=None, enum_type=None, containing_type=None,
      is_extension=False, extension_scope=None,
      options=None),
    descriptor.FieldDescriptor(
      name='label', full_name='feat_extract.Datum.label', index=4,
      number=5, type=5, cpp_type=1, label=1,
      has_default_value=False, default_value=0,
      message_type=None, enum_type=None, containing_type=None,
      is_extension=False, extension_scope=None,
      options=None),
    descriptor.FieldDescriptor(
      name='float_data', full_name='feat_extract.Datum.float_data', index=5,
      number=6, type=2, cpp_type=6, label=3,
      has_default_value=False, default_value=[],
      message_type=None, enum_type=None, containing_type=None,
      is_extension=False, extension_scope=None,
      options=None),
  ],
  extensions=[
  ],
  nested_types=[],
  enum_types=[
  ],
  options=None,
  is_extendable=False,
  extension_ranges=[],
  serialized_start=29,
  serialized_end=134,
)

DESCRIPTOR.message_types_by_name['Datum'] = _DATUM

class Datum(message.Message):
  __metaclass__ = reflection.GeneratedProtocolMessageType
  DESCRIPTOR = _DATUM

  # @@protoc_insertion_point(class_scope:feat_extract.Datum)

# @@protoc_insertion_point(module_scope)
lmdb2mat.py代码如下:
import lmdb
import feat_helper_pb2
import numpy as np
import scipy.io as sio
import time

def main(argv):
    lmdb_name = sys.argv[1]
    print "%s" % sys.argv[1]
    batch_num = int(sys.argv[2]);
    batch_size = int(sys.argv[3]);
    window_num = batch_num*batch_size;

    start = time.time()
    if 'db' not in locals().keys():
        db = lmdb.open(lmdb_name)
        txn= db.begin()
        cursor = txn.cursor()
        cursor.iternext()
        datum = feat_helper_pb2.Datum()

        keys = []
        values = []
        for key, value in enumerate( cursor.iternext_nodup()):
            keys.append(key)
            values.append(cursor.value())

    ft = np.zeros((window_num, int(sys.argv[4])))
    for im_idx in range(window_num):
        datum.ParseFromString(values[im_idx])
        ft[im_idx, :] = datum.float_data

    print 'time 1: %f' %(time.time() - start)
    sio.savemat(sys.argv[5], {'feats':ft})
    print 'time 2: %f' %(time.time() - start)
    print 'done!'

if __name__ == '__main__':
    import sys
    main(sys.argv)
然后再用bash运行如下代码,就可以将lmdb文件转换为mat文件:
#!/usr/bin/env sh

LMDB=/home//wjw/temp/features_fc7 # lmdb文件路径

BATCHNUM=1
BATCHSIZE=10

#需要手工计算feature长度
#DIM=290400 # conv1
#DIM=43264 # conv5
DIM=4096 #fc7

OUT=/home/wjw/temp/features_fc7.mat #mat文件保存路径

python ./lmdb2mat.py $LMDB $BATCHNUM $BATCHSIZE $DIM $OUT
最后,参考UFLDL里的display_network函数,对mat文件里的特征进行可视化。
display_network.m代码如下:
function [h, array] = display_network(A, opt_normalize, opt_graycolor, cols, opt_colmajor)
% This function visualizes filters in matrix A. Each column of A is a
% filter. We will reshape each column into a square image and visualizes
% on each cell of the visualization panel.
% All other parameters are optional, usually you do not need to worry
% about it.
% opt_normalize: whether we need to normalize the filter so that all of
% them can have similar contrast. Default value is true.
% opt_graycolor: whether we use gray as the heat map. Default is true.
% cols: how many columns are there in the display. Default value is the
% squareroot of the number of columns in A.
% opt_colmajor: you can switch convention to row major for A. In that
% case, each row of A is a filter. Default value is false.
warning off all
if ~exist('opt_normalize', 'var') || isempty(opt_normalize)
    opt_normalize= true;
end
if ~exist('opt_graycolor', 'var') || isempty(opt_graycolor)
    opt_graycolor= true;
end
if ~exist('opt_colmajor', 'var') || isempty(opt_colmajor)
    opt_colmajor = false;
end

% rescale
A = A - mean(A(:));

if opt_graycolor, colormap(gray); end

% compute rows, cols
[L M]=size(A);
sz=sqrt(L);
buf=1;
if ~exist('cols', 'var')
    if floor(sqrt(M))^2 ~= M
        n=ceil(sqrt(M));
        while mod(M, n)~=0 && n<1.2*sqrt(M), n=n+1;end
        m=ceil(M/n);
    else
        n=sqrt(M);
        m=n;
    end
else
    n = cols;
    m = ceil(M/n);
end

array=-ones(buf+m*(sz+buf),buf+n*(sz+buf));

if ~opt_graycolor
    array = 0.1.* array;
end


if ~opt_colmajor
    k=1;
    for i=1:m
        for j=1:n
            if k>M
                continue;
            end
            clim=max(abs(A(:,k)));
            if opt_normalize
                array(buf+(i-1)*(sz+buf)+(1:sz),buf+(j-1)*(sz+buf)+(1:sz))=reshape(A(:,k),sz,sz)'/clim;
            else
                array(buf+(i-1)*(sz+buf)+(1:sz),buf+(j-1)*(sz+buf)+(1:sz))=reshape(A(:,k),sz,sz)'/max(abs(A(:)));
            end
            k=k+1;
        end
    end
else
    k=1;
    for j=1:n
        for i=1:m
            if k>M
                continue;
            end
            clim=max(abs(A(:,k)));
            if opt_normalize
                array(buf+(i-1)*(sz+buf)+(1:sz),buf+(j-1)*(sz+buf)+(1:sz))=reshape(A(:,k),sz,sz)'/clim;
            else
                array(buf+(i-1)*(sz+buf)+(1:sz),buf+(j-1)*(sz+buf)+(1:sz))=reshape(A(:,k),sz,sz)';
            end
            k=k+1;
        end
    end
end
if opt_graycolor
    h=imagesc(array);
else
    h=imagesc(array,'EraseMode','none',[-1 1]);
end
axis image off

drawnow;

warning on all
在matlab里运行以下代码,即可实现特征的可视化:
nsample = 12; %根据想要可视化的数量进行实际修改
% num_output = 96; % conv1
% num_output = 256; % conv5
num_output = 4096; % fc7

load features_fc7.mat
width = size(feats, 2);
nmap = width / num_output;

for i = 1 : nsample
    feat = feats(i, :);
    feat = reshape(feat, [nmap num_output]);
    figure('name', sprintf('image #%d', i));
    display_network(feat);
end
参考链接:
https://blog.csdn.net/jiandanjinxin/article/details/50410290
https://blog.csdn.net/zhansama/article/details/80658880
https://blog.csdn.net/lijiancheng0614/article/details/48180331
https://blog.csdn.net/qq_36481821/article/details/83214167
