kvm虚拟化
1. 虚拟化介绍
虚拟化是云计算的基础。简单的说,虚拟化使得在一台物理的服务器上可以跑多台虚拟机,虚拟机共享物理机的 CPU、内存、IO 硬件资源,但逻辑上虚拟机之间是相互隔离的。
物理机我们一般称为宿主机(Host),宿主机上面的虚拟机称为客户机(Guest)。
那么 Host 是如何将自己的硬件资源虚拟化,并提供给 Guest 使用的呢?
这个主要是通过一个叫做 Hypervisor 的程序实现的。
根据 Hypervisor 的实现方式和所处的位置,虚拟化又分为两种:
全虚拟化
半虚拟化
全虚拟化:
Hypervisor 直接安装在物理机上,多个虚拟机在 Hypervisor 上运行。Hypervisor 实现方式一般是一个特殊定制的 Linux 系统。Xen 和 VMWare 的 ESXi 都属于这个类型
半虚拟化:
物理机上首先安装常规的操作系统,比如 Redhat、Ubuntu 和 Windows。Hypervisor 作为 OS 上的一个程序模块运行,并对管理虚拟机进行管理。KVM、VirtualBox 和 VMWare Workstation 都属于这个类型
理论上讲:
全虚拟化一般对硬件虚拟化功能进行了特别优化,性能上比半虚拟化要高;
半虚拟化因为基于普通的操作系统,会比较灵活,比如支持虚拟机嵌套。嵌套意味着可以在KVM虚拟机中再运行KVM。
2. kvm介绍
kVM 全称是 Kernel-Based Virtual Machine。也就是说 KVM 是基于 Linux 内核实现的。
KVM有一个内核模块叫 kvm.ko,只用于管理虚拟 CPU 和内存。
那 IO 的虚拟化,比如存储和网络设备则是由 Linux 内核与Qemu来实现。
作为一个 Hypervisor,KVM 本身只关注虚拟机调度和内存管理这两个方面。IO 外设的任务交给 Linux 内核和 Qemu。
大家在网上看 KVM 相关文章的时候肯定经常会看到 Libvirt 这个东西。
Libvirt 就是 KVM 的管理工具。
其实,Libvirt 除了能管理 KVM 这种 Hypervisor,还能管理 Xen,VirtualBox 等。
Libvirt 包含 3 个东西:后台 daemon 程序 libvirtd、API 库和命令行工具 virsh
libvirtd是服务程序,接收和处理 API 请求;
API 库使得其他人可以开发基于 Libvirt 的高级工具,比如 virt-manager,这是个图形化的 KVM 管理工具;
virsh 是我们经常要用的 KVM 命令行工具
3. kvm部署
环境说明:
系统类型 IP
RHEL7 172.16.12.128
3.1 kvm安装
部署前请确保你的CPU虚拟化功能已开启。分为两种情况:
虚拟机要关机设置CPU虚拟化
物理机要在BIOS里开启CPU虚拟化
//关闭防火墙与SELINUX
[root@xj ~]# systemctl restart firewalld
[root@xj ~]# systemctl stop firewalld
[root@xj ~]#  setenforce 0
[root@xj ~]# sed -ri 's/^(SELINUX=).*/\1disabled/g' /etc/selinux/config
//配置网络源
[root@xj yum.repos.d]# curl -o /etc/yum.repos.d/CentOS7-Base-163.repo http://mirrors.163.com/.help/CentOS7-Base-163.repo
[root@xj ~]# sed -i 's/\$releasever/7/g' /etc/yum.repos.d/CentOS7-Base-163.repo
[root@xj ~]# sed -i 's/^enabled=.*/enabled=1/g' /etc/yum.repos.d/CentOS7-Base-163.repo
[root@xj ~]# yum -y install epel-release vim wget net-tools unzip zip gcc gcc-c++
安装过程略.....
//验证CPU是否支持KVM;如果结果中有vmx(Intel)或svm(AMD)字样,就说明CPU的支持的
[root@xj ~]# egrep -o 'vmx|svm' /proc/cpuinfo
vmx
//kvm安装.
[root@xj ~]# yum -y install qemu-kvm qemu-kvm-tools qemu-img virt-manager libvirt libvirt-python libvirt-client virt-install virt-viewer bridge-utils libguestfs-tools
安装过程略......
//因为虚拟机中网络,我们一般都是和公司的其他服务器是同一个网段,所以我们需要把
KVM服务器的网卡配置成桥接模式。这样的话KVM的虚拟机就可以通过该桥接网卡和公司内部
其他服务器处于同一网段
//此处我的网卡是ens33,所以用br0来桥接ens33网卡
[root@xj ~]#  cd /etc/sysconfig/network-scripts/
[root@xj network-scripts]# ls
ifcfg-br0    ifdown-ib    ifdown-routes    ifup-aliases  ifup-isdn    ifup-sit          network-functions
ifcfg-ens32  ifdown-ippp  ifdown-sit       ifup-bnep     ifup-plip    ifup-Team         network-functions-ipv6
...l
root@xj network-scripts]# cp ifcfg-eno16777728 ifcfg-br0
[root@xj network-scripts]# cat ifcfg-br0
TYPE=Bridge
BOOTPROTO="static"
DEFROUTE="yes"
PEERDNS="yes"
PEERROUTES="yes"
IPV4_FAILURE_FATAL="no"
NAME="br0"
ONBOOT="yes"
IPADDR="192.168.125.199"
GATEWAY="192.168.125.2"
NETMASK=255.255.255.0
DNS1=114.114.114.114

[root@xj network-scripts]# cat ifcfg-ens33
TYPE="Ethernet"
PROXY_METHOD="none"
BROWSER_ONLY="no"
BOOTPROTO="dhcp"
DEFROUTE="yes"
IPV4_FAILURE_FATAL="no"
IPV6INIT="yes"
IPV6_AUTOCONF="yes"
IPV6_DEFROUTE="yes"
IPV6_FAILURE_FATAL="no"
IPV6_ADDR_GEN_MODE="stable-privacy"
NAME="ens32"
UUID="184a8fc0-f078-4bbe-be81-a49d88cab354"
DEVICE="ens32"
ONBOOT="yes"
BRIDGE="br0"
~             "
//重启网络
[root@xj network-scripts]# systemctl restart network
[root@xj network-scripts]# ip a
1: lo:  mtu 65536 qdisc noqueue state UNKNOWN
    link/loopback 00:00:00:00:00:00 brd 00:00:00:00:00:00
    inet 127.0.0.1/8 scope host lo
       valid_lft forever preferred_lft forever
    inet6 ::1/128 scope host
       valid_lft forever preferred_lft forever
2: ens32:  mtu 1500 qdisc pfifo_fast state UP qlen 1000
    link/ether 00:0c:29:11:07:3f brd ff:ff:ff:ff:ff:ff
    inet 192.168.125.199/24 brd 192.168.125.255 scope global eno16777728
       valid_lft forever preferred_lft forever
    inet6 fe80::20c:29ff:fe11:73f/64 scope link
       valid_lft forever preferred_lft forever
[root@xj network-scripts]#
//启动服务
[root@xj ~]# systemctl start libvirtd
[root@xj ~]# systemctl enable libvirtd
[root@xj ~]#
//验证安装结果
[root@xj network-scripts]# lsmod|grep kvm
kvm_intel             170086  0
kvm                   566340  1 kvm_intel
irqbypass              13503  1 kvm
//测试并验证安装结果
[root@xj network-scripts]#  virsh -c qemu:///system list
 Id    名称                         状态
----------------------------------------------------
[root@xj ]# virsh --version
4.5.0
[root@xj ~]# virt-install --version
1.5.0
[root@xj ~]# ln -s /usr/libexec/qemu-kvm /usr/bin/qemu-kvm
[root@xj ~]#  ll /usr/bin/qemu-kvm
lrwxrwxrwx. 1 root root 21 3月  11 16:04 /usr/bin/qemu-kvm -> /usr/libexec/qemu-kvm

[root@xj ~]# lsmod |grep kvm
kvm_intel             170086  0
kvm                   566340  1 kvm_intel
irqbypass              13503  1 kvm
//查看网桥信息
[root@kvm ~]# brctl show
bridge name     bridge id               STP enabled     interfaces
br0             8000.000c294c50b4       no              ens33
virbr0          8000.52540060a8ea       yes             virbr0-nic
3.2 kvm web管理界面安装
kvm 的 web 管理界面是由 webvirtmgr 程序提供的。
//安装依赖包
[root@xj ~]# yum -y install git python-pip libvirt-python libxml2-python python-websockify supervisor nginx python-devel
//升级pip
[root@xj yum.repos.d]# pip install --upgrade pip
Collecting pip
  Downloading https://files.pythonhosted.org/packages/d8/f3/413bab4ff08e1fc4828dfc59996d721917df8e8583ea85385d51125dceff/pip-19.0.3-py2.py3-none-any.whl (1.4MB)
    100% |████████████████████████████████| 1.4MB 204kB/s
Installing collected packages: pip
  Found existing installation: pip 8.1.2
    Uninstalling pip-8.1.2:
      Successfully uninstalled pip-8.1.2
Successfully installed pip-19.0.3
//从github上下载webvirtmgr代码
[root@xj ~]# cd /usr/local/src/
[root@xj src]# git clone git://github.com/retspen/webvirtmgr.git
正克隆到 'webvirtmgr'...
remote: Enumerating objects: 5614, done.
remote: Total 5614 (delta 0), reused 0 (delta 0), pack-reused 5614
接收对象中: 100% (5614/5614), 2.98 MiB | 600.00 KiB/s, done.
处理 delta 中: 100% (3602/3602), done.
[root@xj src]#
- 安装webvirtmgr
[root@xj src]# cd webvirtmgr/
[root@xj webvirtmgr]# pip install -r requirements.txt
DEPRECATION: Python 2.7 will reach the end of its life on January 1st, 2020. Please upgrade your Python as Python 2.7 won't be maintained after that date. A future version of pip will drop support for Python 2.7.
Collecting django==1.5.5 (from -r requirements.txt (line 1))
  Downloading https://files.pythonhosted.org/packages/38/49/93511c5d3367b6b21fc2995a0e53399721afc15e4cd6eb57be879ae13ad4/Django-1.5.5.tar.gz (8.1MB)
.....此处省略安装步骤
- 检查sqlite3是否安装
[root@xj webvirtmgr]# python
Python 2.7.5 (default, Oct 30 2018, 23:45:53)
[GCC 4.8.5 20150623 (Red Hat 4.8.5-36)] on linux2
Type "help", "copyright", "credits" or "license" for more information.
>>> import sqlite3
>>> exit()
Use exit() or Ctrl-D (i.e. EOF) to exit
- 初始化帐号信息
[root@xj webvirtmgr]# python manage.py syncdb
WARNING:root:No local_settings file found.
Creating tables ...
Creating table auth_permission
Creating table auth_group_permissions
Creating table auth_group
Creating table auth_user_groups
Creating table auth_user_user_permissions
Creating table auth_user
Creating table django_content_type
Creating table django_session
Creating table django_site
Creating table servers_compute
Creating table instance_instance
Creating table create_flavor

You just installed Django's auth system, which means you don't have any superusers defined.
Would you like to create one now? (yes/no): yes     //问你是否创建超级管理员帐号
Username (leave blank to use 'root'):   //指定超级管理员帐号用户名,默认留空为root
Email address: [email protected]    //设置超级管理员邮箱
Password:       //设置超级管理员密码
Password (again):       //再次输入超级管理员密码
Superuser created successfully.
Installing custom SQL ...
Installing indexes ...
Installed 6 object(s) from 1 fixture(s)
- 拷贝web网页至指定目录
[root@xj ]# cd /usr/share/nginx/html/
[root@xj html]# ls
404.html  50x.html  index.html  nginx-logo.png  poweredby.png  webvirtmgr
[root@xj html]# cd ..
[root@xj nginx]# ls
html  modules
[root@xj share]# chown -R nginx.nginx /usr/share/nginx/html/webvirtmgr
[root@xj share]# ll /usr/share/nginx/html/webvirtmgr
总用量 72
drwxr-xr-x. 6 nginx nginx   114 3月  11 18:22 conf
drwxr-xr-x. 2 nginx nginx   116 3月  11 18:22 console
drwxr-xr-x. 3 nginx nginx   144 3月  11 18:22 create
drwxr-xr-x. 4 nginx nginx    36 3月  11 18:22 deploy
-rw-r--r--. 1 nginx nginx    85 3月  11 18:22 dev-requirements.txt
drwxr-xr-x. 2 nginx nginx    57 3月  11 18:22 hostdetail
drwxr-xr-x. 2 nginx nginx    23 3月  11 18:22 images
drwxr-xr-x. 3 nginx nginx   132 3月  11 18:22 instance
drwxr-xr-x. 2 nginx nginx    73 3月  11 18:22 interfaces
drwxr-xr-x. 5 nginx nginx    42 3月  11 18:22 locale
-rwxr-xr-x. 1 nginx nginx   253 3月  11 18:22 manage.py
-rw-r--r--. 1 nginx nginx   722 3月  11 18:22 MANIFEST.in
drwxr-xr-x. 2 nginx nginx    73 3月  11 18:22 networks
-rw-r--r--. 1 nginx nginx  2300 3月  11 18:22 README.rst
-rw-r--r--. 1 nginx nginx   149 3月  11 18:22 requirements.txt
drwxr-xr-x. 2 nginx nginx    73 3月  11 18:22 secrets
drwxr-xr-x. 2 nginx nginx    74 3月  11 18:22 serverlog
drwxr-xr-x. 2 nginx nginx   128 3月  11 18:22 servers
-rw-r--r--. 1 nginx nginx  2263 3月  11 18:22 setup.py
drwxr-xr-x. 2 nginx nginx    73 3月  11 18:22 storages
drwxr-xr-x. 2 nginx nginx  4096 3月  11 18:22 templates
-rw-r--r--. 1 nginx nginx   580 3月  11 18:22 Vagrantfile
drwxr-xr-x. 2 nginx nginx   224 3月  11 18:22 vrtManager
drwxr-xr-x. 5 nginx nginx   177 3月  11 18:22 webvirtmgr
-rw-r--r--. 1 nginx nginx 38912 3月  11 18:22 webvirtmgr.sqlite3
//生成密钥
[root@xj ~]# ssh-keygen -t rsa
Generating public/private rsa key pair.
Enter file in which to save the key (/root/.ssh/id_rsa):
Created directory '/root/.ssh'.
Enter passphrase (empty for no passphrase):
Enter same passphrase again:
Your identification has been saved in /root/.ssh/id_rsa.
Your public key has been saved in /root/.ssh/id_rsa.pub.
The key fingerprint is:
SHA256:5cy2BX9PTl7fTVFtKuNjIxRuLLE94A/pEOf4r9LSfk4 root@xj
The key's randomart image is:
+---[RSA 2048]----+
|                o|
|      . + .     +|
|       * Oo.   + |
|      o B=Boo . .|
|       +S*=ooo. =|
|        o.oo=. B=|
|       o .Eo o  B|
|      o o.o      |
|       +o+.      |
+----[SHA256]-----+
//由于这里webvirtmgr和kvm服务部署在同一台机器,所以这里本地信任。如果kvm部署在其他机器,那么这个是它的ip
[root@xj ~]# ssh-copy-id 192.168.43.199
/usr/bin/ssh-copy-id: INFO: Source of key(s) to be installed: "/root/.ssh/id_rsa.pub"
The authenticity of host '192.168.43.199 (192.168.43.199)' can't be established.
ECDSA key fingerprint is SHA256:3KeEeM0S3c4p1ltdfLElAFxxGENIvXCj4b3y2gSHsnU.
ECDSA key fingerprint is MD5:be:99:90:79:15:79:17:78:fa:12:54:e7:9d:c8:af:99.
Are you sure you want to continue connecting (yes/no)? yes
/usr/bin/ssh-copy-id: INFO: attempting to log in with the new key(s), to filter out any that are already installed
/usr/bin/ssh-copy-id: INFO: 1 key(s) remain to be installed -- if you are prompted now it is to install the new keys

[email protected]'s password:

Number of key(s) added: 1

Now try logging into the machine, with:   "ssh '192.168.43.199'"
and check to make sure that only the key(s) you wanted were added.
//配置端口转发
[root@xj ~]# ssh 192.168.43.199 -L localhost:8000:localhost:8000 -L localhost:6080:localhost:60
Last failed login: Mon Mar 11 18:27:57 CST 2019 from 192.168.43.199 on ssh:notty
There was 1 failed login attempt since the last successful login.
Last login: Mon Mar 11 17:35:59 2019
[root@xj ~]# ss -anlt
State      Recv-Q Send-Q     Local Address:Port                    Peer Address:Port
LISTEN     0      128                    *:111                                *:*
LISTEN     0      5          192.168.122.1:53                                 *:*
LISTEN     0      128                    *:22                                 *:*
LISTEN     0      100            127.0.0.1:25                                 *:*
LISTEN     0      128            127.0.0.1:6080                               *:*
LISTEN     0      128            127.0.0.1:8000                               *:*
LISTEN     0      128                   :::111                               :::*
LISTEN     0      128                   :::22                                :::*
LISTEN     0      100                  ::1:25                                :::*
LISTEN     0      128                  ::1:6080                              :::*
LISTEN     0      128                  ::1:8000                              :::*
[root@xj ~]#
- 配置nginx
[root@kvm ~]# vim /etc/nginx/nginx.conf
user nginx;
worker_processes auto;
error_log /var/log/nginx/error.log;
pid /run/nginx.pid;

include /usr/share/nginx/modules/*.conf;

events {
    worker_connections 1024;
}

http {
    log_format  main  '$remote_addr - $remote_user [$time_local] "$request" '
                      '$status $body_bytes_sent "$http_referer" '
                      '"$http_user_agent" "$http_x_forwarded_for"';

    access_log  /var/log/nginx/access.log  main;

    sendfile            on;
    tcp_nopush          on;
    tcp_nodelay         on;
    keepalive_timeout   65;
    types_hash_max_size 2048;

    include             /etc/nginx/mime.types;
    default_type        application/octet-stream;

    include /etc/nginx/conf.d/*.conf;

    server {
        listen       80;
        server_name  localhost;

        include /etc/nginx/default.d/*.conf;

        location / {
            root html;
            index index.html index.htm;
        }

        error_page 404 /404.html;
            location = /40x.html {
        }

        error_page 500 502 503 504 /50x.html;
            location = /50x.html {
        }
    }
}
[root@kvm ~]# vim /etc/nginx/conf.d/webvirtmgr.conf
server {
    listen 80 default_server;

    server_name $hostname;
    #access_log /usr/share/nginx/html/nginx/webvirtmgr_access_log;

    location /static/ {
        root /usr/share/nginx/html/webvirtmgr/webvirtmgr;
        expires max;
    }

    location / {
        proxy_pass http://127.0.0.1:8000;
        proxy_set_header X-Real-IP $remote_addr;
        proxy_set_header X-Forwarded-for $proxy_add_x_forwarded_for;
        proxy_set_header Host $host:$server_port;
        proxy_set_header X-Forwarded-Proto $remote_addr;
        proxy_connect_timeout 600;
        proxy_read_timeout 600;
        proxy_send_timeout 600;
        client_max_body_size 1024M;
    }
}
- 确保bind绑定的是本机的8000端口
[root@xj ~]# vim /usr/share/nginx/html/webvirtmgr/conf/gunicorn.conf.py
.....此处省略N行
bind = '0.0.0.0:8000'     //确保此处绑定的是本机的8000端口,这个在nginx配置中定义了,被代理的端口
backlog = 2048
.....此处省略N行
- 重启nginx
[root@kvm ~]# systemctl restart nginx
[root@kvm ~]# ss -antl
State       Recv-Q Send-Q Local Address:Port               Peer Address:Port
LISTEN      0      128              *:111                          *:*
LISTEN      0      128              *:80                           *:*
LISTEN      0      5      192.168.122.1:53                           *:*
LISTEN      0      128              *:22                           *:*
LISTEN      0      100      127.0.0.1:25                           *:*
LISTEN      0      128      127.0.0.1:6080                         *:*
LISTEN      0      128      127.0.0.1:8000                         *:*
LISTEN      0      128             :::111                         :::*
LISTEN      0      128             :::22                          :::*
LISTEN      0      100            ::1:25                          :::*
LISTEN      0      128            ::1:6080                        :::*
LISTEN      0      128            ::1:8000                        :::*
- 设置supervisor
[root@xj ~]# vim /etc/supervisord.conf
.....此处省略上面的内容,在文件最后加上以下内容
[program:webvirtmgr]
command=/usr/bin/python2 /usr/share/nginx/html/webvirtmgr/manage.py run_gunicorn -c /usr/share/nginx/html/webvirtmgr/conf/gunicorn.conf.py
directory=/usr/share/nginx/html/webvirtmgr
autostart=true
autorestart=true
logfile=/var/log/supervisor/webvirtmgr.log
log_stderr=true
user=nginx

[program:webvirtmgr-console]
command=/usr/bin/python2 /usr/share/nginx/html/webvirtmgr/console/webvirtmgr-console
directory=/usr/share/nginx/html/webvirtmgr
autostart=true
autorestart=true
stdout_logfile=/var/log/supervisor/webvirtmgr-console.log
redirect_stderr=true
user=nginx
- 启动supervisor并设置开机自启
[root@xj ~]# systemctl start supervisord
[root@xj ~]# systemctl enable supervisord
Created symlink from /etc/systemd/system/multi-user.target.wants/supervisord.service to /usr/lib/systemd/system/supervisord.service
.
[root@xj ~]# systemctl status supervisord
● supervisord.service - Process Monitoring and Control Daemon
   Loaded: loaded (/usr/lib/systemd/system/supervisord.service; enabled; vendor preset: disabled)
   Active: active (running) since 一 2019-03-11 18:55:44 CST; 16s ago
 Main PID: 9324 (supervisord)
   CGroup: /system.slice/supervisord.service
           ├─9324 /usr/bin/python /usr/bin/supervisord -c /etc/supervisord.conf
           └─9363 /usr/bin/python2 /usr/share/nginx/html/webvirtmgr/manage.py run_gunicorn -c /us...

[root@xj ~]# ss -anlt
State      Recv-Q Send-Q     Local Address:Port                    Peer Address:Port
LISTEN     0      128                    *:111                                *:*
LISTEN     0      5          192.168.122.1:53                                 *:*
LISTEN     0      128                    *:22                                 *:*
LISTEN     0      100            127.0.0.1:25                                 *:*
LISTEN     0      128            127.0.0.1:6080                               *:*
LISTEN     0      128            127.0.0.1:8000                               *:*
LISTEN     0      128                   :::111                               :::*
LISTEN     0      128                   :::22                                :::*
LISTEN     0      100                  ::1:25                                :::*
LISTEN     0      128                  ::1:6080                              :::*
LISTEN     0      128                  ::1:8000                              :::*
- 配置nginx用户
[root@xj ~]# cd /home/
[root@xj home]# mkdir nginx
[root@xj home]# chown -R nginx.nginx nginx/
[root@xj home]# chmod -R 700 nginx/
[root@xj home]# ll nginx/ -d
drwx------. 2 nginx nginx 6 3月  11 18:56 nginx/

[root@xj home]# su - nginx -s /bin/bash
-bash-4.2$ ssh-keygen -t rsa
Generating public/private rsa key pair.
Enter file in which to save the key (/var/lib/nginx/.ssh/id_rsa):
Created directory '/var/lib/nginx/.ssh'.
Enter passphrase (empty for no passphrase):
Enter same passphrase again:
Your identification has been saved in /var/lib/nginx/.ssh/id_rsa.
Your public key has been saved in /var/lib/nginx/.ssh/id_rsa.pub.
The key fingerprint is:
SHA256:1EU/dat3tBuTxp0Q0Sd9Xc8JZngRJR+GktfNiL64ecI nginx@xj
The key's randomart image is:
+---[RSA 2048]----+
|           .=@OBB|
|         . =+=O=&|
|        . ..+.o=*|
|       .    . +o=|
|        S  . o Xo|
|          . . o =|
|         . o   . |
|          E .    |
|           o     |
+----[SHA256]-----+
-bash-4.2$

-bash-4.2$ touch ~/.ssh/config && echo -e "StrictHostKeyChecking=no\nUserKnownHostsFile=/dev/null" >> ~/.ssh/config
-bash-4.2$ chmod 0600 ~/.ssh/config
-bash-4.2$ ssh-copy-id [email protected]
/bin/ssh-copy-id: INFO: Source of key(s) to be installed: "/var/lib/nginx/.ssh/id_rsa.pub"
/bin/ssh-copy-id: INFO: attempting to log in with the new key(s), to filter out any that are already installed
/bin/ssh-copy-id: INFO: 1 key(s) remain to be installed -- if you are prompted now it is to install the new keys
Warning: Permanently added '192.168.43.199' (ECDSA) to the list of known hosts.
[email protected]'s password:

Number of key(s) added: 1

Now try logging into the machine, with:   "ssh '[email protected]'"
and check to make sure that only the key(s) you wanted were added.
-bash-4.2$ exit
logout
[root@xj ~]#

[root@xj ~]# vim /etc/polkit-1/localauthority/50-local.d/50-libvirt-remote-access.pkla
[Remote libvirt SSH access]
Identity=unix-user:root
Action=org.libvirt.unix.manage
ResultAny=yes
ResultInactive=yes
ResultActive=yes

[root@xj ~]# chown -R root.root /etc/polkit-1/localauthority/50-local.d/50-libvirt-remote-access.pkla
[root@xj ~]# systemctl restart nginx
[root@xj ~]# systemctl restart libvirtd
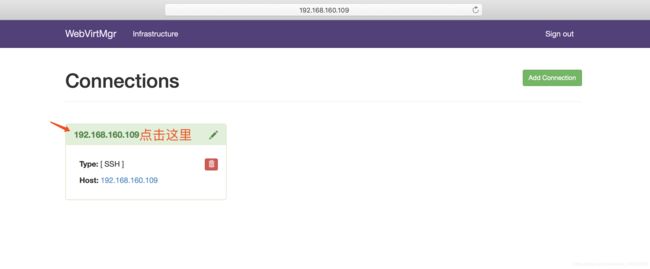
3.3 kvm web界面管理


3.3.2 kvm存储管理
创建存储:

通过远程连接软件上传ISO镜像文件至存储目录/var/lib/libvirt/images/


3.3.3 kvm网络管理
添加桥接网络


3.3.4 实例管理
实例(虚拟机)创建


