使用 Spring + SpringMVC + Hibernate 搭建简易论坛(一)搭建开发环境
一、搭建开发环境
1、下载并安装 MyEclipse
本项目使用 MyEclipse 2017 CI(以下简称 me), 在这里推荐新手入门使用,因为 me 支持自动引包、向工程中添加框架等功能,避免了手动搭建框架时会遇到的一些问题。MyEclipse 官方中文网,可以在这个链接中下载最新版的 me。需要注意的是 me 并不是免费的,只有三十天的试用期,破解方法可自行百度,在第一次打开前进行破解即可,或者也可以在某宝搜索相关关键词,价格也十分低廉。另外 me 是自带 jdk 的,可以不用自己下载安装 jdk,如果本机已安装 jdk,一定要注意在进行项目配置时要使用统一版本的 jdk。
2、下载并安装 Tomcat(可选)
本项目使用 Tomcat 这个免费开源的 web 应用服务器,me 本身也自带了各个版本的 Tomcat,可以选择使用自带的,也可以为了方便自己管理配置等使用自行下载的 Tomcat。下载地址:Apache Tomcat 本项目为了方便使用的是 me 自带的 Tomcat v8.5。
3、搭建项目框架
具体过程如下所示:
(1)首先新建一个名为 mybbs 的 web project,使用默认设置,连续点击两次 next

(2)勾选自动生成 web.xml 文件选项后点击 finish

(3)右键项目,在菜单中找到 Configure Facets, 点击 Install Spring Facet, 连点两次 next 后勾选 Spring Persistence 后点击 finish 完成 Spring 框架基本配置

(4)右键项目,在菜单中找到 Configure Facets, 点击 Install Hibernate Facet,Hibernate 版本选择 4.1,点击 next,取消勾选 Create SessionFactory class, 再次点击 next

(5)配置数据库连接信息,这里我使用的数据库是 mysql, 可根据自己具体所使用的数据库进行配置,完成后点击 finish 完成 Hibernate 框架基本配置

(6)下载 commons-logging.jar 并引入该项目,下载 mysql-connector-java-5.1.45-bin.jar 并放到项目中的 WebRoot/WEB-INF/lib 路径下
(7)打开 WebRoot 下自动生成的 index.jsp,点击运行将其部署到 Tomcat 上,如果还没有安装 Tomcat,可以选择 manually define a new server 自行创建后使用

运行结果如下:

(8)配置 web.xml 文件
在 controller 与 jsp 文件、controller 与数据库之间传递数据的时候,经常会出现中文乱码的情况,原因是部分默认编码格式(如 iso 等)不支持中文编码,所以我们需要在 web.xml 中添加一个 filter 过滤器,将传递的数据格式设置为中文,代码如下:
 <filter>
        <filter-name>characterEncodingFilterfilter-name>
        <filter-class>org.springframework.web.filter.CharacterEncodingFilterfilter-class>
        param>
            <param-name>encodingparam-name>
            <param-value>UTF-8param-value>
        param>
        param>
            <param-name>forceEncodingparam-name>
            <param-value>trueparam-value>
        param>
  filter>
  <filter-mapping>
        <filter-name>characterEncodingFilterfilter-name>
        /*
在自动生成的 web.xml 文件中,context 的配置如下:
param>
    <param-name>contextConfigLocationparam-name>
    <param-value>classpath:applicationContext.xmlparam-value>
param>
而实际上,自动生成的 applicationContext.xml 文件在 src 文件夹中,因此为了方便使用,我们先将 applicationContext.xml 文件从 src 文件夹中移动到 WEB-INF 下,再将上述代码改为:
param>
    <param-name>contextConfigLocationparam-name>
    <param-value>WEB-INF/applicationContext.xmlparam-value>
param>
接下来定义一个名为 bbs 的 DispatcherServlet 用来处理所有的 HTTP 请求和响应:
<servlet>
        <servlet-name>bbs</servlet-name>
        <servlet-class>
            org.springframework.web.servlet.DispatcherServlet
        </servlet-class>
        <init-param>
            <param-name>contextConfigLocation</param-name>
            <param-value>/WEB-INF/applicationContext.xml</param-value>
        </init-param>
        <load-on-startup>1</load-on-startup>
</servlet>
<servlet-mapping>
        <servlet-name>bbs</servlet-name>
        <url-pattern>/</url-pattern>
</servlet-mapping>
在管理用户登陆状态时会用到 session,在这里我将超时时间设置为 30 分钟,也可以根据实际需求进行修改:
<session-config>
        <session-timeout>30session-timeout>
session-config>
现在 web.xml 就已经配置完成了, 代码如下:
<web-app xmlns:xsi="http://www.w3.org/2001/XMLSchema-instance" xmlns="http://xmlns.jcp.org/xml/ns/javaee" xsi:schemaLocation="http://xmlns.jcp.org/xml/ns/javaee http://xmlns.jcp.org/xml/ns/javaee/web-app_3_1.xsd" id="WebApp_ID" version="3.1">
  <display-name>mybbsdisplay-name>
  <welcome-file-list>
    <welcome-file>index.htmlwelcome-file>
    <welcome-file>index.htmwelcome-file>
    <welcome-file>index.jspwelcome-file>
    <welcome-file>default.htmlwelcome-file>
    <welcome-file>default.htmwelcome-file>
    <welcome-file>default.jspwelcome-file>
  welcome-file-list>
  <listener>
    <listener-class>org.springframework.web.context.ContextLoaderListenerlistener-class>
  listener>
  <filter>
        <filter-name>characterEncodingFilterfilter-name>
        <filter-class>org.springframework.web.filter.CharacterEncodingFilterfilter-class>
        <init-param>
            <param-name>encodingparam-name>
            <param-value>UTF-8param-value>
        init-param>
        <init-param>
            <param-name>forceEncodingparam-name>
            <param-value>trueparam-value>
        init-param>
  filter>
  <filter-mapping>
        <filter-name>characterEncodingFilterfilter-name>
        <url-pattern>/*url-pattern>
  filter-mapping>
  <context-param>
    <param-name>contextConfigLocationparam-name>
    <param-value>WEB-INF/applicationContext.xmlparam-value>
  context-param>
  <servlet>
        <servlet-name>bbsservlet-name>
        <servlet-class>
           org.springframework.web.servlet.DispatcherServlet
        servlet-class>
        <init-param>
            <param-name>contextConfigLocationparam-name>
            <param-value>/WEB-INF/applicationContext.xmlparam-value>
        init-param>
        <load-on-startup>1load-on-startup>
    servlet>
    <servlet-mapping>
        <servlet-name>bbsservlet-name>
        <url-pattern>/url-pattern>
    servlet-mapping>
    <session-config>
        <session-timeout>30session-timeout>
    session-config>
web-app>
(9)配置 applicationContext.xml 文件
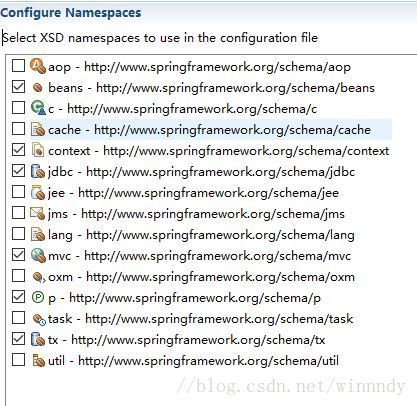
打开文件后点击下方 Namespaces 标签,勾选 context, jdbc, 和 mvc 后 Crtl + S 自动生成相关代码,如下图所示:
自动生成的代码:
<beans xmlns="http://www.springframework.org/schema/beans"
    xmlns:xsi="http://www.w3.org/2001/XMLSchema-instance"
    xmlns:p="http://www.springframework.org/schema/p"
    xmlns:tx="http://www.springframework.org/schema/tx"
    xmlns:context="http://www.springframework.org/schema/context"
    xmlns:jdbc="http://www.springframework.org/schema/jdbc"
    xmlns:mvc="http://www.springframework.org/schema/mvc"
    xsi:schemaLocation="http://www.springframework.org/schema/jdbc http://www.springframework.org/schema/jdbc/spring-jdbc-4.1.xsd
        http://www.springframework.org/schema/mvc http://www.springframework.org/schema/mvc/spring-mvc-4.1.xsd
        http://www.springframework.org/schema/beans http://www.springframework.org/schema/beans/spring-beans-4.1.xsd
        http://www.springframework.org/schema/context http://www.springframework.org/schema/context/spring-context-4.1.xsd
        http://www.springframework.org/schema/tx http://www.springframework.org/schema/tx/spring-tx.xsd">


    <bean id="dataSource"
        class="org.apache.commons.dbcp.BasicDataSource">
        <property name="url" value="jdbc:mysql://localhost:3306/mydb">property>
        <property name="username" value="root">property>
        <property name="password" value="123456">property>
    bean>
    <bean id="sessionFactory"
        class="org.springframework.orm.hibernate4.LocalSessionFactoryBean">
        <property name="dataSource">
            <ref bean="dataSource" />
        property>
        <property name="hibernateProperties">
            <props>
                <prop key="hibernate.dialect">
                    org.hibernate.dialect.MySQLDialect
                prop>
            props>
        property>
    bean>
    <bean id="transactionManager"
        class="org.springframework.orm.hibernate4.HibernateTransactionManager">
        <property name="sessionFactory" ref="sessionFactory" />
    bean>
    <tx:annotation-driven transaction-manager="transactionManager" />
beans>
添加代码:
激活那些已经在 spring 容器里注册过的 bean 上面的注解;
添加代码:
在指定的 package 下扫描以及注册 javabean;
添加代码:
<mvc:annotation-driven>
        <mvc:message-converters register-defaults="true">
            <bean class="org.springframework.http.converter.StringHttpMessageConverter">
                <constructor-arg value="UTF-8" />
            bean>
        mvc:message-converters>
mvc:annotation-driven>
解决 @Controller 注解使用的前提配置和一些情况下的中文乱码问题;
在 dataSource 中添加属性 driverClassName:
在 transactionManager 中添加属性 dataSource:
添加代码:
id="viewResolver"
        class="org.springframework.web.servlet.view.InternalResourceViewResolver"
        primary="false">
        <property name="prefix" value="/" />
        <property name="suffix" value=".jsp" />
来抓取所有访问 WebRoot 下的 JSP 文件的请求;
现在 applicationContext.xml 文件已经基本配置完成,之后会根据业务需求进行一些具体配置,已完成的代码如下:
<beans xmlns="http://www.springframework.org/schema/beans"
    xmlns:xsi="http://www.w3.org/2001/XMLSchema-instance"
    xmlns:p="http://www.springframework.org/schema/p"
    xmlns:tx="http://www.springframework.org/schema/tx"
    xmlns:context="http://www.springframework.org/schema/context"
    xmlns:jdbc="http://www.springframework.org/schema/jdbc"
    xmlns:mvc="http://www.springframework.org/schema/mvc"
    xsi:schemaLocation="http://www.springframework.org/schema/jdbc http://www.springframework.org/schema/jdbc/spring-jdbc-4.1.xsd
        http://www.springframework.org/schema/mvc http://www.springframework.org/schema/mvc/spring-mvc-4.1.xsd
        http://www.springframework.org/schema/beans http://www.springframework.org/schema/beans/spring-beans-4.1.xsd
        http://www.springframework.org/schema/context http://www.springframework.org/schema/context/spring-context-4.1.xsd
        http://www.springframework.org/schema/tx http://www.springframework.org/schema/tx/spring-tx.xsd">
    <context:annotation-config/>
    <context:component-scan base-package="com.sxy.*"/>
    <mvc:annotation-driven>
        <mvc:message-converters register-defaults="true">
            <bean class="org.springframework.http.converter.StringHttpMessageConverter">
                <constructor-arg value="UTF-8" />
            bean>
        mvc:message-converters>
    mvc:annotation-driven>
    <bean id="dataSource"
        class="org.apache.commons.dbcp.BasicDataSource">
        <property name="url" value="jdbc:mysql://localhost:3306/mydb">property>
        <property name="username" value="root">property>
        <property name="password" value="123456">property>
        <property name="driverClassName" value="com.mysql.jdbc.Driver" >property>
    bean>
    <bean id="sessionFactory"
        class="org.springframework.orm.hibernate4.LocalSessionFactoryBean">
        <property name="dataSource">
            <ref bean="dataSource" />
        property>
        <property name="hibernateProperties">
            <props>
                <prop key="hibernate.dialect">
                    org.hibernate.dialect.MySQLDialect
                prop>
            props>
        property>
    bean>
    <bean id="transactionManager"
        class="org.springframework.orm.hibernate4.HibernateTransactionManager">
        <property name="sessionFactory" ref="sessionFactory" />
        <property name="dataSource" ref="dataSource"/>
    bean>
    <tx:annotation-driven transaction-manager="transactionManager" />
    <bean id="viewResolver"
        class="org.springframework.web.servlet.view.InternalResourceViewResolver"
        primary="false">
        <property name="prefix" value="/" />
        <property name="suffix" value=".jsp" />
    bean>
beans>