vuex - modal的实现 =>从入门到放弃(一)
github地址:https://github.com/liuxingzhijian1320/vuex-modal
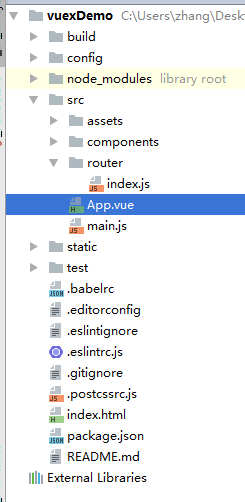
- 新建一个项目
vue init webpack vuexDemo- 运行项目
npm intsall // 下载包
npm run dev //启动项目- router index.js
import Hello from '@/components/Hello'@ 这个符号的解释:这是webpack配置的alias(别名)
,自己定义的名称可在build/webpack.base.conf.js 目录结构下的修改
文件中的代码如下
alias: {
  'vue$': 'vue/dist/vue.esm.js',
  '@': resolve('src')
}
修改结果为
alias: {
      'vue$': 'vue/dist/vue.esm.js',
      '@': resolve('src'),
      'components': resolve('src/components'),
      'views': resolve('src/views'),  //这个后期新增的文件夹,这里先配置好
    }

//这里如果不需要Eslint 语法检查 可将下面代码其注释掉
       {
        test: /\.(js|vue)$/,
        loader: 'eslint-loader',
        enforce: 'pre',
        include: [resolve('src'), resolve('test')],
        options: {
          formatter: require('eslint-friendly-formatter')
        }
      },
注:这里的scss的语法配置 查看的我的blog里面的相关文章,这里不再啰嗦
- src/views/vuex.vue 新建的文件夹
<template>
  <div id="vuex">
      <button class="first-modal">打开modalbutton>
      <button class="second-modal">点击btn传数据到modal上面去button>
  div>
template>
<script>
  export default {

  }
script>
<style scoped>
  #vuex {
    width:100%;
    min-height: 100vh; /*满屏撑起来的*/
    background-color: red;
  }
  .first-modal,.second-modal {
    height: 100px;
    width: 100px;
  }
style>- router index.js
import Vue from 'vue'
import Router from 'vue-router'
import Hello from '@/components/Hello'
import vuexdemo from 'views/vuex' //这就是上面配置alias的作用

Vue.use(Router)

export default new Router({
  routes: [
    {
      path: '/',
      name: 'vuexdemo',
      component: vuexdemo
    }, {
      path: '*',
      redirect: {
        name: 'vuexdemo'   //这句话的目的,重定向url输错时候,自动跳到的vuexdemo这条路由上面的
      }
    }
  ]
})- App.vue 文件
<template>
  <div id="app">
    <router-view>router-view>
  div>
template>
<script>
export default {
  name: 'app'
}
script>
<style>
  *{
   padding: 0;
    margin: 0;
  }
  /* 1.这里为了偷懒 没有引入的reset.css,可从bootcdn查找,然后index.html 直接link标签引入即可
  2.这里的rem布局 我也懒得设置,后面的所有的css布局 凭感觉的*/
style>
贴了这么多的代码 ,现在运行项目,因为之前修改过脚手架,现在需要重新的npm run dev 效果如下:
//第二个btn 下节讲解
敌军还有三十秒到达战场(重点)
前面那么的铺垫只是为了跑起来这个项目,顺便说一了平常的小知识点
新建文件夹 src/store/index.js src/store/modules/modal.js
-src
—-store
——index.js
——modules >>> modal.js下载vuex的包
npm install vuex -D- index.js
// 组装模块并导出 store 的地方
import Vue from 'vue';
import Vuex from 'vuex';


import modal from './modules/modal'; // modal 弹窗 模块

Vue.use(Vuex);

export default new Vuex.Store({
  mutations: {

  },
  modules: {
    modal,
  },
  strict: process.env.NODE_ENV !== 'production', // 严格模式
});
- modal.js
// 初始状态
const state = {
  name: '', //不同modal的姓名
  status: false, // 显示的状态
  data: null, // 传递的data
  callback: null, // 回到函数
};

// 读取数据
const getters = {};


// 数据改变
const mutations = {
  setModalState(state, { name, status = false, data = null, callback = null }) {
    state.name = name;
    state.status = status;
    state.data = data;
    state.callback = callback;
    console.info(222,name,status,state)

  },
  closeModal(state){
    //console.info('closeModal')
    state.status = false;
  },
};
// 逻辑响应
const actions = {
  toggleModal({ state, rootState, commit, dispatch, getters }, payload) {
    //console.info(111,payload)
    commit('setModalState', payload);
  },
};

export default {
  state,
  getters,
  actions,
  mutations,
};
- main.js
import Vue from 'vue'
import App from './App'
import router from './router'
import store from './store';
Vue.config.productionTip = false
/* eslint-disable no-new */
new Vue({
el: '#app',
router,
store,
template: '– 写了这么多的 ,npm run dev 查看有没有报错
– vuex的部分写完了。现在开始编写modal的组件了
<template>
  <transition name="modal">
      <div @click="close" class="modal-mask">
        <div class="modal-outter">
          <div class="modal-wrapper">
            <div class="modal-container"  @click.stop>
              <div class="modal-body">
                我是好人modal 仅仅起到打开modal的作用,不做modal传数据的操作
                <br>
                <button class="bt" @click="test()">关闭button>
              div>
            div>

          div>
        div>

      div>

  transition>
template>
<script>
  import {
    mapState,
    mapGetters,
    mapActions,
    mapMutations,
  } from 'vuex';

  export default {
    name: 'firstmodal',
    data() {
      return {};
    },
    computed: {
      ...mapState({
        data: state => state.modal.data || {},
        callback: state => state.modal.callback,
      }),
      ...mapGetters([]),
    },
    methods: {
      close() {
        this.$store.commit('closeModal');
      },
      test() {
        this.close()
        this.callback && this.callback();
      },
    },
    mounted() {},
  };
script>
<style scoped>
  .modal-mask {
    position: fixed;
    z-index: 9998;
    top: 0;
    left: 0;
    width: 100%;
    height: 100%;
    background-color: rgba(0, 0, 0, .5);
    display: table;
    transition: opacity .3s ease;
  }

  .modal-wrapper {
    display: table-cell;
    vertical-align: middle;
  }

  .modal-container {
    width: 300px;
    height: 300px;
    margin: 0 auto;
    background-color: red;
    border-radius: 2px;
    box-shadow: 0 2px 8px rgba(0, 0, 0, .33);
    transition: all .3s ease;
    font-family: Helvetica, Arial, sans-serif;
    position: relative;
    color: #ffffff;
    font-size:30px;
  }

  .bt {
    width:100px;
    height: 50px;
    position: absolute;
    bottom: 0;
    left:50%;
    transform: translateX(-50%);
  }

  .modal-default-button {
    float: right;
  }

  .modal-enter {
    opacity: 0;
  }

  .modal-leave-active {
    opacity: 0;
  }

  .modal-enter .modal-container,
  .modal-leave-active .modal-container {
    -webkit-transform: scale(1.1);
    transform: scale(1.1);
  }

style>
- modal.vue
<template>
  <component v-show="status" id="modal" v-bind:is="name">

  component>
template>
<script>
//有多少个modal组件 就在这里引入
import firstmodal from './first_modal/first.modal.vue';

import {
  mapState,
  mapGetters,
  mapActions,
  mapMutations,
} from 'vuex';

// 弹出modal的代码
// this.$store.dispatch('toggleModal', {
//   name: 'volume',
//   status: true
// });

export default {
  name: 'modal',
  computed: {
    ...mapState({
      status: state => state.modal.status,
      name: state => state.modal.name,
    }),
  },
  components: {
    //有多少个modal组件 就在这里引入
    //这个文件只需要动这2个地方即可,其他代码不用修改
    firstmodal: firstmodal,

  },
};
script>
<style lang="scss">
#modal {
  position: fixed;
}
style>
组件的编写完了
现在全局需要将modal.vue挂载上去
App.vue
<template>
  <div id="app">
    <router-view>router-view>
    <modal>modal>
  div>
template>

<script>
  import modal from 'components/modal/modal'  //add
  export default {
    name: 'app',
    components: {
      modal  //add
    }
  }
script>

<style>
  * {
    padding: 0;
    margin: 0;
  }
style>
– 写了这么多的 ,npm run dev 查看有没有报错
点击事件 开始调用这个modal
vuex.vue
<button class="first-modal" @click="firstClick">打开modalbutton>//js
<script>
  export default {
    name: 'vuexdemo',
    methods: {
      firstClick(){
          //不同的modal调用方法是一样的,只是name的属性不同而已
        this.$store.dispatch('toggleModal', {
          name: 'firstmodal',
          status: true
        })

      }
    }
  }
script>- npm run dev 查看项目运行结果


