Appium工作原理
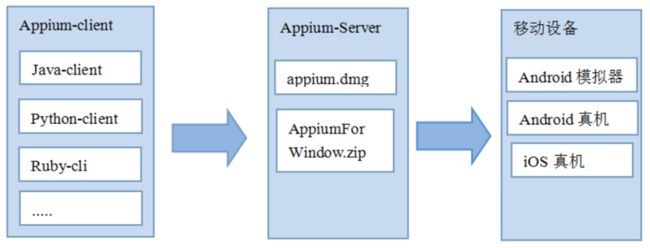
支持多平台、多语言
appium是跨平台的,可以用在OSX,Windows以及Linux桌面系统上运行。
appium选择了Client/Server的设计模式。只要client能够发送http请求给server,那么的话client用什么语言来实现都是可以的,这就是appium及Selenium(WebDriver)如何做到支持多语言的原因;
appium扩展了WebDriver的协议,没有自己重新去实现一套。
这样的好处是以前的WebDriver API能够直接被继承过来,以前的Selenium(WebDriver)各种语言的binding都可以拿来就用,省去了为每种语言开发一个client的工作量;
1、安装Appium
方式一 npm install -g appium --registry=https://registry.npm.taobao.org
方式二 安装appium-desktop桌面版(https://github.com/appium/appium-desktop/releases)
2、安装appium-doctor
2.1 Android
MacBookPro:redis-4.0.9 zhangxm$ appium-doctor --android
info AppiumDoctor Appium Doctor v.1.15.3
info AppiumDoctor ### Diagnostic for necessary dependencies starting ###
info AppiumDoctor  ✔ The Node.js binary was found at: /usr/local/bin/node
info AppiumDoctor  ✔ Node version is 12.16.0
info AppiumDoctor  ✔ ANDROID_HOME is set to: /Users/zhangxm/Library/Android/sdk
info AppiumDoctor  ✔ JAVA_HOME is set to: /Library/Java/JavaVirtualMachines/jdk1.8.0_121.jdk/Contents/Home
info AppiumDoctor    Checking adb, android, emulator
info AppiumDoctor      'adb' is in /Users/zhangxm/Library/Android/sdk/platform-tools/adb
info AppiumDoctor      'android' is in /Users/zhangxm/Library/Android/sdk/tools/android
info AppiumDoctor      'emulator' is in /Users/zhangxm/Library/Android/sdk/emulator/emulator
info AppiumDoctor  ✔ adb, android, emulator exist: /Users/zhangxm/Library/Android/sdk
info AppiumDoctor  ✔ Bin directory of $JAVA_HOME is set
info AppiumDoctor ### Diagnostic for necessary dependencies completed, no fix needed. ###
info AppiumDoctor
info AppiumDoctor ### Diagnostic for optional dependencies starting ###
WARN AppiumDoctor  ✖ opencv4nodejs cannot be found.
WARN AppiumDoctor  ✖ ffmpeg cannot be found
WARN AppiumDoctor  ✖ mjpeg-consumer cannot be found.
WARN AppiumDoctor  ✖ bundletool.jar cannot be found
WARN AppiumDoctor  ✖ gst-launch-1.0 and/or gst-inspect-1.0 cannot be found
info AppiumDoctor ### Diagnostic for optional dependencies completed, 5 fixes possible. ###
info AppiumDoctor
info AppiumDoctor ### Optional Manual Fixes ###
info AppiumDoctor The configuration can install optionally. Please do the following manually:
WARN AppiumDoctor  ➜ Why opencv4nodejs is needed and how to install it: https://github.com/appium/appium/blob/master/docs/en/writing-running-appium/image-comparison.md
WARN AppiumDoctor  ➜ ffmpeg is needed to record screen features. Please read https://www.ffmpeg.org/ to install it
WARN AppiumDoctor  ➜ mjpeg-consumer module is required to use MJPEG-over-HTTP features. Please install it with 'npm i -g mjpeg-consumer'.
WARN AppiumDoctor  ➜ bundletool.jar is used to handle Android App Bundle. Please read http://appium.io/docs/en/writing-running-appium/android/android-appbundle/ to install it
WARN AppiumDoctor  ➜ gst-launch-1.0 and gst-inspect-1.0 are used to stream the screen of the device under test. Please read https://appium.io/docs/en/writing-running-appium/android/android-screen-streaming/ to install them and for more details
info AppiumDoctor
info AppiumDoctor ###
info AppiumDoctor
info AppiumDoctor Bye! Run appium-doctor again when all manual fixes have been applied!
info AppiumDoctor
opencv4nodejs
第一步:安装cmake并配置环境变量
1、打开terminal执行:cmake —version,提示未安装
2、安装cmake步骤:
CMake http://www.cmake.org/
我是下载的CMake的dmg文件,图形界面安装,但安装完后在命令行中运行不了cmake命令,需要将cmake命令添加到环境变量中。
(1)打开 .bash_profile 文件配置环境变量,终端输入 open -e .bash_profile
打开的文件加入下面两句,保存修改即可。
# Add Cmake Root to Path
export CMAKE_ROOT=/Applications/CMake.app/Contents/bin/(你自己的安装目录)
export PATH=$CMAKE_ROOT:$PATH
(2)更新刚配置的环境变量:
输入source .bash_profile
(3)再次执行cmake —version,提示安装成功
第二步、执行:npm -g install opencv4nodejs
等待安装完成,则看到已成功安装。
ffmpeg
brew install ffmpeg
mjpeg-consumer
npm install -g mjpeg-consumer
bundletool.jar cannot be found
到https://github.com/google/bundletool/releases下载bundletool.jar的最新版本,下载到的这个jar的文件名可能有带版本号,无论是什么,都改名为bundletool.jar。
在前面创建的sdk目录下,创建一个子目录bundle-tool,把bundletool.jar放在这个子目录下。
给这个子目录和这个jar文件,增加权限。执行下面的脚本:
chmod +x
chmod +x bundletool.jar
在全局变量PATH中,增加bundletool.jar的路径,如下所示:
expert PATH=${PATH}:$ANDROID_HOME/bundle-tool
gst-launch-1.0
brew install gstreamer gst-plugins-base gst-plugins-good gst-plugins-bad gst-plugins-ugly gst-libav
2.2 IOS
MacBookPro:bundle-tool zhangxm$ appium-doctor --ios
info AppiumDoctor Appium Doctor v.1.15.3
info AppiumDoctor ### Diagnostic for necessary dependencies starting ###
info AppiumDoctor  ✔ The Node.js binary was found at: /usr/local/bin/node
info AppiumDoctor  ✔ Node version is 12.16.0
info AppiumDoctor  ✔ Xcode is installed at: /Applications/Xcode.app/Contents/Developer
info AppiumDoctor  ✔ Xcode Command Line Tools are installed in: /Applications/Xcode.app/Contents/Developer
info AppiumDoctor  ✔ DevToolsSecurity is enabled.
info AppiumDoctor  ✔ The Authorization DB is set up properly.
info AppiumDoctor  ✔ Carthage was found at: /usr/local/bin/carthage. Installed version is: 0.23.0
info AppiumDoctor  ✔ HOME is set to: /Users/zhangxm
info AppiumDoctor ### Diagnostic for necessary dependencies completed, no fix needed. ###
info AppiumDoctor
info AppiumDoctor ### Diagnostic for optional dependencies starting ###
WARN AppiumDoctor  ✖ opencv4nodejs cannot be found.
info AppiumDoctor  ✔ ffmpeg is installed at: /usr/local/bin/ffmpeg. ffmpeg version 4.2.2 Copyright (c) 2000-2019 the FFmpeg developers
info AppiumDoctor  ✔ mjpeg-consumer is installed at: /usr/local/lib. Installed version is: 2.0.0
WARN AppiumDoctor  ✖ set-simulator-location is not installed
WARN AppiumDoctor  ✖ idb and idb_companion are not installed
WARN AppiumDoctor  ✖ applesimutils cannot be found
info AppiumDoctor  ✔ ios-deploy is installed at: /usr/local/bin/ios-deploy. Installed version is: 1.9.1
info AppiumDoctor ### Diagnostic for optional dependencies completed, 4 fixes possible. ###
info AppiumDoctor
info AppiumDoctor ### Optional Manual Fixes ###
info AppiumDoctor The configuration can install optionally. Please do the following manually:
WARN AppiumDoctor  ➜ Why opencv4nodejs is needed and how to install it: https://github.com/appium/appium/blob/master/docs/en/writing-running-appium/image-comparison.md
WARN AppiumDoctor  ➜ set-simulator-location is needed to set location for Simulator. Please read https://github.com/lyft/set-simulator-location to install it
WARN AppiumDoctor  ➜ Why idb is needed and how to install it: https://github.com/appium/appium-idb
WARN AppiumDoctor  ➜ Why applesimutils is needed and how to install it: http://appium.io/docs/en/drivers/ios-xcuitest/
info AppiumDoctor
info AppiumDoctor ###
info AppiumDoctor
info AppiumDoctor Bye! Run appium-doctor again when all manual fixes have been applied!
info AppiumDoctor
set-simulator-location
brew install lyft/formulae/set-simulator-location
ios-deploy
sudo npm install -g ios-deploy —unsafe-perm=true
applesimutils
brew tap wix/brew
brew install applesimutils
idb
brew tap facebook/fb
brew install idb-companion
pip3.7 install fb-idb
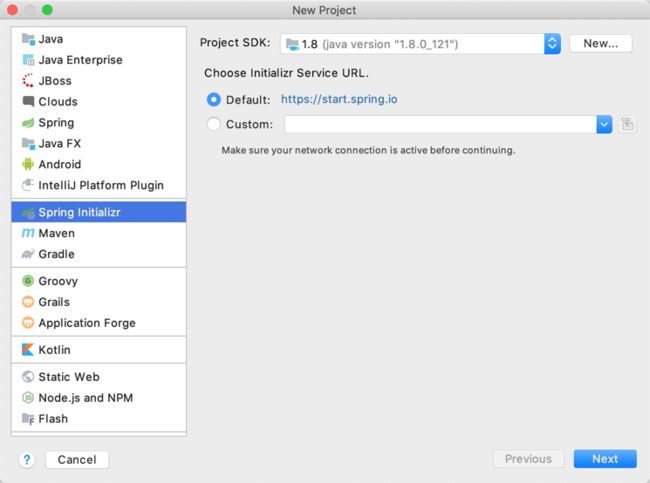
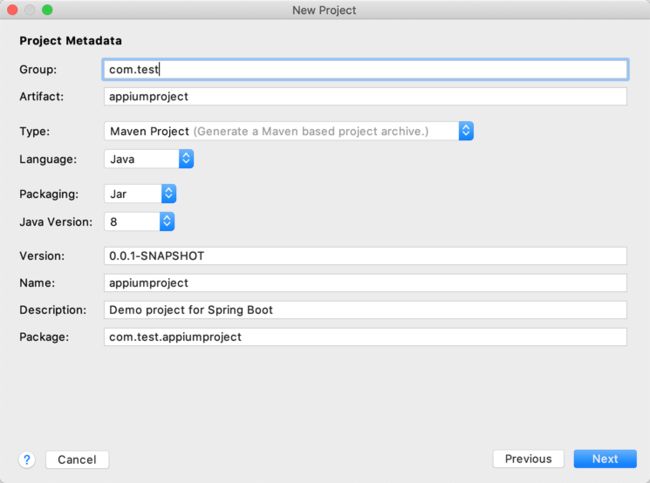
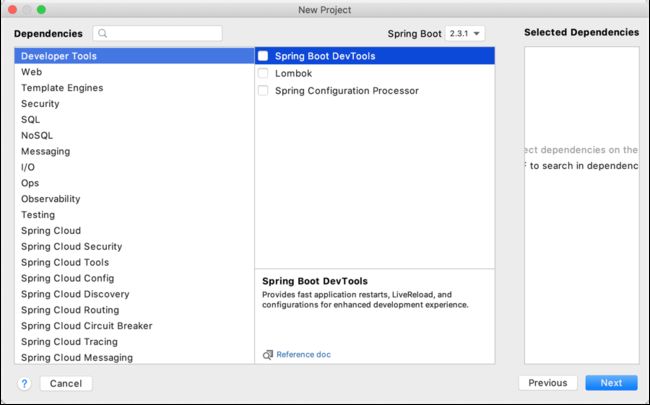
3、新建SpringBoot工程

pom文件加载需要的java-client包
https://github.com/appium/java-client
How to install latest java client Beta/Snapshots
Java client project is available to use even before it is officially published to maven central. Refer jitpack.io
Maven
Add the following to pom.xml:


        jitpack.io
        https://jitpack.io
Add the dependency:
    com.github.appium
    java-client
    latest commit ID from master branch