DeepLabV3+训练自定义数据集实例(1)
1.下载数据集
在这里面,用的是狗猫数据集中的猫数据的一部分,官方下载地址为:https://www.kaggle.com/c/dogs-vs-cats/data
2.使用labelme最新版打标签
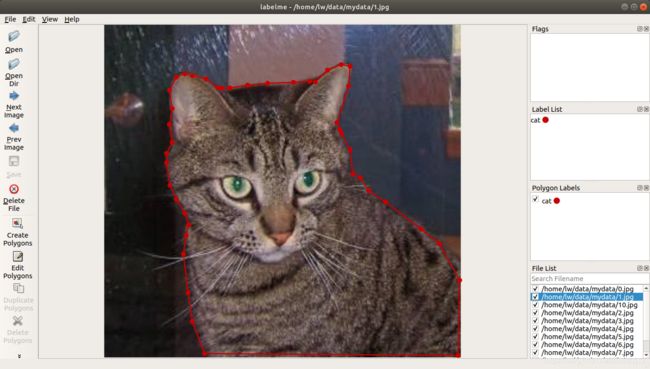
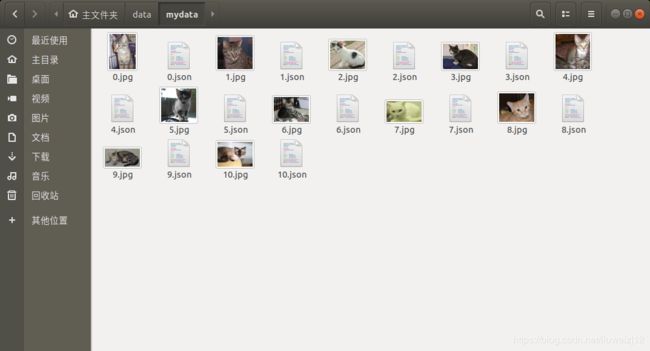
我使用了11个猫的图像数据来制作,制作完成后如下图:
3.采用改进的json_to_mask批量生成标签,制作成为标准数据集
# -*- coding: utf-8 -*-

import argparse
import base64
import json
import os
import os.path as osp

import imgviz
import PIL.Image

from labelme.logger import logger
from labelme import utils
from skimage import img_as_ubyte
import cv2

json_file = "/home/lw/data/mydata/"

list_path = os.listdir(json_file)

for i in range(0, len(list_path)):
    path = os.path.join(json_file, list_path[i])
    if os.path.isfile(path) & path.endswith('.json'):

        data = json.load(open(path))
        imageData = data.get('imageData')
        if not imageData:
            imagePath = os.path.join(os.path.dirname(json_file), data['imagePath'])
            with open(imagePath, 'rb') as f:
                imageData = f.read()
                imageData = base64.b64encode(imageData).decode('utf-8')

        img = utils.img_b64_to_arr(imageData)  # 原始图像

        label_name_to_value = {'_background_': 0}
        for shape in sorted(data['shapes'], key=lambda x: x['label']):
            label_name = shape['label']
            if label_name in label_name_to_value:
                label_value = label_name_to_value[label_name]
            else:
                label_value = len(label_name_to_value)
                label_name_to_value[label_name] = label_value

        lbl, _ = utils.shapes_to_label(img.shape, data['shapes'], label_name_to_value)


        image_dir=osp.join(osp.dirname(json_file),"image")
        print image_dir
        # 建立image文件夹
        if not osp.exists(image_dir):
            os.mkdir(image_dir)
        PIL.Image.fromarray(img).save(osp.join(image_dir, data['imagePath'])) #保存原图


        mask_dir=osp.join(osp.dirname(json_file),"mask")
        # 建立image文件夹
        if not osp.exists(mask_dir):
            os.mkdir(mask_dir)
        #utils.lblsave(osp.join(mask_dir, 'label1.png'), lbl) #三通道标签
        mask_dst = img_as_ubyte(lbl)
        cv2.imwrite((osp.join(mask_dir,os.path.splitext(list_path[i])[0]) + '.png'), mask_dst) #二值化标签

        full_dir=osp.join(osp.dirname(json_file),"full")
        # 建立image文件夹
        if not osp.exists(full_dir):
            os.mkdir(full_dir)

        lbl_viz = imgviz.label2rgb(label=lbl, img=imgviz.asgray(img),  loc='rb')
        PIL.Image.fromarray(lbl_viz).save(full_dir + '/' +os.path.splitext(list_path[i])[0]+ '_label_viz.png') #label的可视化图像
        PIL.Image.fromarray(img).save(full_dir + '/' + data['imagePath']) #保存原图
        cv2.imwrite(full_dir + '/' + os.path.splitext(list_path[i])[0] + '.png', mask_dst) #二值化标签
#
for i in range(0, len(list_path)):
    path = os.path.join(json_file, list_path[i])
    if os.path.isfile(path) & path.endswith('.jpg'):
            os.remove(path)
执行完成后,生生的数据集目录所下图所示: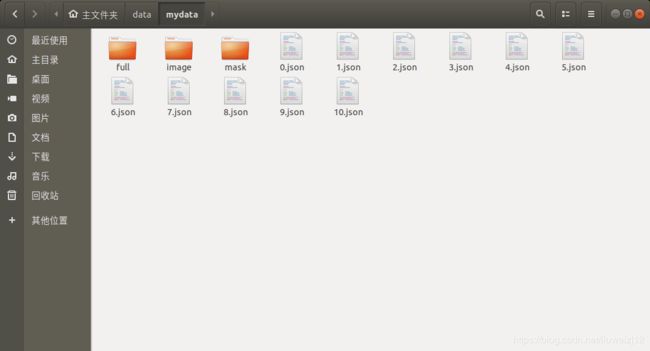
image存放的是原图
mask存放的是标签
full 存放的是原图,标签图和三通道标签图
4,判断标签是否正确
# -*- coding: utf-8 -*-


import cv2
import matplotlib.pyplot as plt

#文件地址
imageAddress="/home/lw/data/mydata/full/0.png"
img=cv2.imread(imageAddress)
print(img.shape)

plt.imshow(img)
plt.show()
用代码显示出标签图,用鼠标移动到相应位置,看一下左下角的值是否变化。


5,分训练集与验证集
新建index目录,分别建立train.txt,trainval.txt, val.txt
将训练和验证图片的名字分别放入train.txt, val.txt

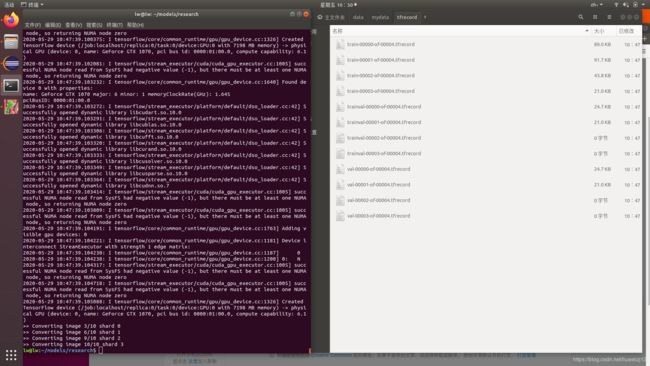
6,生成tfrecord数据
在终端进入/models/research ,在该路径下,执行官方程序自带的build_voc2012_data.py
首先在mydatah目录下建立新目录tfrecord,然后,执行:
python deeplab/datasets/build_voc2012_data.py \
      --image_folder="/home/lw/data/mydata/image" \
      --semantic_segmentation_folder="/home/lw/data/mydata/mask" \
      --list_folder="/home/lw/data/mydata/index" \
      --image_format="jpg" \
      --label_format="png" \
      --output_dir="/home/lw/data/mydata/tfrecord"