Android之ConstraintLayout用法全面解析
在Android开发中我们在写布局时候经常会使用到布局的嵌套,比如常见的Android布局FrameLayout LinearLayout
RelativeLayout等布局的相互嵌套,而且在写xml布局时候对布局可视化的操作不是很到位(很鸡肋)
而ConstarintLayout的出现就能够有效的解决以上的两个痛点,即:
1.布局嵌套过多的问题
2.布局可视化支持不够哟好的问题
而本文主要是讲解ConstraintLayout 通过xml手动操作的方式,毕竟知其然还要知其所以然吗啊(手写的方式回了可视化
肯定也没有什么大的问题)而且现在我们android新建的项目中也都是默认以ConstraintLayout做为默认的根布局为
开始:
首先导入ConstraintLayout 库
dependencies {
    implementation  'com.android.support.constraint:constraint-layout:1.1.3'
}
本文以ConstraintLayout1.1.3版本为基础进行讲解:
ConstraintLayout 中的 Constraint 翻译为:约束,限制,强制,所以顾名思义该布局在每个在子 View 上添加各种约束条件
来控制每个子 View 所处的位置以及显示的尺寸。ConstraintLayout 在 1.1.3 版本有如下 的布局属性:
ConstraintLayout_Layout_android_orientation = 0;
ConstraintLayout_Layout_android_maxWidth = 1;
ConstraintLayout_Layout_android_maxHeight = 2;
ConstraintLayout_Layout_android_minWidth = 3;
ConstraintLayout_Layout_android_minHeight = 4;
ConstraintLayout_Layout_barrierAllowsGoneWidgets = 5;
ConstraintLayout_Layout_barrierDirection = 6;
ConstraintLayout_Layout_chainUseRtl = 7;
ConstraintLayout_Layout_constraintSet = 8;
ConstraintLayout_Layout_constraint_referenced_ids = 9;
ConstraintLayout_Layout_layout_constrainedHeight = 10;
ConstraintLayout_Layout_layout_constrainedWidth = 11;
ConstraintLayout_Layout_layout_constraintBaseline_creator = 12;
ConstraintLayout_Layout_layout_constraintBaseline_toBaselineOf =
ConstraintLayout_Layout_layout_constraintBottom_creator = 14;
ConstraintLayout_Layout_layout_constraintBottom_toBottomOf = 15;
ConstraintLayout_Layout_layout_constraintBottom_toTopOf = 16;
ConstraintLayout_Layout_layout_constraintCircle = 17;
ConstraintLayout_Layout_layout_constraintCircleAngle = 18;
ConstraintLayout_Layout_layout_constraintCircleRadius = 19;
ConstraintLayout_Layout_layout_constraintDimensionRatio = 20;
ConstraintLayout_Layout_layout_constraintEnd_toEndOf = 21;
ConstraintLayout_Layout_layout_constraintEnd_toStartOf = 22;
ConstraintLayout_Layout_layout_constraintGuide_begin = 23;
ConstraintLayout_Layout_layout_constraintGuide_end = 24;
ConstraintLayout_Layout_layout_constraintGuide_percent = 25;
ConstraintLayout_Layout_layout_constraintHeight_default = 26;
ConstraintLayout_Layout_layout_constraintHeight_max = 27;
ConstraintLayout_Layout_layout_constraintHeight_min = 28;
ConstraintLayout_Layout_layout_constraintHeight_percent = 29;
ConstraintLayout_Layout_layout_constraintHorizontal_bias = 30;
ConstraintLayout_Layout_layout_constraintHorizontal_chainStyle =
ConstraintLayout_Layout_layout_constraintHorizontal_weight = 32;
ConstraintLayout_Layout_layout_constraintLeft_creator = 33;
ConstraintLayout_Layout_layout_constraintLeft_toLeftOf = 34;
ConstraintLayout_Layout_layout_constraintLeft_toRightOf = 35;
ConstraintLayout_Layout_layout_constraintRight_creator = 36;
ConstraintLayout_Layout_layout_constraintRight_toLeftOf = 37;
ConstraintLayout_Layout_layout_constraintRight_toRightOf = 38;
ConstraintLayout_Layout_layout_constraintStart_toEndOf = 39;
ConstraintLayout_Layout_layout_constraintStart_toStartOf = 40;
ConstraintLayout_Layout_layout_constraintTop_creator = 41;
ConstraintLayout_Layout_layout_constraintTop_toBottomOf = 42;
ConstraintLayout_Layout_layout_constraintTop_toTopOf = 43;
ConstraintLayout_Layout_layout_constraintVertical_bias = 44;
ConstraintLayout_Layout_layout_constraintVertical_chainStyle = 4
ConstraintLayout_Layout_layout_constraintVertical_weight = 46;
ConstraintLayout_Layout_layout_constraintWidth_default = 47;
ConstraintLayout_Layout_layout_constraintWidth_max = 48;
ConstraintLayout_Layout_layout_constraintWidth_min = 49;
ConstraintLayout_Layout_layout_constraintWidth_percent = 50;
ConstraintLayout_Layout_layout_editor_absoluteX = 51;
ConstraintLayout_Layout_layout_editor_absoluteY = 52;
ConstraintLayout_Layout_layout_goneMarginBottom = 53;
ConstraintLayout_Layout_layout_goneMarginEnd = 54;
ConstraintLayout_Layout_layout_goneMarginLeft = 55;
ConstraintLayout_Layout_layout_goneMarginRight = 56;
ConstraintLayout_Layout_layout_goneMarginStart = 57;
ConstraintLayout_Layout_layout_goneMarginTop = 58;
ConstraintLayout_Layout_layout_optimizationLevel = 59;
ConstraintLayout_placeholder_content = 0;
ConstraintLayout_placeholder_emptyVisibility = 1;
ConstraintSet_android_orientation = 0;
ConstraintSet_android_id = 1;
ConstraintSet_android_visibility = 2;
ConstraintSet_android_layout_width = 3;
ConstraintSet_android_layout_height = 4;
ConstraintSet_android_layout_marginLeft = 5;
ConstraintSet_android_layout_marginTop = 6;
ConstraintSet_android_layout_marginRight = 7;
ConstraintSet_android_layout_marginBottom = 8;
ConstraintSet_android_maxWidth = 9;
ConstraintSet_android_maxHeight = 10;
ConstraintSet_android_minWidth = 11;
ConstraintSet_android_minHeight = 12;
ConstraintSet_android_alpha = 13;
ConstraintSet_android_transformPivotX = 14;
ConstraintSet_android_transformPivotY = 15;
ConstraintSet_android_translationX = 16;
ConstraintSet_android_translationY = 17;
ConstraintSet_android_scaleX = 18;
ConstraintSet_android_scaleY = 19;
ConstraintSet_android_rotation = 20;
ConstraintSet_android_rotationX = 21;
ConstraintSet_android_rotationY = 22;
ConstraintSet_android_layout_marginStart = 23;
ConstraintSet_android_layout_marginEnd = 24;
ConstraintSet_android_translationZ = 25;
ConstraintSet_android_elevation = 26;
ConstraintSet_barrierAllowsGoneWidgets = 27;
ConstraintSet_barrierDirection = 28;
ConstraintSet_chainUseRtl = 29;
ConstraintSet_constraint_referenced_ids = 30;
ConstraintSet_layout_constrainedHeight = 31;
ConstraintSet_layout_constrainedWidth = 32;
ConstraintSet_layout_constraintBaseline_creator = 33;
ConstraintSet_layout_constraintBaseline_toBaselineOf = 34;
ConstraintSet_layout_constraintBottom_creator = 35;
ConstraintSet_layout_constraintBottom_toBottomOf = 36;
ConstraintSet_layout_constraintBottom_toTopOf = 37;
ConstraintSet_layout_constraintCircle = 38;
ConstraintSet_layout_constraintCircleAngle = 39;
ConstraintSet_layout_constraintCircleRadius = 40;
ConstraintSet_layout_constraintDimensionRatio = 41;
ConstraintSet_layout_constraintEnd_toEndOf = 42;
ConstraintSet_layout_constraintEnd_toStartOf = 43;
ConstraintSet_layout_constraintGuide_begin = 44;
ConstraintSet_layout_constraintGuide_end = 45;
ConstraintSet_layout_constraintGuide_percent = 46;
ConstraintSet_layout_constraintHeight_default = 47;
ConstraintSet_layout_constraintHeight_max = 48;
ConstraintSet_layout_constraintHeight_min = 49;
ConstraintSet_layout_constraintHeight_percent = 50;
ConstraintSet_layout_constraintHorizontal_bias = 51;
ConstraintSet_layout_constraintHorizontal_chainStyle = 52;
ConstraintSet_layout_constraintHorizontal_weight = 53;
ConstraintSet_layout_constraintLeft_creator = 54;
ConstraintSet_layout_constraintLeft_toLeftOf = 55;
ConstraintSet_layout_constraintLeft_toRightOf = 56;
ConstraintSet_layout_constraintRight_creator = 57;
ConstraintSet_layout_constraintRight_toLeftOf = 58;
ConstraintSet_layout_constraintRight_toRightOf = 59;
ConstraintSet_layout_constraintStart_toEndOf = 60;
ConstraintSet_layout_constraintStart_toStartOf = 61;
ConstraintSet_layout_constraintTop_creator = 62;
ConstraintSet_layout_constraintTop_toBottomOf = 63;
ConstraintSet_layout_constraintTop_toTopOf = 64;
ConstraintSet_layout_constraintVertical_bias = 65;
ConstraintSet_layout_constraintVertical_chainStyle = 66;
ConstraintSet_layout_constraintVertical_weight = 67;
ConstraintSet_layout_constraintWidth_default = 68;
ConstraintSet_layout_constraintWidth_max = 69;
ConstraintSet_layout_constraintWidth_min = 70;
ConstraintSet_layout_constraintWidth_percent = 71;
ConstraintSet_layout_editor_absoluteX = 72;
ConstraintSet_layout_editor_absoluteY = 73;
ConstraintSet_layout_goneMarginBottom = 74;
ConstraintSet_layout_goneMarginEnd = 75;
ConstraintSet_layout_goneMarginLeft = 76;
ConstraintSet_layout_goneMarginRight = 77;
ConstraintSet_layout_goneMarginStart = 78;
ConstraintSet_layout_goneMarginTop = 79;
LinearConstraintLayout_android_orientation = 0;
但是以上的这些个布局属性通过分类我们可以将它们分为一下的几类:
1.ConstraintLayout基本设置宽width和高height的基本属性:
Constraintlayout自身的宽高在wrap_content的情况下可以使用android:minWidth/android:minHeight
android:maxWidth/android:maxHeight来限制自身的大小
ConstraintLayout包含的控件的尺寸大小有以下四种模式:
1.wrap_content 根据内容计算合适的大小 在wrap_content的模式下有一个强制约束
(enforcing constraints (Added in 1.1))1.1以后的版本意味着如果生成的尺寸过大,将会导致约束失效
(从翻译来看说的是约束不会限制生成的尺寸) 如果你仍然
要保持约束性,则可以增加app:layout_constrainedWidth/app:layout_constrainedHeight属性来保持这个约束
例如TextView的文本长度会动态的变化如果过长约束可能就会失效而且会有我们意想不到的视觉效果因此就需要
使用强制约束 来限制TextView的内容区域不会超出我们预期指定的范围里面 当一个控件设为wrap_content时,
再添加约束尺寸是不起效果的。 如需生效,需要设置如下属性为true使用强制约束: app:layout_constrainedWidth=
”true|false” app:layout_constrainedHeight=”true|false” 配合以下属性使用 layout_constraintWidth_min
和layout_constraintHeight_min:设置最小值 layout_constraintWidth_max和layout_constraintHeight_max:设置最大值
也可以使用android自带的属性android:minWidth android:minHeight来进行设置不需要
开启强制约束
2.fixed 固定大小模式 如120dp
3.match_parent:填充满父布局,但是此时设置的约束都失效了(具体可看下面的例子)
(在之前的约束布局版本貌似不允许在其子view中使用match_parent属性,但是在新版本上也是可以用上去的)
但是view设置的margin padding值之类都会是有效的 这种方式不推荐在Constraintlayout中进行使用
4.any size 0dp match_constraint任意模式(控件的最终大小由该控件设置的约束限制来决定可以用这个来代替之前
的match_parent属性) layout_constraintWidth_percent和layout_constraintHeight_percent:设置控件相对于父容器的
百分比大小(1.1.0开始支持) 使用之前需要先设置为百分比模式,然后设置设置宽高值为0~1之间. 设置为百分比模式的
属性: app:layout_constraintWidth_default="percent" app:layout_constraintHeight_default="percent"
对于constraintWidth_default / constraintHeight_default这两个属性有三种模式可以提供选择:
spread: 这种模式下是将控件的宽度或者高度尽量展开填充父布局
wrap: 以view自身内容的大小来决定宽或者高(即包裹内容)
percent: 以设置的约束形成的宽和高的百分比来决定控件自身的宽高 最后还有一种形式使用dimensionRatio的
形式来确定宽和高
2.GuideLine的使用
GuideLine是不会显示在设备上(标记为View.GONE).GuideLine可以是水平的也可以是垂直的
可以通过三种不同的方式定位指南:
指定布局左侧或顶部的固定距离(layout_constraintGuide_begin)
指定布局右侧或底部的固定距离(layout_constraintGuide_end)
指定布局的宽度或高度的百分比(layout_constraintGuide_percent)
看如下的示例:
效果如下图:
自定义Guideline:
对Guideline设置相对位置属性是不生效的,因此当我们想要一个相对于某个view的Guideline时,
约束布局是不能满足我们的要求的。
在Constraintlayout中margin只能设置正值或者0,负值无效
我们之前实现重叠布局时,会通过设置负的margin值实现。
但是在约束布局中,负的margin值不会生效,只能设置0或者大于0的值,小于0也当作0处理。
Guideline是一个不可见的view,
我们可以布局时放置一个不可见的view来作为Guideline的替代品,实现一些特殊布局要求。
例如本例中的按钮B需要一部分重叠在按钮A的上面
同时这种方式可以弥补margin不能设置为负值的不足,而且并没有增加布局层级
3.相对位置属性的使用
ConstraintLayout有一下的一些相对位置属性:
layout_constraintLeft_toLeftOf
layout_constraintLeft_toRightOf
layout_constraintRight_toLeftOf
layout_constraintRight_toRightOf
layout_constraintTop_toTopOf
layout_constraintTop_toBottomOf
layout_constraintBottom_toTopOf
layout_constraintBottom_toBottomOf
layout_constraintBaseline_toBaselineOf
layout_constraintStart_toEndOf
layout_constraintStart_toStartOf
layout_constraintEnd_toStartOf
layout_constraintEnd_toEndOf
以上这些属性,用于设置一个控件相对于其他控件、Guideline或者父容器的位置。
以layout_constraintLeft_toLeftOf为例,其中layout_部分是固定格式,主要的信息包含在下面两部分:
constraintXXX:指定当前控件需要设置约束的属性部分。如constraintLeft表示对当前控件的左边进行约束设置。
toXXXOf:其指定的内容是作为当前控件设置约束需要依赖的控件或父容器(可以理解为设置约束的参照物).
并通过XXX指定被依赖对象用于参考的属性。如toLeftOf="parent" :表示当前控件相对于父容器的左边进行约束设置。

4.Margin边距的使用
在ConstraintLayout中,控件除了可以设置普通的边距属性,
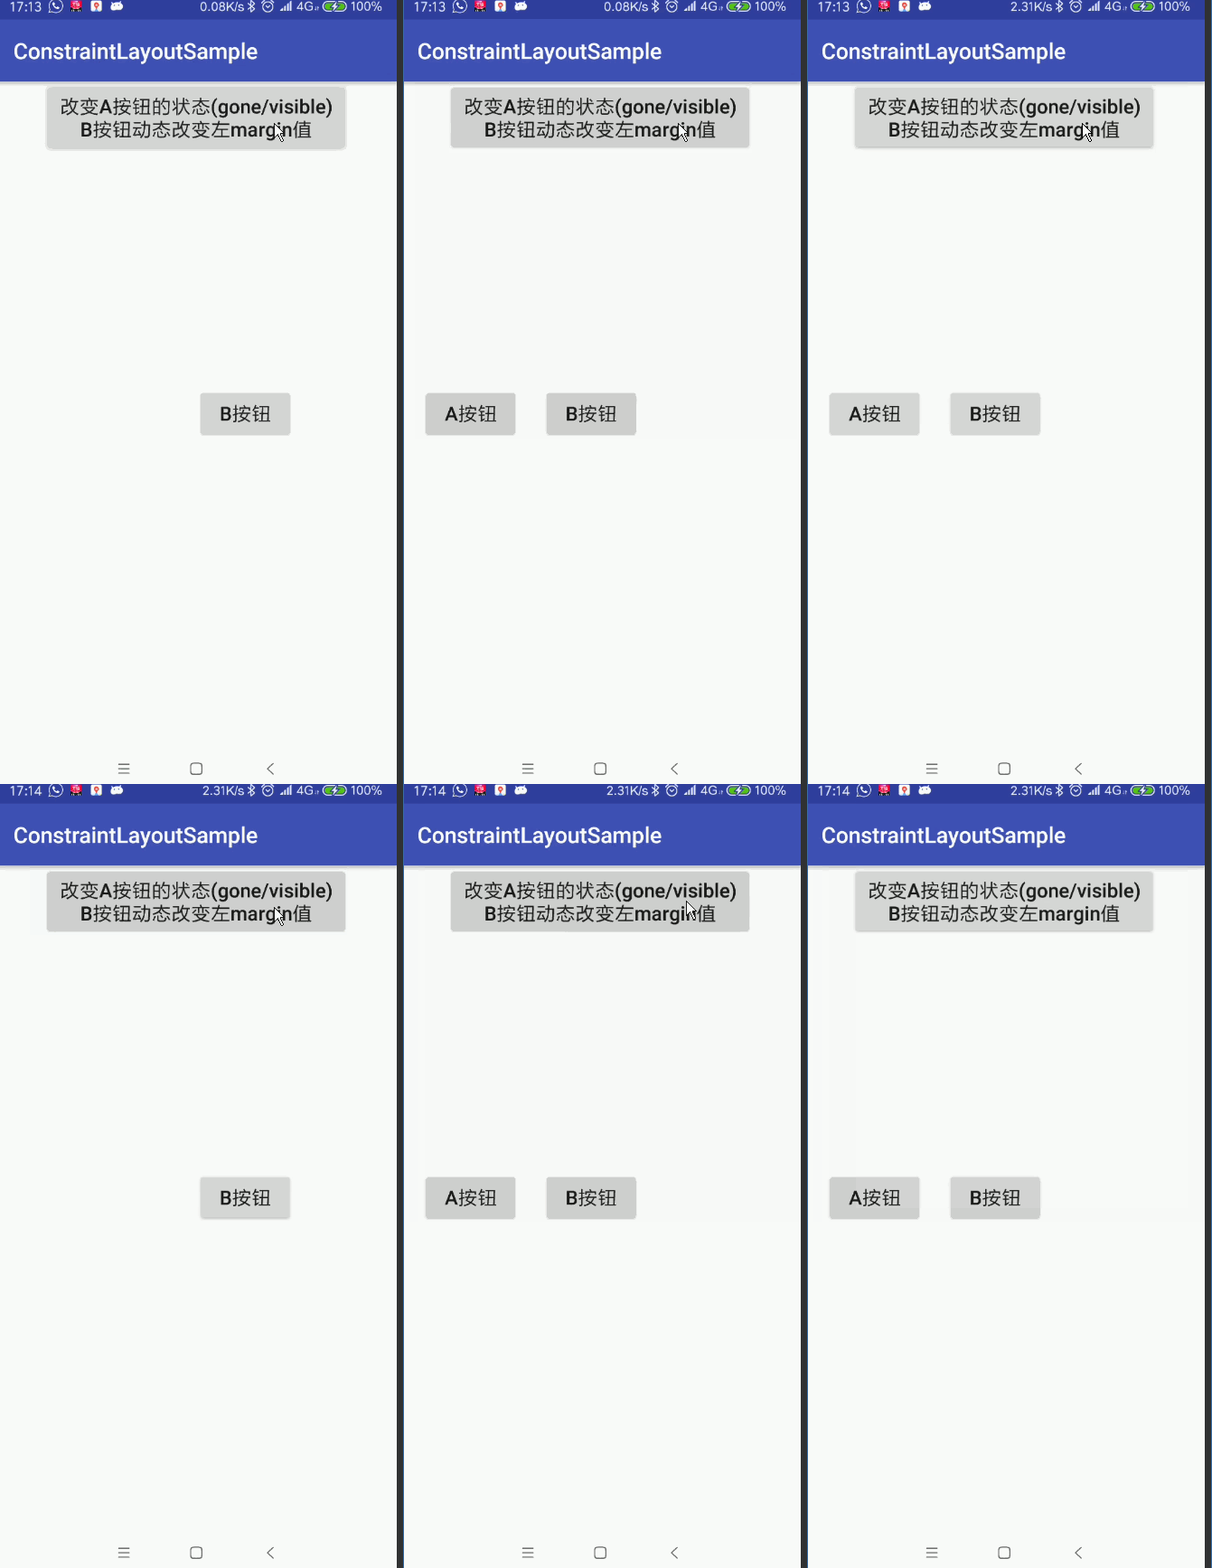
还可以设置当控件依赖的控件GONE之后的边距属性。
即我们可以理解可以根据被依赖控件是否GONE的状态,
设置两种边距值。分别通过如下属性进行设置:
    普通边距属性
    android:layout_marginStart
    android:layout_marginEnd
    android:layout_marginLeft
    android:layout_marginTop
    android:layout_marginRight
    android:layout_marginBottom
    被依赖控件GONE之后的边距属性
    layout_goneMarginStart
    layout_goneMarginEnd
    layout_goneMarginLeft
    layout_goneMarginTop
    layout_goneMarginRight
    layout_goneMarginBottom
另外要注意:
可见性这个属性大家应该很熟悉,但是约束布局的可见性属性和其它布局相比,存在以下区别:
 当控件设为GONE时,被认为尺寸为0。可以理解为布局上的一个点。
 而传统的view设置gone时该view会移除出这个布局容器
 若GONE的控件对其它控件有约束,则约束保留并生效,但所有的边距(margin)会清零。
 传统情况下如果GONE控件对其它控件有约束的话 会提示找不到该控件view
5.bias 居中和偏移
偏移:
在设置控件的居中属性之后,通过偏移属性可以设置让控件更偏向于依赖控件的某一方,
偏移设置为0~1之间的值。

相应属性:
    layout_constraintHorizontal_bias // 水平偏移
    layout_constraintVertical_bias   // 垂直偏移

6.比例Ratio的使用
控件可以定义两个尺寸之间的比例,目前支持宽高比。 前提条件是至少有一个尺寸设置为0dp, 然后通过l
ayout_constraintDimentionRatio属性设置宽高比。 设置方式有以下几种: 直接设置一个float值,表示宽高比 以
” width:height”形式设置 通过设置前缀W或H,指定一边相对于另一边的尺寸,如”H, 16:9”,高比宽为16:9 如果
宽高都设置为0dp,也可以用ratio设置。这种情况下控件会在满足比例 约束的条件下,尽可能填满父布局。
对于以上的情况是宽w和高h至少有一边的长度是确定的因此我们可以使用 1.直接设置一个float值 确定宽和
高的长度的比值 2.使用W:H的形式确定宽和高的比值 对于另外一种情况就是宽w和高h都是0dp(match_constraint)
的情况 在这种情况下,系统会使用满足所有约束条件和比率的最大尺寸。 如果需要根据一个维度的尺寸去约束另
一个维度的尺寸。 则可以在比率值的前面添加 W 或者 H 来分别约束宽度或者高度。 当宽和高都为match_constraint
即0dp时有两种情况: 约束方向为x轴时(宽为parent): w, 1:2 高比宽; h, 2:1 宽比高 约束方向为y轴时(高为parent): w,
1:2 宽比高; h, 2:1 高比宽
7.chains链条的使用
Chains 为同一个方向(水平或者垂直)上的多个子 View 提供一个类似群组的概念。其他的方向则可以单独控制。
Chain 链是一种特殊的约束让多个 chain 链连接的 Views 能够平分剩余空间位置。 在 Android 传统布局特性里面
最相似的应该是 LinearLayout中的权重比 weight , 但 Chains 链能做到的远远不止权重比 weight 的功能。
chain head:最左边或最上边的控件为链头,链的属性由链头控制 我们可以对链头设置整个链的样式style:
spread:Chain 链的默认模式就是 spread 模式,它将平分间隙让多个 Views布局到剩余空间
spread inside:spread inside 模式,它将会把两边最边缘的两个 View 到外向父组件边缘的距离去除, 然后让剩
余的 Views 在剩余的空间内平分间隙布局。 packed:packed,它将所有 Views 打包到一起不分配多余的间隙
(当然不包括通过margin 设置多个 Views 之间的间隙),然后将整个组件组在可用的剩余位置居中 我们通过
设置链头的bias来是整个链的位置进行指定的偏移
8.Barrier的使用
Barrier是一个虚拟的辅助控件,它可以阻止一个或者多个控件越过自己,就像一个屏障一样。
当某个控件要越过自己的时候,Barrier会自动移动,避免自己被覆盖

当我们创建布局的时候,有时会遇到布局会随着本地化变化的情况,比如下面的例子:
    我们有三个TextViews: 左边 textView1 和 textView2,右边 textView3。
    textView3 约束在 textView1 的右边,效果也符合我们的预期。
    但是当需要支持多语言的时候事情就变得复杂了。如果我们添加英语就出现了问题,
    因为在中文里面textView1(阿根廷)的文字是长于textView2(美国)的,
    但是在英语中却是textView2(美国)的文字比textView1(阿根廷)长

    这里的问题在于textView3仍然是相对于textView1的,所以textView2直接插入了textView3中

    比较直接的解决办法是使用TableLayout表格布局,
    或者把 textView1 & textView2 包裹在一个垂直的,
    android:layout_width="wrap_content" 的 LinearLayout中。
    然后让textView3约束在这个LinearLayout的后面。
    但是我们有更好的办法:Barriers。
9.环形布局circular position
圆形定位(Circular Positioning)可以让一个控件以另一个控件的中心为中心点, 来设置其相对与该中心点的距离和角度。
可以设置的属性有: layout_constraintCircle:引用另一个控件的 id。 layout_constraintCircleRadius:到另一个控件中心
的距离。 layout_constraintCircleAngle:控件的角度(顺时针,0 - 360 度)。
例如常见的消息小红点,或者各种用传统的布局不易实现的布局,都可以使用环形定位来实现
10. 组Group的使用
使用组,您可以将某些视图分组在一起。不要把这与Android中的普通ViewGroups混淆。
ConstraintLayout中的一个组仅包含对视图ID的引用,而不将组合中的视图嵌套。
这样一来,您可以设置组中控件的可见性仅通过设置组的可见性就行了,
而无需设置每个视图的可见性。这对于诸如错误屏幕或加载屏幕的事情是有用的
,其中一些元素需要一次更改其可见性。
例如我们可以使用Group的特性实现我们常见的页面多状态视图的加载(加载状态 错误状态 加载成功状态)
注意多个组 Mutiple groups
多个组Group可以引用相同的view
在这种情况下,XML声明顺序将定义应用view的最终的可见性状态(view的可见性状态将由最后声明的组Group决定)。
11. PlaceHolder的使用
Placeholder顾名思义,就是用来一个占位的东西,它可以把自己的内容设置为ConstraintLayout内的其它view。
因此它用来写布局的模版,也可以用来动态修改UI的内容。

用作模版:
我们用Placeholder创建一个名为placeholder_template1.xml的模版

我们把刚才定义的模版include到真正的布局文件中,并且在这个布局文件中添加真实的控件,
注意这里的控件无需添加任何约束,因为它们的位置是由Placeholder决定的。

还有一点就是模版要放在被引用的所有控件之前

这就是PlaceHolder的使用场景之一模版功能
//引入模版
模版如下:
12.ConstraintSet的使用
在ConstraintLayout出来之前,就是在LinearLayout、RelativeLayout时代,如果想要在代码中动态修改布局中控件
的尺寸、位置、与其他控件的相对关系等,我们都用的是LayoutParams,在刚接触ConstraintLayout的时候,我也
以为仍然是用LayoutParams,结果发现有ConstraintSet这么一个好东西,
ConstraintSet是用来通过代码管理布局属性的集合对象,可以通过这个类来创建各种布局约束,然后把创建好的
布局约束应用到一个 ConstraintLayout 上,可以通过如下几种方式来创建 ConstraintSet:
手工创建:
c = new ConstraintSet(); c.connect(….);
从 R.layout.* 对象获取
c.clone(context, R.layout.layout1);
从 ConstraintLayout 中获取
c.clone(clayout);
然后通过 applyTo 函数来应用到ConstraintLayout 上
我们以从xml文件获取ConstraintSet为例,如下动图效果:
代码如下:
public class MyConstraintLayout2 extends ConstraintLayout implements View.OnClickListener {

    private ConstraintSet set1 = new ConstraintSet();
    private ConstraintSet set2 = new ConstraintSet();

    public MyConstraintLayout2(Context context) {
        super(context);
        init();
    }

    public MyConstraintLayout2(Context context, AttributeSet attrs) {
        super(context, attrs);
        init();
    }

    public MyConstraintLayout2(Context context, AttributeSet attrs, int defStyleAttr) {
        super(context, attrs, defStyleAttr);
        init();
    }

    private void init() {
       inflate(getContext(),R.layout.layout_constraintset,this);

       this.findViewById(R.id.btn_apply).setOnClickListener(this);
       this.findViewById(R.id.btn_reset).setOnClickListener(this);

       set1.clone(this);

       set2.clone(getContext(),R.layout.layout_constraintset2);
    }

    @Override
    public void onClick(View v) {
        TransitionManager.beginDelayedTransition(this);

        switch (v.getId()) {
            case R.id.btn_apply:
                set2.applyTo(this);
                break;
            case R.id.btn_reset:
                set1.applyTo(this);
                break;
        }
    }
}
以上就是ConstraintLayout在开发中常见的用法了,ConstraintLayout其可以有效的减少我们布局的嵌套层级从而避免布局过渡绘制的
问题,因此建议大家在开发中使用ConstraintLayout来代替传统的安卓布局.


