目标跟踪——OTB平台的Python版tracker使用
注意:由于OTB不像VOT那样有Python代码接口,所以我是用Pysot测试平台实现OTB评测功能。
方法:先安装Pysot在系统上,Windows和Linux(Ubuntu发行版)都可以,我是用Windows系统做的。然后在网上搜集其他trakcers的评测结果,由于都是.mat格式的文件,要在Pysot里使用就得转化成.txt格式。本人方法如下:
1. .mat文件转换成.txt文件
import scipy.io as scio
import pandas as pd
import numpy as np
import os
import h5py
import hdf5storage

# ------------------------------
# 1. .mat文件转换成.txt文件
# ------------------------------
# 注意:下面的代码根据不同类型的.mat有所不同  可输出.mat中的keys查看
path_matfile = "E:\\0_OTB_benchmark\\SiamRPN\\SiamRPN_OTB100"
outpath = "E:\\0_OTB_benchmark\\SiamRPN\\SiamRPN_OTB100_txt"
all_matfile_list = os.listdir(path_matfile)

each_matfile_path = [os.path.join(path_matfile, matfile) for matfile in all_matfile_list]
videos_name_txt = [video_name.replace('_SIAMRPN', '').replace('.mat', '').capitalize() + '.txt' for video_name in all_matfile_list]

for i, matfile_path in enumerate(each_matfile_path):
    # data = scio.loadmat(matfile_path)  # 有些类型的mat文件不能读取
    data = hdf5storage.loadmat(matfile_path)  # 兼容mat文件类型较多
    # 下面两行有些.mat不同
    track_result = data['results']  # 有些tracker的键值为'result'
    track_result = track_result[0][0][0][0][0]  # 有些为track_result[0][0][0][1]
    print(videos_name_txt[i])
    np.savetxt(os.path.join(outpath, videos_name_txt[i]), track_result, delimiter=',', fmt='%d')

# -----------------------
# 2. 文件重命名
# -----------------------
# 有些trackers在OTB100或OTB50中生成的是小写字母开头的跟踪结果,需要把首字母转化成大写字母,以匹配otb100.json或otb50.json(因为我下载的.json文件视频的首字母都是大写的)
# 代码依实际情况变化
src_path = "E:\\0_OTB_benchmark\\Pysot\\pysot-toolkit\\result\\Results_OTB100\\DaSiamRPN"
dst_path = "E:\\0_OTB_benchmark\\Pysot\\pysot-toolkit\\result\\Results_OTB100\\DaSiamRPN_upper"
all_filename = os.listdir(src_path)

all_filename_path_old = [os.path.join(src_path, filename) for filename in all_filename if '.txt' in filename]
all_filename_path_new = [os.path.join(dst_path, filename.capitalize()) for filename in all_filename]  # .capitalize()将字符串首字母变为大写

for (old_file, new_file) in zip(all_filename_path_old, all_filename_path_new):
    os.renames(old_file, new_file)  # 好像把原来的文件夹覆盖掉了,先拷贝一份,以防万一

# 从OTB100中转移OTB50数据
src_otb100_path = "E:\\0_OTB_benchmark\\Pysot\\pysot-toolkit\\result\\Results_OTB100"
dst_otb50_path = "E:\\0_OTB_benchmark\\Pysot\\pysot-toolkit\\result\\Results_OTB50"

template_tracker = os.path.join(dst_otb50_path, 'Initial_Method')
template_videos = os.listdir(template_tracker)

all_trackername = os.listdir(src_otb100_path)
src_trackers = [os.path.join(src_otb100_path, src_tracker) for src_tracker in all_trackername]

for tracker_file in all_trackername:
    if tracker_file not in os.listdir(dst_otb50_path):
        os.mkdir(os.path.join(dst_otb50_path, tracker_file))

print(template_videos)
print(all_trackername)

for i, tracker in enumerate(src_trackers):
    each_tracker_videos = os.listdir(tracker)
    for video in template_videos:
        shutil.copyfile(os.path.join(tracker, video), os.path.join(dst_otb50_path, all_trackername[i], video))
我将一些转化好的OTB.txt文件传到百度云上了,还有json文件。
注意:OTB50有些问题,大家先用OTB100测试
https://pan.baidu.com/s/1cl_7KabuKSUqVIjHysgPJA
提取码:5ic7
2. 使用过程
参考github上的仓库:这个仓库不是我的。
https://github.com/StrangerZhang/pysot-toolkit
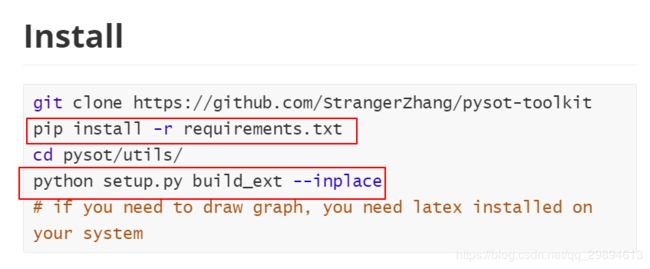
- 下载后的文件夹下有这些文件

先按照README里面将的测试一些trackers
注意: 我只测试了OTB,其他的没有测试,不敢保证可以用。
将从百度云里下载的OTB100_trackers放到一个文件夹里。
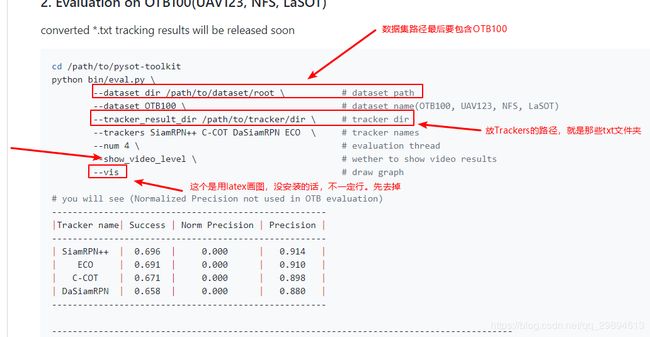
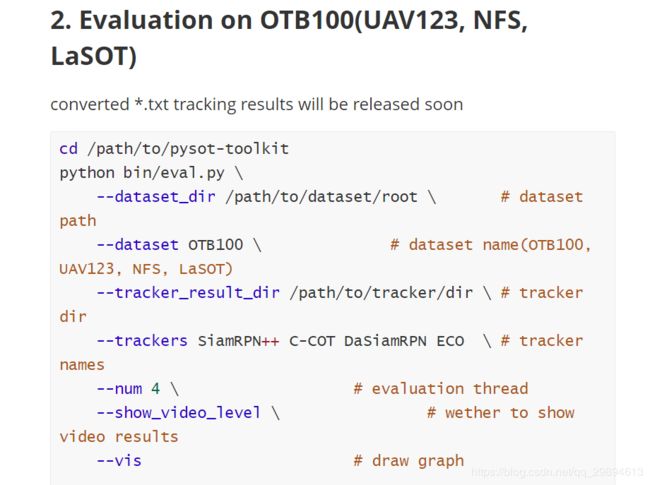
下面是我在windows下的执行命令:
python eval.py --dataset_dir E:\\0_OTB_benchmark\\Pysot\\dataset\\OTB100 --dataset OTB100 --tracker_result_dir E:\\0_OTB_benchmark\\Pysot\\pysot-toolkit\\result\\Results_OTB100 --trackers CFNet DaSiamRPN DeepSRDCF --num 4 --show_video_level --vis
# 注意:假如没有安装latex软件的话,先不要加--vis
2020.1.12更新
安装latex软件
注意:用conda或者pip安装latex包没有用,不知道为什么,需要额外安装一个Tex
- (windows系统)
注意:以下本人安装完latex软件后,亲测使用Matplotlib可以画出OTB下的评测图。
1. 下载MiKTeX
官网下载地址:https://miktex.org/download
按照正常软件傻瓜式安装就行了。
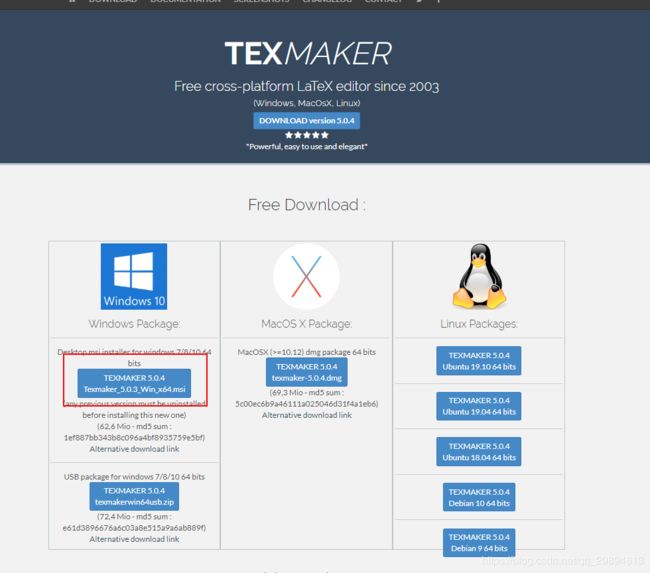
2. 下载TexMaker
官网下载地址:https://www.xm1math.net/texmaker/
按照正常软甲傻瓜式安装
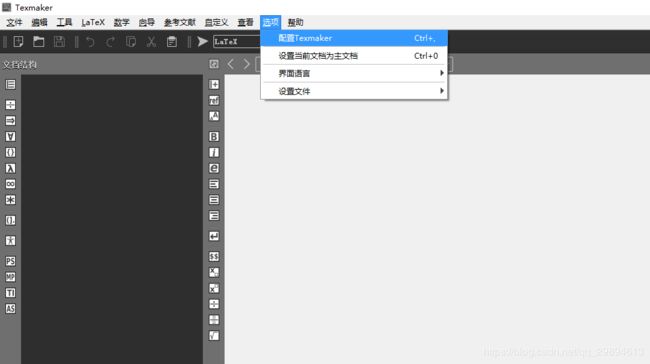
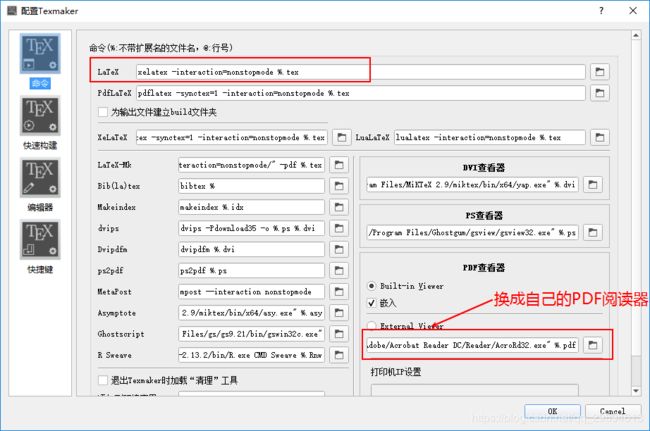
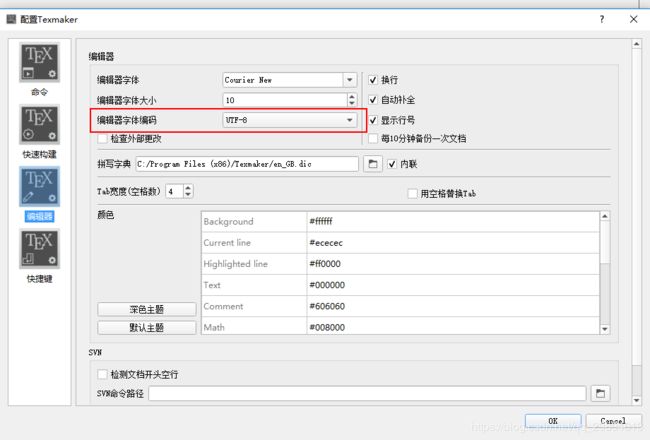
稍微配置一下TexMaker软件:
接下来重启一下电脑,然后运行python程序看看有没有画出来图。
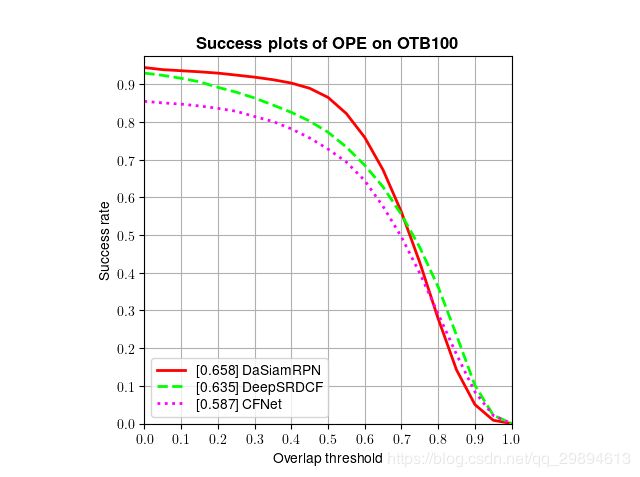
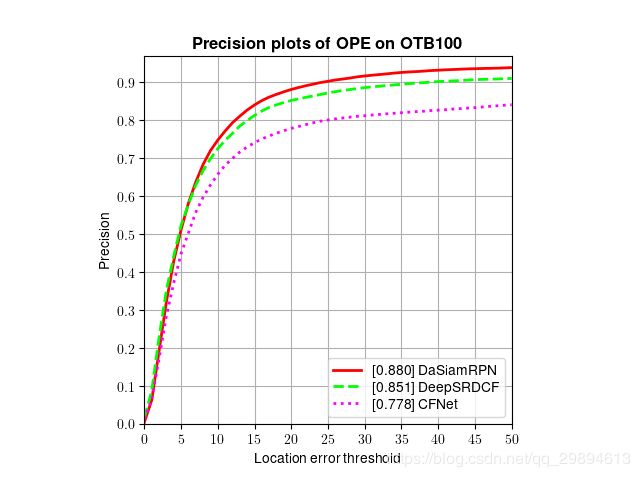
python eval.py --dataset_dir E:\\0_OTB_benchmark\\Pysot\\dataset\\OTB100 --dataset OTB100 --tracker_result_dir E:\\0_OTB_benchmark\\Pysot\\pysot-toolkit\\result\\Results_OTB100 --trackers CFNet DaSiamRPN DeepSRDCF --num 4 --show_video_level --vis
显示的图形:
- Ubuntu系统
MikTex下载地址:https://miktex.org/download#unx
安装步骤:
Install on Linux
MiKTeX is available for selected Linux distributions.
Installing MiKTeX on Linux involves these steps:
Register the GPG keywith which MiKTeX installation packages and metadata is signed. The key ID is:D6BC243565B2087BC3F897C9277A7293F59E4889
sudo apt-key adv --keyserver hkp://keyserver.ubuntu.com:80 --recv-keys D6BC243565B2087BC3F897C9277A7293F59E4889
Register the installation sourcewhich contains the MiKTeX installation package. The installation source depends on the Linux distribution version.
Ubuntu 18.04 LTS (Bionic Beaver):
echo "deb http://miktex.org/download/ubuntu bionic universe" | sudo tee /etc/apt/sources.list.d/miktex.list
Ubuntu 16.04 LTS (Xenial Xerus):
echo "deb http://miktex.org/download/ubuntu xenial universe" | sudo tee /etc/apt/sources.list.d/miktex.list
- Use the package management system to
install MiKTeX.
sudo apt-get update
sudo apt-get install miktex
- Finish the setup.
Before you can use MiKTeX, you have to finish the setup. You can use MiKTeX Console or, if you prefer the command line,miktexsetup.
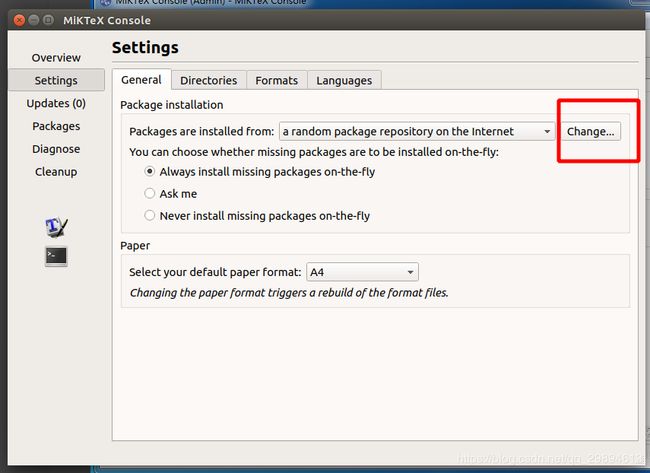
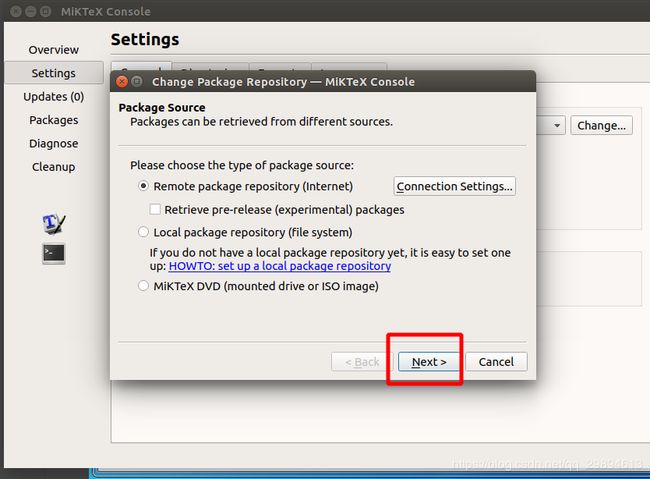
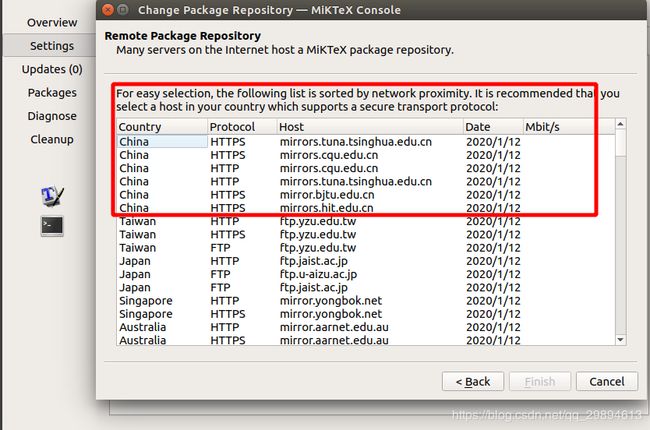
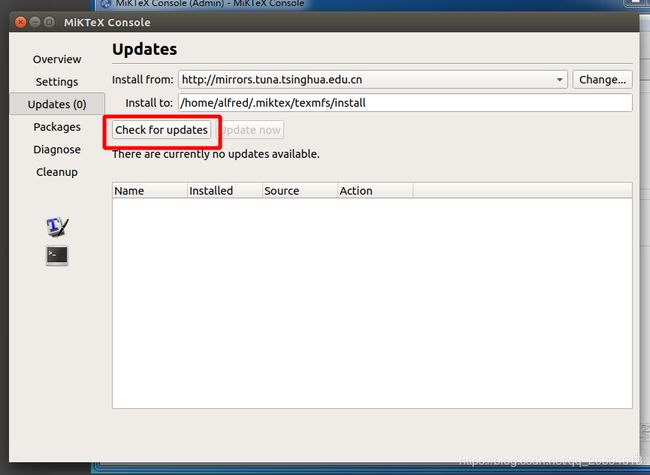
Start MiKTeX Console to finish the setup
Search&click the MiKTeX Console icon to start MiKTeX Console:
注意:下面的图片是windows下面的和ubuntu中的类似
找到MikTex Console软件,然后执行下面的设置: