教程说明
如何初始化一个redux Store
如何使用action+reducer来管理state
如何在react-native里更新ui
这个例子可能不是很具体,但是对于理解用法比较好(目前看到的例子都是counter)
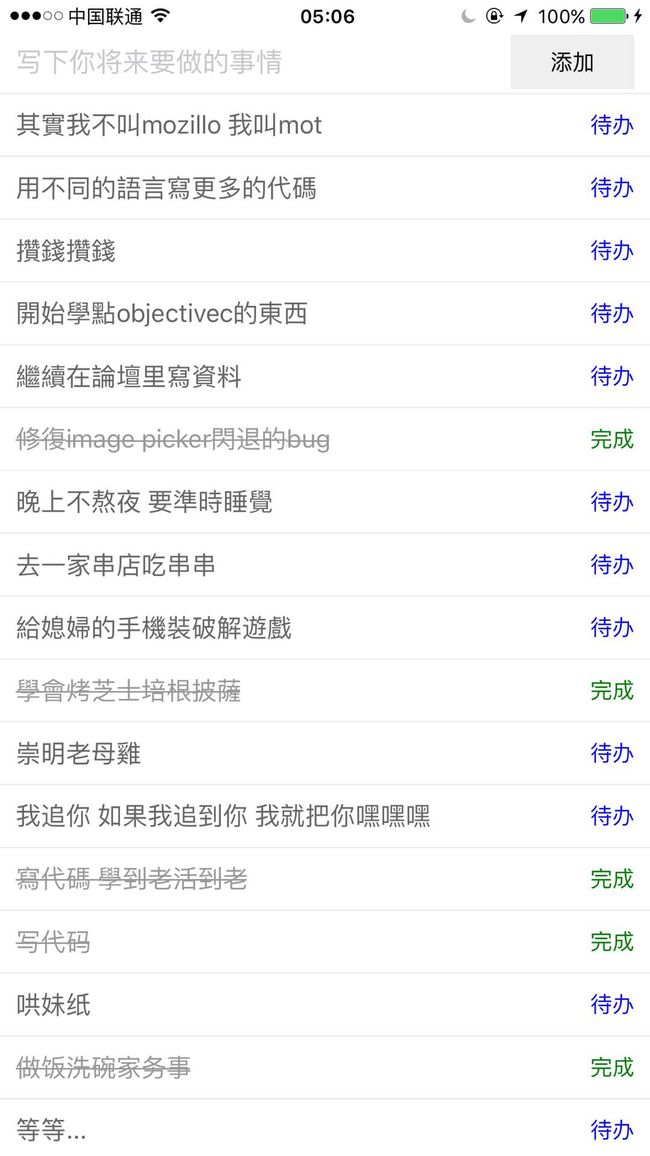
SCREENSHOT
PACKAGE.JSON
一些版本的东西(因为react-redux暂时用3.x,原因看 this React Native issue)
PACKAGE.JSON
一些版本的东西(因为react-redux暂时用3.x,原因看 [this React Native issue](https://github.com/facebook/react-native/issues/2985))
{
    "name": "TodoList",
    "version": "0.0.1",
    "private": true,
     "scripts": {
         "start": "node_modules/react-native/packager/packager.sh"
   },
 "dependencies": {
     "normalizr": "^1.4.0",
    "react-native": "^0.14.2",
     "react-redux": "^3.0.1",
     "redux": "^3.0.4",
     "redux-thunk": "^1.0.0"
}}
目录结构
.
├── index.ios.js
├── index.android.js
└── src
├── actions //存放Actions
├── containers //UI && Component
└── reducers //存放Reducers
首先index.io.js改下入口:
/**
* Sample React Native App
* https://github.com/facebook/react-native
*/
'use strict';
import React from 'react-native';
import App from './src/containers/App';
var {
AppRegistry,
} = React;
var TodoList = React.createClass({
render: function() {
return (
把我们的入口设置成 App.js.
现在来创建App.js文件,位于./src/containers/App.js :
import React, { Component, View, Text } from 'react-native';
import { Provider } from 'react-redux/native';
import { createStore, applyMiddleware, combineReducers } from 'redux';
import thunk from 'redux-thunk';
import * as reducers from '../reducers';
import BaseApp from './BaseApp';
//apply thunk
const createStoreWithThunk = applyMiddleware(thunk)(createStore);
const reducer = combineReducers(reducers);
const store = createStoreWithThunk(reducer);
export default class App extends Component {
render() {
return (
{ () =>
);
}
}
先来解释这个地方具体做什么事,这里把reducers收集起来了,然后打包成一个叫做Store的东西,这个Store就是我们后面用到的所有state合集,具体不清楚,可以选择直接console.log(Store),发现Store有这些method:
dispatch: (action)
getState: getState()
replaceReducer: replaceReducer(nextReducer)
subscribe: subscribe(listener)
具体是做什么用,后面说明。
关于reducers,其实就是定义了我们整个state的数据结构的一个东西。就像我们要做一个todoList,它最基本的数据结构就是:
{
    todos: [
        { text: "吃饭" , selected: false },
        { text: "上班" , selected: false },
        { text: "写代码" , selected: true },
        ...
    ]
}
那么我们的App里,reducer就需要返回这个,所以简单的说,你就理解成:
var reducer = (condition) => {
    //根据条件做了一些羞羞的事情
    a();
    b();
    c();

    return {
        todos: [
            { text: "吃饭" , selected: false },
            { text: "上班" , selected: false },
            { text: "写代码" , selected: true },
            ...
        ]
    }
}
就好了,具体如何做,看我们后面解释。
所以这里 App.js里面,我们就拿到了后面定义的所有state的读取的权力。这里有行代码:
const createStoreWithThunk = applyMiddleware(thunk)(createStore);
关于thunk是什么 说简单点,就是给我们的代码提供了异步的功能,也就是在promise里还可以同时做很多操作,比如更新列表,弹出提醒等等,详见后面。
{ () =>
我们现在通过Provider把Store递交给了真正的App入口,也就是开始渲染界面的东西: BaseApp.js。
现在来创建BaseApp.js文件,文件位于 ./src/containers/BaseApp.js:
import React, {
Component,
View,
Text,
Navigator,
TabBarIOS,
} from 'react-native';
import { bindActionCreators } from 'redux';
import { connect } from 'react-redux/native';
import * as actions from '../actions';
import List from './List';
@connect(state => ({
    state: state
}))
export default class BaseApp extends Component {
constructor(props) {
super(props);
this.initialRoute = {
name: 'List',
component: List,
}
}
configureScene() {
return Navigator.SceneConfigs.VerticalDownSwipeJump;
}
renderScene(route, navigator) {
let Component = route.component;
const { state, dispatch } = this.props;
const action = bindActionCreators(actions, dispatch);
return (
这是一个简单的 Navigator,关于Navigator的用法,请看我上一个帖子。
但是唯一区别的地方在于:
@connect(state => ({
state: state
}))
这是一个es6的语法,叫es7.decorators,具体操作是把上一个App入口传入的Store里的state取到,然后作为props在BaseApp里面使用。
既然说到了state,那就先去创建一个reducer吧,先定义一下初始的state结构:
创建todo.js 文件位于 ./src/reducers/todo.js:
const defaultTodos = [
                    {text: '写代码'},
                    {text: '哄妹纸'},
                    {text: '做饭洗碗家务事'},
                    {text: '等等...'}
                ];

module.exports = function(state, action) {
    state = state || {
        type: 'INITIAL_TODOS',
        todos: []
    }

    return {
        ...state
    }
}
这里定义了默认的todoList结构,然后返回这个函数给了exports。
为了方便import,我们在这个目录下再创建一个index.js
创建index.js 文件位于 ./src/reducers/index.js:
module.exports.todo = require('./todo');
导出为todo就好了,这个todo就是一个整个state数据结构里的一部分了。
这里看到了 type: 'INITIAL_TODOS' ,也就是这个操作就是初始化todos,那么加载出来defaultTodos怎么写呢:
修改todo.js 文件位于 ./src/reducers/todo.js:
import React, {
    ListView
} from 'react-native';

const defaultTodos = [
                    {text: '写代码'},
                    {text: '哄妹纸'},
                    {text: '做饭洗碗家务事'},
                    {text: '等等...'}
                ];

module.exports = function(state, action) {
    state = state || {
        type: 'INITIAL_TODOS',
        todos: []
    }

    switch(action.type) {
        case 'LOAD_TODOS': {
            var dataSource = new ListView.DataSource({ rowHasChanged: (r1, r2) => r1 !== r2 });
            dataSource = dataSource.cloneWithRows(defaultTodos);
            return {
                ...state,
                ...action,
                todos: defaultTodos,
                dataSource,
            }
        }

    return {
        ...state
    }
}
这里给action的type开始做判断了,action是我们的一些具体操作,比如 loadTodos就是加载todoList数据,这里LOAD_TODOS先创建一个ListView用于后面渲染todoList的内容,
然后把初始数据给拷贝给了ListView,然后用 ...展开方法,把state,action,todos,dataSource都给返回了。
现在要创建我们的action了,这里记住reducer只是单纯的负责返回数据结构,并不能做抓取数据/更新/修改/删除数据的操作,CRUD这些操作都是在action中进行。
创建TodoActions.js文件 文件位于 ./src/actions/TodoActions.js:
const LOAD_TODOS = 'LOAD_TODOS';
const SELECT_TODO = 'SELECT_TODO';
const APPEND_TODO = 'APPEND_TODO';

var loadTodos = () => {
    return (dispatch) => {
        setTimeout(() => {
            dispatch({ type: LOAD_TODOS });
        }, 1000);

        // fetch().then() => dispatch in promise
    }
}

var appendTodo = (text, cleanUIState) => {
    if(text) {
        if(cleanUIState)
            cleanUIState();
        return {
            type: APPEND_TODO,
            todo: { text },
        }
    }

    return ;
}

var selectTodo = (selected) => {
    return {
        type: SELECT_TODO,
        selected
    }
}

module.exports = {
    loadTodos,
    appendTodo,
    selectTodo,
}
同理为了方便 import ,我们创建index.js文件 文件位于 ./src/actions/index.js:
//exports很多对象时候的另一种写法而已
var todo = require('./TodoActions');
var actions = {};
Object.assign(actions, todo);
module.exports = actions;
这里我定义了三个常亮跟三个方法,三个方法分别用于加载todo任务,追加todo任务,以及完成/撤销todo任务,然后再提交给exports,这里千万别忘了module.exports。
var loadTodos = () => {
return (dispatch) => {
setTimeout(() => {
dispatch({ type: LOAD_TODOS });
}, 1000);
    // fetch().then() => dispatch in promise
}
}
这里是做了一个获取数据的操作,我给它延时1s操作,就是为了模拟从本地读取或者从服务器抓取数据,这些因为是异步操作,再回到前面那个thunk的middleware,就是在这里起作用了。
我们在react-native中就可以直接用 loadTodos() 来触发初始化todoList的操作了。
这里看最后的 dispatch({ type: LOAD_TODOS });
这个dispatch就会把我们的数据传递到reducer里的 module.exports = function(state, action) 在./src/reducers/todo.js打印那个console.log(action)就会显示我们这里dispatch的
{ type: LOAD_TODOS }
如果我们换成
{ type: LOAD_TODOS, defaultTodos: [{text: '我在dispatch数据给reducer'}] }
试试看,你会看到什么。。。
再回到我们的BaseApp里的
renderScene(route, navigator) {
let Component = route.component;
const { state, dispatch } = this.props;
const action = bindActionCreators(actions, dispatch);
return (
state,dispath 都来自于我们的Store,
然后bindActionCreators把我们定义的所有的actions通过dispatch的参数来关联到reducer的返回,也就是state。于是我们action中写的所有method,都可以通过action.type来reducer中找到对应的返回的state!
最后都传递给我们的组件的Props。所以这里发生了一个事情,就是在所有通过Navigator导航的Component里,我们都可以操作全局的state。
现在来完善我们的 reducers.js:
todo 文件位于 ./scr/reducers/todo.js:
import React, {
    ListView
} from 'react-native';

const defaultTodos = [
                    {text: '写代码'},
                    {text: '哄妹纸'},
                    {text: '做饭洗碗家务事'},
                    {text: '等等...'}
                ];

module.exports = function(state, action) {
    state = state || {
        type: 'INITIAL_TODOS',
        todos: []
    }

    switch(action.type) {

        case 'LOAD_TODOS': {
            var dataSource = new ListView.DataSource({ rowHasChanged: (r1, r2) => r1 !== r2 });
            dataSource = dataSource.cloneWithRows(defaultTodos);

            return {
                ...state,
                ...action,
                todos: defaultTodos,
                dataSource,
            }
        }

        case 'APPEND_TODO': {
            var todos = [ ...state.todos ];
            todos.unshift(action.todo);
            dataSource = state.dataSource.cloneWithRows(todos);
            return {
                ...state,
                ...action,
                todos,
                dataSource
            }
        }

        case 'SELECT_TODO': {
            var selected = action.selected;
            var todos = [ ...state.todos ];
            var index = todos.indexOf(selected);

            if(todos[index].selected) {
                todos[index] = { text: todos[index].text }
            }else {
                todos[index] = { text: todos[index].text, selected: true }
            }

            dataSource = state.dataSource.cloneWithRows(todos);
            return {
                ...state,
                ...action,
                todos,
                dataSource
            }
        }
    }

    return {
        ...state
    }
}
会看到这里都在用 ...展开,这样可以创建一个新的对象,而旧的对象不会发生改变,这个的目的是为了另一个功能,具体这里先不解释了。
现在已经有了Navigator,有个操作state的三个action,有了可以返回完整数据结构的reducer,现在只需要写一个List的页面来载入,添加,完成/撤销todo任务就可以了。
创建文件 List.js 文件位于 ./src/containers/List.js:
import React, {
Component,
View,
ListView,
TextInput,
Text,
Image,
Dimensions,
TouchableOpacity,
ActivityIndicatorIOS,
StyleSheet,
} from 'react-native';
const fullWidth = Dimensions.get('window').width;
const styles = StyleSheet.create({
container: {
flex: 1,
marginTop: 20,
},
todoRow: {
paddingLeft: 10,
paddingRight: 10,
flexDirection: 'row',
alignItems: 'center',
justifyContent: 'space-between',
width: fullWidth,
height: 40,
borderBottomColor: '#EEEEEE',
borderBottomWidth: 1,
},
todoText: {
fontSize: 16,
color: '#666666',
},
todoTextDone: {
fontSize: 16,
color: '999999',
textDecorationColor: '#999999',
textDecorationLine: 'line-through',
textDecorationStyle: 'solid'
},
success: {
color: 'green',
},
pendding: {
color: 'blue',
},
inputText: {
height: 40,
width: (fullWidth-20)*0.8,
borderBottomColor: '#EEEEEE',
borderBottomWidth: 1,
},
button: {
alignItems: 'center',
justifyContent: 'center',
width: (fullWidth - 20)*0.2,
backgroundColor: '#EEEEEE',
padding: 10,
}
});
export default class List extends Component {
constructor(props) {
super(props);
this.state = {
text: null,
placeholder: '写下你将来要做的事情'
}
}
componentDidMount() {
const { loadTodos } = this.props.actions;
loadTodos();
}
appendTodoList() {
const text = this.state.text;
const { appendTodo } = this.props.actions;
appendTodo(text);
this.setState({ text: null });
}
renderHeader() {
return (
this.setState({ text })}
style={styles.inputText} />
添加
);
}
renderRow(dataRow) {
const { selectTodo } = this.props.actions;
return (
{dataRow.text}
selectTodo(dataRow)}>
{ dataRow.selected ? 完成 : 待办 }
)
}
renderList() {
const { todo } = this.props.state;
return (
{ todo.type != 'INITIAL_TODOS' ? this.renderList() : this.renderIndicator() }
);
}
}
目前就写这么多了,可能会有一些错误的地方,后面可以跟帖补上。
黑色斜体高亮部分是完整的代码,拷贝或者改动都可以用的。代码地址