分布式定时任务 XXL-Job 简单教程
一、前言
之前在做一个重构项目时,有一个需求是:需要将老系统数据的数据同步到新系统。因为数据量不是很大,存量数据我们直接一次性同步完。但当时新系统还未完全使用,我们需要将老系统的增量数据实时同步到新系统,我们定的方案是使用定时任务。
二、@Scheduled 注解定时任务
一开始是使用@Scheduled注解做的同步,我们是Springboot项目。用这个注解非常的简单。只需要在启动类上加上@EnableScheduling,标识支持定时任务。
@Scheduled 定时任务代码示例
1、创建Springboot项目
<?xml version="1.0" encoding="UTF-8"?>
<project xmlns="http://maven.apache.org/POM/4.0.0" xmlns:xsi="http://www.w3.org/2001/XMLSchema-instance"
         xsi:schemaLocation="http://maven.apache.org/POM/4.0.0 https://maven.apache.org/xsd/maven-4.0.0.xsd">
    <modelVersion>4.0.0</modelVersion>
    <parent>
        <groupId>org.springframework.boot</groupId>
        <artifactId>spring-boot-starter-parent</artifactId>
        <version>2.2.2.RELEASE</version>
        <relativePath/> <!-- lookup parent from repository -->
    </parent>
    <groupId>com.wpj</groupId>
    <artifactId>task</artifactId>
    <version>1.0.0-SNAPSHOT</version>
    <name>task</name>
    <description>定时任务学习</description>

    <properties>
        <java.version>1.8</java.version>
    </properties>

    <dependencies>
        <dependency>
            <groupId>org.springframework.boot</groupId>
            <artifactId>spring-boot-starter</artifactId>
        </dependency>

        <dependency>
            <groupId>org.springframework.boot</groupId>
            <artifactId>spring-boot-starter-web</artifactId>
        </dependency>
    </dependencies>

    <build>
        <plugins>
            <plugin>
                <groupId>org.springframework.boot</groupId>
                <artifactId>spring-boot-maven-plugin</artifactId>
            </plugin>
        </plugins>
    </build>

</project>
2、启动类加上@EnableScheduling注解
package task;

import org.springframework.boot.SpringApplication;
import org.springframework.boot.autoconfigure.SpringBootApplication;
import org.springframework.scheduling.annotation.EnableScheduling;
import org.springframework.scheduling.annotation.Scheduled;
import org.springframework.web.bind.annotation.GetMapping;
import org.springframework.web.bind.annotation.RestController;

import java.time.LocalDateTime;

/**
 * @Description 定时任务
 * EnableScheduling注解  用以表示启动Spring的计划任务执行功能。
 * @Date 2020/1/22 9:59
 * @Author King
 * @Version 1.0
 **/
@RestController
@EnableScheduling
@SpringBootApplication
public class TimerApplication {

    public static void main(String[] args) {
        SpringApplication.run(TimerApplication.class, args);
    }

    /**
     * Scheduled注解表示该方法是任务调度的方法。cron属性表示时间表达式: 每秒执行一次
     * 在线cron生成网址:http://cron.qqe2.com/
     */
    @Scheduled(cron = "0/1 * * * * ?")
    public void task() {
        System.out.println("当前时间:" + LocalDateTime.now());
    }

    @GetMapping("test")
    public String test() {
        return "成功";
    }
}
3、运行结果

三、线上问题
因为我们线上部署了两天机器,要知道计算机的处理速度是毫秒级的,在一条数据两台机器同时同步时,导致出现了并发。所以改变了方案:使用XXL-Job分布式定时任务框架。
四、 xxl-job 定时任务教程
1、从Git上拉去xxl-job项目代码
git pull https://github.com/xuxueli/xxl-job.git
2、配置部署“调度中心” xxl-job-admin
① 执行sql脚本,路径:/xxl-job/doc/db/tables_xxl_job.sql
② 修改配置文件,路径: /xxl-job/xxl-job-admin/src/main/resources/application.properties
注:主要修改数据库信息、邮箱地址、线程数、端口号(防止冲突)
### 调度中心JDBC链接:链接地址请保持和 2.1章节 所创建的调度数据库的地址一致
spring.datasource.url=jdbc:mysql://127.0.0.1:3306/xxl_job?Unicode=true&characterEncoding=UTF-8
spring.datasource.username=root
spring.datasource.password=root_pwd
spring.datasource.driver-class-name=com.mysql.jdbc.Driver
### 报警邮箱
spring.mail.host=smtp.qq.com
spring.mail.port=25
spring.mail.username=xxx@qq.com
spring.mail.password=xxx
spring.mail.properties.mail.smtp.auth=true
spring.mail.properties.mail.smtp.starttls.enable=true
spring.mail.properties.mail.smtp.starttls.required=true
spring.mail.properties.mail.smtp.socketFactory.class=javax.net.ssl.SSLSocketFactory
### 调度中心通讯TOKEN [选填]:非空时启用;
xxl.job.accessToken=
### 调度中心国际化配置 [选填]: 默认为空,表示中文; "en" 表示英文;
xxl.job.i18n=
## 调度线程池最大线程配置【必填】
xxl.job.triggerpool.fast.max=200
xxl.job.triggerpool.slow.max=100
### 调度中心日志表数据保存天数 [必填]:过期日志自动清理;限制大于等于7时生效,否则, 如-1,关闭自动清理功能;
xxl.job.logretentiondays=30
3、启动xxl-job-admin项目
调度中心访问地址:http://localhost:8080/xxl-job-admin (该地址执行器将会使用到,作为回调地址)
默认登录账号 “admin/123456”, 登录后运行界面如下图所示。

4、集成Springboot项目
①、首先引入xxl-job核心依赖
 		<!--xxl-job核心依赖最新版本-->
        <!--<xxl-job-core.version>2.1.2</xxl-job-core.version>-->
        <dependency>
            <groupId>com.xuxueli</groupId>
            <artifactId>xxl-job-core</artifactId>
            <version>${xxl-job-core.version}</version>
        </dependency>
②、application.yml中配置xxl-job
spring:
  application:
    name: task

xxl:
  job:
    admin:
      # 调度中心部署跟地址 [选填]:如调度中心集群部署存在多个地址则用逗号分隔。
      # 执行器将会使用该地址进行"执行器心跳注册"和"任务结果回调";为空则关闭自动注册
      addresses: http://localhost:8081/xxl-job-admin
    executor:
      # 执行器名称
      appname: task-job
      # 执行器IP  也就是定时任务项目部署的ip 为空则自动获取
      ip:
      # 执行器端口号 [选填]:小于等于0则自动获取;默认端口为9999,单机部署多个执行器时,注意要配置不同执行器端口
      port: 8888
      # 执行器日志文件保存天数 [选填] : 过期日志自动清理, 限制值大于等于3时生效; 否则, 如-1, 关闭自动清理功能
      logretentiondays: -1
③、执行器配置
package task;

import com.xxl.job.core.executor.impl.XxlJobSpringExecutor;
import org.springframework.beans.factory.annotation.Value;
import org.springframework.context.annotation.Bean;
import org.springframework.context.annotation.Configuration;

/**
 * @Description xxl-job配置
 * @Date 2019/12/18 17:24
 * @Author King
 * @Version 1.0
 **/
@Configuration
public class XxlJobConfig {

    @Value("${xxl.job.admin.addresses}")
    private String adminAddresses;

    @Value("${xxl.job.executor.appname}")
    private String appName;

    @Value("${xxl.job.executor.ip}")
    private String ip;

    @Value("${xxl.job.executor.port}")
    private int port;

    @Value("${xxl.job.executor.logretentiondays}")
    private int logRetentionDays;

    @Bean(initMethod = "start", destroyMethod = "destroy")
    public XxlJobSpringExecutor xxlJobExecutor() {
        XxlJobSpringExecutor xxlJobSpringExecutor = new XxlJobSpringExecutor();
        xxlJobSpringExecutor.setAdminAddresses(adminAddresses);
        xxlJobSpringExecutor.setAppName(appName);
        xxlJobSpringExecutor.setIp(ip);
        xxlJobSpringExecutor.setPort(port);
        xxlJobSpringExecutor.setLogRetentionDays(logRetentionDays);
        return xxlJobSpringExecutor;
    }

}
④、创建定时任务
package task;

import com.xxl.job.core.biz.model.ReturnT;
import com.xxl.job.core.handler.IJobHandler;
import com.xxl.job.core.handler.annotation.JobHandler;
import org.springframework.stereotype.Component;

import java.time.LocalDateTime;


/**
 * @Description 定时任务
 *
 *     1、继承"IJobHandler":“com.xxl.job.core.handler.IJobHandler”
 *     2、注册到Spring容器:添加“@Component”注解,被Spring容器扫描为Bean实例
 *     3、注册到执行器工厂:添加“@JobHandler(value="自定义jobhandler名称")”注解,
 *     注解value值对应的是调度中心新建任务的JobHandler属性的值
 *
 * @Date 2019/12/18 17:32
 * @Author King
 * @Version 1.0
 **/
@Component
@JobHandler(value = "taskJobHandler")
public class TaskJobHandler extends IJobHandler {

    @Override
    public ReturnT<String> execute(String param) {
        System.out.println("当前时间:" + LocalDateTime.now());
        return SUCCESS;
    }

}
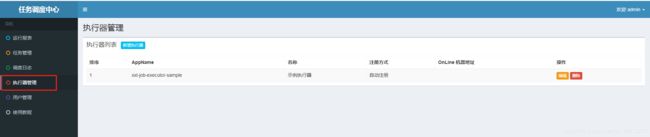
5、在调度中心配置任务执行器
①、打开执行管理
②、新增执行器 (定时任务项目的实例配置)

③、新建定时任务(JobHandler的值与注解@JobHandler的value保持一致)


④、在任务管理中启动任务

⑤、查看任务启动情况
