Android系统源码阅读(11):Android的InputManagerService的工作过程
Android系统源码阅读(11):Android的InputManagerService的工作过程
请对照AOSP版本:6.0.1_r50。
1. 创建InputManager
这里和老罗当年的版本有很大不同了,有了InputManagerService管理InputManager。
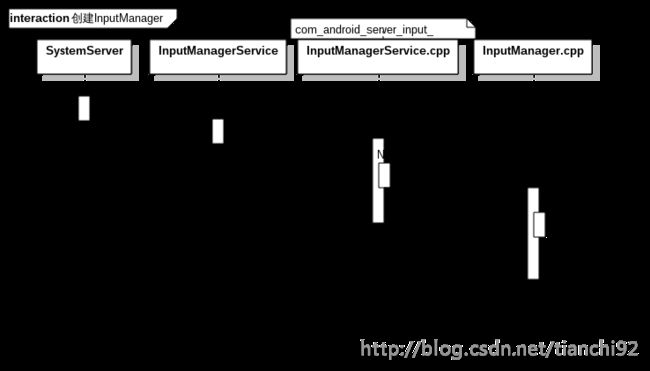
1.1
想要探索如何启动的相关server,需要从SystemServer开始探寻。从SystemServer的进程开始运行开始,它就会创建一些系统server,这里就会启动other services。
其中,会创建Input Manager和Window Manager两个服务。
frameworks/base/services/java/com/android/server/SystemServer.java :
Slog.i(TAG, "Input Manager");
inputManager = new InputManagerService(context);

Slog.i(TAG, "Window Manager");
wm = WindowManagerService.main(context, inputManager,
        mFactoryTestMode != FactoryTest.FACTORY_TEST_LOW_LEVEL,
        !mFirstBoot, mOnlyCore);
ServiceManager.addService(Context.WINDOW_SERVICE, wm);
ServiceManager.addService(Context.INPUT_SERVICE, inputManager);
//..
inputManager.start();
1.2
先来仔细端详一下InputManagerService的构造函数。这里会调用c++层的初始化函数。
frameworks/base/services/core/java/com/android/server/input/InputManagerService.java :
this.mHandler = new InputManagerHandler(DisplayThread.get().getLooper);
//..
mPtr = nativeInit(this, mContext, mHandler.getLooper().getQueue());
注意这里将DisplayThread的Looper传递过去,DisplayThread是一个单例模式的类,它会启动唯一的线程。同时DisplayThread是一个HandlerThread的子类,实现了Looper循环机制。DisplayThread是用来执行和显示有关的操作,显示操作一般需要比较小的延迟。DisplayThread只能被WindowManager、DisplayManager,InputManager用来执行一些快速地实时操作。
1.3
这一步首先将java层的MessageQueue变为了c++的MessageQueue。然后构造了一个NativeInputManager对象,最后将指向该对象的指针im返回给java层。
frameworks/base/services/core/jni/com_android_server_input_InputManagerService.cpp :
NativeInputManager* im = new NativeInputManager(contextObj, serviceObj, messageQueue->getLooper());1.4
在构造NativeInputManager时,会创建一个InputManager对象mInputManager。
frameworks/base/services/core/jni/com_android_server_input_InputManagerService.cpp :
sp eventHub = new EventHub();
mInputManager = new InputManager(eventHub, this, this);
1.5
这一步会创建一个dispatcher负责分发输入事件,一个reader负责获取事件。
frameworks/native/services/inputflinger/InputManager.cpp :
mDispatcher = new InputDispatcher(dispatcherPolicy);
mReader = new InputReader(eventHub, readerPolicy, mDispatcher);
initialize();
1.6
这里会创建两个线程,在以后的步骤中会用来运行前面创建的dispathcer和reader。
frameworks/native/services/inputflinger/InputManager.cpp :
mReaderThread = new InputReaderThread(mReader);
mDispatcherThread = new InputDispatcherThread(mDispatcher);
2. 启动InputManager
将视线再次回到SystemServer中,在创建完InputManagerService后,需要将这个Service启动,同样是在1.1的startOtherServices函数里,调用了InputManagerService的成员函数start。

2.1
这里首先调用了c++层的nativeStart,然后InputManagerService将自己交给Watchdog监视。然后注册了PointerSpeedSetting和ShowTouchesSetting两个Observer。
frameworks/base/services/core/java/com/android/server/input/InputManagerService.java :
nativeStart(mPtr);

// Add ourself to the Watchdog monitors.
Watchdog.getInstance().addMonitor(this);

registerPointerSpeedSettingObserver();
registerShowTouchesSettingObserver();
这两个Observer暂时还没搞清楚是干什么的。
2.2
这一步将传来的ptr参数转化为一个NativeInputManager指针,同时开始启动NativeInputManager中的InputManager。
frameworks/base/services/core/jni/com_android_server_input_InputManagerService.cpp :
NativeInputManager* im = reinterpret_cast(ptr);
status_t result = im->getInputManager()->start();
2.3
这里会启动在1.6中创建的两个线程,分别用来分发和监听Input事件。
frameworks/native/services/inputflinger/InputManager.cpp :
status_t result = mDispatcherThread->run("InputDispatcher", PRIORITY_URGENT_DISPLAY);
result = mReaderThread->run("InputReader", PRIORITY_URGENT_DISPLAY);)
3. 启动InputDispatcher
在2.3中运行的线程以threadLoop为入口,开始进入循环。

3.1
这一步直接将任务交给InputDispatcher的dispatchOnce函数。
frameworks/native/services/inputflinger/InputDispatcher.cpp :
bool InputDispatcherThread::threadLoop() {
    mDispatcher->dispatchOnce();
    return true;
}
3.2
整个函数如下:
frameworks/native/services/inputflinger/InputDispatcher.cpp :
void InputDispatcher::dispatchOnce() {

    nsecs_t nextWakeupTime = LONG_LONG_MAX;
    {
        // acquire lock
        AutoMutex _l(mLock);
        mDispatcherIsAliveCondition.broadcast();

        // Run a dispatch loop if there are no pending commands.
        // The dispatch loop might enqueue commands to run afterwards.
        if (!haveCommandsLocked()) {
            dispatchOnceInnerLocked(&nextWakeupTime);
        }

        // Run all pending commands if there are any.
        // If any commands were run then force the next poll to wake up immediately.
        if (runCommandsLockedInterruptible()) {
            nextWakeupTime = LONG_LONG_MIN;
        }
    } // release lock

    nsecs_t currentTime = now();
    int timeoutMillis = toMillisecondTimeoutDelay(currentTime, nextWakeupTime);
    mLooper->pollOnce(timeoutMillis);
}在这一步骤中,首先判断是否有Command还未被执行,如果有去执行Command。否则,调用dispatchOnceInnerLocked函数去获取事件,这里会将nextWakeupTime传递过去,让其设置合适的苏醒时间,具体内容在以后讲解。然后runCommandsLockedInterruptible函数会执行缓存的Command,如果有Command在这一步中被执行,则需要将苏醒事件设置为LONG_LONG_MIN,因为执行这些命令需要耗费事件,在这期间可能已经有输入事件发生了,所有下次循环不需要等待。
最后,根据等待时间和当前时间,计算出需要睡眠的时间,通过pollOnce进入睡眠,等待唤醒,或者超时。
3.3
这里和上一个章节中的pollOnce道理相同。
3.4
这里会调用epoll_wait函数,使其在mEpollFd所描述的epoll上等待一段时间,这个epoll监听着文件描述符的读写事件。如果有人在pip中写入,则会返回,否则等待指定时间后返回。
system/core/libutils/Looper.cpp
int eventCount = epoll_wait(mEpollFd, eventItems, EPOLL_MAX_EVENTS, timeoutMillis);4. 启动InputReader
在2.3中运行的线程以threadLoop为入口,开始进入循环。

4.1
这一步与3.1一样,将任务丢给InputReader处理。
4.2
这一步会尝试从mEventHub中获取事件,如果获取一些事件,则进行处理。
frameworks/native/services/inputflinger/InputReader.cpp :
//从EventHub中获取event,这里先详细讲解这一步
size_t count = mEventHub->getEvents(timeoutMillis, mEventBuffer, EVENT_BUFFER_SIZE);
//省略..
if (count) {
    //事件处理,将在后面博客中讲解
    processEventsLocked(mEventBuffer, count);
}
这里我们先考虑如何从EventHub中获取事件的。
4.3
首先这一个函数不是就获得一个event这么简单,它是想获得一组event,这里和旧版本有所不同,可见工程师对系统做了优化。这一步内容比较到,让我们通过注释来讲解。
frameworks/native/services/inputflinger/EventHub.cpp :
size_t EventHub::getEvents(int timeoutMillis, RawEvent* buffer, size_t bufferSize) {
    ALOG_ASSERT(bufferSize >= 1);
    AutoMutex _l(mLock);
    struct input_event readBuffer[bufferSize];
    //event 指向了存储事件的位置
    RawEvent* event = buffer;
    size_t capacity = bufferSize;
    bool awoken = false;

    //开始循环获取事件,目的是填充buffer
    for (;;) {
        nsecs_t now = systemTime(SYSTEM_TIME_MONOTONIC);

        // Reopen input devices if needed.
        //如果需要重新打开输入设备,则首先要关闭所有的设备
        if (mNeedToReopenDevices) {
            mNeedToReopenDevices = false;
            ALOGI("Reopening all input devices due to a configuration change.");
            closeAllDevicesLocked();
            mNeedToScanDevices = true;
            break; // return to the caller before we actually rescan
        }

        // Report any devices that had last been added/removed.
        //这里会移除所有关闭的设备
        while (mClosingDevices) {
            Device* device = mClosingDevices;
            ALOGV("Reporting device closed: id=%d, name=%s\n",
                 device->id, device->path.string());
            mClosingDevices = device->next;
            //创建了一个设备removed的event
            event->when = now;
            event->deviceId = device->id == mBuiltInKeyboardId ? BUILT_IN_KEYBOARD_ID : device->id;
            event->type = DEVICE_REMOVED;
            event += 1;
            delete device;
            mNeedToSendFinishedDeviceScan = true;
            if (--capacity == 0) {
                break;
            }
        }

    //如果上面步骤关闭了设备,这里需要重新扫描所有的设备
        if (mNeedToScanDevices) {
            mNeedToScanDevices = false;
            //下面会详细讲解这里如何获取输入设备的
            scanDevicesLocked();
            mNeedToSendFinishedDeviceScan = true;
        }

    //这里会添加正在开启的设备
        while (mOpeningDevices != NULL) {
            Device* device = mOpeningDevices;
            ALOGV("Reporting device opened: id=%d, name=%s\n",
                 device->id, device->path.string());
            mOpeningDevices = device->next;
            //同样这里会创建设备添加的event
            event->when = now;
            event->deviceId = device->id == mBuiltInKeyboardId ? 0 : device->id;
            event->type = DEVICE_ADDED;
            event += 1;
            mNeedToSendFinishedDeviceScan = true;
            if (--capacity == 0) {
                break;
            }
        }

        if (mNeedToSendFinishedDeviceScan) {
            mNeedToSendFinishedDeviceScan = false;
            event->when = now;
            event->type = FINISHED_DEVICE_SCAN;
            event += 1;
            if (--capacity == 0) {
                break;
            }
        }
    //以上步骤主要是负责重新获取接入的设备,下面将会负责获得设备中的event

        // Grab the next input event.
        bool deviceChanged = false;
        //开始循环获取pending的event
        //当前处理的Event序号是否小于正在等待的事件数目,这里会循环读出所有等待的事件
        while (mPendingEventIndex < mPendingEventCount) {
        //获取一个event项
            const struct epoll_event& eventItem = mPendingEventItems[mPendingEventIndex++];
        //如果这是个INotify事件
            if (eventItem.data.u32 == EPOLL_ID_INOTIFY) {
                if (eventItem.events & EPOLLIN) {
                    mPendingINotify = true;
                } else {
                    ALOGW("Received unexpected epoll event 0x%08x for INotify.", eventItem.events);
                }
                continue;
            }
        //如果这是一个Id wake事件,则读出mWakeReadPipeFd的数据,让等待在这个文件描述符上的线程得到唤醒
            if (eventItem.data.u32 == EPOLL_ID_WAKE) {
                if (eventItem.events & EPOLLIN) {
                    ALOGV("awoken after wake()");
                    awoken = true;
                    char buffer[16];
                    ssize_t nRead;
                    do {
                        nRead = read(mWakeReadPipeFd, buffer, sizeof(buffer));
                    } while ((nRead == -1 && errno == EINTR) || nRead == sizeof(buffer));
                } else {
                    ALOGW("Received unexpected epoll event 0x%08x for wake read pipe.",
                            eventItem.events);
                }
                continue;
            }

        //这里开始处理其它非特殊的event
        //获取event项对应的设备的编号
            ssize_t deviceIndex = mDevices.indexOfKey(eventItem.data.u32);
            if (deviceIndex < 0) {
                ALOGW("Received unexpected epoll event 0x%08x for unknown device id %d.",
                        eventItem.events, eventItem.data.u32);
                continue;
            }
            //获取设备,所有已知的设备都放在了mDevices中
            Device* device = mDevices.valueAt(deviceIndex);
            if (eventItem.events & EPOLLIN) {
                //从这个设备中读出数据流,并且存入readBuffer下
                int32_t readSize = read(device->fd, readBuffer,
                        sizeof(struct input_event) * capacity);
                if (readSize == 0 || (readSize < 0 && errno == ENODEV)) {
                    // Device was removed before INotify noticed.
                //先处理一些异常情况,先省略
                //...
                } else {
                    //键盘事件的id需要特殊处理,一直设置为0
                    int32_t deviceId = device->id == mBuiltInKeyboardId ? 0 : device->id;

                    size_t count = size_t(readSize) / sizeof(struct input_event);
                    //开始循环,从设备中读出每一个event
                    for (size_t i = 0; i < count; i++) {
                        struct input_event& iev = readBuffer[i];

                        //这里做了许多处理事件异常时间的工作,先略过
                        //...

                        //将获取的事件存入event
                        event->deviceId = deviceId;
                        event->type = iev.type;
                        event->code = iev.code;
                        event->value = iev.value;
                        //event指向下一个位置,容量也随之减少一个
                        event += 1;
                        capacity -= 1;
                    }
                    if (capacity == 0) {
                        // The result buffer is full.  Reset the pending event index
                        // so we will try to read the device again on the next iteration.
                        //buffer已经填满,退出处理pending event的循环,将index回到上一个位置,因为该设备event还没读完,下次再接着读
                        mPendingEventIndex -= 1;
                        break;
                    }
                }
            } else if (eventItem.events & EPOLLHUP) {
              //处理一些其它情况,省略
              //...
            }
        }


        //在读出所有event后,才能关闭设备,这里省略了对此的处理过程
        //...

        //到这里说明pending event已经处理完,或者buffer已经塞满。buffer塞满或者存了一些事件,则退出最外层填充buffer的循环
        // Return now if we have collected any events or if we were explicitly awoken.
        if (event != buffer || awoken) {
            break;
        }

        //这里处理了一些wake lock的事情,省略
        //...

        //到这一步说明buffer里没有填任何事件,同时也没有pending event
        //所以需要等待有人向device文件描述符里写入一些事件
        int pollResult = epoll_wait(mEpollFd, mPendingEventItems, EPOLL_MAX_EVENTS, timeoutMillis);

        //时间已到,还是没有事件,那咱就结束吧
        if (pollResult == 0) {
            // Timed out.
            mPendingEventCount = 0;
            break;
        }
        //出错了,让我睡一会,下次再尝试
        if (pollResult < 0) {
            // An error occurred.
            mPendingEventCount = 0;

            // Sleep after errors to avoid locking up the system.
            // Hopefully the error is transient.
            if (errno != EINTR) {
                ALOGW("poll failed (errno=%d)\n", errno);
                usleep(100000);
            }
        } else {
            // Some events occurred.
            mPendingEventCount = size_t(pollResult);
            //获取了一些event,那么继续循环,填充buffer!
        }
    }

    // All done, return the number of events we read.
    return event - buffer;
}
4.4
从这里开始扫描设备。在研究这个函数前,先看一下DEVICE_PATH的来头:
frameworks/native/services/inputflinger/EventHub.cpp :
   //这一段代码位于EventHub的构造函数中,这里使用了linux的inotify机制
   //inotify机制可以监控文件的变化
   //因此系统可以实时监控设备的添加和移除
   mINotifyFd = inotify_init();
   int result = inotify_add_watch(mINotifyFd, DEVICE_PATH, IN_DELETE | IN_CREATE);
frameworks/native/services/inputflinger/EventHub.cpp :
void EventHub::scanDevicesLocked() {
     //扫描目录:/dev/input
    status_t res = scanDirLocked(DEVICE_PATH);
    if(res < 0) {
        ALOGE("scan dir failed for %s\n", DEVICE_PATH);
    }
    if (mDevices.indexOfKey(VIRTUAL_KEYBOARD_ID) < 0) {
        //创建一个虚拟键盘
        createVirtualKeyboardLocked();
    }
}
4.5
这里开始扫描/dev/input/目录下的所有设备。
frameworks/native/services/inputflinger/EventHub.cpp :
status_t EventHub::scanDirLocked(const char *dirname)
{
    char devname[PATH_MAX];
    char *filename;
    DIR *dir;
    struct dirent *de;
    dir = opendir(dirname);
    if(dir == NULL)
        return -1;
    strcpy(devname, dirname);
    filename = devname + strlen(devname);
    //filename指向了devname目录的尾端,方便在其后面添加设备文件
    *filename++ = '/';
    //读取该目录下的每一个设备文件
    while((de = readdir(dir))) {
        if(de->d_name[0] == '.' &&
           (de->d_name[1] == '\0' ||
            (de->d_name[1] == '.' && de->d_name[2] == '\0')))
            continue;
        strcpy(filename, de->d_name);
        //打开设备,devname里是设备的绝对路径
        openDeviceLocked(devname);
    }
    closedir(dir);
    return 0;
}
4.6
frameworks/native/services/inputflinger/EventHub.cpp :
status_t EventHub::openDeviceLocked(const char *devicePath) {
    char buffer[80];

    //打开文件
    int fd = open(devicePath, O_RDWR | O_CLOEXEC);
    if(fd < 0) {
        ALOGE("could not open %s, %s\n", devicePath, strerror(errno));
        return -1;
    }

    InputDeviceIdentifier identifier;

    // Get device name.
    if(ioctl(fd, EVIOCGNAME(sizeof(buffer) - 1), &buffer) < 1) {
        //fprintf(stderr, "could not get device name for %s, %s\n", devicePath, strerror(errno));
    } else {
        buffer[sizeof(buffer) - 1] = '\0';
        identifier.name.setTo(buffer);
    }

    // Check to see if the device is on our excluded list
    //删除排除的设备

    //一下步骤从文件中获取device的基本信息
    //...
    // Get device driver version.
    // Get device identifier.
    // Get device physical location.
    // Get device unique id.
    // Fill in the descriptor.
    // Make file descriptor non-blocking for use with poll().

    //创建device对象
    // Allocate device.  (The device object takes ownership of the fd at this point.)
    int32_t deviceId = mNextDeviceId++;
    Device* device = new Device(fd, deviceId, String8(devicePath), identifier);
    //根据device的特征,设置device的class参数
    //...

    // Register with epoll.
    struct epoll_event eventItem;
    memset(&eventItem, 0, sizeof(eventItem));
    eventItem.events = EPOLLIN;
    if (mUsingEpollWakeup) {
        eventItem.events |= EPOLLWAKEUP;
    }
    eventItem.data.u32 = deviceId;
    //将该device的文件fd交给epoll监视,以及时获得它的变化
    if (epoll_ctl(mEpollFd, EPOLL_CTL_ADD, fd, &eventItem)) {
        ALOGE("Could not add device fd to epoll instance.  errno=%d", errno);
        delete device;
        return -1;
    }

    //处理时钟问题..

    //添加device
    addDeviceLocked(device);
    return 0;
4.7
这一步比较轻松,将创建好的device对象放入mDevices即可。
void EventHub::addDeviceLocked(Device* device) {
    mDevices.add(device->id, device);
    device->next = mOpeningDevices;
    mOpeningDevices = device;
}