Graylog 部署(Centos 6/7+ MongoDB3* + Graylog 3.2 + Elasticsearch6* )
CentOS6 或7或更高都可以
1.安装 MongoDB
手动建立 mongodb repo 源,如果没有安装 vim,则先执行
yum install vim
在线安装mongodb
vim /etc/yum.repos.d/mongodb-org-3.6.repo
配置如下
[mongodb-org-3.6]
name=MongoDB Repository
baseurl=https://repo.mongodb.org/yum/redhat/$releasever/mongodb-org/3.6/x86_64/
gpgcheck=1
enabled=1
gpgkey=https://www.mongodb.org/static/pgp/server-3.6.asc
执行安装
yum install mongodb-org
查看mongo安装位置 :
whereis mongod
离线安装mongodb
https://www.mongodb.com/try/download/community
选择合适的版本

此处离线用的是3.2.1
https://fastdl.mongodb.org/linux/mongodb-linux-x86_64-3.2.10.tgz
然后执行解压,重命名
查看修改配置文件 :
vim /etc/mongod.conf
修改数据存储路径
将文件中dbPath修改为自己指定的路径
dbPath: /data1/ViewLog/database/mongodb/mongo
端口修改,也可以默认不改
net:
  port: 27317
启动MongoDB
sudo /usr/bin/mongod -config /etc/mongod.conf
/usr/bin/mongod
sudo /usr/bin/mongod -shutdown -config /etc/mongod.conf
命令:
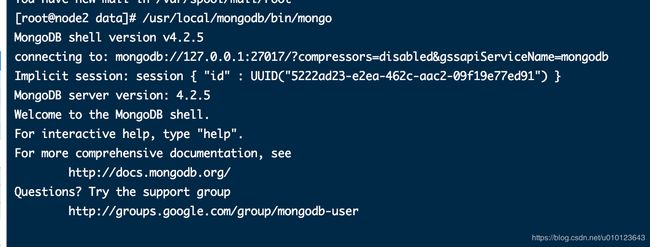
mongo
查看数据库:
show dbs
2.安装Elasticsearch
下载elasticsearch
https://www.elastic.co/cn/downloads/elasticsearch 添加链接描述
Graylog目前对7支持还有问题,建议下6的
历史版本下载地址
https://www.elastic.co/cn/downloads/past-releases#elasticsearch
我选择6.8.5
上传至服务器并解压到指定目录
tar -zxvf elasticsearch-6.8.5.tar.gz -C ../module/
重命名
mv elasticsearch-6.8.5/ elasticsearch/
cd elasticsearch/
添加数据目录
mkdir data
修改配置文件
vim config/elasticsearch.yml
#修改集群名
cluster.name: grayloges
#修改节点名
node.name: node-log1
#修改数据的存储目录
path.data: /data1/ViewLog/module/elasticsearch/data
#修改日志的存储目录
path.logs: /data1/ViewLog/module/elasticsearch/logs
#设置绑定的ip,和redis一个道理,设置为0.0.0.0以后就可以让任何计算机节点访问到你了
network.host: 0.0.0.0
# Set a custom port for HTTP:
#不修改就是默认端口
#http.port: 9200
设置资源参数
vi /etc/security/limits.conf
修改如下
* soft nofile 65536
* hard nofile 131072
* soft nproc 65536
* hard nproc 131072
设置用户资源参数
vim /etc/security/limits.d/90-nproc.conf
将“ soft nproc 1024”改为“* soft nproc 4096”*
* soft nproc 4096
配置完成后进入bin目录执行启动脚本elasticsearch
cd bin/
前台启动
./elasticsearch
后台启动
./elasticsearch -d
报错1
java.lang.RuntimeException: can not run elasticsearch as root
        at org.elasticsearch.bootstrap.Bootstrap.initializeNatives(Bootstrap.java:111)
        at org.elasticsearch.bootstrap.Bootstrap.setup(Bootstrap.java:178)
        at org.elasticsearch.bootstrap.Bootstrap.init(Bootstrap.java:393)
        at org.elasticsearch.bootstrap.Elasticsearch.init(Elasticsearch.java:170)
        at org.elasticsearch.bootstrap.Elasticsearch.execute(Elasticsearch.java:161)
        at org.elasticsearch.cli.EnvironmentAwareCommand.execute(EnvironmentAwareCommand.java:86)
        at org.elasticsearch.cli.Command.mainWithoutErrorHandling(Command.java:127)
        at org.elasticsearch.cli.Command.main(Command.java:90)
        at org.elasticsearch.bootstrap.Elasticsearch.main(Elasticsearch.java:126)
        at org.elasticsearch.bootstrap.Elasticsearch.main(Elasticsearch.java:92)
解决办法:
创建一个独立的用户,比如elk来启动elasticsearch,不用root用户启动、
报错2
java.lang.UnsupportedOperationException: seccomp unavailable: CONFIG_SECCOMP not compiled into kernel, CONFIG_SECCOMP and CONFIG_SECCOMP_FILTER are needed
错误描述:
ElasticSearch集群启动错误,错误的原因是:因为Centos6不支持SecComp,而ES默认bootstrap.system_call_filter为true进行检测,所以导致检测失败,失败后直接导致ES不能启动解决:修改elasticsearch.yml
问题解决:
在所有节点的elasticsearch.yml配置文件中加入:
bootstrap.memory_lock: false
bootstrap.system_call_filter: false
后台启动
./elasticsearch -d
web查看
ip:9200
3.安装Graylog
下载Graylog
https://www.graylog.org/downloads
解压到指定文件夹并重命名
修改配置文件
修改安装目录下的graylog.conf.example
vim graylog.conf.example
#时区
root_timezone = Asia/Shanghai
#pssworde_secret可以通过命令:pwgen -N 1 -s 96 来随机生成,下面就是我随机生成的
password_secret =UQUOMnZvVGCUsEc5u8tYCCnBjMvtiAQfYOmTcXhGdie8R5OZ7Xxx6WycyWdsqA7IWIF4TjCCQEY0xnvhmvMSb4OqG3LvdQUg
# 生成后,请记住你的 YourPassword
#echo -n "Enter Password: " && head -1
修改配置文件
因为graylog安装bin目录下,默认启动配置文件
![]()
配置文件路径 /etc/graylog/server/server.conf
所以需要将graylog.conf.example 复制到/etc/graylog/server/目录下,并改名为server.conf
执行命令
mkdir -p /etc/graylog/server/
启动Graylog
进入graylog目录下
./graylogctl start
查看Graylog运行日志
在graylog安装目录下执行
tail -200f log/graylog-server.log
使用ip:9000 进行访问


