iOS开发中图片圆角设置是最常见的需求,圆角符合人类视觉安全体验,让人感觉舒适,设置圆角也是非常简单,有五种方式来设置.
CornerRadius.png
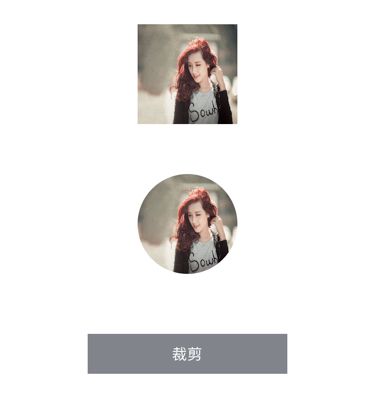
cornerRadius圆角设置
cornerRadius是最常见的设置,cornerRadius不会引发离屏渲染,masksToBounds设置才会引发.如果视图中圆角视图比较少,使用masksToBounds不会有太大影响,如果设置比较多页面才会有卡顿.
   self.bottomImgView.image = [UIImage imageNamed:@"girl.jpg"];
    self.bottomImgView.layer.cornerRadius = 50;
    self.bottomImgView.layer.masksToBounds = YES;
CAShapeLayer圆角设置
CAShapeLayer设置圆角路径,然后设置UIImageView的layer的mask,跟的直接设置圆角相比性能更低.
    self.bottomImgView.image = [UIImage imageNamed:@"girl.jpg"];
    UIBezierPath *maskPath = [UIBezierPath bezierPathWithRoundedRect:self.bottomImgView.bounds byRoundingCorners:UIRectCornerAllCorners cornerRadii:self.bottomImgView.bounds.size];

    CAShapeLayer *maskLayer = [[CAShapeLayer alloc]init];
    //设置大小
    maskLayer.frame = self.bottomImgView.bounds;
    maskLayer.path = maskPath.CGPath;
    self.bottomImgView.layer.mask = maskLayer;
UIBezierPath 贝塞尔曲线
UIBezierPath 裁剪出圆形路径,然后在drawRect进行渲染绘制,会导致内存增加.
    self.bottomImgView.image = [UIImage imageNamed:@"girl.jpg"];
    //开始对imageView进行画图
    UIGraphicsBeginImageContextWithOptions(self.bottomImgView.bounds.size, NO, [UIScreen mainScreen].scale);
    //使用贝塞尔曲线画出一个圆形图
    [[UIBezierPath bezierPathWithRoundedRect:self.bottomImgView.bounds cornerRadius:self.bottomImgView.frame.size.width] addClip];
    [self.bottomImgView drawRect:self.bottomImgView.bounds];

    self.bottomImgView.image = UIGraphicsGetImageFromCurrentImageContext();
    //结束画图
    UIGraphicsEndImageContext();
Core Graphics设置
SDWebImage在处理图片时CGContext绘制圆角,设置圆角路径.
int width = self.bottomImgView.frame.size.width * 2;
    int height = self.bottomImgView.frame.size.height * 2;
    int radius = width / 2;

    UIImage *img = [UIImage imageNamed:@"girl.jpg"];
    CGColorSpaceRef colorSpace = CGColorSpaceCreateDeviceRGB();
    CGContextRef context = CGBitmapContextCreate(NULL, width, height, 8, 4 * width, colorSpace, kCGImageAlphaPremultipliedFirst);
    CGRect rect = CGRectMake(0, 0, width, height);

    CGContextBeginPath(context);
    addRoundedRectToPath(context, rect, radius, radius);
    CGContextClosePath(context);
    CGContextClip(context);
    CGContextDrawImage(context, CGRectMake(0, 0, width, height), img.CGImage);
    CGImageRef imageMasked = CGBitmapContextCreateImage(context);
    img = [UIImage imageWithCGImage:imageMasked];

    CGContextRelease(context);
    CGColorSpaceRelease(colorSpace);
    CGImageRelease(imageMasked);

    self.bottomImgView.image = img;
辅助方法:
static void addRoundedRectToPath(CGContextRef context, CGRect rect, float ovalWidth,
                                 float ovalHeight)
{
    float fw, fh;

    if (ovalWidth == 0 || ovalHeight == 0)
    {
        CGContextAddRect(context, rect);
        return;
    }

    CGContextSaveGState(context);
    CGContextTranslateCTM(context, CGRectGetMinX(rect), CGRectGetMinY(rect));
    CGContextScaleCTM(context, ovalWidth, ovalHeight);
    fw = CGRectGetWidth(rect) / ovalWidth;
    fh = CGRectGetHeight(rect) / ovalHeight;

    CGContextMoveToPoint(context, fw, fh/2);  // Start at lower right corner
    CGContextAddArcToPoint(context, fw, fh, fw/2, fh, 1);  // Top right corner
    CGContextAddArcToPoint(context, 0, fh, 0, fh/2, 1); // Top left corner
    CGContextAddArcToPoint(context, 0, 0, fw/2, 0, 1); // Lower left corner
    CGContextAddArcToPoint(context, fw, 0, fw, fh/2, 1); // Back to lower right

    CGContextClosePath(context);
    CGContextRestoreGState(context);
}
背景图片
圆角设置可以先让UI切一张背景透明的圆角图片作为子视图,最后设置图片,即可形成圆角图片.
   UIImageView *bgImgView = [[UIImageView alloc] initWithFrame:self.bottomImgView.bounds];
    bgImgView.image = [UIImage imageNamed:@"circle_bg"];
    [self.bottomImgView addSubview:bgImgView];

    self.bottomImgView.image = [UIImage imageNamed:@"girl.jpg"];
参考资料:
[iOS] 图像处理 - 一种高效裁剪图片圆角的算法
iOS图片设置圆角性能问题
小心别让圆角成了你列表的帧数杀手
圆角卡顿刨根问底