CentOS 7.X 安装 CDH 6.0
请务必注意CDH6的安装前置条件包括如下:
- 外部数据库支持:
MySQL 5.7或更高
MariaDB 5.5或更高
PostgreSQL 8.4或更高
Oracle 12c或更高
- JDK
Oracle JDK1.8,将不再支持JDK1.7
- 操作系统支持
RHEL 6.8或更高
RHEL 7.2或更高
SLES 12 SP2或更高
Ubuntu 16或更高
- 本次测试环境为
1.CM和CDH版本为6.0.0
2.Redhat 7.6
3.JDK1.8.0_141
4.MariaDB-5.5.56
5.root用户安装
1.前置准备
1.1.hostname及hosts配置
集群中各个节点之间能互相通信使用静态IP地址。IP地址和主机名通过/etc/hosts配置,主机名通过/etc/hostname进行配置。
以cm节点(utility)为例:
- hostname配置
/etc/hostname文件如下:
[root@utility ~]# vi /etc/hostname utility
utility
或者你可以通过命令修改立即生效
[root@utility ~]# hostnamectl set-hostname utility - hosts配置
/etc/hosts文件如下:
127.0.0.1   localhost localhost.localdomain localhost4 localhost4.localdomain4
::1         localhost localhost.localdomain localhost6 localhost6.localdomain6
10.18.100.116 utility
10.18.100.173 master
10.18.100.174 worker1
10.18.100.175 worker2
10.18.100.176 worker3
以上两步操作,在集群中其它节点做相应配置。
1.2.禁用SELinux
在所有节点执行setenforce 0 命令,此处使用批处理shell执行:
[root@utility ~]# setenforce 0
setenforce: SELinux is disabled
集群所有节点修改/etc/selinux/config文件如下:
# This file controls the state of SELinux on the system.
# SELINUX= can take one of these three values:
#     enforcing - SELinux security policy is enforced.
#     permissive - SELinux prints warnings instead of enforcing.
#     disabled - No SELinux policy is loaded.
SELINUX=disabled
# SELINUXTYPE= can take one of three two values:
#     targeted - Targeted processes are protected,
#     minimum - Modification of targeted policy. Only selected processes are protected.
#     mls - Multi Level Security protection.
SELINUXTYPE=targeted
1.3.关闭防火墙
集群所有节点执行 systemctl stop命令,此处通过shell批量执行命令如下:
[root@utility ~]# systemctl stop firewalld
[root@utility ~]# systemctl disable firewalld
[root@utility ~]# systemctl status firewalld
1.4.集群时钟同步
在Redhat7.x的操作系统上,已经默认的安装了chrony,我们这里先卸载chrony,然后安装ntp。使用ntp来配置各台机器的时钟同步,将cm(10.18.100.116)服务作为本地ntp服务器,其它3台服务器与其保持同步。
1.所有机器卸载chrony
[root@utility ~]# yum -y remove chrony2.所有机器安装ntp
[root@utility ~]# yum -y install ntp3.cm机器配置时钟与自己同步
[root@utility ~]# vi /etc/ntp.conf
#server 0.rhel.pool.ntp.org iburst
#server 1.rhel.pool.ntp.org iburst
#server 2.rhel.pool.ntp.org iburst
#server 3.rhel.pool.ntp.org iburst
server  127.127.1.0     # local clock
fudge   127.127.1.0 stratum 10
4.集群其它节点,配置找cm机器去同步
#server 0.rhel.pool.ntp.org iburst
#server 1.rhel.pool.ntp.org iburst
#server 2.rhel.pool.ntp.org iburst
#server 3.rhel.pool.ntp.org iburst
server 10.18.100.116
5.重启所有机器的ntp服务
[root@utility ~]# systemctl restart ntpd
[root@utility ~]# systemctl status ntpd
6.验证始终同步,在所有节点执行ntpq -p命令,如下使用脚本批量执行
[root@utility ~]# ntpq -p

左边出现*号表示同步成功。
1.5.设置swap
所有节点执行:
[root@utility ~]# echo vm.swappiness = 10 >> /etc/sysctl.conf1.6.设置透明大页面
所有节点执行:
[root@utility ~]# echo never > /sys/kernel/mm/transparent_hugepage/defrag

[root@utility ~]# echo never > /sys/kernel/mm/transparent_hugepage/enabled
设置开机自关闭
将如下脚本添加到/etc/rc.d/rc.local文件中
if test -f /sys/kernel/mm/transparent_hugepage/enabled; then echo never > /sys/kernel/mm/transparent_hugepage/enabled fi if test -f /sys/kernel/mm/transparent_hugepage/defrag; then echo never > /sys/kernel/mm/transparent_hugepage/defrag fi同步到所有节点
1.7.安装http服务
- 安装httpd服务
[root@utility ~]# yum -y install httpd- 启动httpd服务
[root@utility ~]# systemctl start httpd1.修改/etc/httpd/conf/httpd.conf配置文件,在
AddType application/x-gzip .gz .tgz .parcel
2.保存httpd.conf的修改,并重启httpd服务
[root@utility ~]# systemctl restart httpd1.8.安装MariaDB
1.安装MariaDB
[root@utility ~]# yum -y install mariadb
[root@utility ~]# yum -y install mariadb-server
2.启动并配置MariaDB
[root@utility ~]# systemctl start mariadb
[root@utility ~]# /usr/bin/mysql_secure_installation
NOTE: RUNNING ALL PARTS OF THIS SCRIPT IS RECOMMENDED FOR ALL MariaDB
      SERVERS IN PRODUCTION USE!  PLEASE READ EACH STEP CAREFULLY!

In order to log into MariaDB to secure it, we'll need the current
password for the root user.  If you've just installed MariaDB, and
you haven't set the root password yet, the password will be blank,
so you should just press enter here.

Enter current password for root (enter for none):
OK, successfully used password, moving on...

Setting the root password ensures that nobody can log into the MariaDB
root user without the proper authorisation.

Set root password? [Y/n] Y
New password:
Re-enter new password:
Password updated successfully!
Reloading privilege tables..
 ... Success!


By default, a MariaDB installation has an anonymous user, allowing anyone
to log into MariaDB without having to have a user account created for
them.  This is intended only for testing, and to make the installation
go a bit smoother.  You should remove them before moving into a
production environment.

Remove anonymous users? [Y/n] Y
 ... Success!

Normally, root should only be allowed to connect from 'localhost'.  This
ensures that someone cannot guess at the root password from the network.

Disallow root login remotely? [Y/n] n
 ... skipping.

By default, MariaDB comes with a database named 'test' that anyone can
access.  This is also intended only for testing, and should be removed
before moving into a production environment.

Remove test database and access to it? [Y/n] Y
 - Dropping test database...
 ... Success!
 - Removing privileges on test database...
 ... Success!

Reloading the privilege tables will ensure that all changes made so far
will take effect immediately.

Reload privilege tables now? [Y/n] Y
 ... Success!

Cleaning up...

All done!  If you've completed all of the above steps, your MariaDB
installation should now be secure.

Thanks for using MariaDB!
安装mariadb后执行 systemctl start mariadb 命令启动,在此处容易报错
Job for mariadb.service failed because the control process exited with error code.See “systemctl status mariadb.service” and “journalctl -xe” for details.一定要运行systemctl status mariadb.service和journalctl -xe查看问题原因,
比如我的电脑Linux(centos7.6)操作系统下就是因为/var/lib/mysql下不空导致错误发生,清空后
sudo systemctl start maiiadb 就OK了.
或者为了避免mysql有之前安装的碎片,卸载mysql
查看与mysql数据库:rpm -qa | grep mysql
卸载mysql数据库:rpm -e --nodeps mysql数据库
删除etc目录下的my.cnf文件:rm /etc/my.cnf
3.建立CM,Hive等需要的表
[root@utility ~]# mysql -u root -p
Enter password:
Welcome to the MariaDB monitor.  Commands end with ; or \g.
Your MariaDB connection id is 9
Server version: 5.5.56-MariaDB MariaDB Server

Copyright (c) 2000, 2017, Oracle, MariaDB Corporation Ab and others.

Type 'help;' or '\h' for help. Type '\c' to clear the current input statement.

MariaDB [(none)]>

create database metastore default character set utf8;  CREATE USER 'hive'@'%' IDENTIFIED BY 'root';   GRANT ALL PRIVILEGES ON metastore. * TO 'hive'@'%';   FLUSH PRIVILEGES;

create database cm default character set utf8;  CREATE USER 'cm'@'%' IDENTIFIED BY 'root';   GRANT ALL PRIVILEGES ON cm. * TO 'cm'@'%';   FLUSH PRIVILEGES;

create database am default character set utf8;   CREATE USER 'am'@'%' IDENTIFIED BY 'root';    GRANT ALL PRIVILEGES ON am. * TO 'am'@'%';    FLUSH PRIVILEGES;

create database rm default character set utf8;   CREATE USER 'rm'@'%' IDENTIFIED BY 'root';    GRANT ALL PRIVILEGES ON rm. * TO 'rm'@'%';    FLUSH PRIVILEGES;

create database hue default character set utf8;   CREATE USER 'hue'@'%' IDENTIFIED BY 'root';    GRANT ALL PRIVILEGES ON hue. * TO 'hue'@'%';    FLUSH PRIVILEGES;

create database oozie default character set utf8;   CREATE USER 'oozie'@'%' IDENTIFIED BY 'root';    GRANT ALL PRIVILEGES ON oozie. * TO 'oozie'@'%';    FLUSH PRIVILEGES;

create database sentry default character set utf8;   CREATE USER 'sentry'@'%' IDENTIFIED BY 'root';    GRANT ALL PRIVILEGES ON sentry. * TO 'sentry'@'%';    FLUSH PRIVILEGES;

create database nav_ms default character set utf8;   CREATE USER 'nav_ms'@'%' IDENTIFIED BY 'root';    GRANT ALL PRIVILEGES ON nav_ms. * TO 'nav_ms'@'%';    FLUSH PRIVILEGES;

create database nav_as default character set utf8;  CREATE USER 'nav_as'@'%' IDENTIFIED BY 'root';   GRANT ALL PRIVILEGES ON nav_as. * TO 'nav_as'@'%';   FLUSH PRIVILEGES;
安装jdbc驱动
[root@utility ~]# mkdir -p /usr/share/java/
[root@utility ~]# mv mysql-connector-java-5.1.34-bin.jar /usr/share/java/
[root@utility ~]# cd /usr/share/java
[root@utility java]# chmod 777 mysql-connector-java-5.1.34-bin.jar
[root@utility java]# ln -s mysql-connector-java-5.1.34-bin.jar mysql-connector-java.jar
[root@utility java]# ll
total 940
-rwxrwxrwx. 1 root root 960372 May 16 15:53 mysql-connector-java-5.1.34-bin.jar
lrwxrwxrwx. 1 root root     31 May 16 15:53 mysql-connector-java.jar -> mysql-connector-java-5.1.34-bin.jar
2.Cloudera Manager安装
2.1.配置本地repo源
1.下载CM6.0的安装包,地址为:
https://archive.cloudera.com/cm6/6.0.0/redhat7/yum/RPMS/x86_64/cloudera-manager-agent-6.0.0-530873.el7.x86_64.rpm
https://archive.cloudera.com/cm6/6.0.0/redhat7/yum/RPMS/x86_64/cloudera-manager-daemons-6.0.0-530873.el7.x86_64.rpm
https://archive.cloudera.com/cm6/6.0.0/redhat7/yum/RPMS/x86_64/cloudera-manager-server-6.0.0-530873.el7.x86_64.rpm
https://archive.cloudera.com/cm6/6.0.0/redhat7/yum/RPMS/x86_64/cloudera-manager-server-db-2-6.0.0-530873.el7.x86_64.rpm
https://archive.cloudera.com/cm6/6.0.0/redhat7/yum/RPMS/x86_64/oracle-j2sdk1.8-1.8.0+update141-1.x86_64.rpm
https://archive.cloudera.com/cm6/6.0.0/allkeys.asc
2.下载CDH6.0的安装包,地址为:
https://archive.cloudera.com/cdh6/6.0.0/parcels/CDH-6.0.0-1.cdh6.0.0.p0.537114-el7.parcel
https://archive.cloudera.com/cdh6/6.0.0/parcels/CDH-6.0.0-1.cdh6.0.0.p0.537114-el7.parcel.sha256
https://archive.cloudera.com/cdh6/6.0.0/parcels/manifest.json
3.将Cloudera Manager安装需要的5个rpm包以及一个asc文件下载到本地,放在同一目录,执行createrepo命令生成rpm元数据。
[root@utility cm6.0]# ll
total 1274736
-rw-r--r-- 1 root root      14041 Aug 29 13:49 allkeys.asc
-rw-r--r-- 1 root root   25903408 Aug 29 13:49 cloudera-manager-agent-6.0.0-530873.el7.x86_64.rpm
-rw-r--r-- 1 root root 1094489320 Aug 29 13:49 cloudera-manager-daemons-6.0.0-530873.el7.x86_64.rpm
-rw-r--r-- 1 root root       8148 Aug 29 13:49 cloudera-manager-server-6.0.0-530873.el7.x86_64.rpm
-rw-r--r-- 1 root root      11000 Aug 29 13:49 cloudera-manager-server-db-2-6.0.0-530873.el7.x86_64.rpm
-rw-r--r-- 1 root root  184888690 Aug 29 13:49 oracle-j2sdk1.8-1.8.0+update141-1.x86_64.rpm
drwxr-xr-x 2 root root       4096 Sep  1 11:43 repodata
[root@ip-172-31-6-83 cm6.0]# createrepo .
Spawning worker 0 with 2 pkgs
Spawning worker 1 with 1 pkgs
Spawning worker 2 with 1 pkgs
Spawning worker 3 with 1 pkgs
Workers Finished
Saving Primary metadata
Saving file lists metadata
Saving other metadata
Generating sqlite DBs
Sqlite DBs complete
同样的,我们为了加速我们的安装,我们可以把需要下载的软件包提前下载下来,也可以创建CDH私有仓库。
[root@utility ~]# cd /opt/cloudera/parcel-repo在manifest.json文件中,找到对应版本的秘钥,复制到.sha文件中。
echo "de86cc42380f073f4906801913d7083b39e46db7" > CDH-6.0.0-1.cdh6.0.0.p0.537114-el7.parcel.sha注意:如果不进行这一步,安装过程3.1.13中会报Hash verification failed,解决方案也可见3.1.13
4.配置Web服务器
将上述cdh6.0 /cm6.0目录移动到/var/www/html目录下, 使得用户可以通过HTTP访问这些rpm包。
[root@iutility ~]# mv cdh6.0/ cm6.0/ /var/www/html/验证浏览器能否正常访问


5.制作Cloudera Manager的repo源
[root@utility ~]# vim /etc/yum.repos.d/cm.repo
[cmrepo]
name = cm_repo
baseurl= http://10.18.100.116/cm6.0
enable = true
gpgcheck = false
[root@utility yum.repos.d]# yum repolist
Loaded plugins: amazon-id, rhui-lb, search-disabled-repos
Repodata is over 2 weeks old. Install yum-cron? Or run: yum makecache fast
repo id                                                                                    repo name                                                                                                 status
!cmrepo                                                                                    cm_repo                                                                                                        7
!rhui-REGION-client-config-server-7/x86_64                                                 Red Hat Update Infrastructure 2.0 Client Configuration Server 7                                                1
!rhui-REGION-rhel-server-releases/7Server/x86_64                                           Red Hat Enterprise Linux Server 7 (RPMs)                                                                  20,672
!rhui-REGION-rhel-server-rh-common/7Server/x86_64                                          Red Hat Enterprise Linux Server 7 RH Common (RPMs)                                                           233
repolist: 20,913
6.验证安装JDK
[root@utility yum.repos.d]# yum -y install oracle-j2sdk1.8-1.8.0+update141-1.x86_642.2.安装Cloudera Manager Server
1.通过yum安装Cloudera Manager Server
[root@utility yum.repos.d]# yum -y install cloudera-manager-server2.初始化数据库
[root@utility yum.repos.d]# /opt/cloudera/cm/schema/scm_prepare_database.sh mysql cm cm root3.启动Cloudera Manager Server
[root@utility ~]# systemctl start cloudera-scm-server4.检查端口是否监听
[root@utility ~]# netstat -lnpt | grep 7180
tcp        0      0 0.0.0.0:7180            0.0.0.0:*              LISTEN      4053/java
5.通过http://10.18.100.116:7180/cmf/login访问CM

3.CDH安装
3.1.CDH集群安装向导
1.admin/admin登录到CM

2.同意license协议,点击继续

3.选择60试用,点击继续

4.点击“继续”
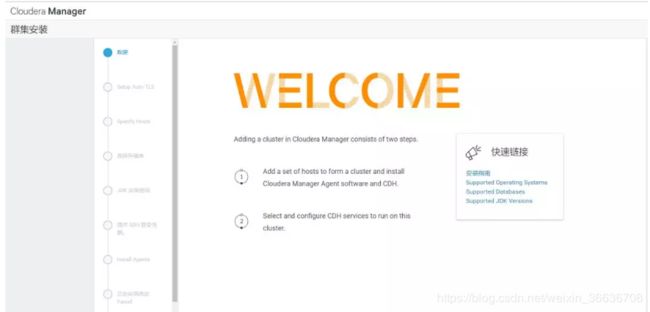
5.点击“继续”,可以忽略这个自动TLS自动安装。

6.输入主机ip或者名称,点击搜索找到主机后点击继续


7.点击“继续”
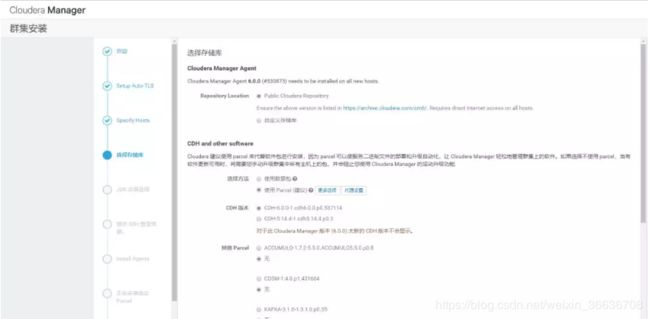
8.使用Parcel选择,点击“更多选项”,点击“-”删除其它所有地址,输入
https://10.18.100.116/cdh6.0,点击“保存更改”

9.选择自定义存储库,输入cm的http地址
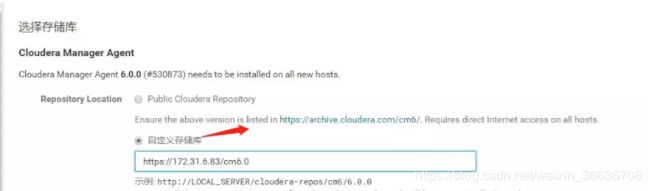
10.点击“继续”,进入下一步安装jdk

11.点击“继续”,进入下一步配置ssh账号密码

12.点击“继续”,进入下一步,安装Cloudera Manager相关到各个节点
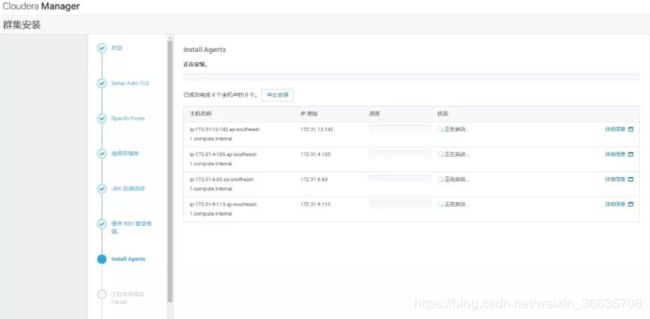
等待agent安装完毕后,自动跳转到下一步开始分发parcel
注意:在这儿安装的可能会时候遇到 无法接受Agent发出的信号检测问题

解决方法:查看这个进程,然后杀死进程,重新启动就可以了
ps -ef | grep supervisord
kill -9
systemctl restart cloudera-scm-agent
错误2:
在web界面安装 agent那一步,抛错,单击信息查看如下

解决做法:
mv /usr/bin/host /usr/bin/host.bak
13.点击“继续”,进入下一步安装cdh到各个节点

注意:在这儿安装的时候遇到 Hash verification failed的问题
界面集群安装过程中,Parcels hash校验失败。

踩了很多坑,试了各种解决办法都没有,最后发现是版本秘钥的问题
解决方案是,在上传完上面的CDH之后,要在manifest.json 中找到CDH-6.0.1-1.cdh6.0.1.p0.590678-el7.parcel ,然后找到上面的hash值,即:

将"de86cc42380f073f4906801913d7083b39e46db7" 替换掉CDH-6.0.0-1.cdh6.0.0.p0.537114-el7.parcel.sha 中的内容
echo "de86cc42380f073f4906801913d7083b39e46db7" > CDH-6.0.0-1.cdh6.0.0.p0.537114-el7.parcel.sha14.点击“继续”,进入下一步主机检查,确保所有检查项均通过。测试环境的机器因为有多个Java版本有一些警告,此步忽略。
点击完成进入服务安装向导。
3.2.集群设置安装向导
1.选择需要安装的服务
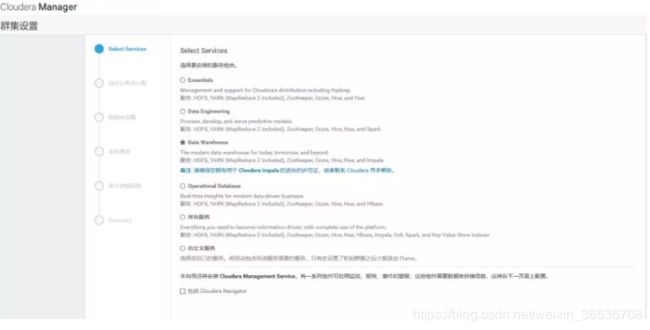
2.点击“继续”,进入集群角色分配


3.点击“继续”,进入下一步,测试数据库连接
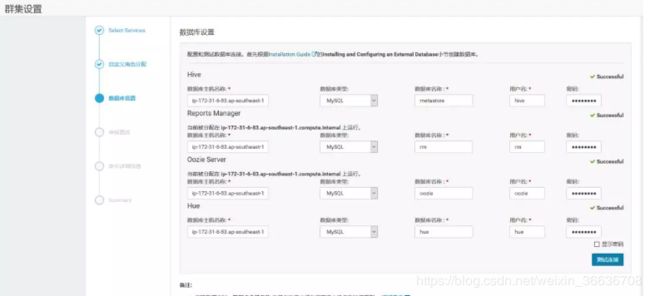
4.测试成功,点击“继续”,进入目录设置,此处使用默认默认目录,根据实际情况进行目录修改

5.点击“继续”,进入各个服务启动

6.安装成功,点击继续

7.安装成功后进入home管理界面
